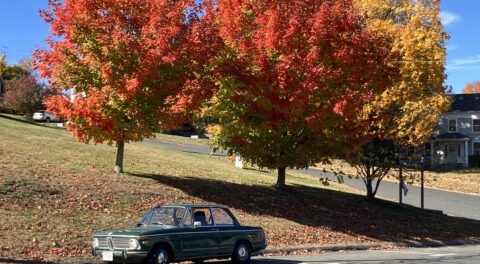
Last week, I brought Louie (the Ran When Parked car) home from storage to deal with two issues—a hard-starting problem and a too-stiff front suspension that was driving me nuts.
The hard-starting was solved pretty quickly. As I said last week, the workaround had been to connect a jumper wire from battery positive to the hot (“15” or “+”) side of the ignition coil. Since this always made the car start instantly, the issue had to be that the coil wasn’t receiving voltage (or adequate voltage) during cranking but was getting it when the key was released to the ignition setting. This implicated either the ballast resistor, the circuit running it, or the connection to ignition switch itself.
As I wrote about here, the purpose of the ballast resistor is to limit current to the coil when the engine is running but maximize it during engine starting. On Modell 71 cars (2002s with the small facelift that includes the lower rubber door trim), this is done via a relay in the back corner of the engine compartment. When the engine is cranked, terminal 86 is fed voltage. This energizes the relay, which connects terminal 30 to 87. Since 87 is connected directly to the hot side of the coil, this bypasses the ballast resistor and supplies the coil with full battery voltage. Testing the relay revealed that it was fine. The problem turned out to be due to its ground connection (the thin gray wire on its right) to terminal 85. Once I cleaned the screw and reseated it, the problem went away. Would that all issues were this easily dispatched.
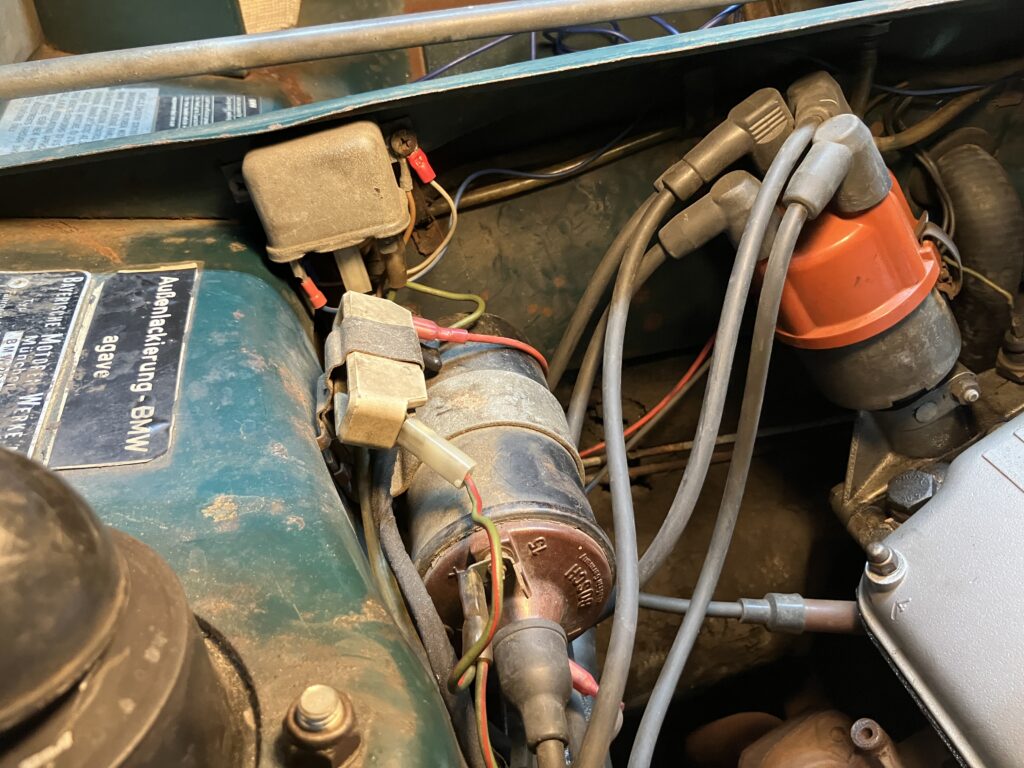
The coil, ballast resistor, and bypass relay.
On to the suspension. I’d updated Louie’s original suspension in 2020 during the height of the pandemic, and wrote pieces about installing H&R springs and Bilstein HD shocks and struts, as well as installing a used set of Suspension Techniques sway bars. Many folks use this combination and like it, though the front sway bar is a pain in the butt to install. I’ve had the additional issue that, as the urethane bushings age, they begin squeaking. Because this was a used set of sway bars, the bushings squeaked from the get-go, and I had to lather them in silicon-based lubricant to get them to quiet down. Two years later, they began squeaking again, and I switched to PTFE (Teflon)-based lube and installed grease fittings so I could lube them without taking them apart.
But in addition to the noisy bushings, the nose of the car was incredibly stiff. I couldn’t even do the traditional suspension-test bounce on it. I began to feel that I’d overmodified the car, and wondered if I needed to pull the H&R springs out in order to bring it back to a configuration that I’d enjoyed. So I gave Louie the place of honor on the midrise lift to see what was going on.
When I looked at the front sway bar, I was astonished. It was touching the inside of the nose of the car.
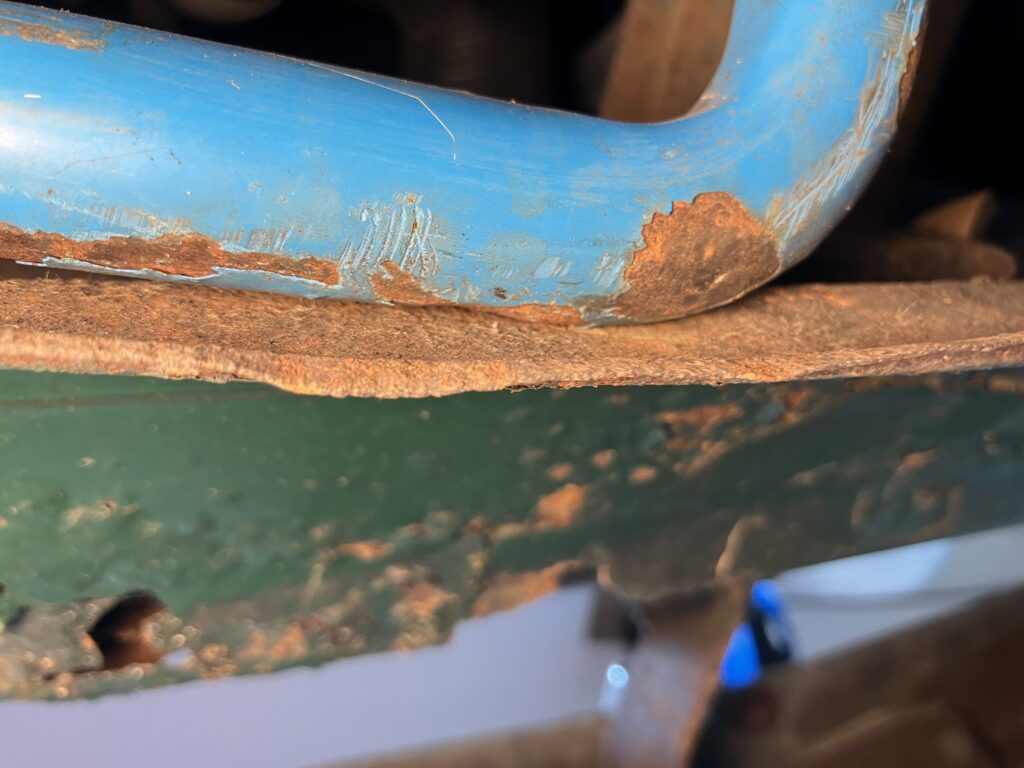
What the?
I undid the links holding the ends of the sway bar to the control arms so I could pivot it, and there was no question that it was making hard direct scraping metal-on-metal contact against the nose through a range of motion. This explained both the stiffness in the nose as well as the noise I was hearing. My 2020 article about installing the sway bars references having to beat on the inside of the nose in order to make clearance for the sway bar, but I had no explanation for why that clearance was now gone.
I wanted to be absolutely certain that it was the source of the problems, so I unbolted the brackets holding the bushings and moved the bar out of the way, lowered the car off the lift, and bounced the nose. It moved freely and with no noise.
I then went to town clearancing the sway bar. As you can see in the pic, Louie’s nose is pretty rusty, so I wasn’t the least bit squeamish about beating the bejesus out of the underside with a hammer. I then maneuvered the bar back into position, snugged down the bushings, reattached the corners of the bar to the control arms, and bounced the car.
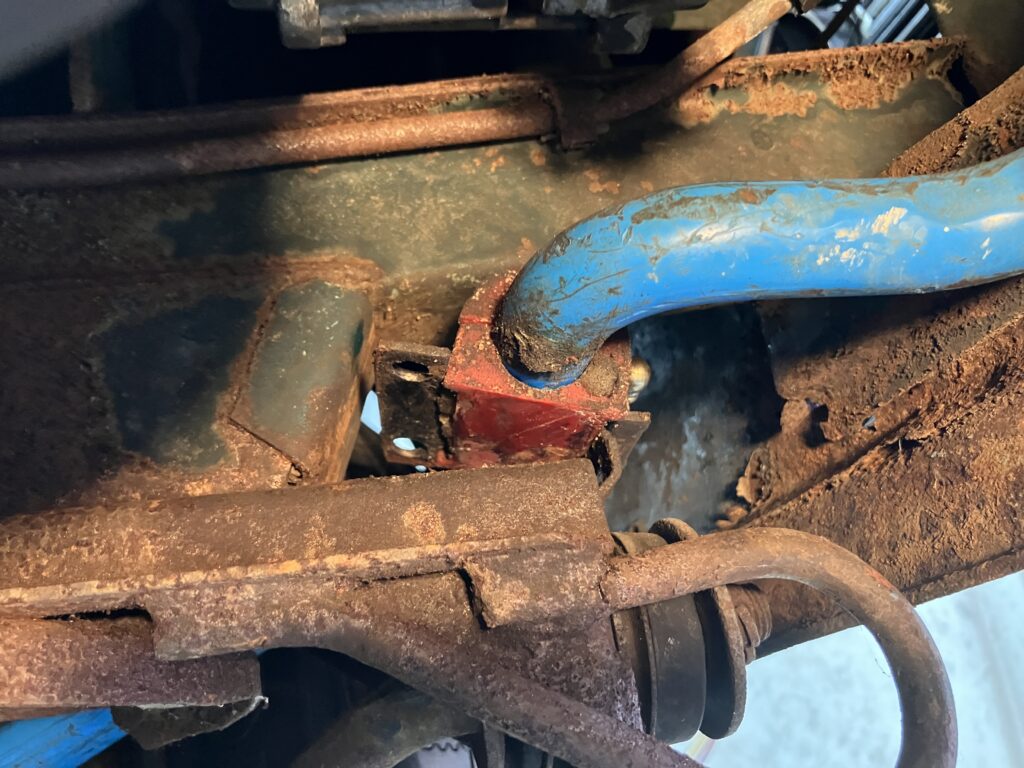
The bushing bracket temporarily freed so the bar could be moved away from the nose.
And… the suspension binding was still gone, and there was no longer any metal-on-metal scraping, but I could clearly hear the eeeka eeeka eeeka of the sway bar bushings sounding like a pair of monkeys high up in a tree doing the nasty that had plagued me years before. Damn.
I disconnected the corners of the bar again, found the grease gun with the PTFE lube in it that I’d set up in 2022, shot it into my hack-installed grease fittings, moved the bar back and forth to distribute the lube, and could not get the bushings to quiet down. I pulled the whole thing apart, took the brackets and bushings off, applied enough lube directly to the bushings to, well, a LOT of lube, and even with the bracket bolts loose, the thing still squeaked when I manually pivoted the sway bar.
When I had this problem years back, I searched online to find a source for 22mm rubber sway bar bushings for a 2002, found none, then contacted Suspension Techniques (now ST Suspensions) about buying new urethane bushings for the 2002 sway bar they still sell. Weeks later, they sent me an email asking if that was an E21 320i, and saying I’d need to call to order the bushings. I then called, got voicemail, left a message, and never heard back. Not exactly confidence-inspiring. This time I tried both the call and email, waited a day, and again heard nothing. A big boo to ST Suspensions on their customer support.
I searched online and found no other source of bushings for a 22mm 2002 front sway bar, urethane or rubber. I did, though, see references to rubber bushings for a 22mm bar for a Mazda 6. They were cheap on Rockauto (Delphi TD5772W, $12.60 shipped), so I ordered a pair, knowing full well the chances of them fitting the bracket in any dimension except internal diameter were zero.
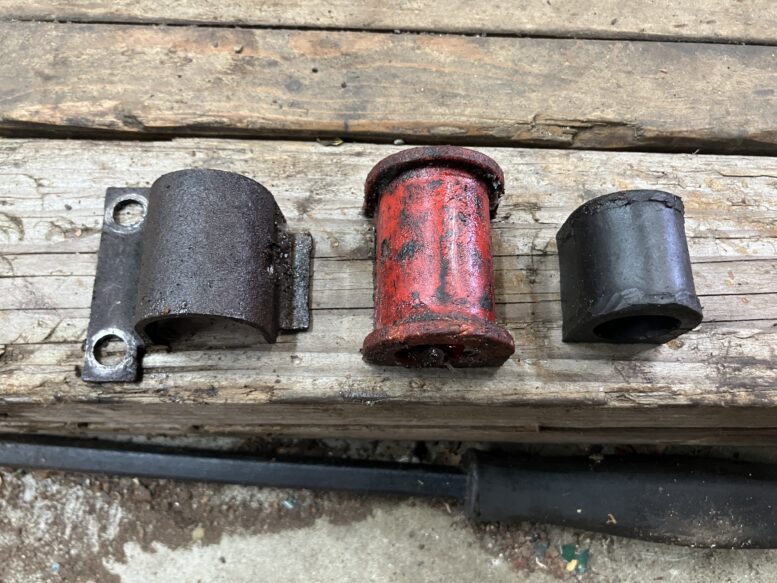
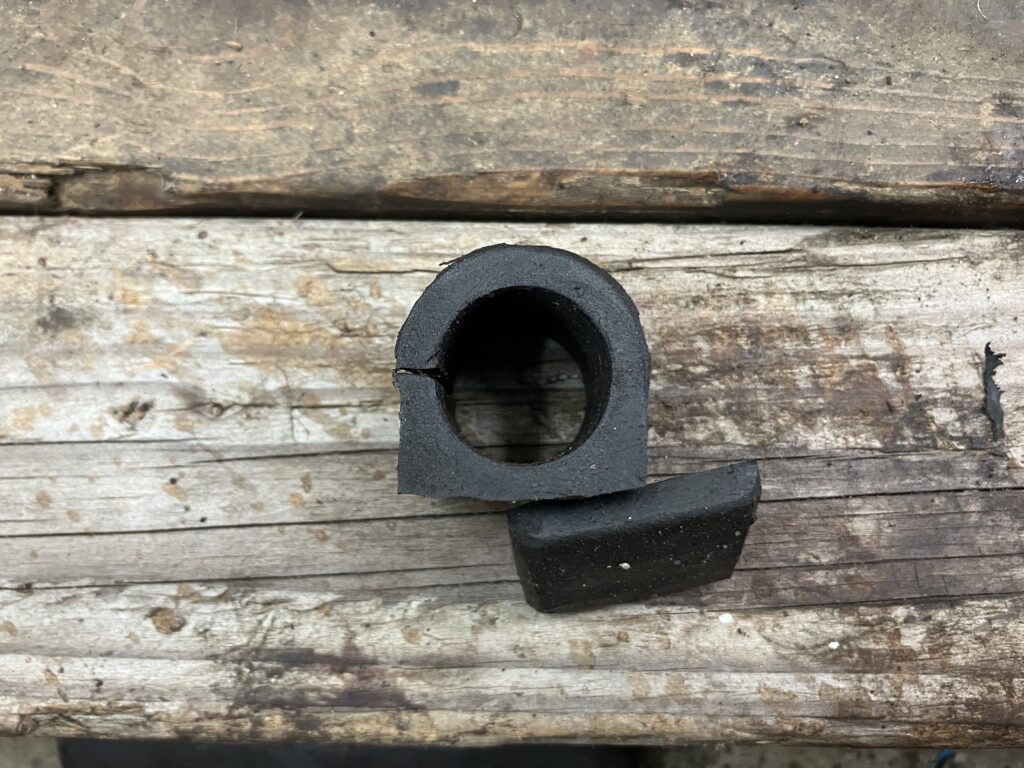
When they arrived, I found that they were too narrow as well as too tall for the bracket, but by trimming the ridges off the sides and about 3/16″ off the bottom, I got them to fit.
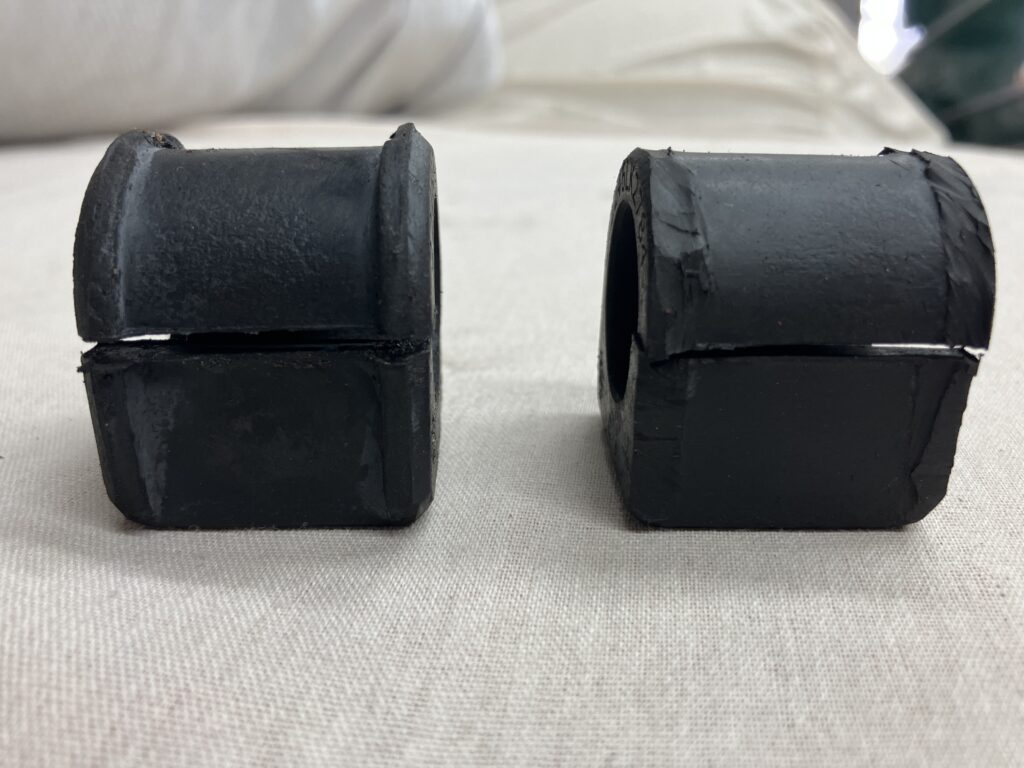
The Mazda 6 22mm bushings before and after trimming the ridges off so they’d fit the bracket…
…and trimming the bottom so they weren’t too tall.
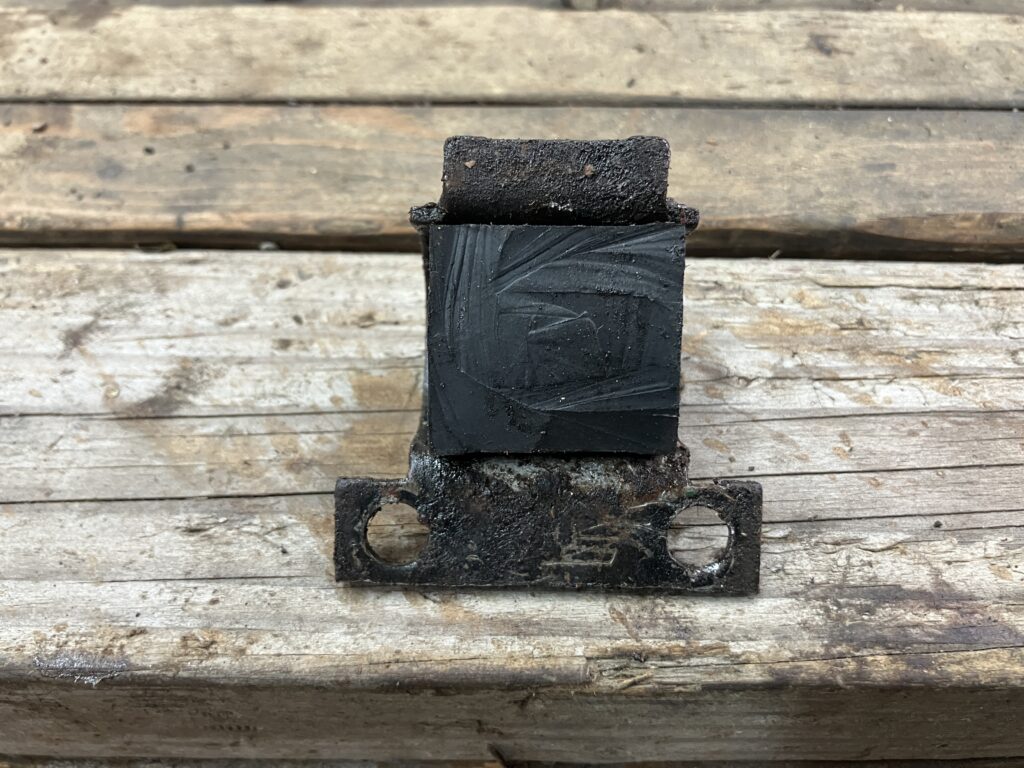
Not bad for 20 minutes with a razor blade.
And, with that, I lightly lubricated the bushings with a thin coating of PTFE, installed them under the sway bar bracket, used 12mm nuts on the Allen-head M8 bolts instead of the standard 13mm nuts to allow for greater wrench clearance, snugged them down, and held my breath.
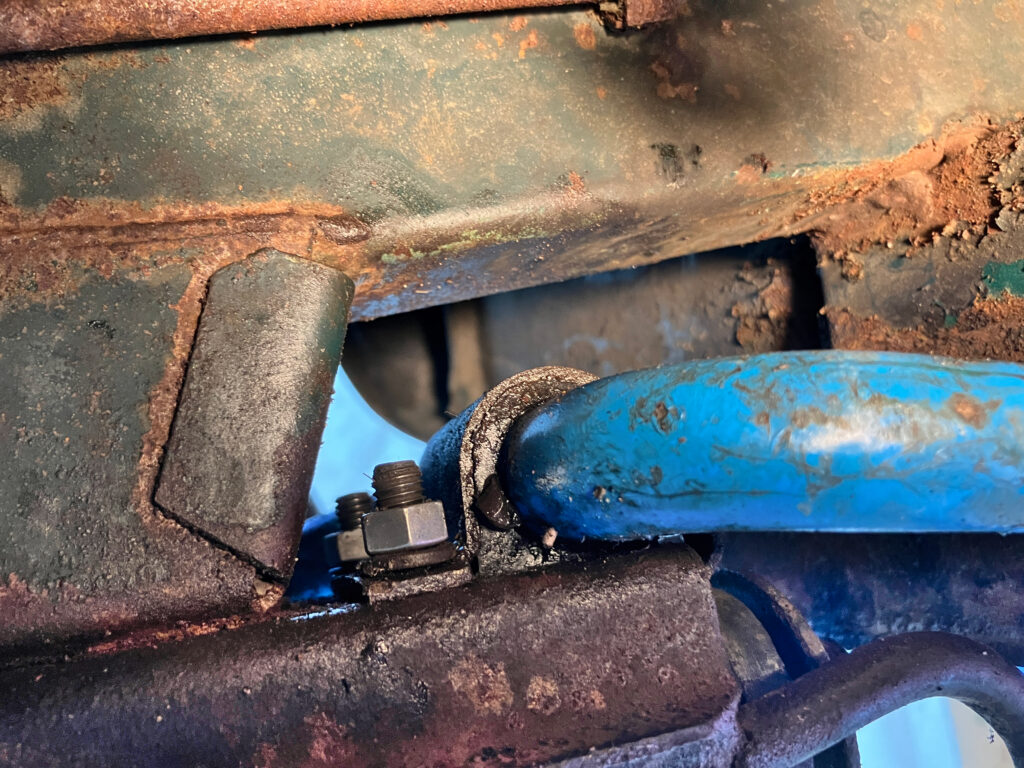
Looks good to me.
I grabbed the end of the bar, rotated it up and down, and…
Nothing. No monkeys in the trees. The squeak was gone.
Booya!
I buttoned up the repair, reattaching the sway bar ends to the control arms, and bounced it. It was still quiet. I then took the car for a drive on my Newton suspension-testing torture track (a particularly thunk-clunk-and-rattle-inducing section of pavement not far from my house). While there was no mistaking the 54-year-old tii for a modern car, the issues that made me think I had a winter suspension-yanking project ahead of me were gone.
Booya a second time!
Because these bushings are too narrow to have ridges on the side that hold them in place under the bracket, there’s the possibility that, with mileage and vibration, they may move. I’ll need to check in on them and see if that’s happening. But there’s nothing that kills your enjoyment of driving a beloved car like an irritating clunk over every bump, and few things as satisfying as having it gone with a few hours of work and a cut-to-fit pair of bushings that cost less than a large pizza.
(BTW, two weeks have passed, and I’ve still heard nothing from ST Suspensions. Boo!)
—Rob Siegel
____________________________________
Rob’s newly-expanded book The Best Of The Hack Mechanic™: 40 years of hacks, kluges, and assorted automotive mayhem, is available on Amazon here. His other seven books are available here on Amazon, or you can order personally-inscribed copies (including the new Best Of) from Rob’s website, www.robsiegel.com/books.