A few weeks ago, I wrote about how, while on the Nor’East 02er socially-distanced spring drive, I decided it was time to update the suspension in Louie, my Agave ’72 2002tii, because the floaty feel of the car’s 48-year-old shocks and struts and original springs was no longer quaint and charming to me. I bought a new set of H&R progressive-rate sport lowering springs (part number 50401) and installed a set of used Bilstein HD shocks and struts I’d had kicking around the garage for years. To do so, I had to track down a few AWOL parts, including ponying up to Summit Racing for a missing dust boot, but in a few wrenching sessions I got the springs and shocks installed.
The third component in the suspension triad is bigger sway bars, so as part of the update, I thought that I’d spring (sorry) for a Suspension Techniques (ST) 52000 sway-bar set with a 22-mm front bar and an adjustable 19-mm rear bar. I’ve probably installed this setup in six 2002s over the years (as well as ST’s fatter sets in the E9 and E3) and think it does a good job of knocking down the body roll without making the car feel unnaturally bolted to the horizontal. However, I found that the price had crept up to $339, and spending that much money seemed frivolous, so I tried living with the original sway bars.
The new progressive-rate springs and Bilstein HDs felt great, completely killing the floaty feeling of the car’s ancient original suspension without any harshness, but it was obvious during entrance-ramp tests, some spirited driving on twisty roads, and even simply changing lanes on the highway that the body lean from the car’s original thin sway bars was going to drive me nuts. So I put out a call in that first article and on Facebook that if anyone had a set of used ST sway bars they’d part with for a good price, I’d be wicked-interested.
Of course, almost no one has used performance sway bars for sale: You buy them, install them once, they work, you leave them in the car forever. They’re not like shocks and struts that wear out, or even like springs (there’s always a new product you’re itching to try). The only circumstance I could think of where you’d have a used set of performance sway bars was if you bought a parts car that had them. I recalled that there was such a set in the faux 2002tii running parts car that I had last year, and I rued letting the car go without yanking them out. I even considered contacting the guy I sold the car to.
I looked to see if I had other options than the ST set. CCA member Jim Murphy e-mailed me, advising that I have a look at Adco sway bars. I was surprised; I know Adco as a manufacturer of bumper override bars and roof and trunk racks, not suspension parts. I did check out their offering, and they appeared to be the same size and basic design as the ST bars (which is really just a fatter version of the stock set, with multiple attachment eyelets for the rear bar to give some measure of adjustability) at a slightly higher list price.
Ireland Engineering has a couple of different 2002 sway-bar options. They sell a 22-mm/19-mm set that, when you read the description carefully, is actually just the Suspension Techniques set. But they also sell an in-house-designed thicker and stiffer set, including a front bar that mounts beneath the front subframe like the old Metric Mechanic “Maximum Stick” sway bar instead of clamping on top of it like nearly every other bar. This makes installation much easier—but at a higher price.
I was about to use the $20 discount code that Summit Racing had sent me to order the ST 52000 package from them and be done with it when I received a surprising e-mail from CCA member Doug Frautschy in Ohio. He said that he had a set of used bars that he thought were the STs I was looking for, but they were in his car when he bought it, so he couldn’t be certain of their brand.
I asked him why he pulled them out of his car. He said that his 2002 was set up for track and autocross, which meant that at this point it had the equivalent of an Ireland racing suspension, and that the fatter Ireland sway bars did in fact make a big difference over the STs in flattening out body roll during performance driving.
Doug sent me a photo of the bars to confirm that they were what I wanted. They were blue, which was puzzling, since the six or so sets of ST bars I’ve installed in the past decade have been lime green, but the adjustable rear setup certainly looked like that of the ST set, and a thorough search on bmw2002faq revealed that old ST bar sets were indeed blue. The blue paint was chipped in places, but I didn’t care; I don’t do detailed undercarriages. Far more important was the fact that the set appeared to be complete with bushings and the rear adjustment hardware.
We talked about the price. He asked if I had certain parts I might barter. One of the things he was interested in was a driver’s-side vent window and frame. Incredibly, I had one of these sitting in my driveway from a rusty door I’d parted out. He offered me the sway-bar set for a great price with very reasonable shipping, and I gave him the vent window for the shipping cost. It was exactly the kind of transaction I love, where neither party is trying to squeeze the last dollar out of it, just two enthusiasts happy to find homes for some unused parts.
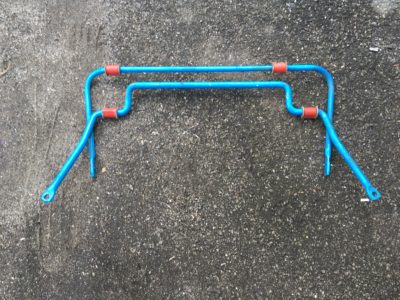
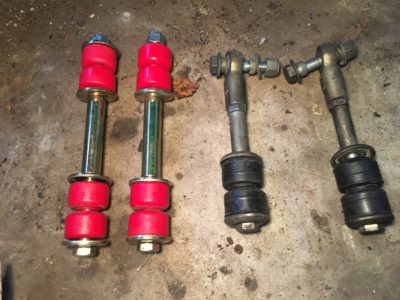
The used ST sway bar set and end links.
I put Louie up on the mid-rise lift, yanked the original sway bars out, and waited for the ST bars to arrive. They came in a big box that had previously held a flat-panel television and thus was labeled with “fragile” and “sensitive electronics” stickers. My son Ethan saw the box on the porch with the “fragile” stickers and asked if I’d bought another guitar. I laughed and explained that there probably wasn’t a less-fragile thing in the world than sway bars, which are little more than pre-bent metal with eyelets at the ends.
I began the installation last Sunday morning. I did the rear bar first, since there’s oodles of clearance. I had it installed before lunch, leaving the rest of the day to battle with the front bar.
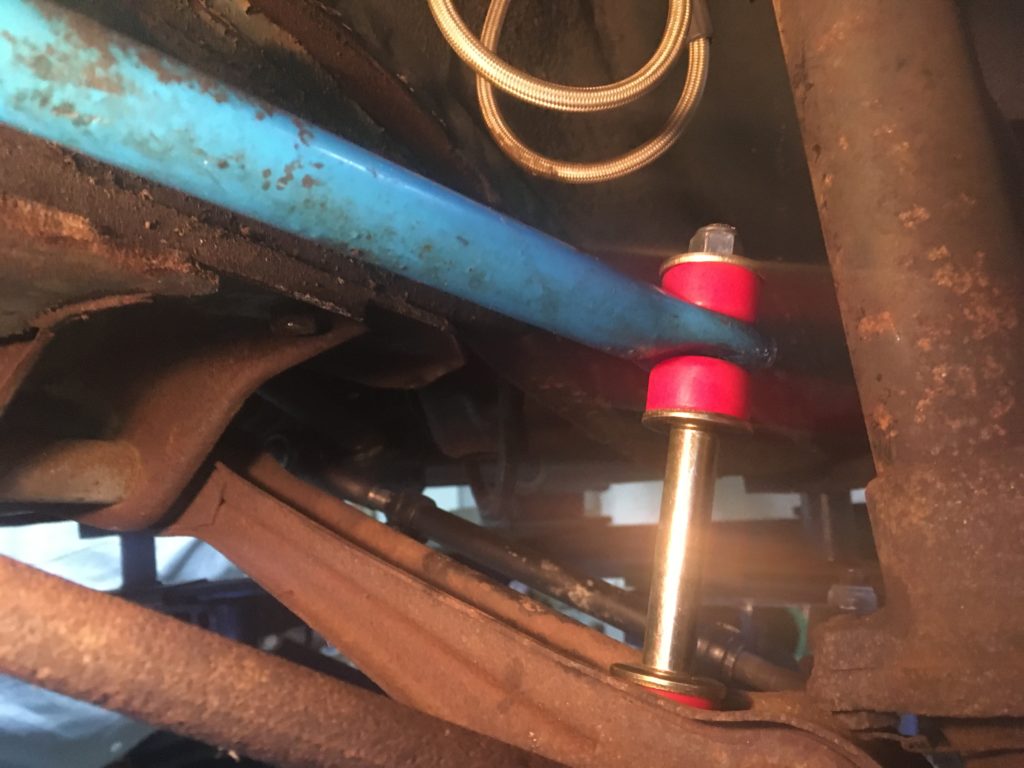
The rear sway bar with its adjustable end links installed.
And a battle it was. Although replacing front sway bars is less work than front struts and springs, it’s always more of a pain than it should be. First you have to get the bar into position, and thicker bars have less clearance to fit between the bottom of the nose and the front of the subframe (specifically the tow hooks and the nuts and washers at the front of the radius rods). I recalled it being like one of those little puzzles with a metal bar, a circle, and a piece of rope where you swear there’s no way and then you rotate it and suddenly it slides in.
I tried every angle but was stymied. I looked it up on bmw2002faq, and laughed when I found a post that not only said, “It’s like one of those little puzzles with a metal bar, a circle, and a piece of rope” but actually showed a photo of one of those very puzzles. But then I read another post that said the instructions from Suspension Techniques say to bend the tow hooks sideways, undo the little brackets holding the flexible brake hoses to the strut to give a little extra clearance, and push the bar straight in. A little bending of the bottom of the valance was also necessary, but Louie is hardly a mint car, and has through-rust in this portion of the nose, so I wasn’t shy about muscling the bar into place.
With the bar in place, the next step is to attach it, and this is also a surprising pain in the butt. As I mentioned earlier, the bar clamps onto the top of the front subframe via U-shaped brackets. A tab on the front edge of the bracket slides into a slot; the back of the bracket is held to the subframe with two Allen-head bolts and nuts. The problem is that the extra thickness of the fatter bar makes it difficult to slide the bracket into position. A trick is to lower the front subframe by carefully undoing the six bolts holding the subframe to the frame rails, one at a time, then screwing them back in a few turns. In addition to lowering the whole assembly by about 3/4″, which gains you clearance to the bottom of the nose, this also allows you to slide the back of the bracket into the gap that opens up between the top of the subframe and underside of the frame rails, then slide the bracket forward so the tab goes into the slot at the front. You then take a screwdriver with a round shaft, slide it up through one hole in the subframe and through the corresponding hole in the bracket, lever the bracket forward and into the slot, and start the bolt and nut in the other hole.
I greased up the bushings with the requisite copious quantities of silicon-based lube, put them on the sway bar, and put the brackets over them, but try as I might, I couldn’t push the bar far enough forward to get the brackets into the slots. I had to do something I’d never done before: trim the back of the brackets to allow them to rotate downward and into position.

Trimming the back of the U-shaped bracket.
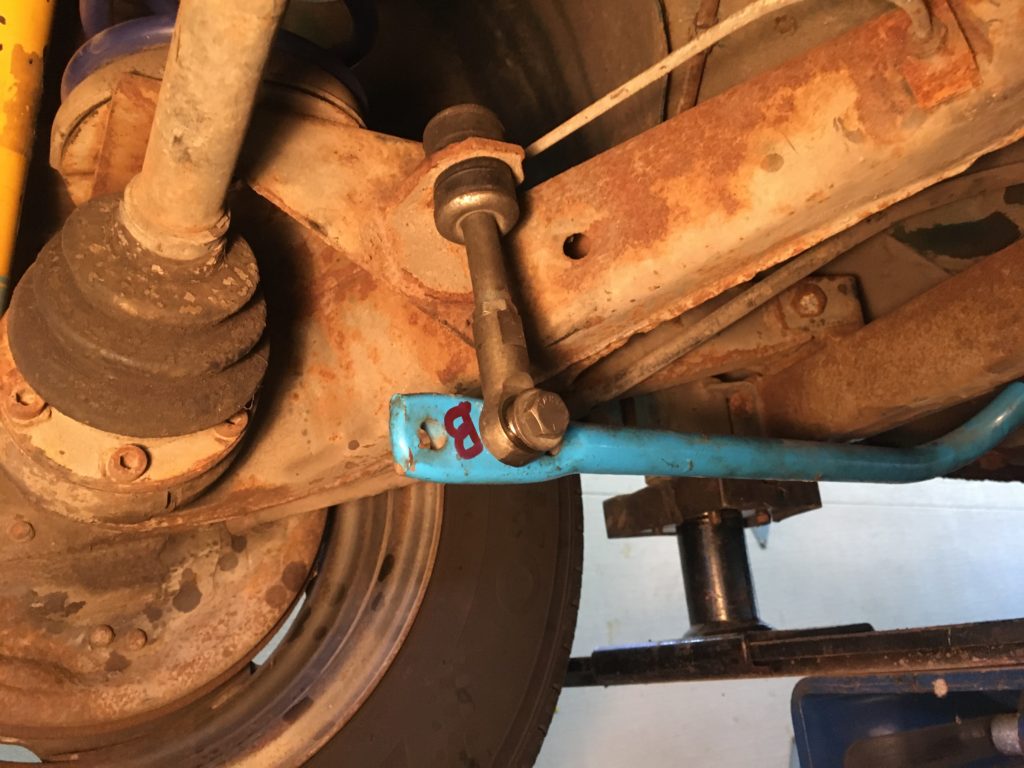
Finally, using a big set of channel-lock pliers to squeeze the bracket and bushing, and employing the trick with the screwdriver to line up the holes, I got the bracket into position. I had to run to the hardware store for longer-than-normal Allen-head bolts, because the back of the brackets remained tipped upward too far for the nuts to reach the bolt threads. I got the nuts started on the ends of the longer bolts, but found that the front part of the bar was hitting the inside of the nose—and not just the thin, easily-bendable part of the valence that I’d pushed the bar past to get it into position; it was hitting the boxed section where clearance would require smacking it with a hammer and a block of wood.
The sway bar was in position, but had zero clearance.
By this time I was hot and tired. I took a break, hydrated myself, then went back out for another presumably calmer, more rational look.
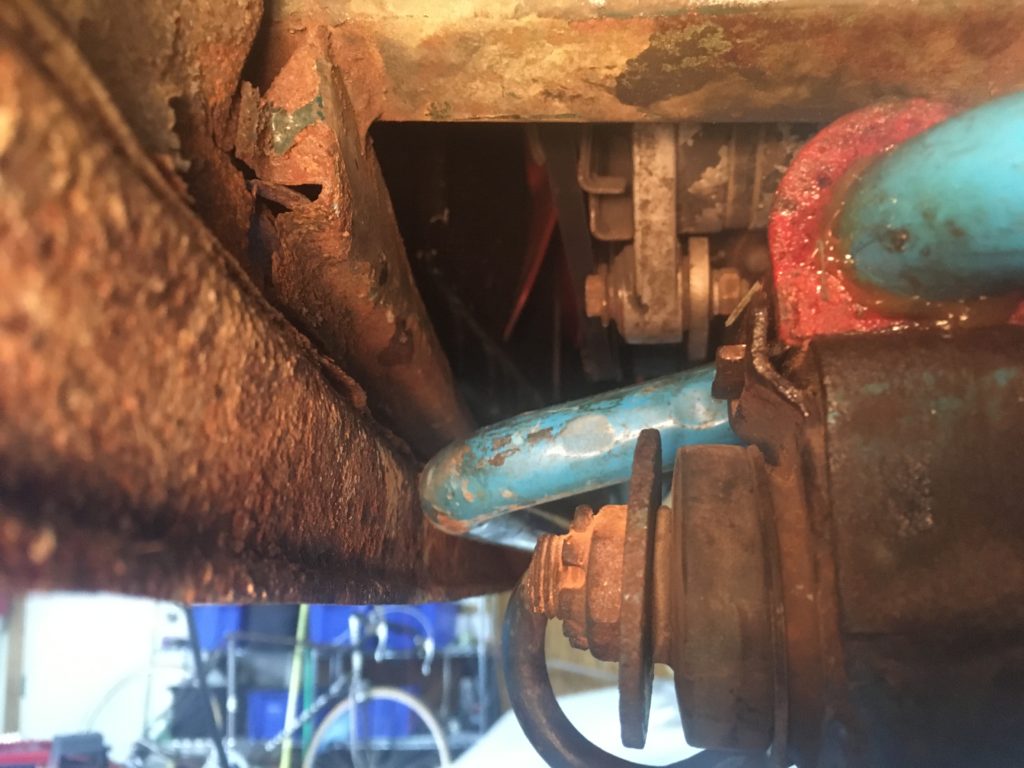
In addition to having the U-shaped brackets attached to the subframe, the ends of the bar are attached to the control arms via links. This allows the bar to pivot on the brackets and bushings as the wheels go up and down. Thus, during installation, before you install the end links, you can tip the eyelets up, which rotates the bar and tips the front of it down. I did that, and clearance improved, but when I installed the end links and their bushings, it see-sawed the front of the bar back up to where it clearly was hitting the nose. I’d never had this happen on an ST bar installation before.
Installing the front sway bar end links pulled the front of the bar even higher up.
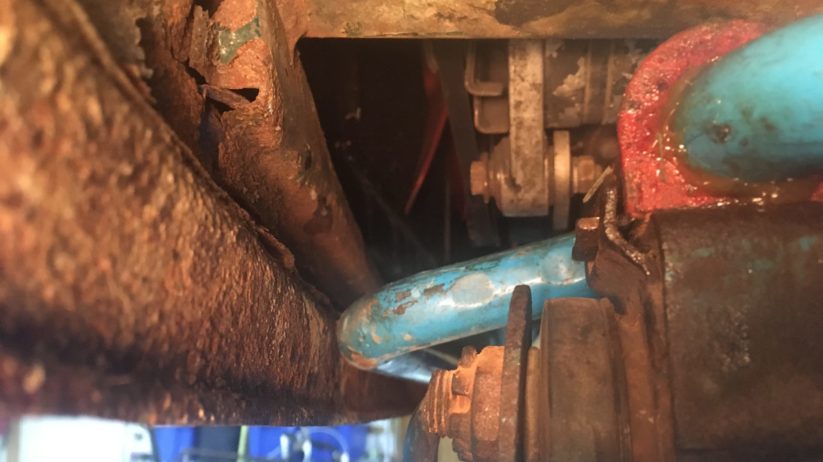
Mystified by this difficulty, I had a look at the front sway bar I’d removed from the car, and noticed something funny: This bar didn’t jut out in the front nearly as much as I was used to seeing. I went around to the back of the house where I have a pile of junk, including sway bars removed from other cars. I dug through it, found the original sway bars I’d pulled out of Kugel, the other ’72 2002tii I owned for eight years, and compared them. It wasn’t my imagination: This front sway bar had a much shallower front jut-out than any I’d ever seen on a 2002.
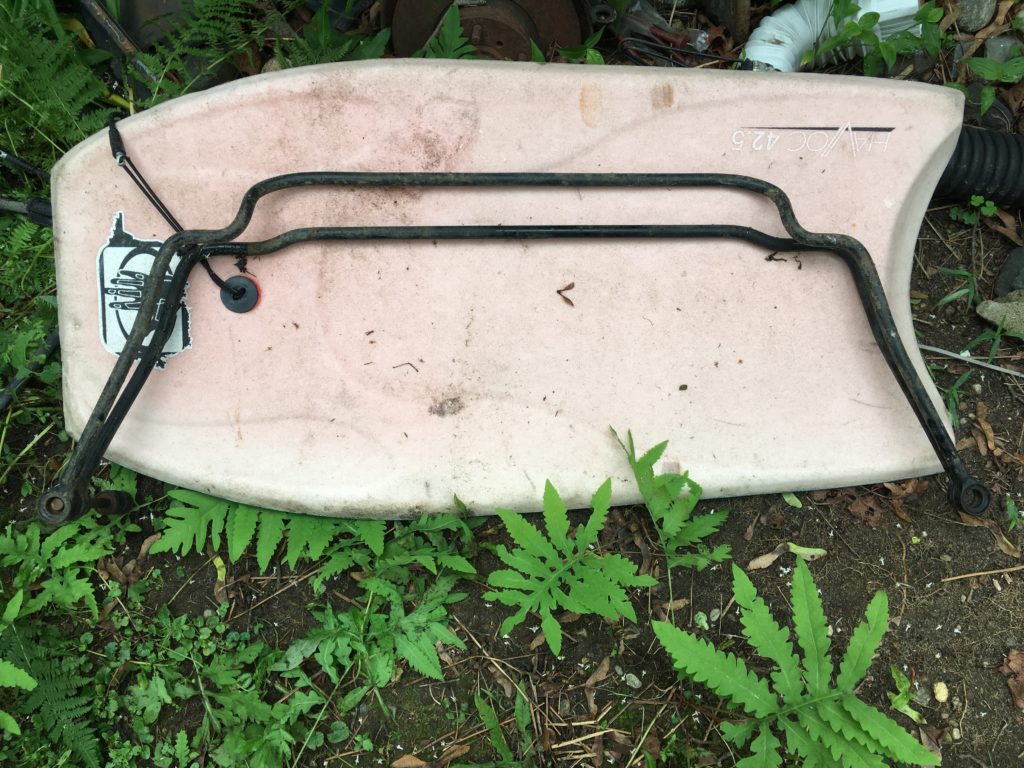
Louie’s front sway bar definitely had less of a jut-out than others I’d replaced.
What was going on? Had Louie been hit in the past and its nose pushed in? Had a new nose been fitted and was it closer than it should be? Had a different front sway bar been installed to work around the problem? Was this why there was zero clearance now with the ST bar? It was bizarre. I didn’t see evidence of accident damage, and the welds on the nose looked original to me, but this isn’t my area of expertise.
On the one hand, I had the car up on the lift, so it would never be easier than now to take another step, whether that was to pull the bar out and replace it with an expensive Ireland under-mount bar, or to beat some clearance into the nose with a hammer and a block of wood. But a combination of denial and exhaustion made me think that maybe things would just settle into place once I let the car down and drove it.
The next day, I went for a drive. On the small step between the end of my driveway and the sidewalk, I heard a big ugly metal-on-metal groan. A drive over the rough pavement at the end of my street produced sounds that would make anyone—not just a hyper-aware owner who’d replaced the sway bars—wince. Oh, boy, I thought, this is going to drive me crazy. Bad choice. Should’ve done something while I had the car up on the lift.
The more I drove the car, though, the more things did seem to settle, to the point where it was only speed bumps and potholes that caused it (and me) to groan. I thought that maybe the small amount of rubbing would create some clearance on its own. Maybe I could help quiet it down with a little oil.
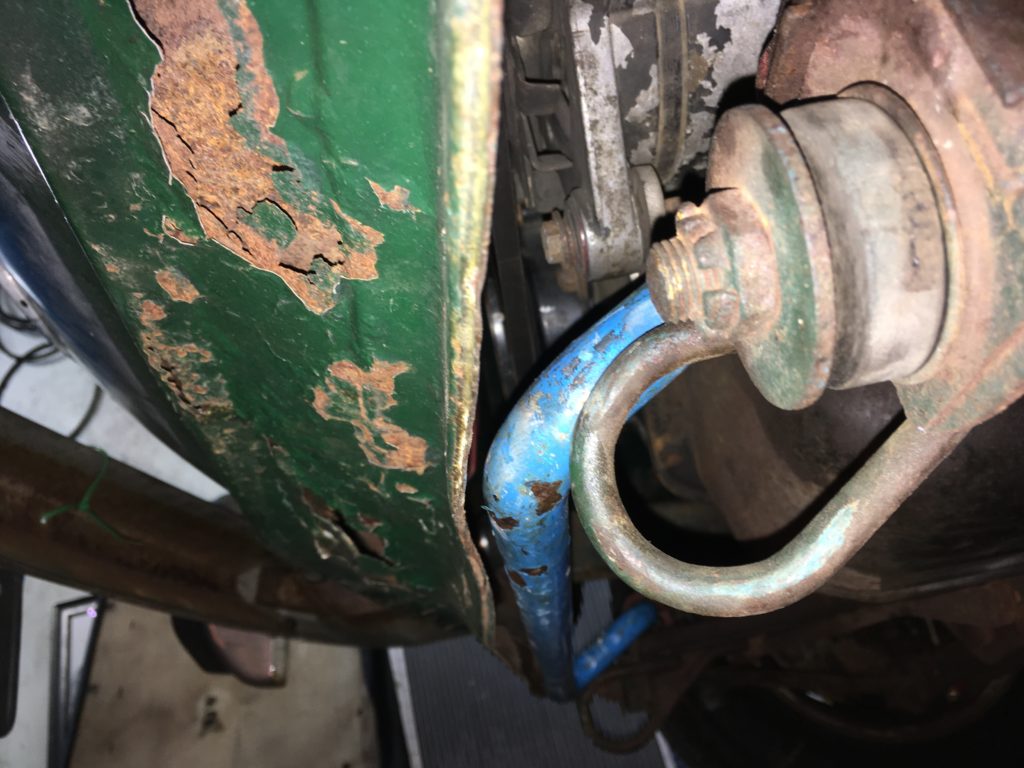
I skooched down under the nose of the car with a can of SiliKroil, and saw something surprising. Now that the suspension had settled, the bottom of the sway bar was visible. It was no longer against the double-walled section of the nose, but instead was peeking out from under the flexible single-layer lip of the front valence. This part of the valence is slightly V-shaped, and I could see that the sway bar was only rubbing at the two corners of where it sticks out. I took a plastic pry tool and easily moved each side of the flexible section of the valence about 3/16 of an inch away. When I drove the car, the noise was gone.
Thanks for the clearance, Clarence.
I’d like to say that my not pulling out the sway bar and instead waiting for things to settle was a measured rational decision based on the 38 years of experience working on 2002s, but it really was exhaustion, denial, and luck. But hey, this time it worked out for me.
Still, it’s a bit of a mystery why this particular 2002 had such clearance issues with this front ST bar. If I had a 2002 on which I didn’t want to risk messing up the paint or bending the sheet metal on the bottom of the valance, I’m not sure that I’d want to go through this again, and might well opt for the IE under-mount bar.
I’d say that Louie is now cornering like a champ, and together we’re entrance-ramp-wailin’ fools, but the Great Suspension Refresh has revealed the next layer of the onion: The Kumho Solus 185/70-13 tires I ordered from the Tire Rack in order to get the car home from Louisville during its in-place resurrection are fine for highway driving, but squeal horribly when pushed even just a little. I think I’ll swap wheels with Bertha the ’75 2002, borrow its 14″ E30 basketweaves with the General Altimaxes on them, and see how the car behaves.
It never ends, does it?—Rob Siegel
Rob’s most recent book, Resurrecting Bertha: Buying Back Our Wedding Car After 26 Years In Storage, is available on Amazon here. His other books, including Just Needs a Recharge: The Hack MechanicTM Guide to Vintage Air Conditioning, are available here on Amazon. Or you can order personally-inscribed copies of all of his books through Rob’s website: www.robsiegel.com. His new book, The Lotus Chronicles, will be available in the fall.