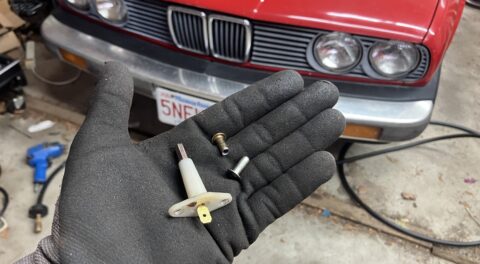
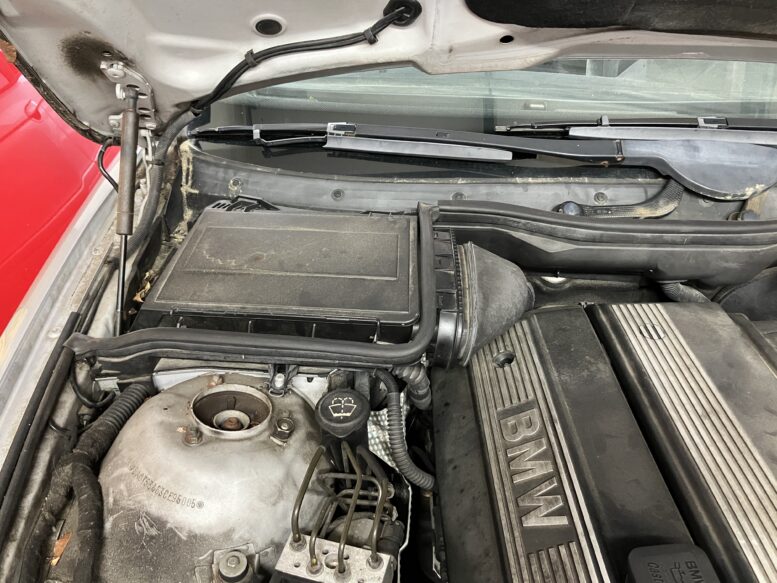
Ever since I’ve owned it, the 2003 E39 530i sport that I’ve been daily-driving for a decade has had an issue where, when idling in traffic, there’s an acrid oily smell inside the cabin. During the first of several coil pack replacements to cure misfires, I discovered the cause—the slotted plastic tab at the top of the plastic elbow duct connecting the passenger-side cabin filter to the firewall was broken, making it so that the duct wouldn’t seal against the firewall (note that the duct has to come off in order to pull the engine cover to replace the stick coils). Years back, I looked up the part (64318379620 for the passenger side, 64318379621 for the driver’s side), found that the dealer list was high, there were no aftermarket sources, and thought “Well, I’m not going to pay that for a plastic elbow,” and lived with the occasional smell. It wasn’t a big deal to me, as I don’t spend a lot of time in traffic. Plus, having the vintage BMWs and vintage Lotuses, the smell of oil and exhaust is part of the ownership experience.
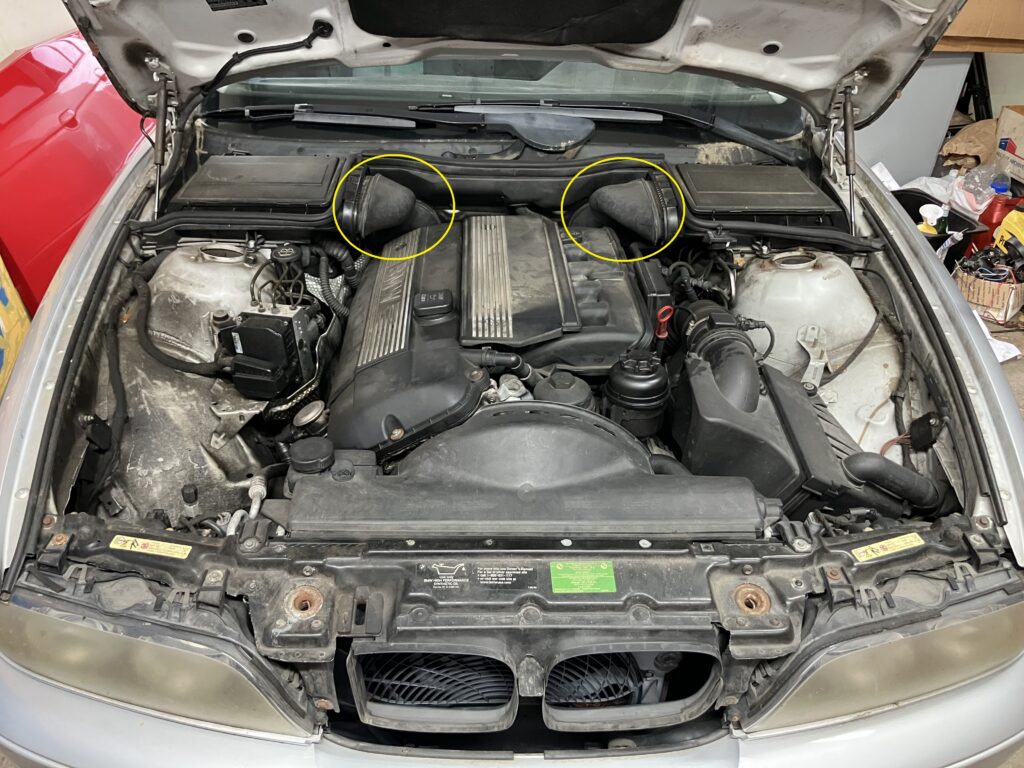
The two cabin air ducts. Please cut me some slack regarding the obvious oil leak on the passenger side and the badly-clouded headlight covers. We’re all just surviving in challenging times.
However, during a hot spell this spring, both Maire Anne and my son Ethan complained about the sharp smell when the car isn’t in motion, so I revisited the issue. I looked on eBay for a used part, and found that many were either honestly represented as having damaged locking tabs, or I couldn’t tell if they were intact from the pics, and when I asked “Can you guarantee that none of the tabs are damaged,” I received no response. I asked “Big Al” Taylor—who I mentioned last month in sourcing a trunk-lid tool kit for the car if he had a good used one—and he said that the first two he pulled had broken tabs. Okay, I thought, so all used ones are damaged. Just pay for a new one and be done with it.
It’s still really surprising to me that, if this is a high-breakage part, there are no aftermarket sources. It may be that, unlike M54B30 engine parts like the intake bellows and the DISA valve that are on every car that uses the engine, the “microfilter air channel” (as it’s called in RealOEM) is used only on the E39. I looked on getbmwparts.com (my usual go-to source for OEM-only parts), found that the list price was $140 and their price was $112, but loaded with shipping, handling, and MA tax, it came to $135. We all have thresholds for parts prices for non-essential repairs, and this apparently exceeded mine. I rolled up my sleeves, searched a little harder, and found it from Motor City BMW Parts for $121 shipped. Hey, every little bit helps.
In addition to my family’s noses, I had another reason for wanting to knock off this repair. I hate to keep harping on this situation with my back and its three bulged discs, but it’s hanging over everything I do. Bending over engine compartments for anything more than a dipstick check, much less lying underneath cars and applying nut-busting amounts of torque, are currently out of the question, and I’m not sure if the future will bring real improvement. I looked at the cabin air duct replacement as an “If I can’t do this, I can’t do anything” line in the sand.
I watched the tracking number of the part, and when I saw an evening delivery, I put the E39 in the garage, opened up the hood, pried off the clips attaching the duct to the air box, rotated the barely-attached part clockwise, and had it out in 30 seconds. I beamed that apparently I wasn’t sidelined yet.
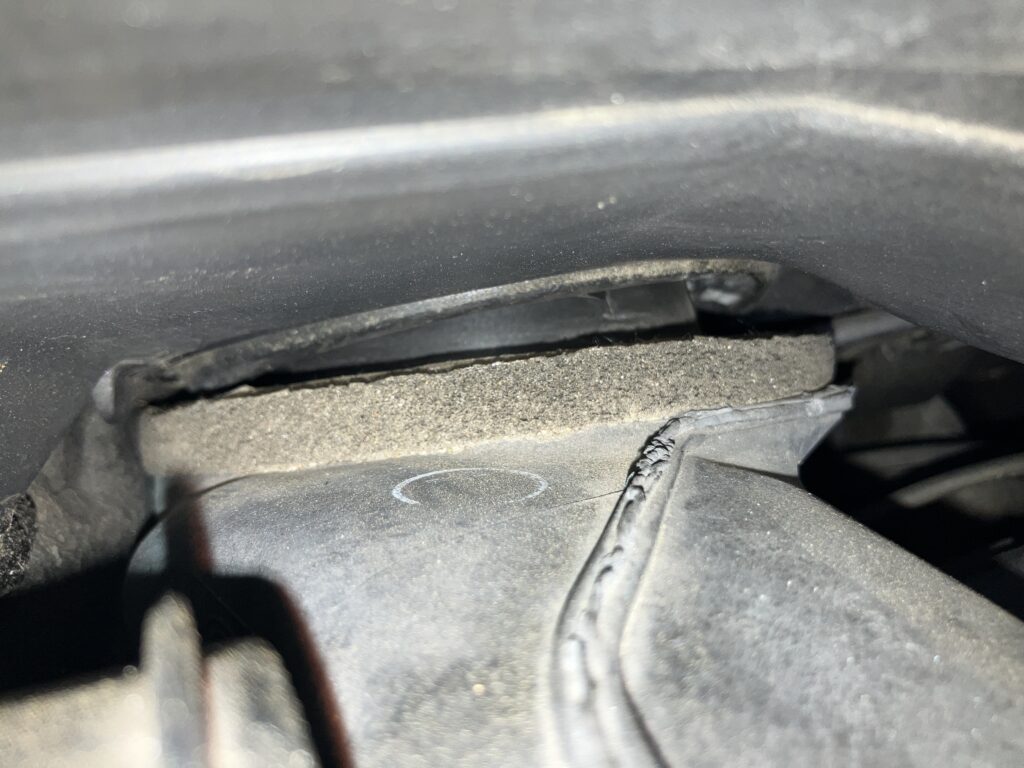
A closeup of the non-sealing duct.
The new duct arrived a few hours later, and I gleefully ran back out to the garage to knock off the repair. I am well aware that sometimes removal of an old part is 80 percent of the work and installation of the new part is trivial, but sometimes it’s the other way around. Even so, I didn’t expect this to be such a killer.
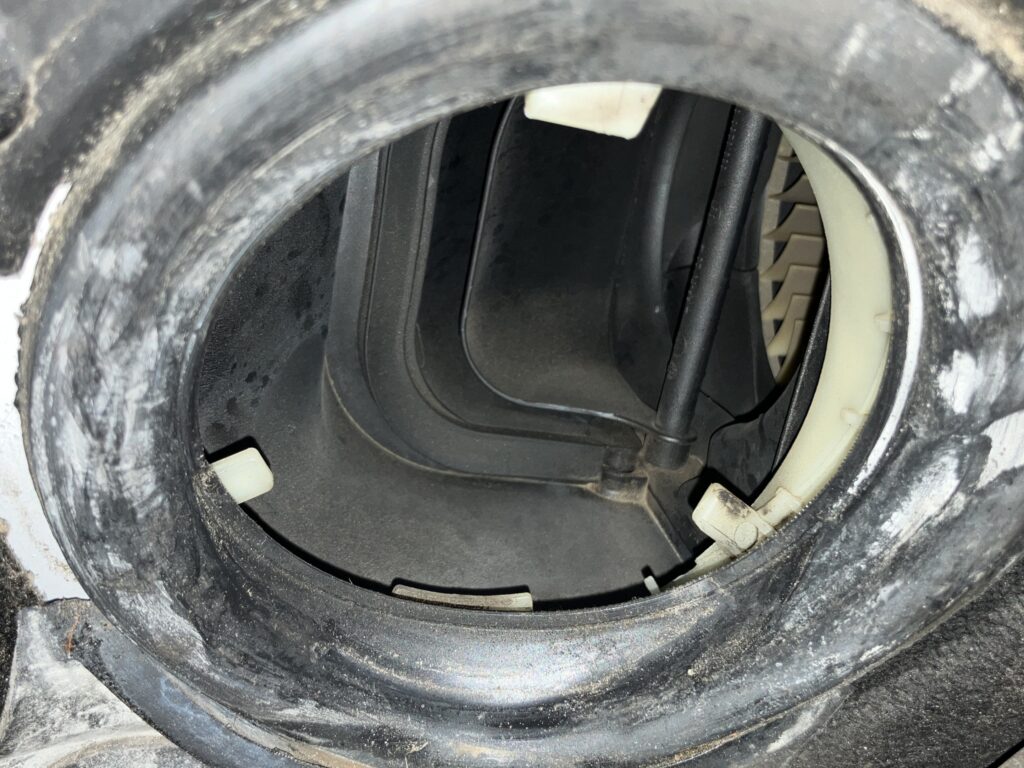
First, let’s look at these twist-locking slotted tabs. Here are the stationary flat ones mounted in the hole in the firewall. If you look carefully, you’ll see that the one at the top is much bigger, and the two smaller ones at the bottom are at different angles.
Here are close-ups of the slotted tabs on the new and old parts. If you’re looking to buy a used part, the pics of the new part may be helpful in showing you what the intact tabs are supposed to look like. You can see that a big piece of the top twist-lock tab on my original part was broken clean off, and that the two bottom tabs were damaged to smaller degrees.
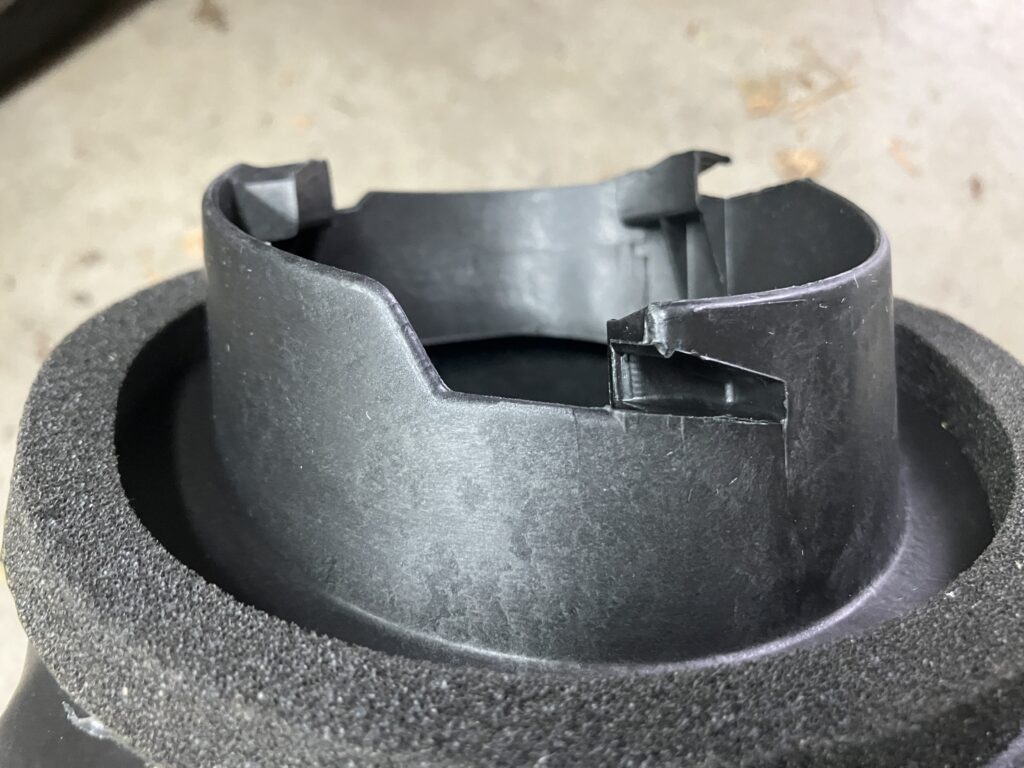
Top, new part
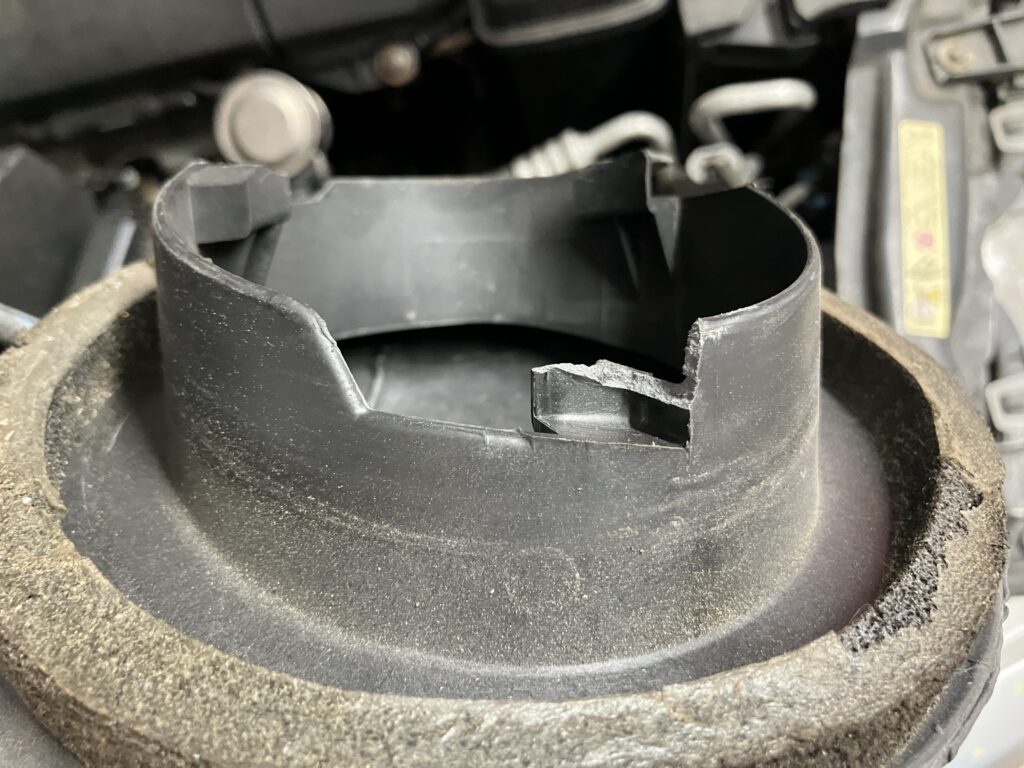
Top, broken part. This was the reason it wouldn’t seal.
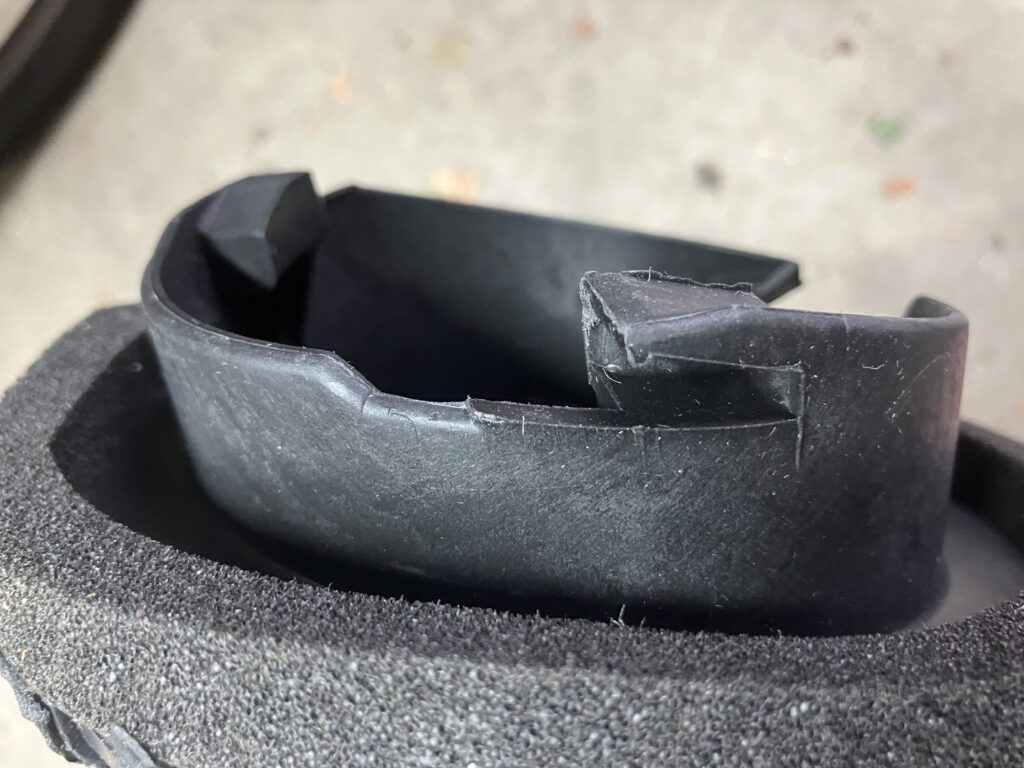
Bottom left, new part
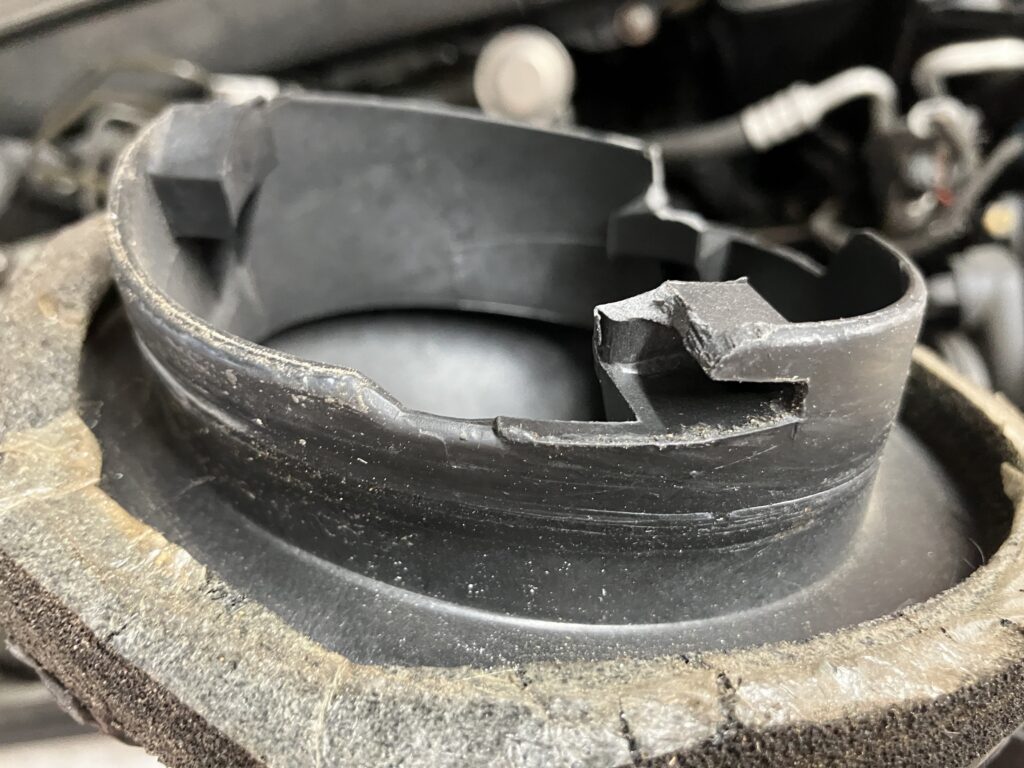
Bottom left, broken part
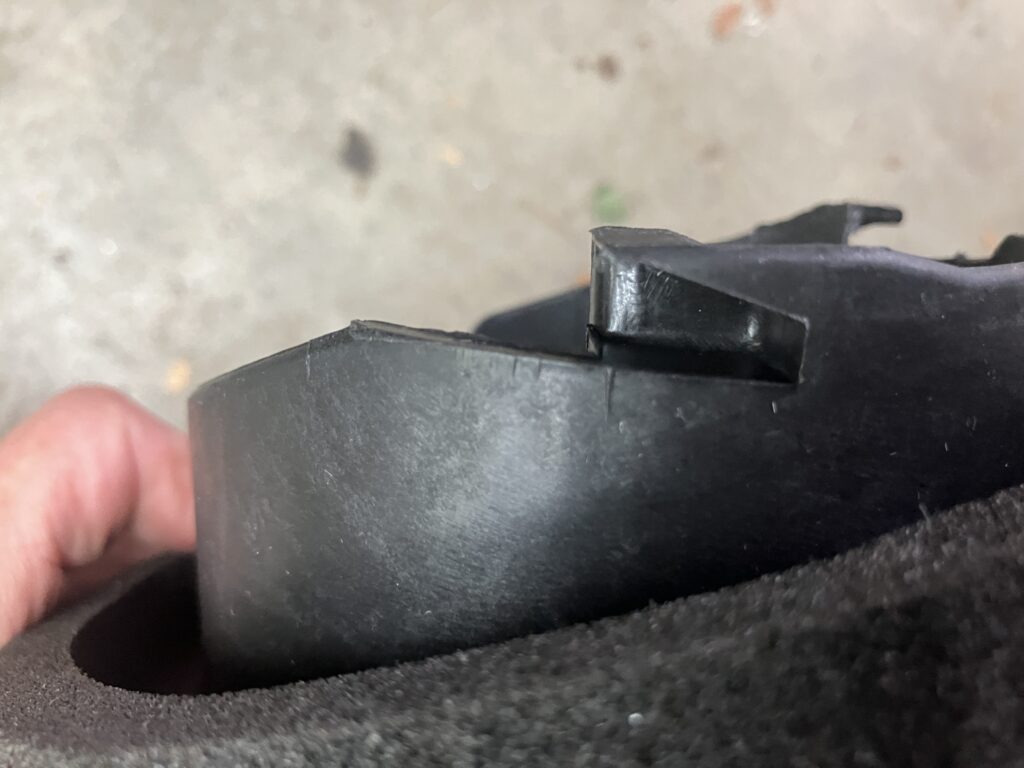
Bottom right, new part
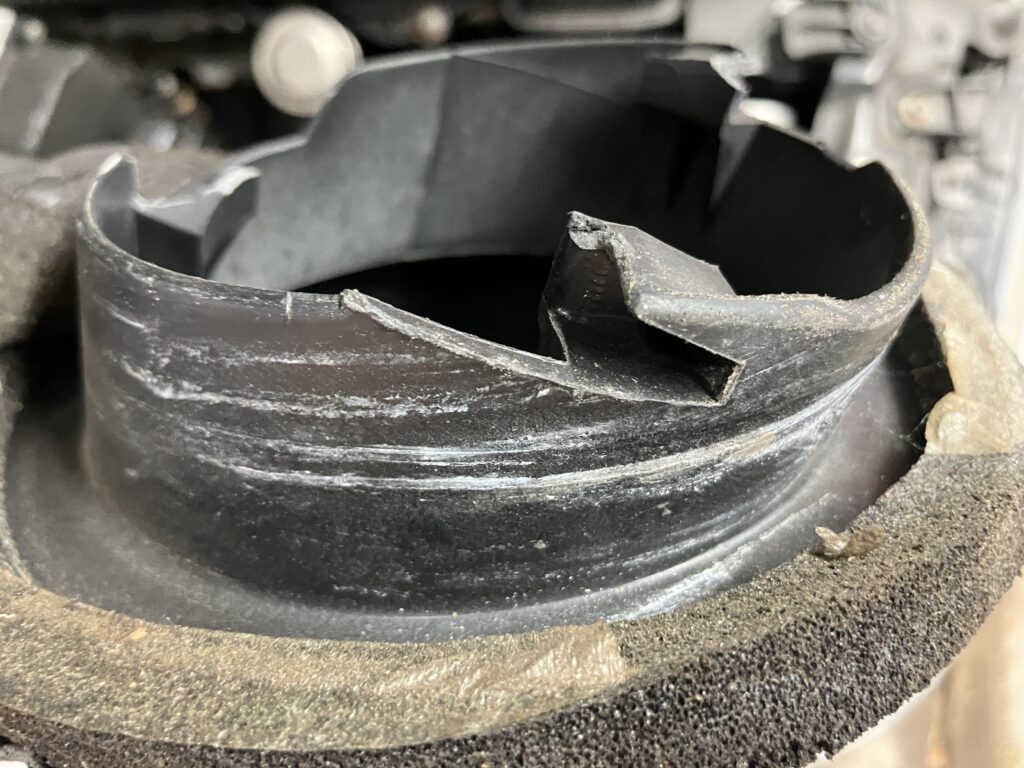
Bottom right, old part
The other thing that shocked me was how poorly made the new part is. This is a fairly heavy plastic part made by heat-joining several sections of rigid plastic. On the original part, the seams looked reasonably presentable, but on the new one, they looked like it was someone’s very first unsmoothed attempt. Again, this is the new part purchased from a BMW dealership.
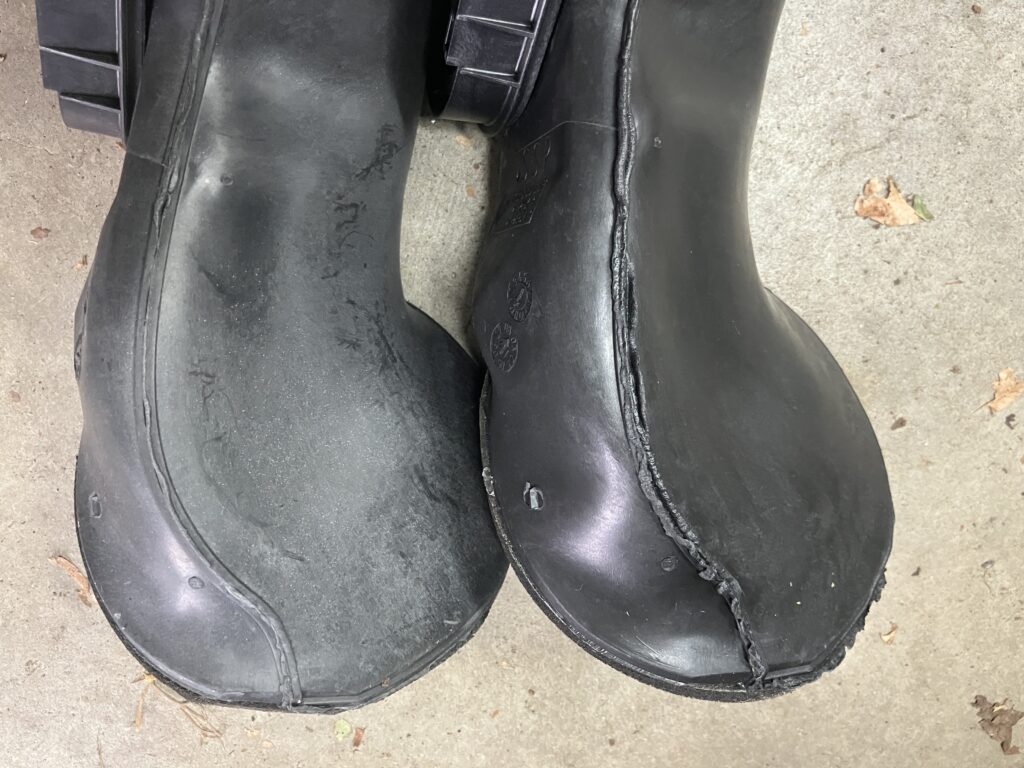
Old left, new right
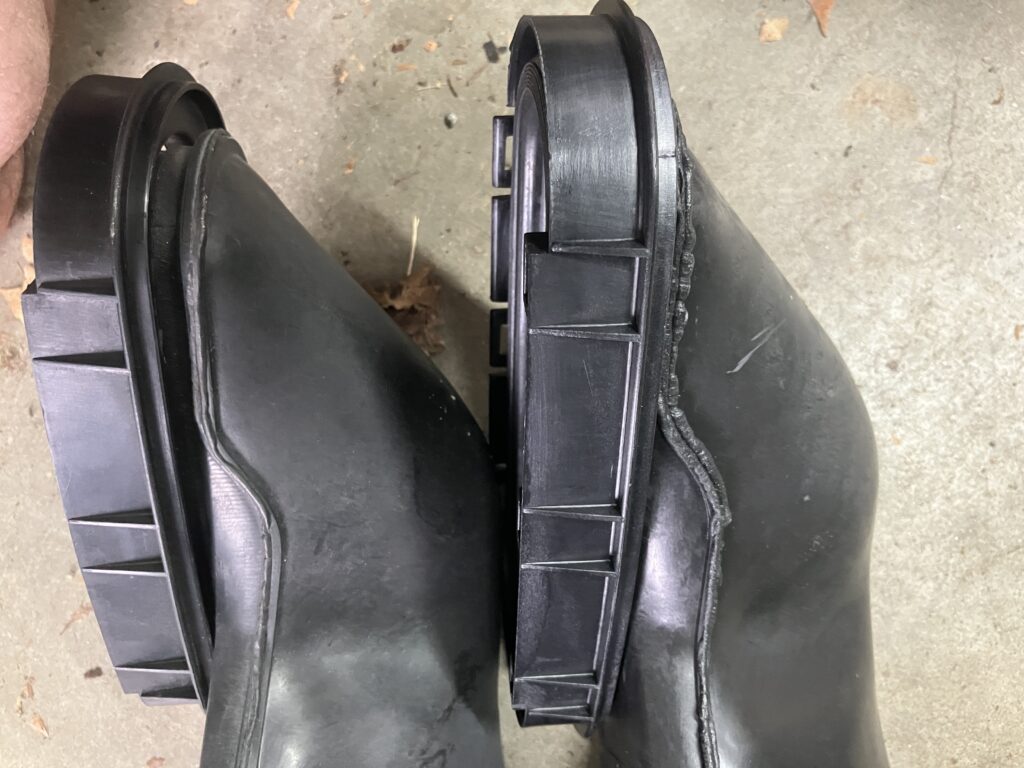
And again.
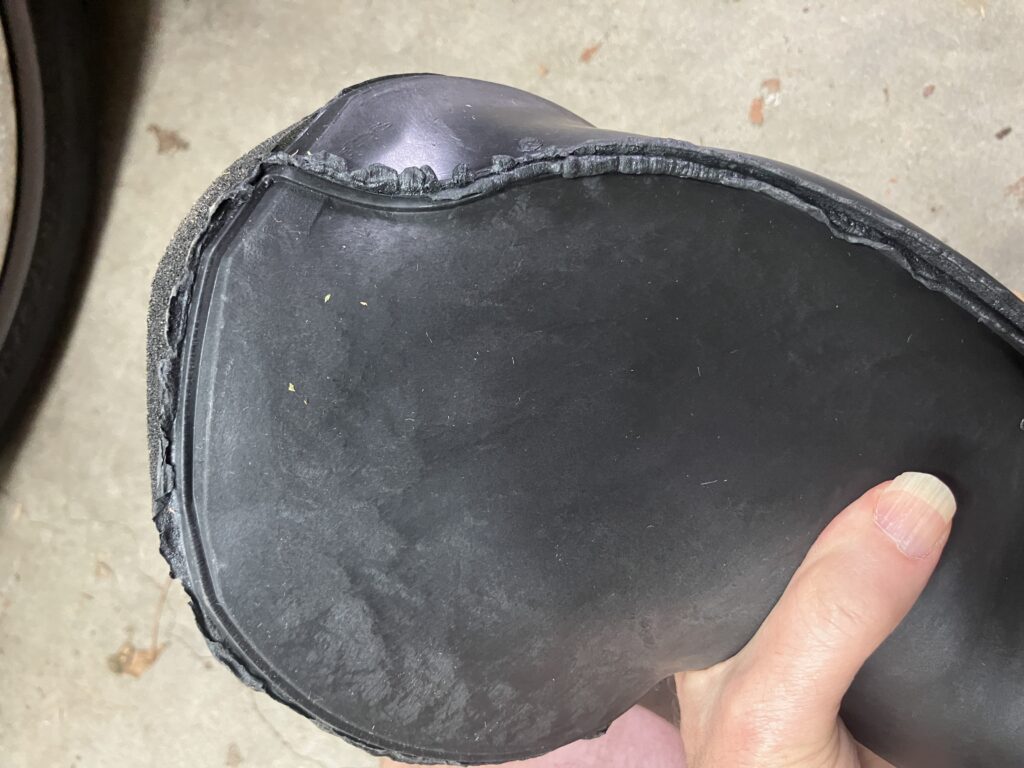
I mean, come on. Everyone say it with me: All new parts, even if they’re bought at a dealer and come in a BMW box with a BMW part number, might be absolute crap.
So you can see why I’m glad that I didn’t pay a dime more than I had to.
But, okay, it’s here, let’s make with the show and get this puppy in. Just take the end with the slotted tabs on it, stick it in the hole in the firewall, and rotate it counter-clockwise, right?
Oh my lord, what a pain in the butt… I mean, back. Try as I might, I could not get the top tab to twist-lock against its stationary counterpart. I read that the thing to do is, by sight and feel, make sure you’re compressing the foam seal around the face of the duct uniformly, but it made no difference. Thinking that maybe I didn’t have enough clearance, I completely removed the cabin filter box so I’d have ample room to twist the thing on so I could know what it felt like when the tabs meshed, but even doing that I couldn’t get the damned thing on. And I really didn’t want to force it.
Plus, after doing this for a half an hour from the right side of the car, the twisting I was subjecting my body to without even realizing it rewarded me with rapidly ramping-up back pain, as happens with bulged discs. I thought “Idiot! Idiot! Idiot! Do not risk a major setback for the sake of what you thought would be an easy repair for something that isn’t even important to you.” I threw the easy-to-install-because-it’s-broken part back in, stretched and then iced my back, gobbled more over-the-counter painkillers, and went to bed, utterly pissed off at the whole situation.
I woke up the next morning with only the background amount of back pain, so I apparently hadn’t permanently fubar’d myself on this quixotic idiotic crusade to show that the Hack Mechanic’s still got it. So yeah, like an idiot I had at it again. I did a bit of reading and learned that the foam seal, even though it’s soft, can prevent the duct from rotating easily, and that the thing to do is put some dish soap on it. I tried that while thinking about water getting in through the duct and causing something like the scene from Woody Allen’s Sleeper where the kitchen is overrun with soap suds. And this time stood at the front of the car instead of the side, which meant that I was twisting my arms and shoulders but not my back. Finally, the thing rotated with the top tab locked. It didn’t do a satisfying THOCK or anything; it was more like it didn’t tip forward at the top, I couldn’t turn it further, and I wasn’t going to risk trying.
Booya!
I was then faced with another problem—the other end of the duct didn’t reach the filter box.
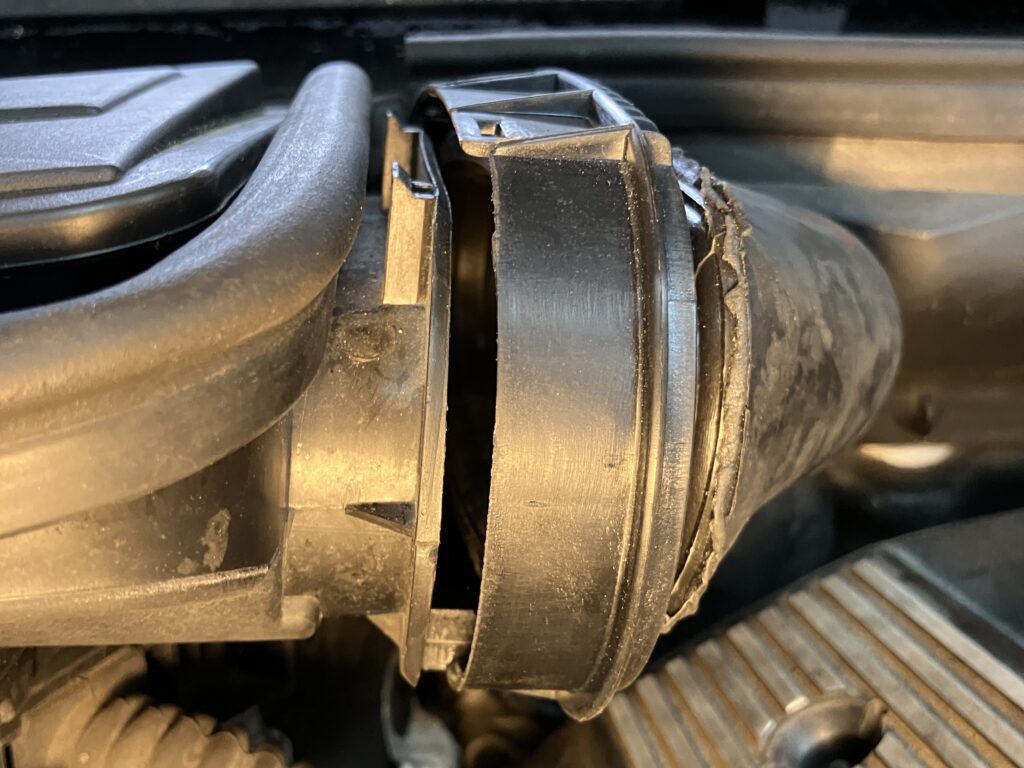
Yikes.
The locking mechanism at this end is an oval collar whose tab-and-clip arrangement at the top is visible, but the one at the bottom is not. Inside this end is a thick rubber (not foam) seal that, when new, is pretty stiff. I remembered getting this attached being challenging even with the original duct. The oval collar slides forward to be pulled over the tabs, but there didn’t appear to be nearly enough motion to close the gap, and I was terrified that, in pulling it, I was going to hear the gut-wrenching snap of the plastic tab at the top of the duct.
The only thing I could think to do was to undo the air filter box, move it closer to the collar, mate them, then move the box back. It’s definitely not designed to be done this way. The lid of the box must first be removed, as it secures the box to two tabs that stick up through it. The box mounts on a post using a metal clip, and in lifting it over the post, it’s higher than in its normal position to interface with the collar for the duct. But it worked, the only damage being that I cracked the plastic fitting that goes around the post.
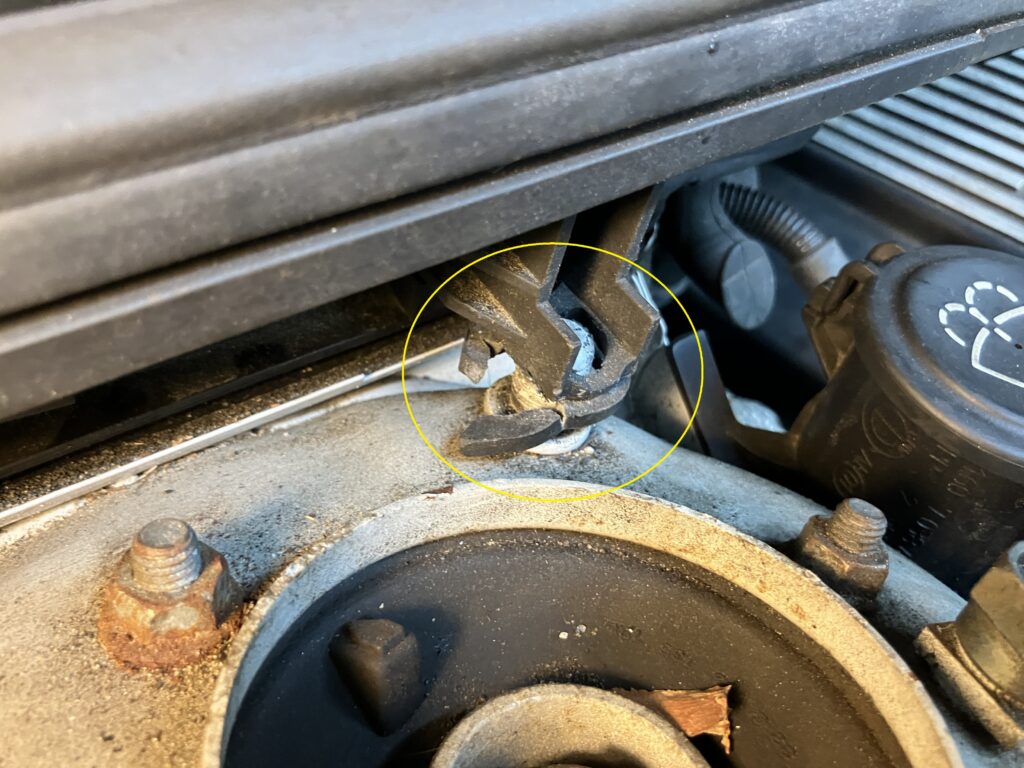
I’ll take it.
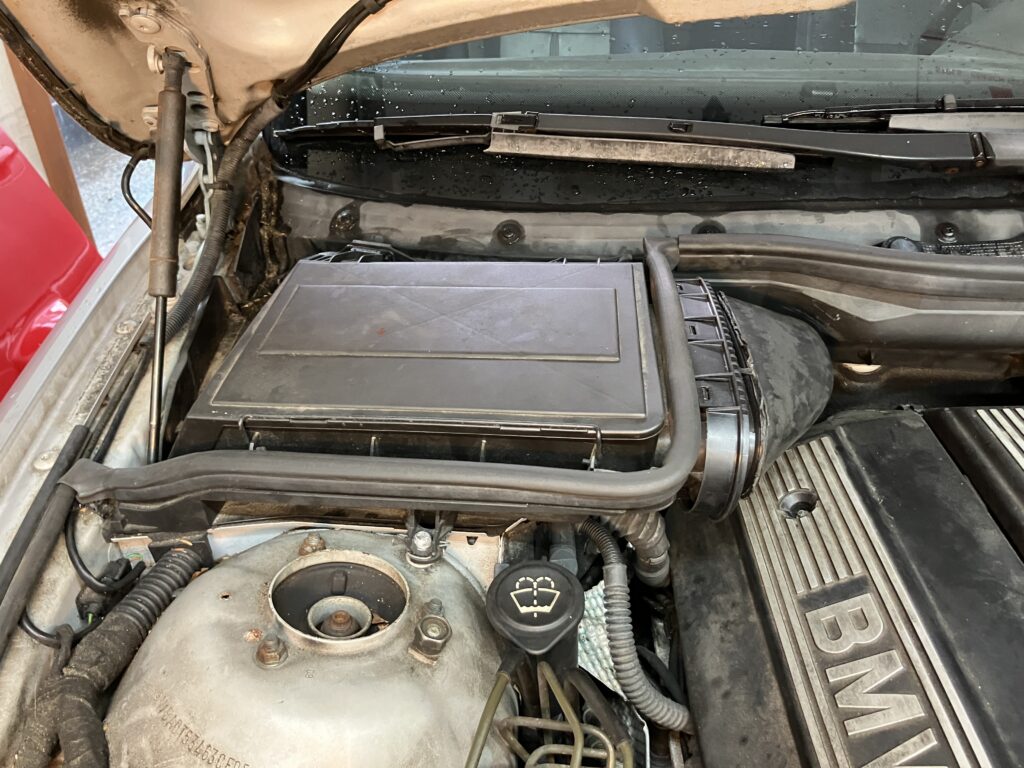
Whew!
So it’s in, it’s done. But if a goal was to address the feeling that “If I can’t do this, I can’t do anything,” I’m not liking the answer.
—Rob Siegel
____________________________________
Rob’s newly-expanded book The Best Of The Hack Mechanic™: 40 years of hacks, kluges, and assorted automotive mayhem, is available on Amazon here. His other seven books are available here on Amazon, or you can order personally-inscribed copies (including the new Best Of) from Rob’s website, www.robsiegel.com/books.