Last week, I accepted a request from my friend and Vintage caravan compatriot Jose to swap the Clardy a/c system from his wrecked 2002 into the lovely Pastellblau car he recently purchased. I may have been reluctant to take on the job due to time, space, and liability issues, but once I was in, I was all in. I had Jose order the big parts like the condenser and fan, and began tearing into the car.
Game on.
As I joke in the title of this short series, I’ve written about a/c retrofit and rejuvenation multiple times. A few winters ago, I even retrofitted a Clardy system like this one into my 2002tii. I wrote about it in condensed form here on BimmerLife (Part I and II), but captured it in mind-numbing detail in a series of nine technical articles on BMW 2002 FAQ that you can find here. So rather than delve into every nuance, I’ll concentrate mainly on what made this particular installation challenging.
Let me start by saying that whenever anyone, including me, talks about retrofitting a/c into a 2002 by installing an old system pulled from another car, what they’re really talking about is using the evaporator assembly (the portion that lives under the dash) and the console that surrounds it, and throwing away every other old component—the compressor and its bracket, the condenser in the nose, the hoses, the receiver-drier, most of the interconnecting wiring—and replacing them with modern counterparts. The big bulky York compressor that looks like a lawnmower engine and the big bracket that holds it get usurped by a small rotary-style compressor and its dedicated bracket, and the serpentine condenser is replaced with a modern parallel-flow unit. The Clardy system, however, was ahead of its time in that it came with a Sanden rotary-style compressor, and if there’s nothing wrong with it, it can be reused.
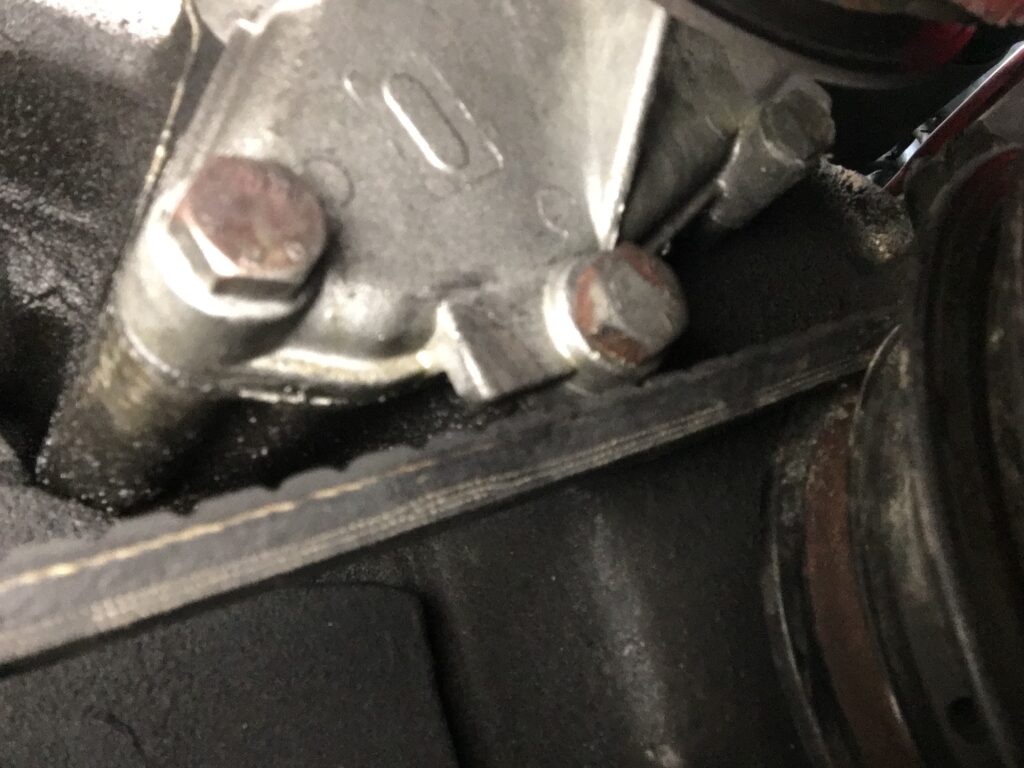
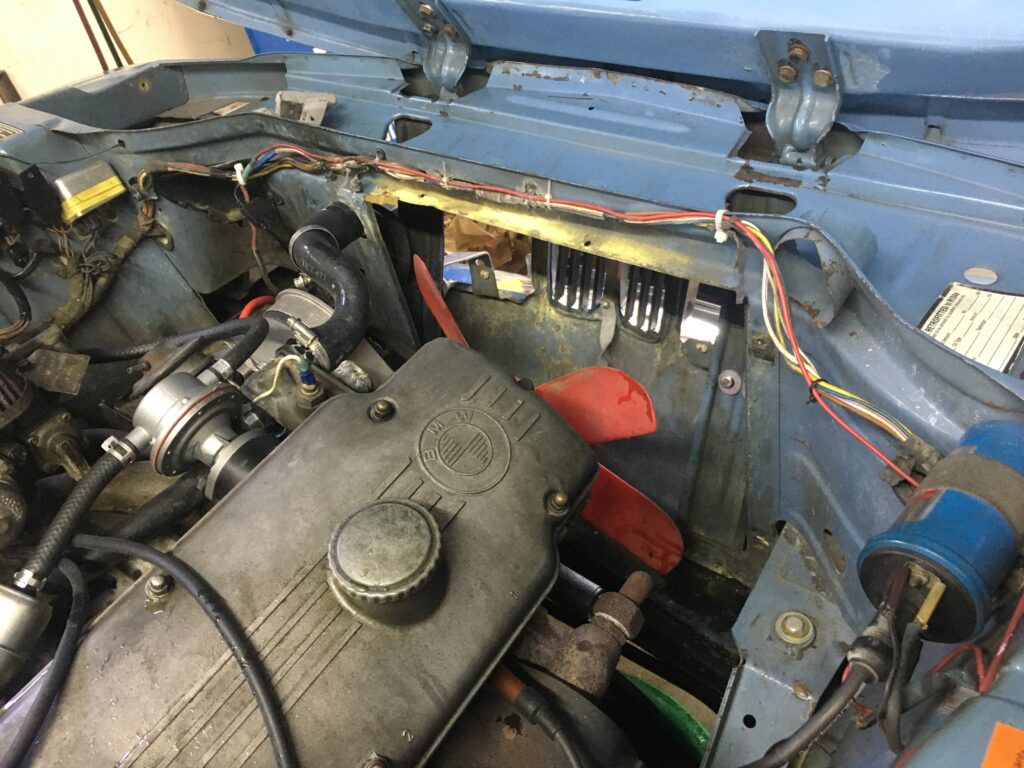
The retrofit into Jose’s car was made easier by the fact that the car at one time had a/c, and thus already had the holes for the hoses punched in the firewall and the nose. In addition, I was surprised to find that the car had a claw-style compressor bracket bolted to the block. I’ve never seen one of these on a 2002 M10 engine; I’d only seen the claw-style York-to-Sanden adapter brackets that attach to the original York bracket. I posted the claw bracket question to 2002faq, and some folks thought it may have originally been made for use on a four-cylinder E30 318i.
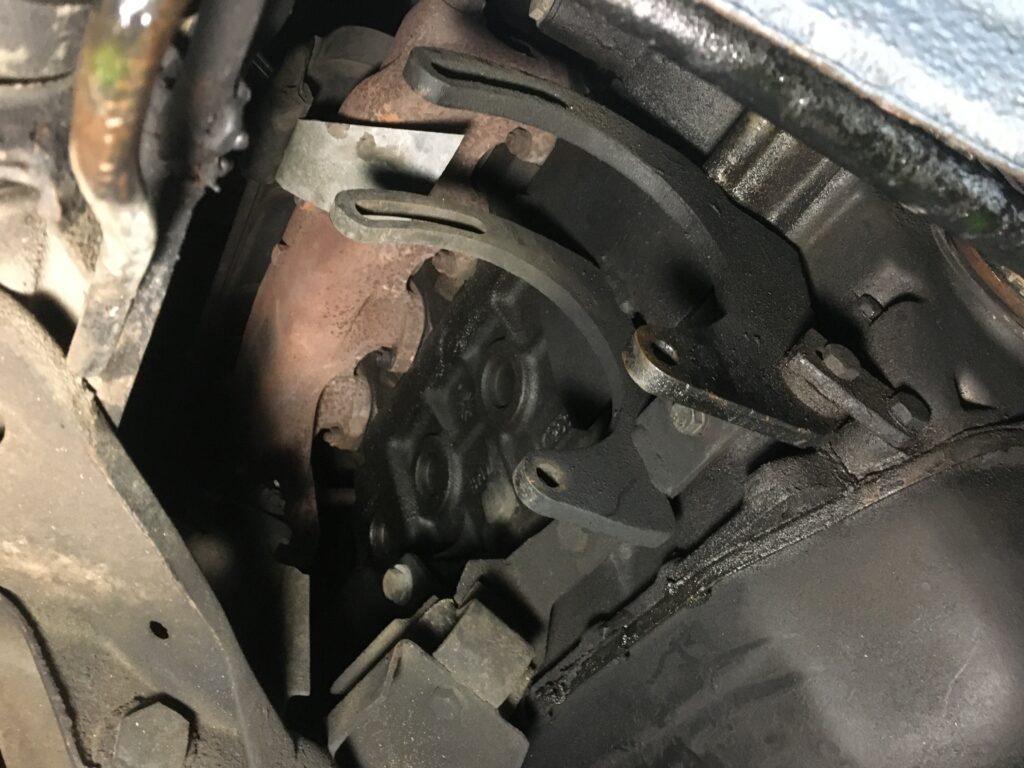
The surprising “claw-style” compressor bracket.
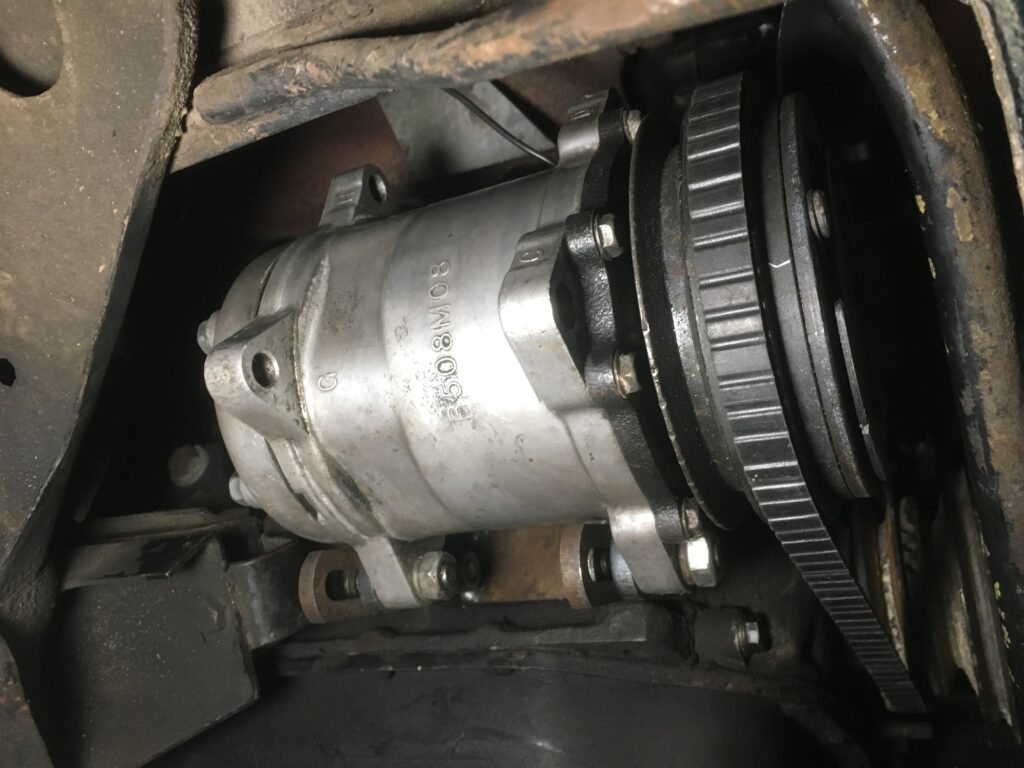
Jose’s wrecked car already had an updated version of the Clardy-Sanden bracket made in small batches by Dave Donohoe and sold on 2002faq under his forum name of Hobiedave. For years, the “Hobiedave bracket” was the only one available for 2002 a/c installation, and while we were blessed to have it, the belt tensioning mechanism is a bit of a pain. Steve Peterson on blunttech.com now sells a whiz-bang bracket with a modern-style toothed-ratcheting tensioning adjustment, but since the “claw” bracket was already there, I was curious about it and tried to use it. Mounting and adjusting the compressor was far easier than on the Hobiedave bracket, but unfortunately the clearance between the belt and the bottom water pump bolt was too close for comfort. With some reluctance, I removed it and installed the Hobiedave bracket.

The Sanden compressor on the claw.
Yeah, that’s just too close.
Okay, one more dance with the Hobiedave bracket and its primitive adjustment mechanism.
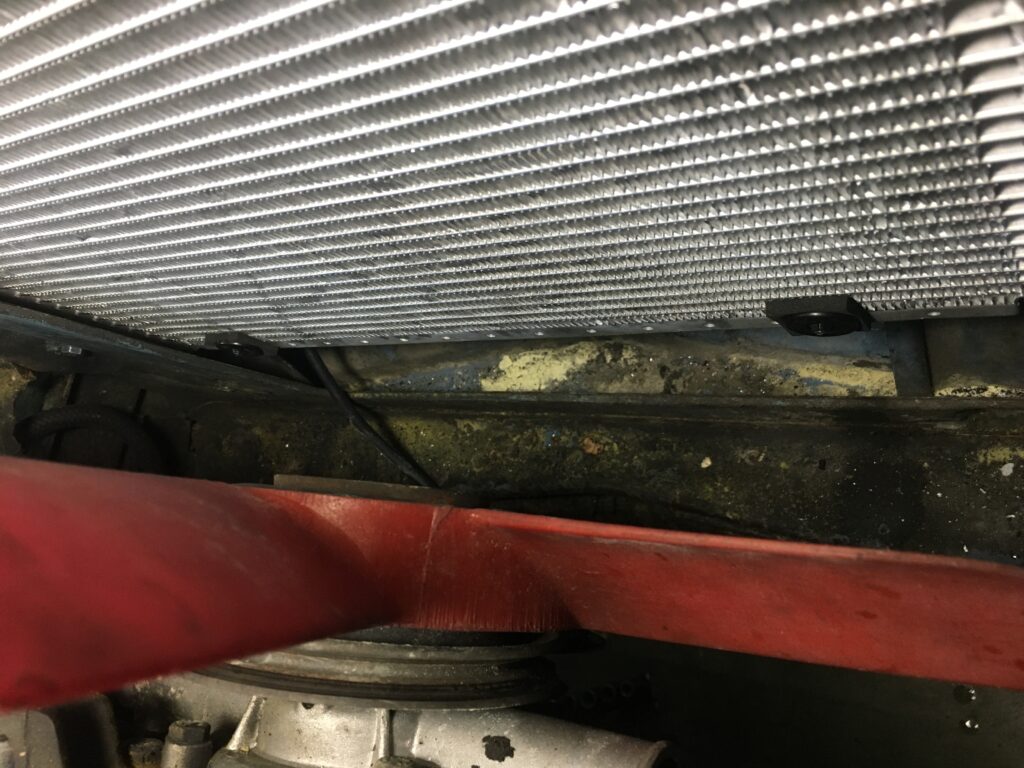
Part of the a/c retrofit and rejuvenation recipe is to install the biggest parallel-flow condenser and fan that’ll fit into the nose of a car. It’s a surprisingly time-consuming job. The condenser dimensions that will fit a 2002 have been well documented (a 10 x 18-inch condenser will fit if you cut the upper part of the condenser bracket to fit around the horn bracket), but the clearances are different in round-tail-light 2002s versus square-tail-light cars due to the different separation of the horn brackets and the presence of a step-up in the frame rail extensions in big-bumpered cars to accommodate the hydraulic bumper pistons. The condenser must be mounted such that there’s enough clearance to attach the hose fittings on the passenger side while making sure that the heads of the bolts used to mount it don’t interfere with the radiator’s mounting brackets. With careful measuring, you can mount the driver’s side of the condenser just wide of the radiator, and fabricate brackets that allow clearance on the passenger side. You wind up test-fitting, measuring, and marking holes multiple times, then at some point go for it, drill the first hole, mount that corner, and re-mark all the other holes. Even still, I often wind up elongating the mounting holes in the brackets, or joining two holes with a slot, to create adjustability necessary for correct clearance and alignment.
On Jose’s car, this was all made more difficult by several factors. There’s a large aftermarket aluminum radiator whose extra width is on the driver’s side. In addition, the radiator’s side brackets are wider than those of a standard 2002 radiator, resulting in it being impossible to fully clear them. And to make matters worse, a quality-control defect in the radiator has one bracket flush with the radiator core, the other one standing off by about 3/8″. And inside the nose, the presence of brackets attached to the hood supports that host a big pair of Marchal driving lights, and adapter brackets for a small-bumper conversion slightly reduced access and/or clearance.
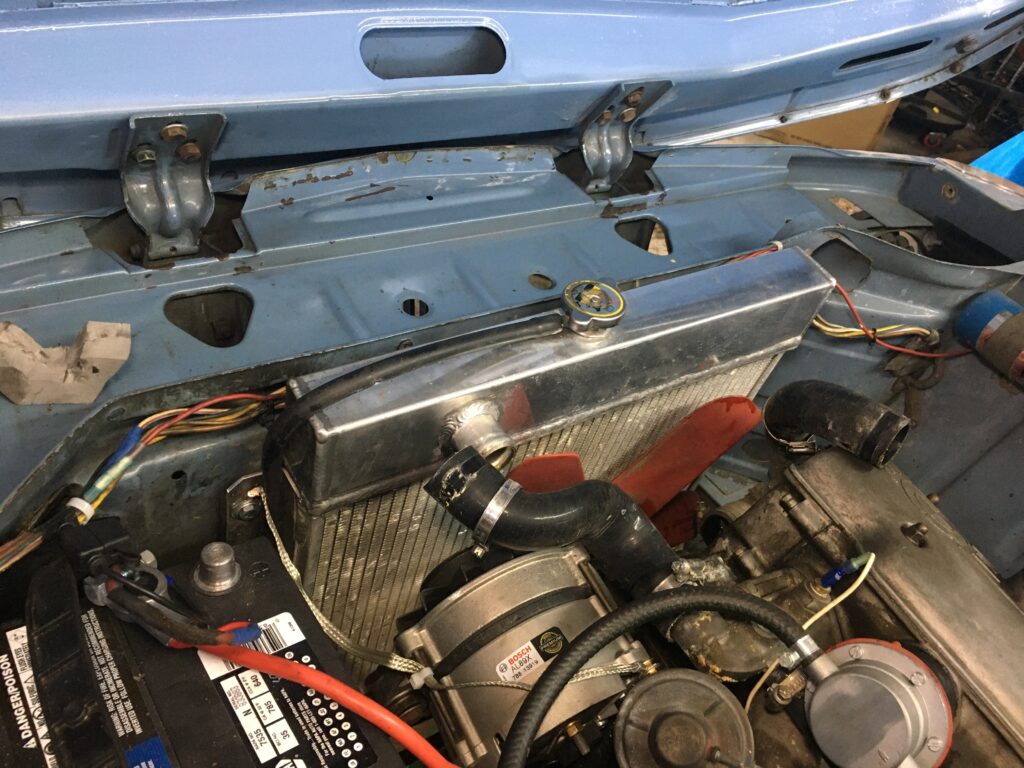
That radiator is both wide and thick.
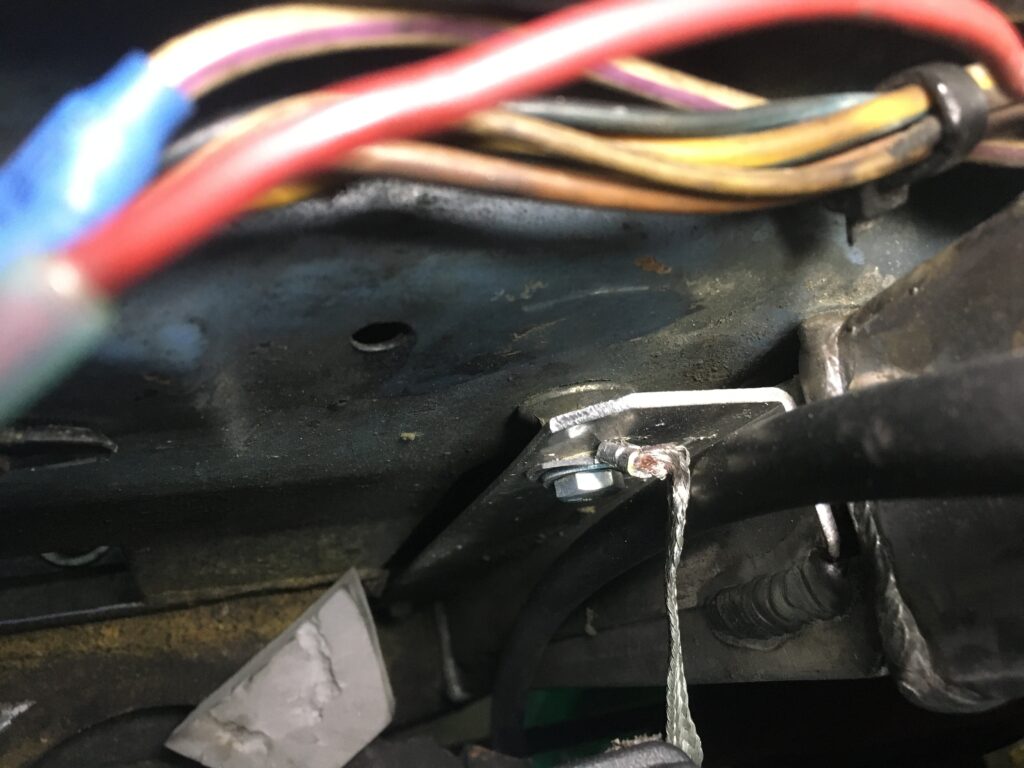
You can see how the radiator core is flush with the nose, but the bracket has so much standoff that the previous owner put a nut behind it to make up the difference and not bend the bracket when the mounting bolts are tightened. And no, that ground strap shouldn’t be there. I moved it.
Just in case you don’t know, no—there’s no way to install the condenser and fan through the grilles. They’re far too big. You have to remove the radiator AND the grilles to have the necessary access. And you’ll have the condenser in and out through the radiator opening so many times you’ll be able to do it in your sleep.
Open wider…
To address Jose’s car’s mounting and clearance issues, I used vibration-isolation bushings with a stud-like installation that, on the driver’s side, allowed me to mount the radiator to them from the back and the condenser to them from the front. On the passenger side, I cut notches in the radiator bracket to allow it to clear the studs. The both of these measures will allow the radiator to be removed without affecting the condenser.
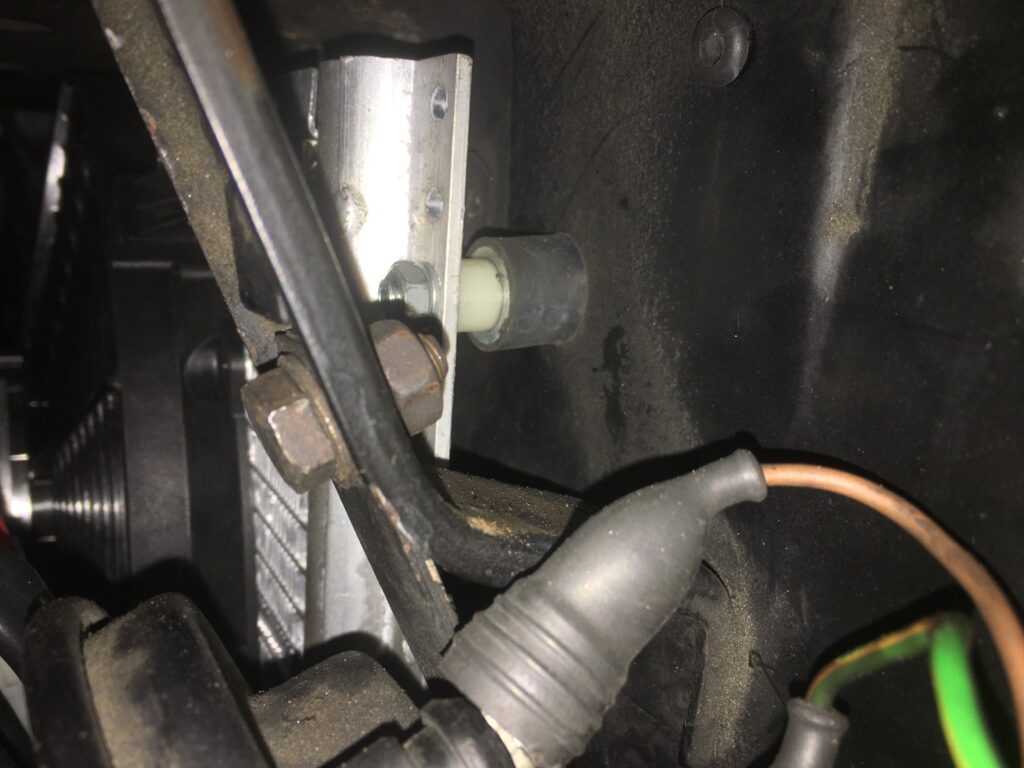
The isolation bushing used as a stud. The upper corner of the radiator is mounted to the other side of this bushing.
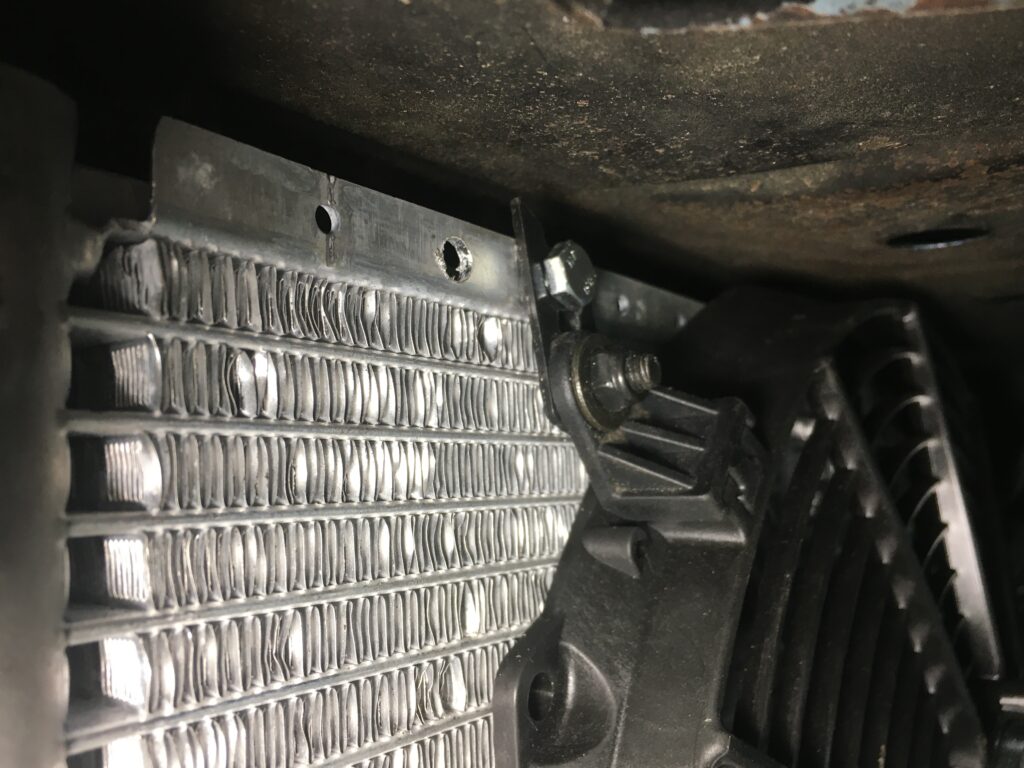
The notched radiator bracket.
One more detail that makes condenser installation a pain is that by super-sizing both the condenser and the fan, you create a situation where you can’t mount the fan to the condenser and then stick the pair of them through the opening in the nose together. There’s not enough clearance. You wind up having to stick the fan in first, stick the condenser in, mount the condenser to the nose, then mount the fan on it. If you’re using the zip-ties-through-the-condenser-fins-style of mounting, it’s pretty easy, but if you’re going for a more robust mounting scheme, it makes for difficult assembly. I think that the zip-tie mounting method is okay for one of the light low-profile Spal fans (let’s be honest—most of these installations are on lightly-driven cars that are mostly driven on smooth roads, not bounced across the Baja), but because this was a work-for-hire on someone else’s car, I elected to secure the top of the radiator with real brackets, leaving the zip ties on the bottom to restrict any lateral motion. I even managed to configure it so the zip ties aren’t even sitting on one of the parallel-flow cross tubes—any weight is restring on the bottom condenser bracket.
These brackets carry the load…
…leaving no real weight on these.
Condenser/fan installation ain’t rocket science, but it’s enough that, when everything is finally tightened down, you feel like you owe yourself a big bowl of ice cream in celebration. Make mine fat-free frozen yogurt with Heath bars and pecans.
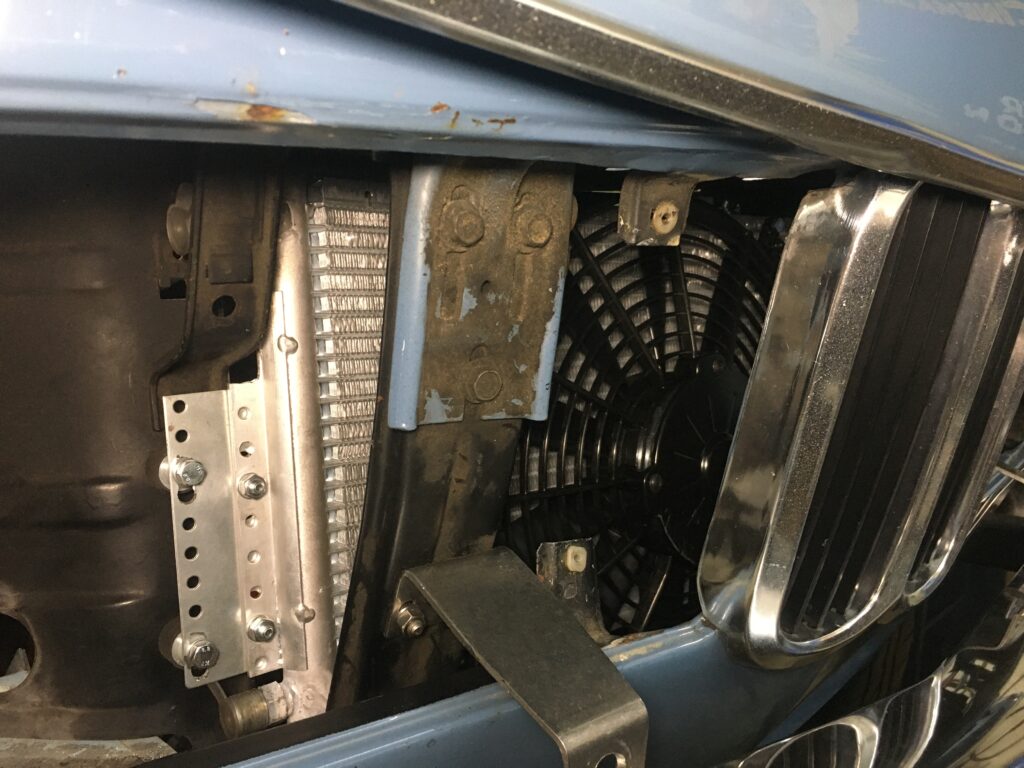
Finally! Note the cut in the top of the condenser bracket to fit around the horn bracket. You can also see where I connected two of the bracket holes with a slot to make it adjustable.
With the fan installation complete, I did a quick test, wiring the fan directly to the battery to verify that the fan wasn’t twisted during mounting, and that the vibration isolation bushings had the intended effect of keeping any fan vibration from coupling into the body of the car. The video can be seen here.
Next week, I’ll address the installation of the odd but hard-blowing Clardy evaporator assembly, as well as hose fabrication and installation.
—Rob Siegel
____________________________________
Rob’s newest book, The Best of The Hack Mechanic, is available here on Amazon, as are his seven other books. Signed copies can be ordered directly from Rob here.