Thanks for the all the input on last week’s piece about my daily-driver E39 530i stick sport dying on me, then being not quite dead. I like the low-fuel/high-temperature/cavitation theory that a few of you have proffered here and on Facebook, partially because it means that I don’t need to do anything. And I haven’t done anything; I’m still driving the car, which is running great and acting as if its near-death experience never happened. As I said, for peace of mind, at some point I think I’ll open up both sides of the tank, inspect things, probably renew the fuel pump while I’m in there, and do the filter at the same time. But for now, I’ve moved on, because I’m up to my hips in—
Chilling Louie!
Yes, I’m retrofitting a/c into the 1972 2002tii that’s the subject of my book Ran When Parked. I’ll be writing about it in great detail on www.bmw2002faq.com (the 2002 brain trust), so I’m going to give more of a travelogue approach here.
The Big Picture: I know that some may think that it’s a little weird that a guy in relatively-temperate Boston is obsessed with having air conditioning in his vintage cars, but it makes sense to me. You folks in the South and Southwest have much hotter summers, but we have real winter, so the driving season here is already short, and when it gets hot and humid here (and it does get hot and humid here), my vintage cars without a/c wind up sitting.
I happened into a complete Clardy a/c unit when I was at the Vintage in 2017 (see this piece for the main differences between the three dealer-installed 2002 a/c systems). It’s been sitting in my basement ever since. As several early-summer 90-degree days moved into Boston, I thought, “Why did I buy it if not to install it in Louie?” So in it’s going.
Even if you buy a complete used system, as I did, you generally only reuse the evaporator assembly, the console, and a few brackets, and replace everything else (the condenser, fan, compressor, receiver-drier, and hoses). The reasons why are age (old hoses are generally garbage, and receiver-driers always need to be replaced when a system is opened) and performance. When you do a retrofit like this, or you rejuvenate a long-dead system, you generally convert it from using the old ozone-depleting refrigerant R12 to its replacement, R134a, and there are improvements you need to make to be satisfied with its performance. (These and other issues are covered in my air-conditioning book, Just Needs a Recharge, so I won’t go into all the details here.)
The Potential Showstopper: In addition to the usual steps, retrofitting a/c into a 2002tii has the additional complication of needing a crankshaft hub that has both the cogged gear for the belt for the injection pump and the extra pulley for the a/c compressor. That’s a rare part. Fortunately, I bought one on eBay a few years ago; like the Clardy system, its presence in my basement was egging me on—e.g., why do I own these things if I’m not going to actually install them in a car I plan to keep?
If I couldn’t get the old hub off, the whole project would grind to a halt, so I tackled that first. Fortunately, it came off without too much of a fight.
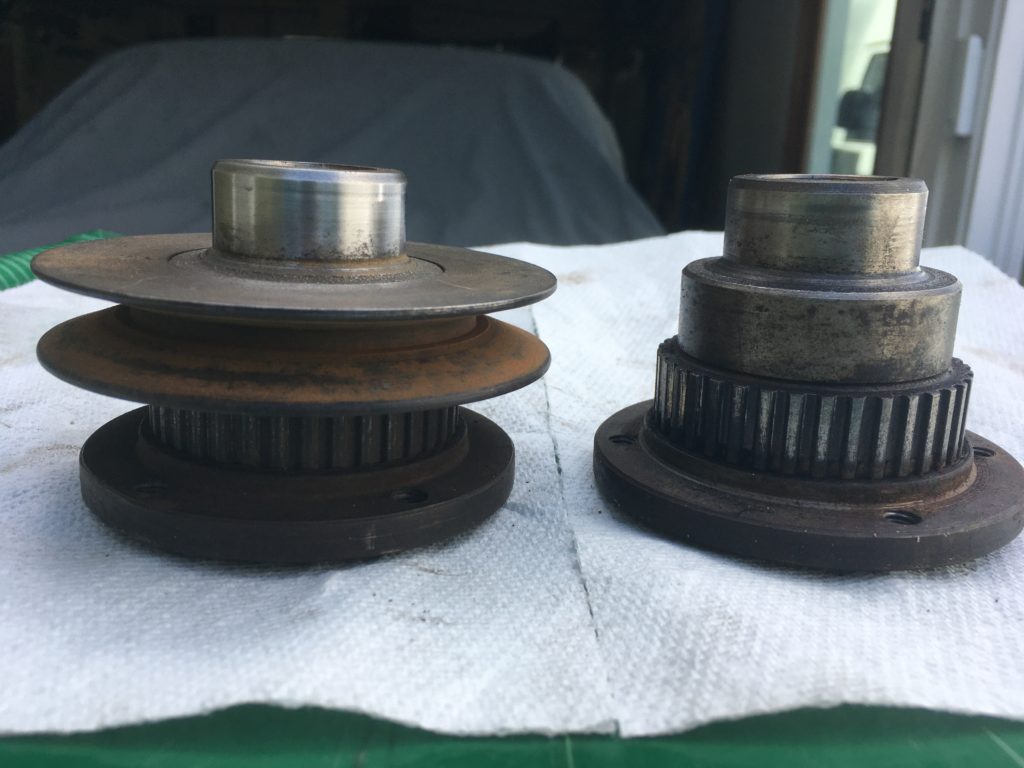
Non-a/c (right) and a/c (left) tii-specific crankshaft hubs.
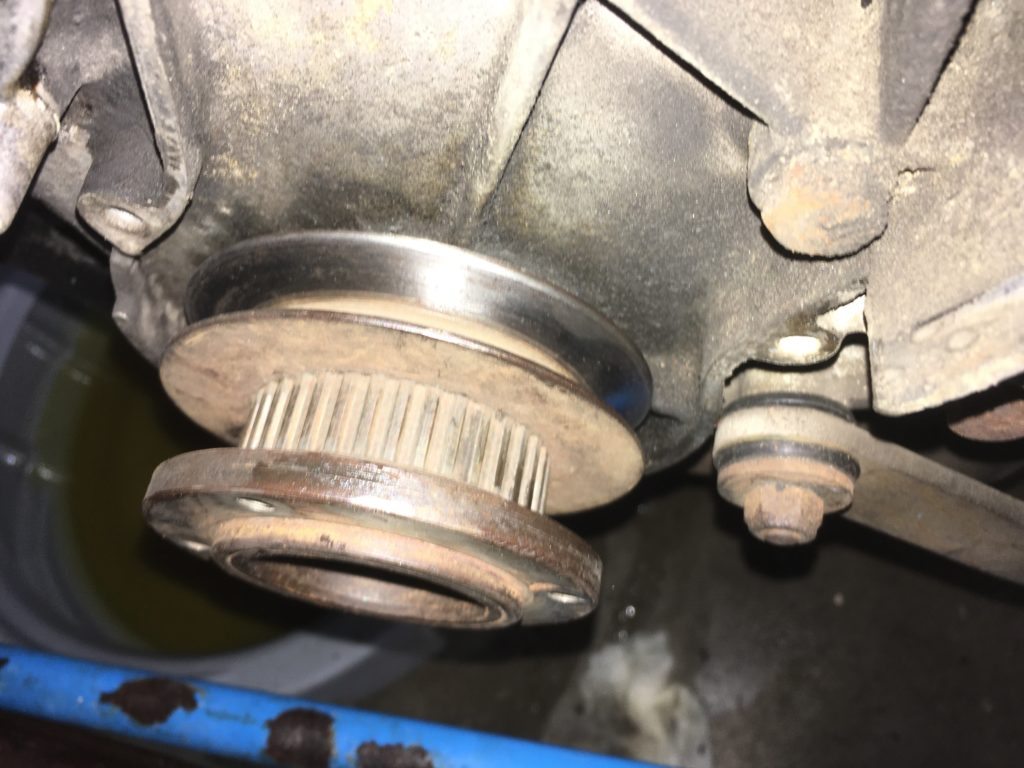
And installed. Note how the compressor pulley sits behind the toothed cog for the injectio- pump belt.
The Compressor, Bracket, and Belt: Next, the bracket and compressor had to go on. The Clardy a/c system was ahead of its time in that it came with a Sanden 508 rotary-style compressor and a compact bracket to mount it to the M10 engine block. The used Clardy system that I bought came with both, but the bearings in the compressor were noisy, so instead I pressed into service a good used Japanese-made Selden compressor with a nearly identical form factor that I had lying around.
The original Clardy bracket used rubber bushings to isolate the compressor from engine vibration, but this was never a great design, because the bushings degrade over time and cause the compressor to cock, throwing the pulleys out of alignment. I found that 3/8″ ID x 3/4″ OD by 1/4″ deep metal inserts fit the bushing holes perfectly, creating a rigid mounting. I used large washers on the bracket bolts to trap the inserts in place.
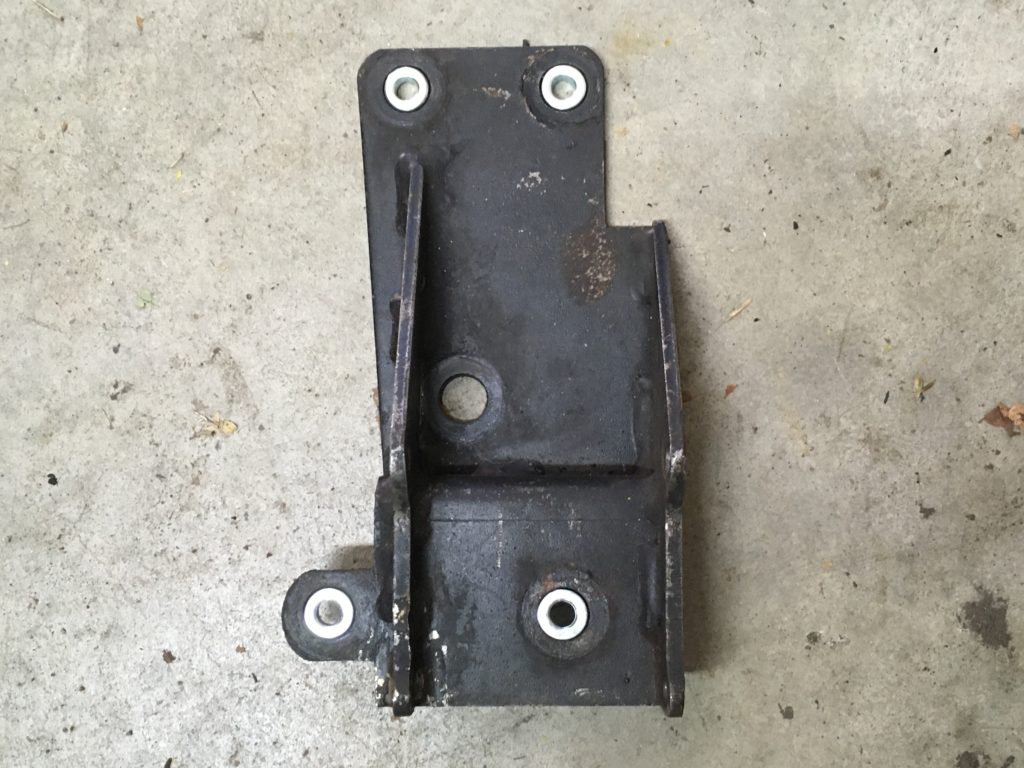
The original Clardy Sanden bracket has been improved with metal inserts instead of rubber bushings.
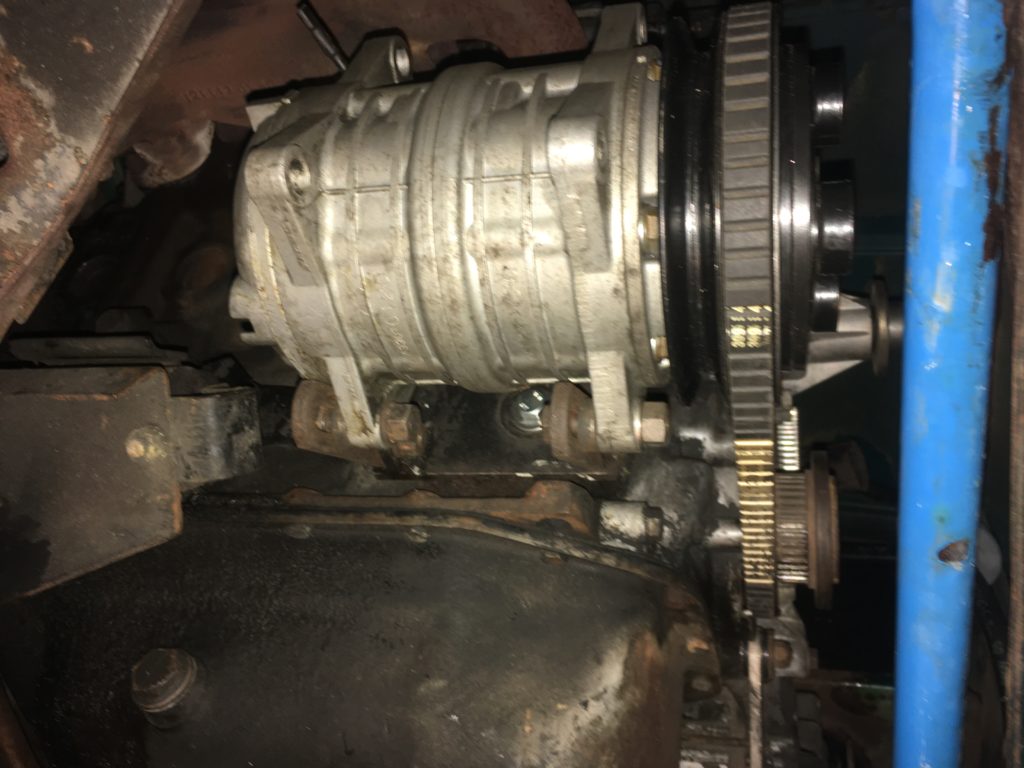
The compressor and belt installed.
Next, the plastic injection-belt cover had to be cut and trimmed to allow the compressor belt through. It’s shown below. You can’t see it, but the cogged injection belt is inside the cover. So the order, from inside-out, is compressor belt, injection belt, plastic cover, bolted-on crankshaft pulley. This weirdness of the compressor belt being “captured” like this is unique to the tii; carbureted 2002s don’t have this problem.
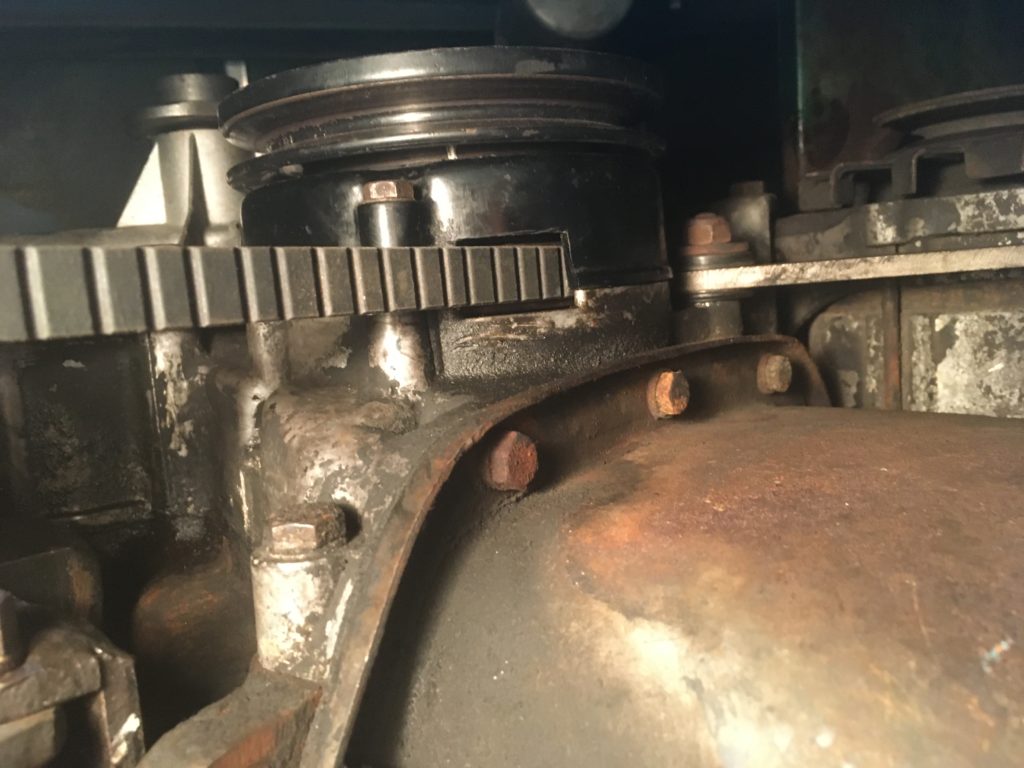
The slot cut in the lower injection belt cover to allow the compressor belt through. There’s another one on the top you can’t see in this photo.
Condenser and Fan: The recipe for upgrading a system from R12 refrigerant to ozone-friendly R134a includes replacing the original serpentine-flow condenser with the largest parallel-flow condenser that’ll fit in the nose of the car, and the largest electric fan that’ll fit on the condenser—at least that’s what you do if you want a system that blows cold when you’re done. The commonly-accepted dimensions for the largest condenser that’ll fit into the nose of a 2002 without cutting any sheet metal is 10″x18″. I once squeezed an 11″x20″ condenser into one of the 2002s, but I cut the horn brackets in order to do it, and I didn’t want to do anything like that on Louie.
I used a piece of particle board as a template and kept trimming it down in size until it fit, while keeping in mind that the condenser brackets and hose fittings add about 1.5 inches in width to the specified size (e.g., a condenser that’s specified as 11″x20″ is actually about 21.5″ wide). I determined that a 10″x20″ unit would fit, but unfortunately neither that size nor 10″x19″ appears to be commercially available. So 10″x18″ it is.
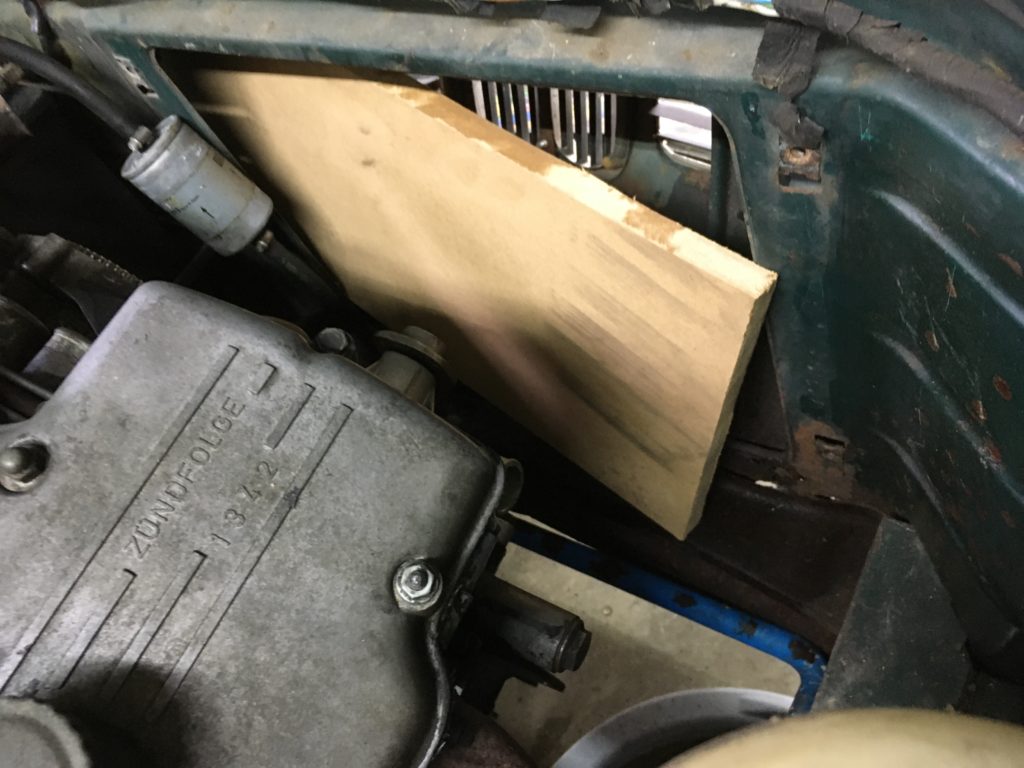
Using a piece of particle board helped verify that the maximum condenser size that can be fit without cutting sheet metal is 10″x18″.
As I’ve done with other cars, I selected a twelve-inch Spal fan, model 30101505. It’s fairly light at four pounds, so I used the commonly-employed zip-tie-like mounting kit to attach it directly to the condenser. Unfortunately, I then found that when the two are attached, there’s insufficient clearance to pass them through the radiator hole in the nose. I cut the ties, passed the fan and condenser through the radiator cut-out separately, then zip-tied them back together.
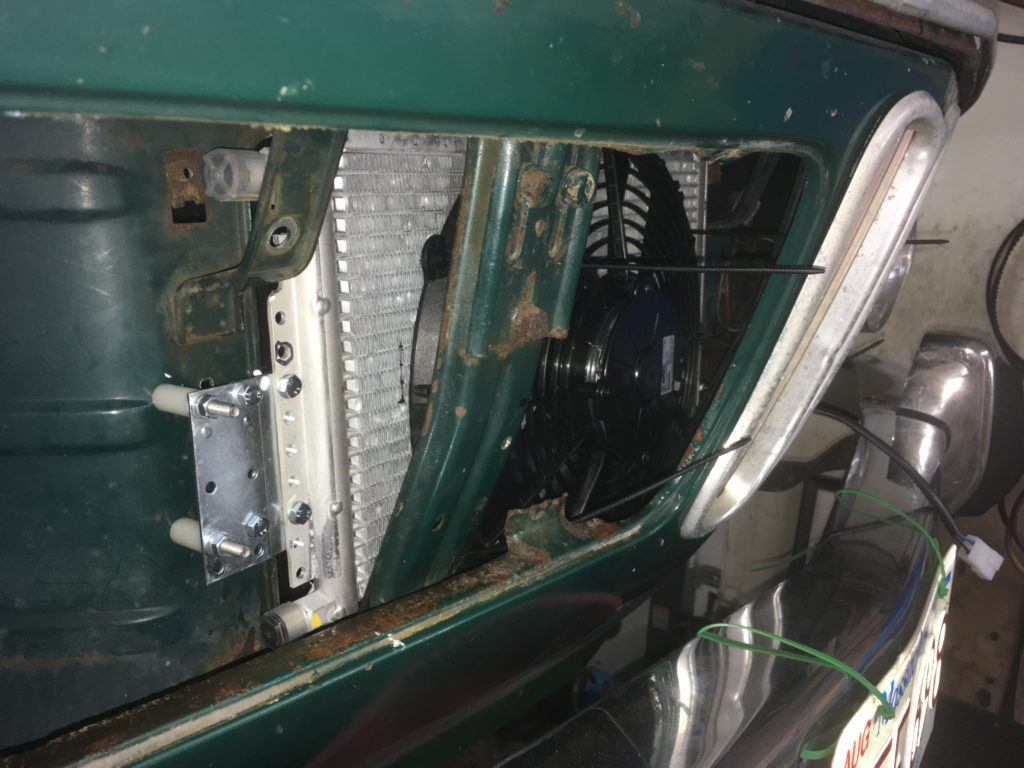
The condenser and fan installed in the nose before trimming the fan-mounting ties.
Punching Holes In The Nose: The input and output hoses plumbing the condenser need to run through the nose, and that means punching or drilling holes. The original Behr a/c manual has a template for where to place the holes, but it’s not critical; you can drill them anywhere that makes sense to you.
The hole for the inlet hose for the condenser should be at about the same level as the inlet port. I placed the other hole directly below it, since one of my other cars had it there and it worked well, Behr template be damned. The hoses are #10 and #8, which have outer diameters of one inch and 29/32″ respectively, but it’s best to put rubber grommets in the holes to prevent the metal from chafing the hoses, so you need to drill them larger to leave room for the grommets. Universal a/c grommets are available from several vendors such as Nostalgic a/c; they require a 1.25″ hole. Some careful placement, a hole saw, a drill, and you’re done.
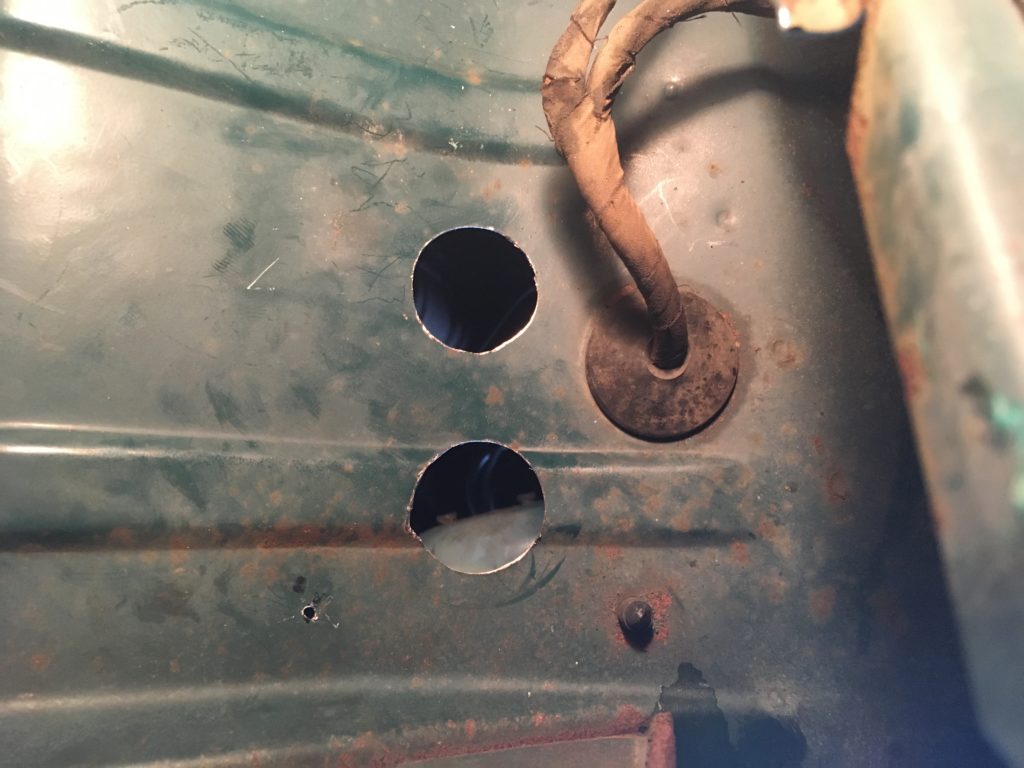
The freshly-cut holes in the nose, and one small pilot hole whose location I didn’t like. Yes, I smoothed and primed them.
Making Hoses: Every installation or rejuvenation I do is different. One reason is that components change or become unavailable, but another is that each time I do this, I try new things and route hoses different ways. I suppose it’s possible to use Cold Hose’s hose-fabrication service, in which you specify the length of the hoses, the types of fittings, and the clocking angle between them, and they fabricate them and mail them to you, but nothing comes close to making your own hoses right there in the car. That way you can crimp one fitting onto the hose, attach it to one component, run it to the one it connects to, cut and trim it to the correct length, crimp on the other fitting, and get it just right. It’s delightful work. And if you screw one up, you’re usually out less than $20 in rubber and fittings.
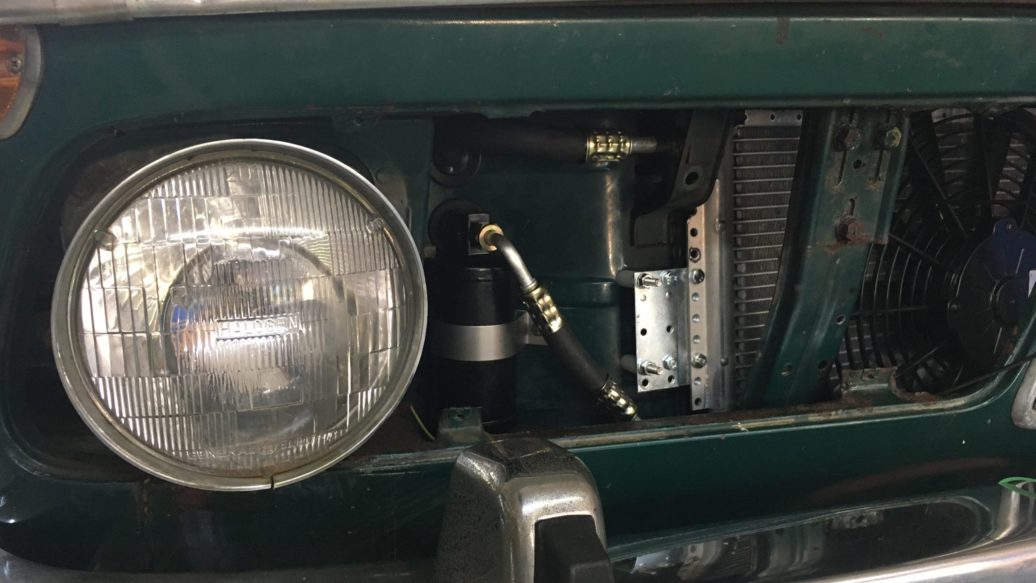
The receiver-drier (the component that contains desiccant and removes moisture from the refrigerant) can be mounted in the nose or on the right inner fender wall. Mounting it in the nose is more work, but it makes the engine compartment a/c hoses a bit cleaner. You need to fabricate a very short hose that mates the drier to the output of the condenser. There’s very little room for error. This one came out well.
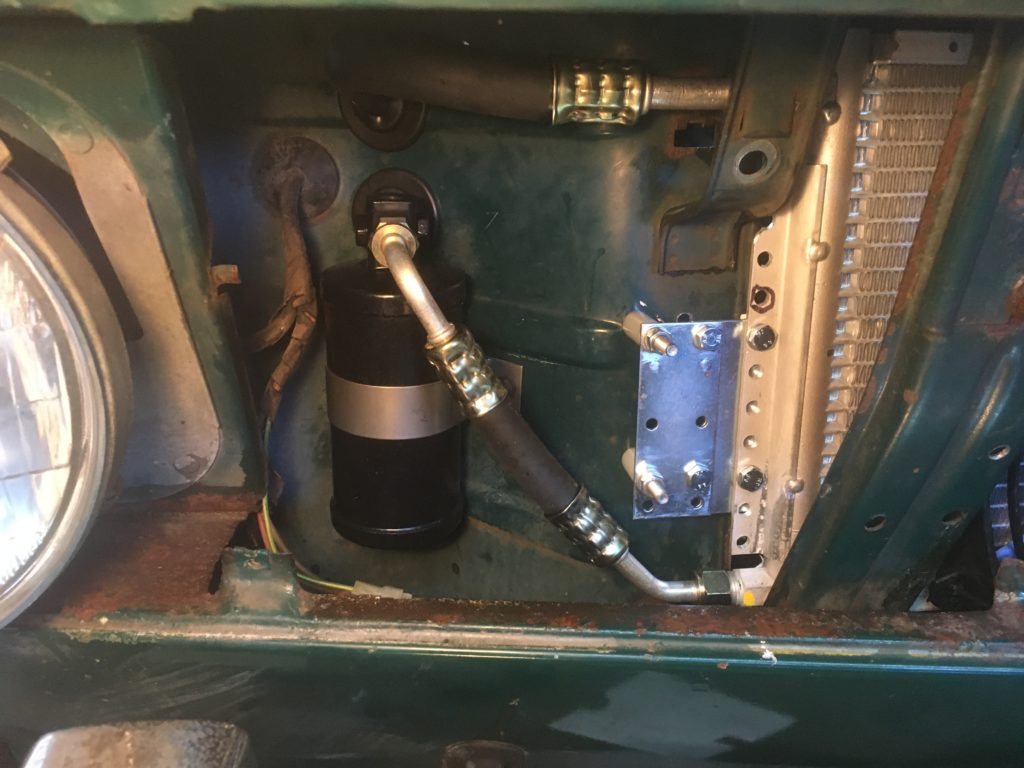
Billiard-level angle specification on the drier input hose.
Next week, I’ll attack the interior, and hopefully emerge from it with a cold car.—Rob Siegel
Rob will be covering this a/c retrofit in a lot of detail on www.bmw2002faq.com, so for more information, look there. His new book, The Best of The Hack Mechanic, is available here on Amazon, as are his seven other books, including his vintage air conditioning book, Just Needs A Recharge. Signed copies of all Rob’s books can be ordered directly from Rob here.