It’s been a few weeks, but Louie is back, and the work spawned by his head repair is as complete as anything ever is on a 50-year-old car.
A brief recap: I began this series months ago by describing how Louie—the ’72 2002tii that’s the subject of Ran When Parked (I bought the car sight-unseen five years ago in Louisville, went down there with tools and parts, spent nearly a week resurrecting it in Jake Metz’ pole barn, then drove it home and made it by the skin of my teeth)—leaked oil onto the exhaust manifold. This was due to a valve-cover stud that couldn’t be tightened because the cylindrical boss in the cylinder head into which the stud was threaded was cracked, and thus tightening the nut just made the crack yawn open wider.
To drive the car home without risking an engine fire, I sealed up the valve cover with Permatex “The Right Stuff,” a sealant that’s so good at stopping things from leaking that you could use it to make a waterproof seal between two cinder blocks. This stanched the leak, but with the result that when I needed to adjust the valves, the valve cover had to be pried off with a putty knife.
I drove the car like this until the crack penetrated through to the outside of the head, allowing even more oil to flow onto the exhaust manifold. To get home, I J-B Welded the crack shut, and then made it a winter project to deal with the crack, some other valve train issues, and to replace the 50-year-old head gasket.
At that time, I wasn’t explicitly planning on driving the car the 3,100 miles round-trip to MidAmerica 02Fest in Arkansas at the end of April, but as those plans came into focus, the head job straddled that line between “This is the best kind of preventive maintenance” and “I hope I get the work and the post-repair testing done in time.”
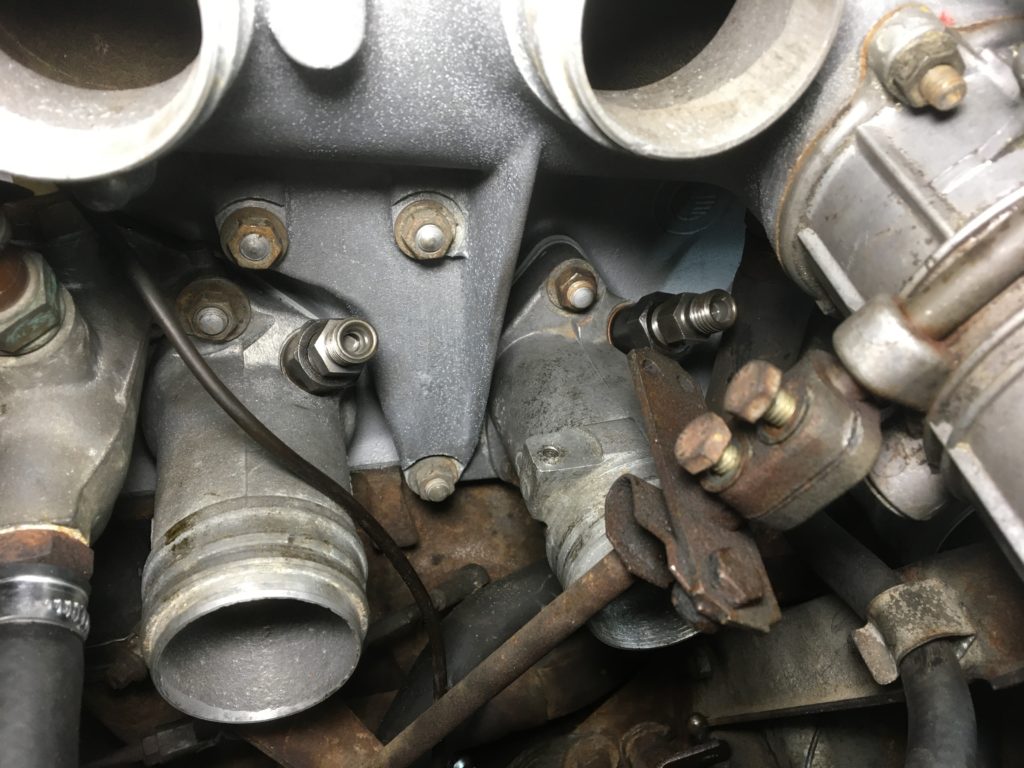
The guy who repaired the cracked head for me had to entirely remove the cracked boss in order to clean out my J-B Weld, fabricate another boss, and weld it in. It wasn’t pretty, but it was what needed to be done.
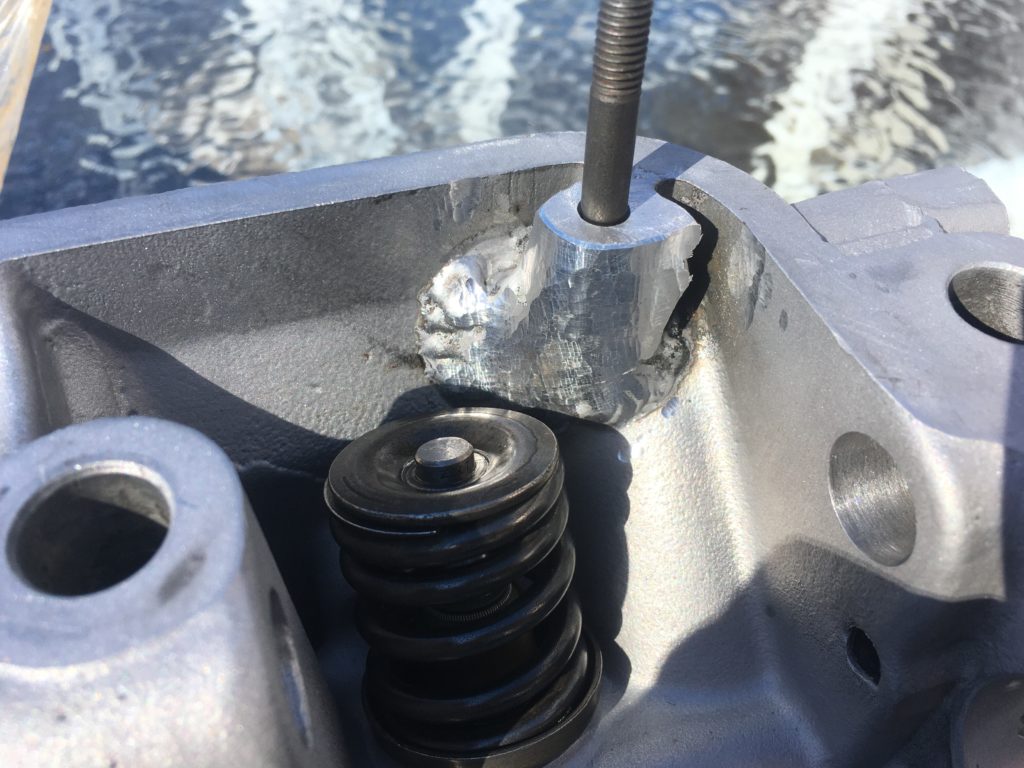
The repaired cylinder head had the previously cracked cylindrical boss replaced.
I got the head reassembled and back on a few weeks ago, but the final buttoning-up was delayed because I was waiting on the fuel injectors, which I’d sent up to Diesel’s Injection Service in Bow, New Hampshire, for cleaning and testing. Generally, when I sort out a tii that’s been sitting for years, I’ll send the injectors off for this kind of evaluation, but because the timeframe of the initial on-the-road adventure with Louie five years ago was compressed, I didn’t have the luxury of yanking the injectors and waiting for them to be tested and returned. Besides, the car never exhibited any problems I’d correlate with plugged injectors.
Still, with tii’s now 48 to 50 years old, with my having seen other cars with rusty injectors, and with my having pulled the intake plenums and manifolds off Louie so that I could have the head redone, it seemed crazy not to have the injectors cleaned and tested. I just didn’t expect it to take so long, nor that the last mile of reassembly would be train-wrecked behind it.
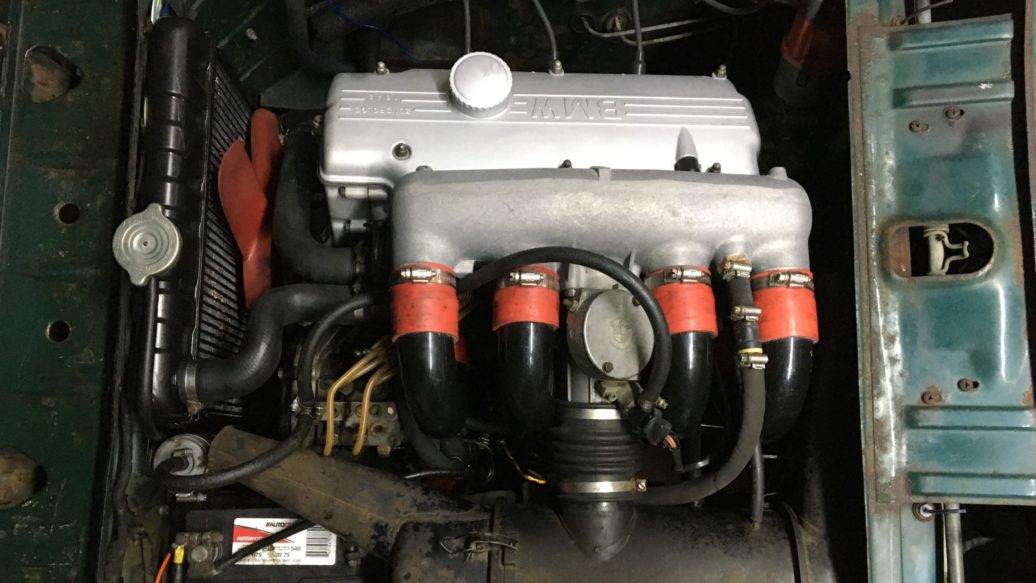
All four injectors tested out as fine, and the moment they arrived, in they went, followed by the plastic injection lines.
We’ll just paint some little injectors here… and here… don’t they look happy in that intake manifold? (Wait, Bob Ross didn’t rebuild tii heads?)
Next came the linkage rods, some of which I’d removed to gain access to the little coolant hoses that plumb the warm-up regulator on the injection pump, since these hoses were likely original to the car. The rods usually have metal cups on the ends which snap-fit onto little balls at the tops of little posts on other linkage components. One of the short rods, however, had plastic ends instead of metal cups, and I must’ve cracked the plastic while pulling it off. I dug around in my box of tii spares and found a compatible rod with metal ends.
Another short rod had a fair amount of play in it. If the play is coming from a worn cup, you swap the rod (or just the threaded-on cup), but if it’s coming from the ball or the post, the repair is more involved. Fortunately, I found that it was just a worn cup, and I found another good rod to swap for it.
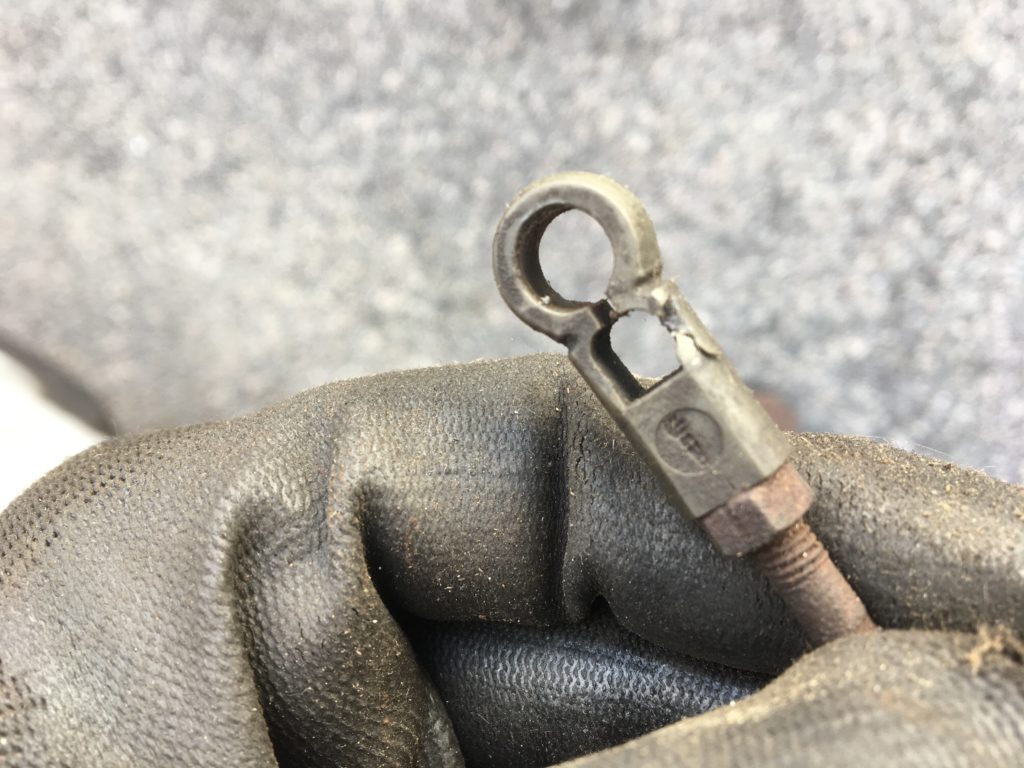
I hate that I was probably the one who cracked this 50-year-old plastic linkage-rod fitting.
Unfortunately, I found that the remainder of the play in the linkage was due to one of the little linkage posts having loosened where it’s pressed onto a metal plate.
I fixed it by J-B Welding it into submission.
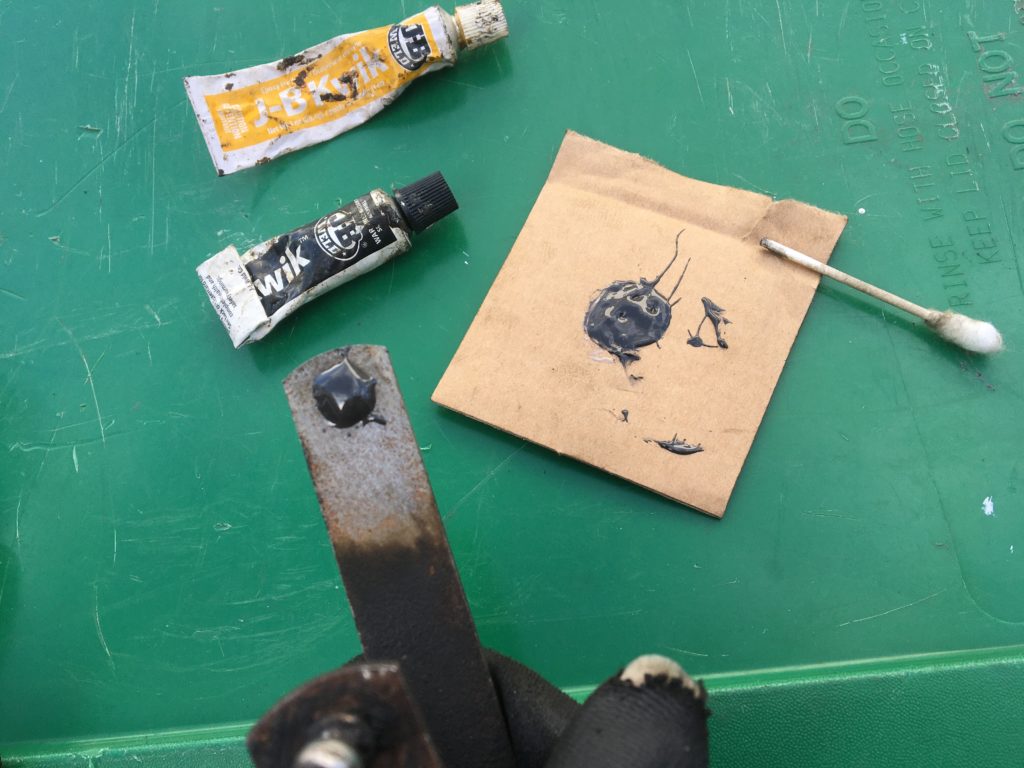
J-B Weld to the rescue… again.
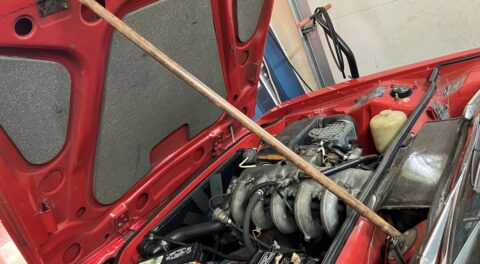
Next came the part that I hate: reinstalling the black plastic intake plenums that were installed only on these ’72 tii’s with the 121ti head. On the one hand, they’re a very cool part of the originality of the car, reflecting the prototype nature of the new Kugelfischer-injected engine; but on the other hand, they were problematic enough when they were new (blowing off with backfiring, cracking, the O-rings not sealing and causing vacuum leaks) that the intake manifold was quickly redesigned to use conventional bolt-on metal plenums.
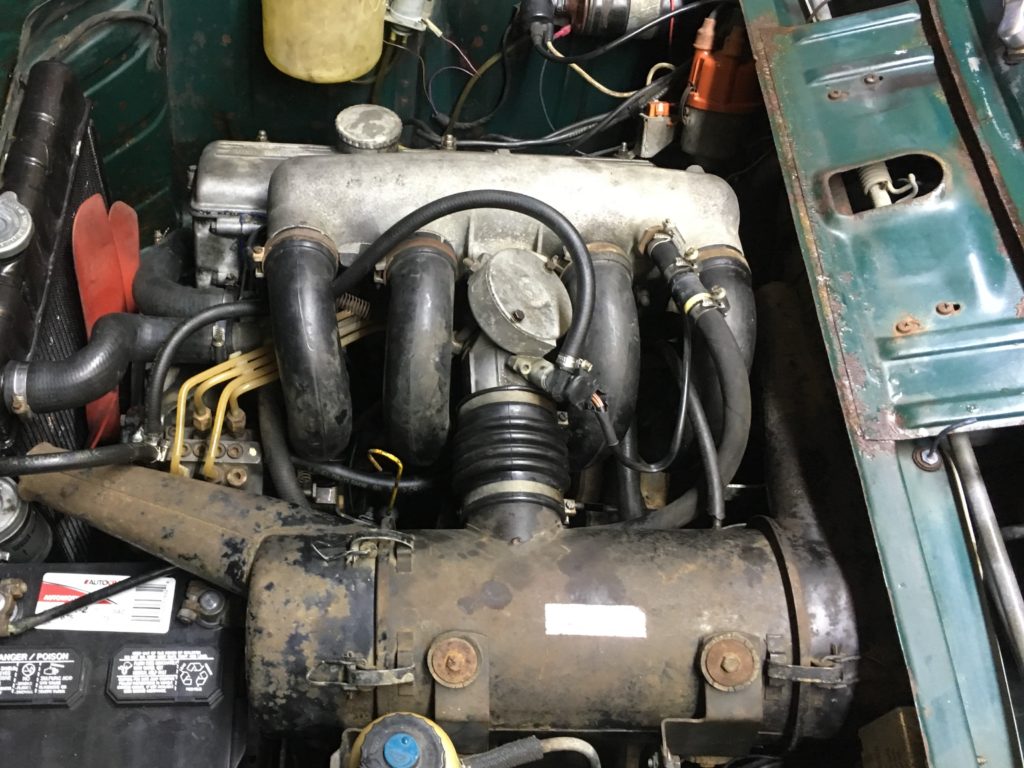
Louie has the original black plastic intake plenums that distinguish the ’72 tii.
In the past, I’ve installed the plastic plenums by heating them in boiling water to soften up the plastic, putting a little silicone lube on the O-rings, and then pushing with all my meager upper-body strength until they snapped into position, but this time I could not get them installed. I tried using a heat gun on the ends of the plenums but still had no success. Nearly two months ago, while pulling the head off and disassembling it, I developed a tennis-elbow-like repetitive-motion injury in my right arm, most likely from all the smacking with the rubber mallet to get the rocker shafts out. It still hasn’t healed, and straining with all my might to pop the plastic plenums on was really angering it, so I stopped.
Fortunately, I had another solution. Eight years ago, when I was trying to solve some lean-running issues with Kugel, my last ’72 tii, I bought a used set of Top End Performance metal intake plenums with red silicone hoses on the end. These are designed exactly for this process of replacing the plastic intake plenums on early tiis. The hoses fit over the openings in the existing manifold and are held there with hose clamps. I had considered selling them, and now I was glad I hadn’t. (I loathe red-colored hoses of any kind in a vintage engine compartment—why Top End Performance used these instead of black hoses, I have no idea—but to get things moving along, I squelched my desire to replace or repaint them and installed them on the car.)
The more I thought about it, the more sense these hoses made, as these plenums can easily be pulled off and popped back on should the need occur, either during the trip to MidAmerica 02Fest or the wringing-out that will precede it.
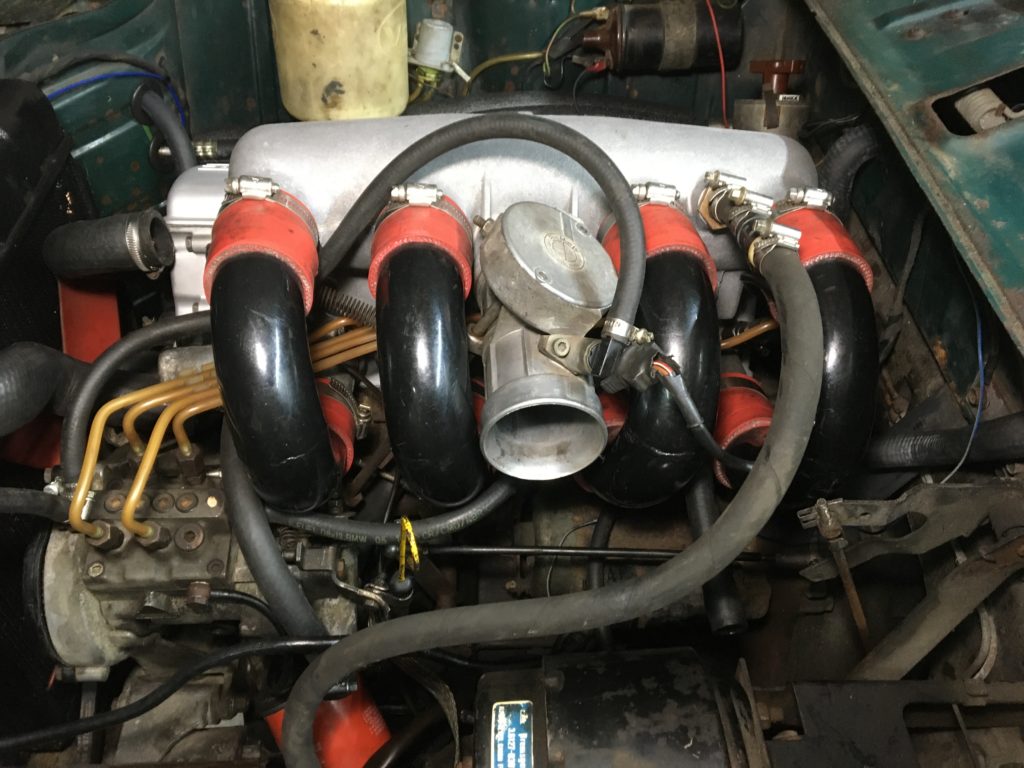
Those red hoses are going to drive me crazy, but other than that, I was glad I still had the Top End Performance intake plenums.
This left only the cooling system to button up. I reattached the water pump and radiator hoses that I’d temporarily removed, double-checked the hose clamps on the heater hoses and warm-up-regulator hoses that I’d replaced, and filled the system with coolant.
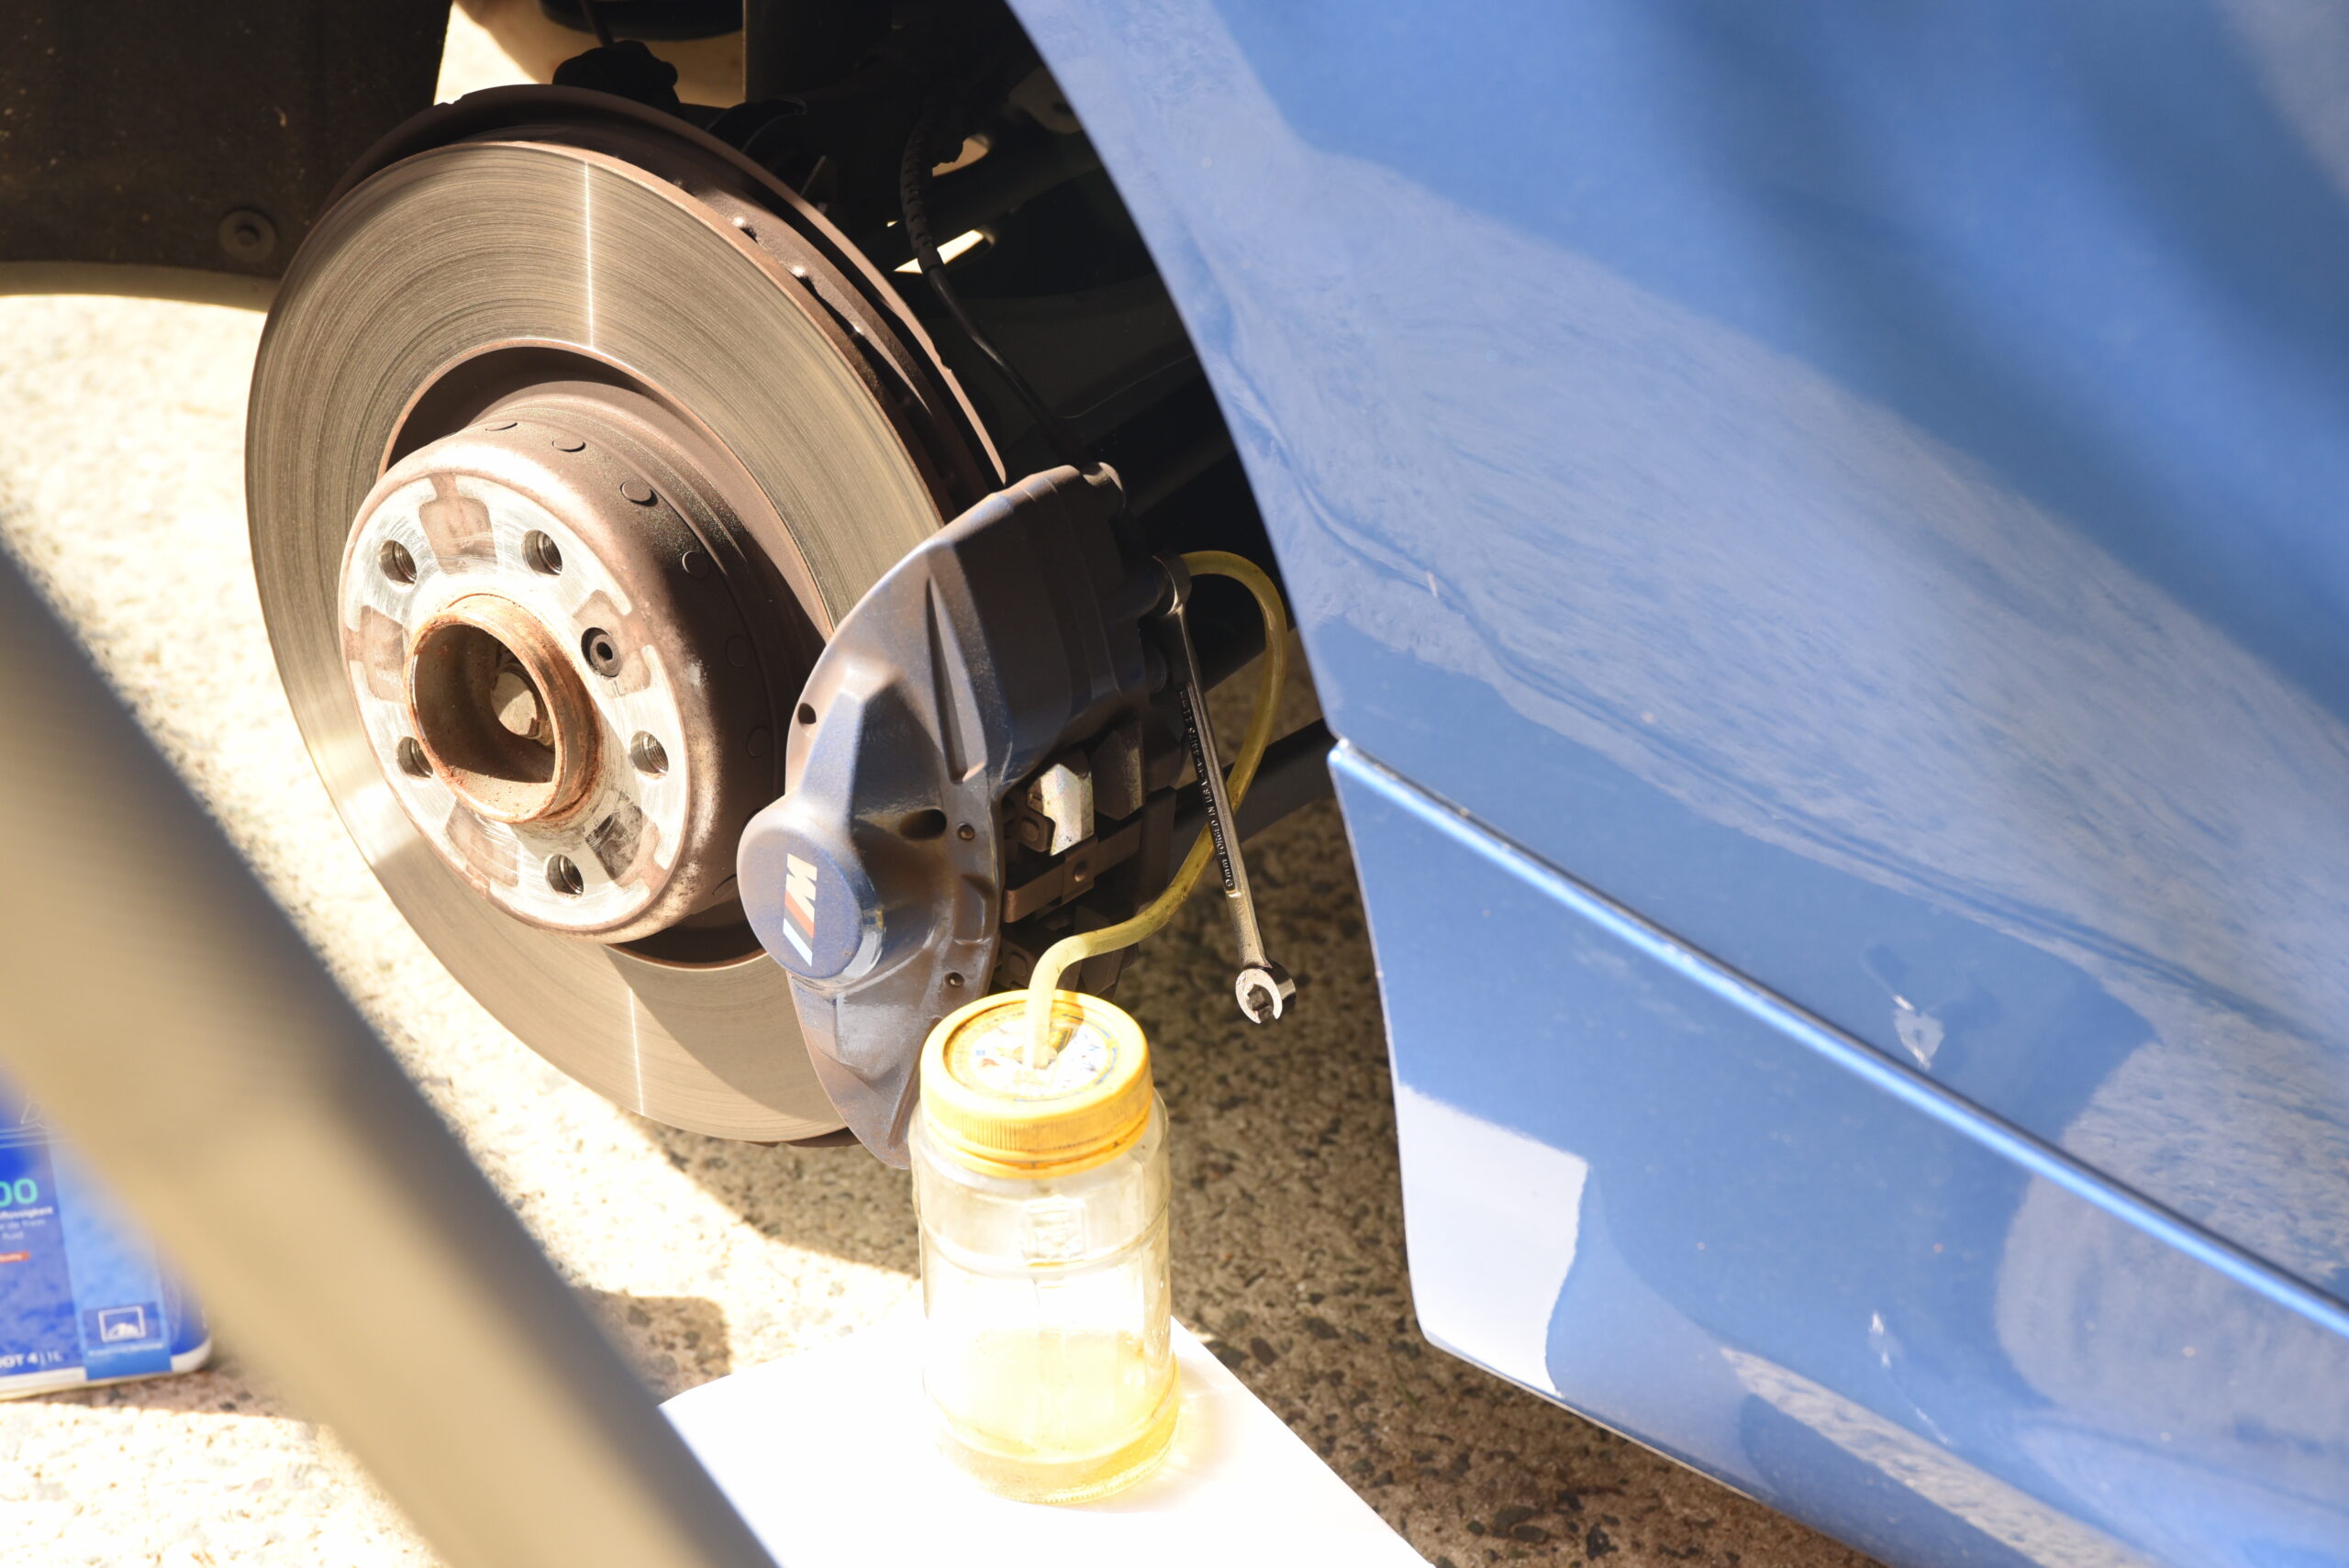
Having recently performed cooling system work on several cars that already had fresh coolant in them, I’ve taken to re-using coolant by running it through a conical paper filter meant for cooking oil. I filter it once when I pour the coolant from the catch basin back into a jug, and again when I pour it from the jug into the radiator or expansion tank.
Hey, there are so many expenses with owning all these cars that if I can save $22 a gallon on the Prestone (or $32 a gallon for the BMW coolant), I will. You are, of course, free to make your own decisions, and ridicule me for mine. When I begin reusing motor oil or brake fluid, though, an intervention will be appropriate.
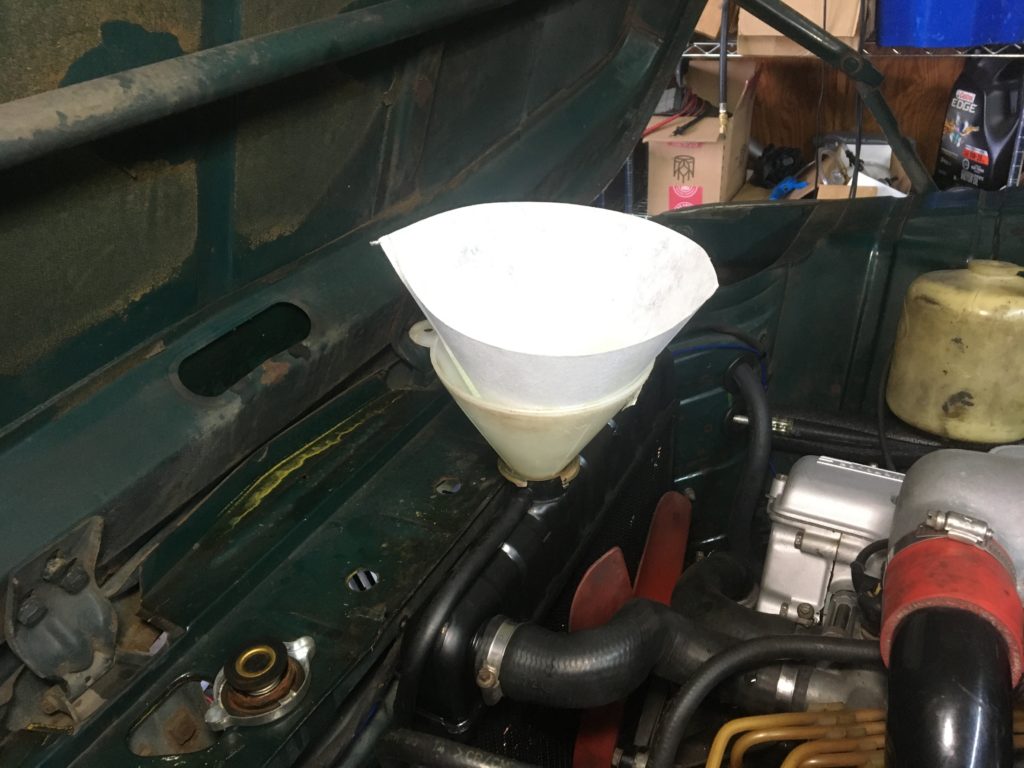
Works for me.
As I said a few weeks ago, the installation instructions for the Elring head gasket specified a conventional cold torque, a cold angle torque, then a 25-minute warmup followed by a warm angle torque. I’d done the first two several weeks ago, and was waiting for the injectors before doing the third. So with a fully-assembled injection and cooling system, I twisted the ignition key to pressurize the fuel system, and—
Found a surprise leak from one of the four rubber O-rings on the top of the injection pump.
I replaced the O-ring, found the fuel system to be leak-free, and cracked the starter. Louie started up easily and settled into a nice idle. I ran the car for a while, watching carefully for coolant and oil leaks. I saw more than the usually expected amount of smoke from grease burning off the exhaust, and when I looked closely, was alarmed to see a sizeable amount of oil in the middle of the manifold. I decided that this was probably due to a little oil having overflowed onto it when I filled the engine, which I did with the valve cover off in order to pour oil all up and down the length of the newly reassembled valve train.
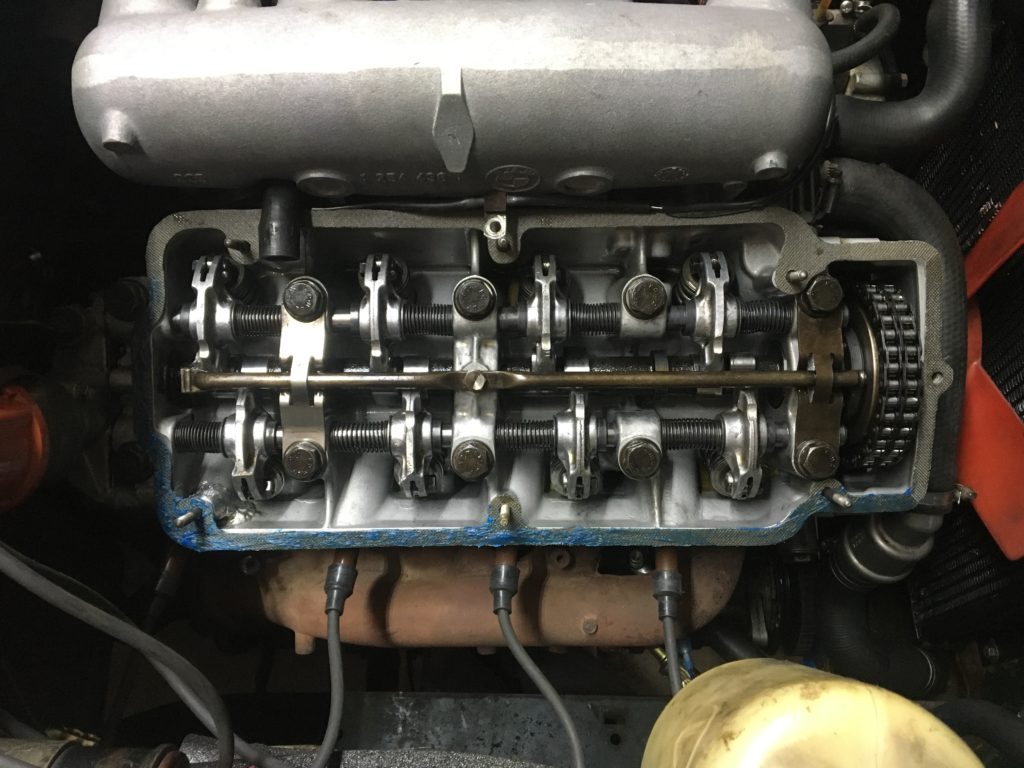
I completed the 25-minute warm-up, then shut the engine down, waited about fifteen minutes, and did the final angle torque on the head gasket. The next morning, with the engine dead cold, I readjusted the valves. It’s my experience that valve clearances can change quite a bit when you do what I did, which was to intermix new valve-train components (rocker shafts) with old ones (cam, valves, and rocker arms), particularly if valves and rockers are not returned to their original positions, as the wear surfaces need to bed themselves in. Sure enough, even after only 25 minutes of idling, about half of the valves were out of adjustment.
After that, I began to exercise the car. I drove a few widening circles around the block, then came back to the garage to check for leaks. I found that the lower radiator hose was dripping because I’d forgotten to tighten its hard-to-reach hose clamp (I’d forgotten that I’d even loosened it, since I hadn’t actually removed that hose). I couldn’t help but flash back to eight years ago when I went through a similar exercise with Kugel, my other (now departed) ’72 tii: Then as now, I was preparing the car for the 3,100-mile round-trip drive to MidAmerica 02Fest. Then as now, I pulled the head to replace the head gasket and deal with some other valve-train issues.
However, then—unlike now—when I looked in the cylinder bores, I saw score marks and decided to pull the pistons, re-ring them, do a block-in-car hone, and replace the rod bearings. And then, unlike now, when I reassembled the engine and ran it for the first time, I heard what was unmistakably a rod knock and had to go back in—and in the middle of all that, I tripped walking down the two steps from the garage into the basement and broke my foot (I still made it to MidAmerica and back). So I figured that this time I was way ahead of the game, and anything that transpired couldn’t possibly rival the events of eight years ago.
Feeling confident, I took the car up onto the highway and ran it about twenty miles. It ran great, but it felt like it could use a little more advance to the timing.
But when I got back to the garage and was about to twist the distributor to dial in a little more advance, I saw the last thing I expected: smoke coming from the exhaust manifold.
What the—?! This was the problem that had first reared its head in Louisville five years ago, the one that caused me to pull the head and have the crack repaired. When I examined the source, I found that the valve cover gasket above the exhaust manifold, particularly near the #4 plug, was wet with oil. I also saw that there was a puddle of oil in the indentation of the head casing, right in front of the distributor. Both of these areas were next to the new boss that had been welded into the head.
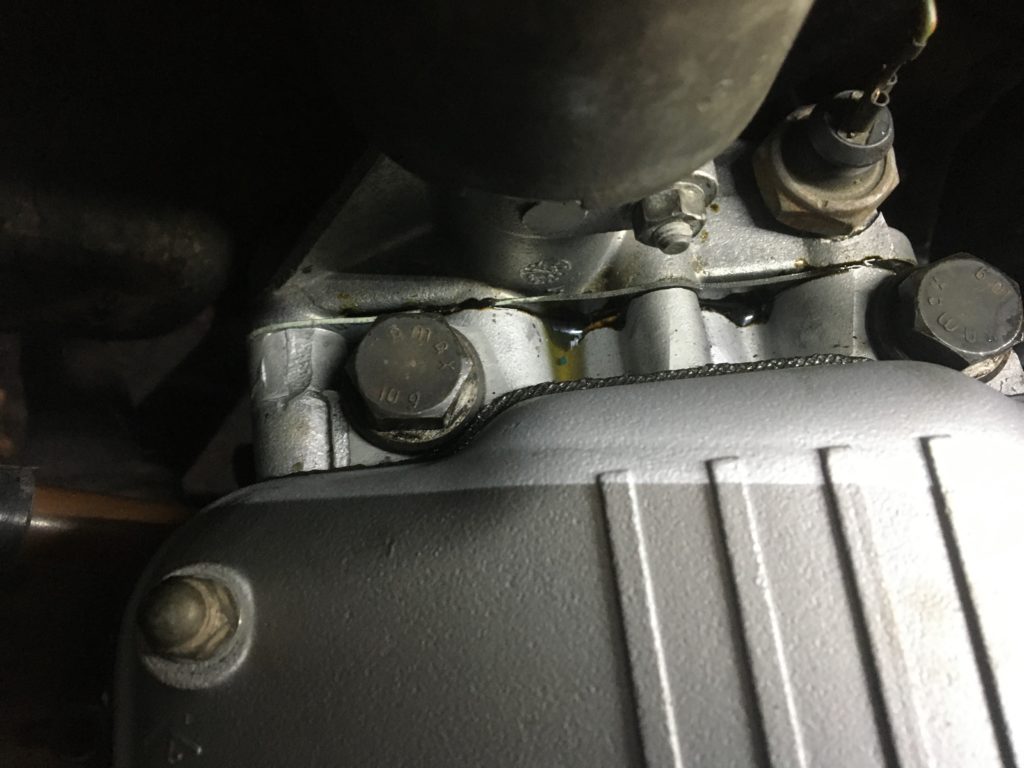
Not good.
I cleaned up the oil, snugged the valve-cover nuts down good and tight, and took the car for another test drive. There was less oil, but the problem was still there.
I pulled the valve cover off and looked. The guy who welded the head said that he thought he’d gotten the top of the new boss level with the valve-cover mating surface, but if I had any doubt, I could have the second machine shop (the one that then resurfaced the head and did the valve job) machine the whole top surface flat. The second shop also thought that it was fine. Maybe, I thought, the top of the boss is just proud enough of the surface that tightening the nut isn’t squeezing that corner of the gasket enough. But whatever the cause, I was not happy that, after all this work to repair the cracked head—whose major symptom was that it leaked oil onto the exhaust manifold—it was still doing exactly that.
I came up with four choices.
- I could try to file down the top of the boss, which would likely get metal shavings in my newly-installed head.
- I could cut off the portion of the valve-cover gasket that goes on top of the boss itself, thereby allowing the nut on that stud to tighten more. Unfortunately, this also runs the risk of allowing oil to leak out past that stud.
- I could go back to using heavy-duty Permatex “The Right Stuff” sealant, but its forever-sealing abilities would interfere with the need for valve adjustment in the still-bedding-in valve-train components.
- I could try using Hylomar, the never-hardening resealable adhesive I use on the valve cover for the Lotus. Or Permatex #2, which Satch swears by.
Choice number four it was. Fortunately, I had another fresh, non-oil-soaked valve cover gasket in the garage. I coated the left and lower surfaces of it with Hylomar, tightened it down, idled the car in the garage for a bit, checked for leakage, didn’t find any, and then drove the car 60 miles.
The resealable adhesive Hylomar is applied to the valve-cover gasket.
And… we’re good!
One of the remarkable things about Louie is that, to me, it feels exactly the way a ’72 tii is supposed to feel, and has felt that way ever since five years ago, when after sorting out the car in Jake’s pole barn, I eased it onto the asphalt and nailed the gas for the first time, as captured in the video below. The car still feels that way to me; it just wants to run.
Many of the vibes a car has are literally vibrations; superpositions of sound and resonance. When you modify or even simply repair a car, it’s very easy to change these vibes, and the car no longer feels and sounds the same—fracturing that fragile connection you have with the car. As I wrote here, Louie’s sway-bar bushings had become noisy. I re-lubed them, and they’re quiet again. There’s still a little bit of a harsh resonance around 3,000 rpm, but it’s not offensive.
I have a few more weeks to put more miles on the rebuilt head, adjust the valves again, and beat down any gremlins trying to crawl out from their dark places. But I’m feeling pretty good about MidAmerica. Maybe I’ll even paint those damned red hoses.
I’ll just be careful not to trip and break my foot again going into the basement to get the paint.—Rob Siegel
Rob’s new book, The Best of The Hack Mechanic, is available here on Amazon, as are his seven other books. Signed copies can be ordered directly from Rob here.