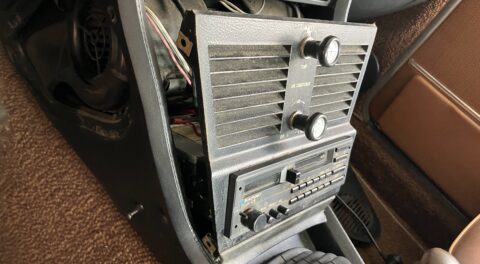
Last week I had the crack repaired in the head of Louie, my ’72 2002tii, then took the head to my regular machine shop for the valve job. It was now time for reassembly of the valve train.
When a head is off, there’s always the question of how much of the valve train to replace. Like many things, it’s a slippery slope, and the degree to which you slide down it is dictated by a combination of what you find, your personality, and your finances. When I first began buying needy 2002s nearly 40 years ago, if I had one with a blown head gasket (e.g., a milkshake in the radiator but no other running problems), I’d think nothing of pulling the head, leaving it fully assembled with both of the manifolds on it, replacing the head gasket, bolting the head and manifolds back on, and doing nothing else but flushing the cooling system and changing the oil.
These days, I’m more circumspect, because the odds that the head will need to be resurfaced and the valve seats will need to be freshened are high. If you’re operating on a really tight budget, you can try to check the head yourself with a straight edge and feeler gauges, and check the valve seats: Do a compression test before you pull it off, and with the head on the bench, turn the cam to top dead center for each cylinder, turn the head upside down, and fill each chamber with solvent to see if it leaks out past the valves. But these days I usually assume that head off equals valve job and resurfacing. The problem is that this means disassembling the valve train, and that means deciding how much of it to renew.
I’ve actually swung the other way over time. I used to take the tack that if I was disassembling the valve train, I’d automatically spring for new rocker arms and shafts. Nowadays, however, I’m more practical (read: thrifty), and have no qualms about reusing valve-train parts if they’re not obviously worn. After all, it’s not as if my vintage cars see anywhere close to the mileage and use of a daily driver.
On the other hand, I don’t want to be penny-wise and pound-foolish about it (valve-guide seals always get replaced, no matter what). I let the machinist recommend whether any of the valves or guides need to be replaced. On Louie’s head, they all were fine.
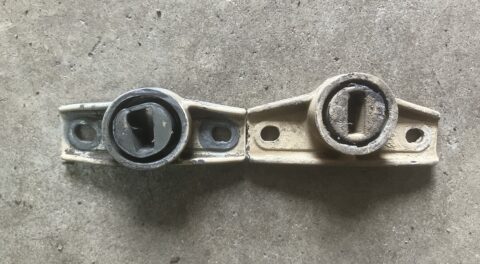
One of the reasons I pulled the head was that the plug at the end of the intake rocker shaft had worked its way out, and when I disassembled the head, I found that one of the exhaust rocker-shaft plugs was coming out as well. So clearly, the rocker shafts needed to be replaced. However, they weren’t grooved from rocker-arm wear, indicating that the arms might be fine.
Valve-train parts have become pricey in recent years. The OE exhaust-rocker shaft for the 2002’s M10 engine lists for $148 from BMW, with a street price usually about $125, but an intake- rocker shaft isn’t available from BMW at all. Genuine OE BMW rocker arms now list at $79 each, with a street price of about $60, while OEM Febi parts are about $17—and you need eight of them.
I looked on eBay and found a gentleman in Greece selling several sets of new-old-stock BMW rocker shafts for less than $100— shipped to the United States. He also sold full sets of shafts and rocker arms for $340, but my rocker arms seemed fine, with very little play on the shafts, no chunks missing from the pads, and no score marks on the bushings from where the old shafts were banged out, so I elected to reuse them. I did, however, pay the machine shop to check and polish both the shafts and the camshaft.
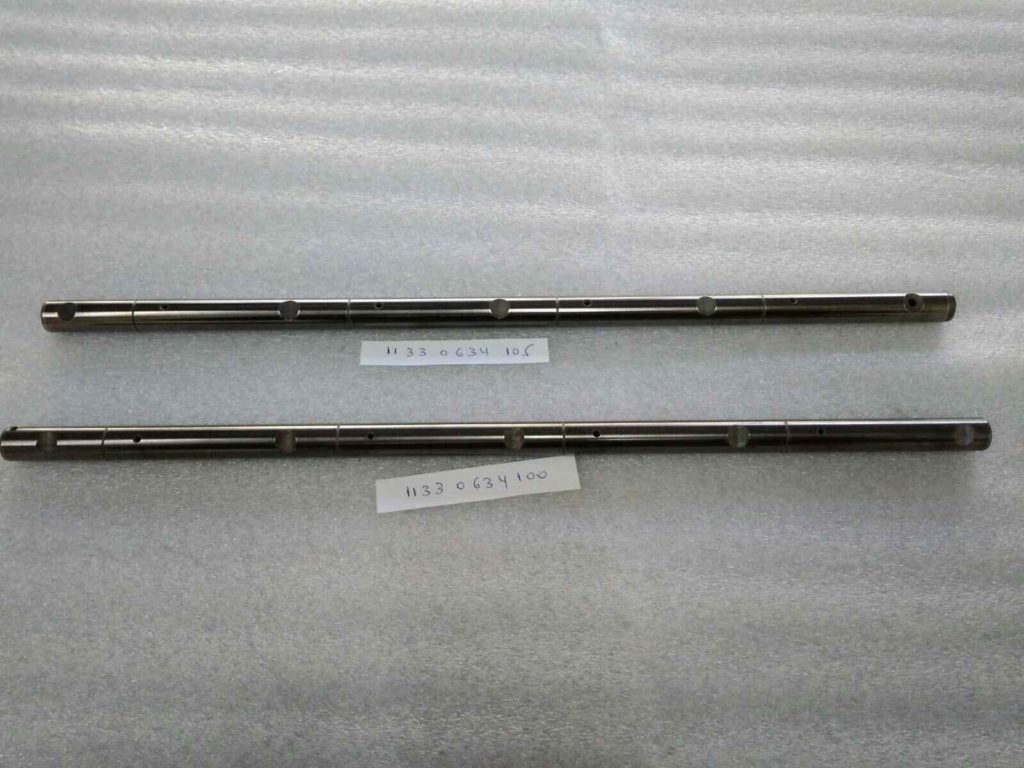
The new old stock rocker shafts shown in the eBay auction.
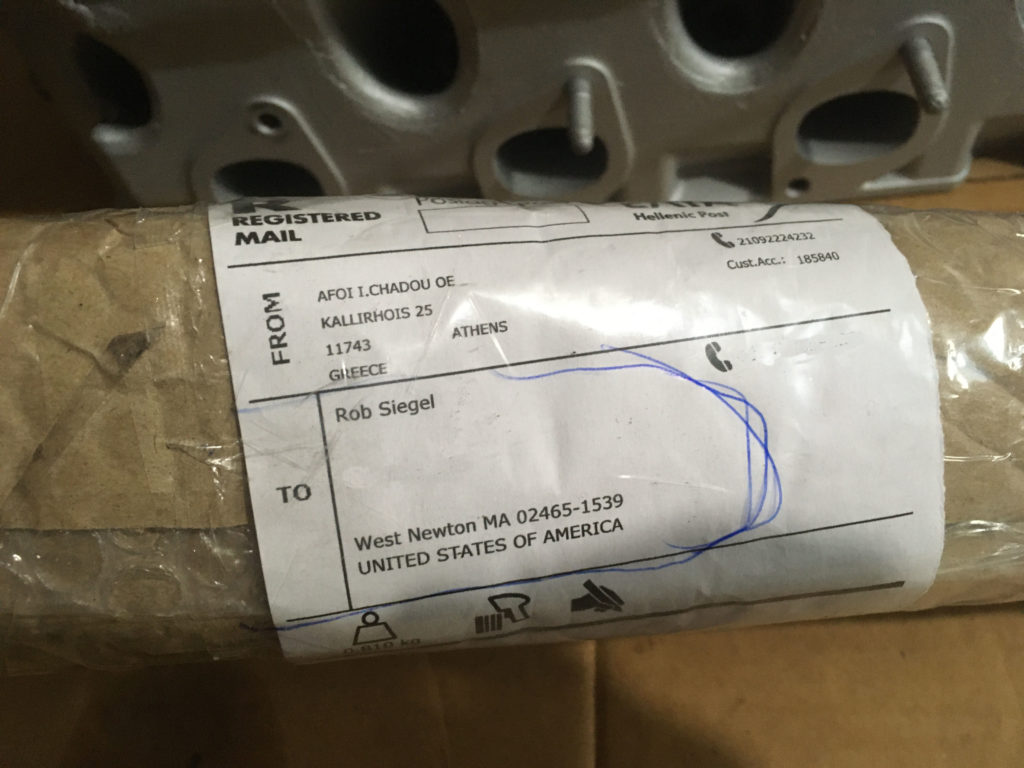
Hot off the plane from Greece.
I discussed valve-train disassembly here. As the repair manuals often tautologically say, assembly is the reverse of disassembly, which means that you have to do the trick of rotating the cam to take the pressure off the valve spring on whatever valve you’re dealing with. Unless you have the special BMW jig to depress the valves, you put the cam in first, then knock the rocker shafts in, rotating the cam so the lobes for the rocker arms you’re installing are pointing down, allowing you to slide the arms, spacers, and springs on as the shafts pass over each valve.

Preparing for cam insertion.

The cam goes in, with the journals lubricated liberally with Liqui Moly engine-assembly paste.
It’s really best if you have a photo of the assembled head in front of you while you’re doing this, but the sequence for sliding the components onto the shaft, assuming you’re banging the shafts in from the rear (distributor) side of the head, is:
- Intake side: Spacer (flat side against the rocker arm, concave side to the right), rocker arm, washer, spring.
- Exhaust side: Spring, washer, rocker arm, spacer (flat side against the rocker arm, concave side to the left).
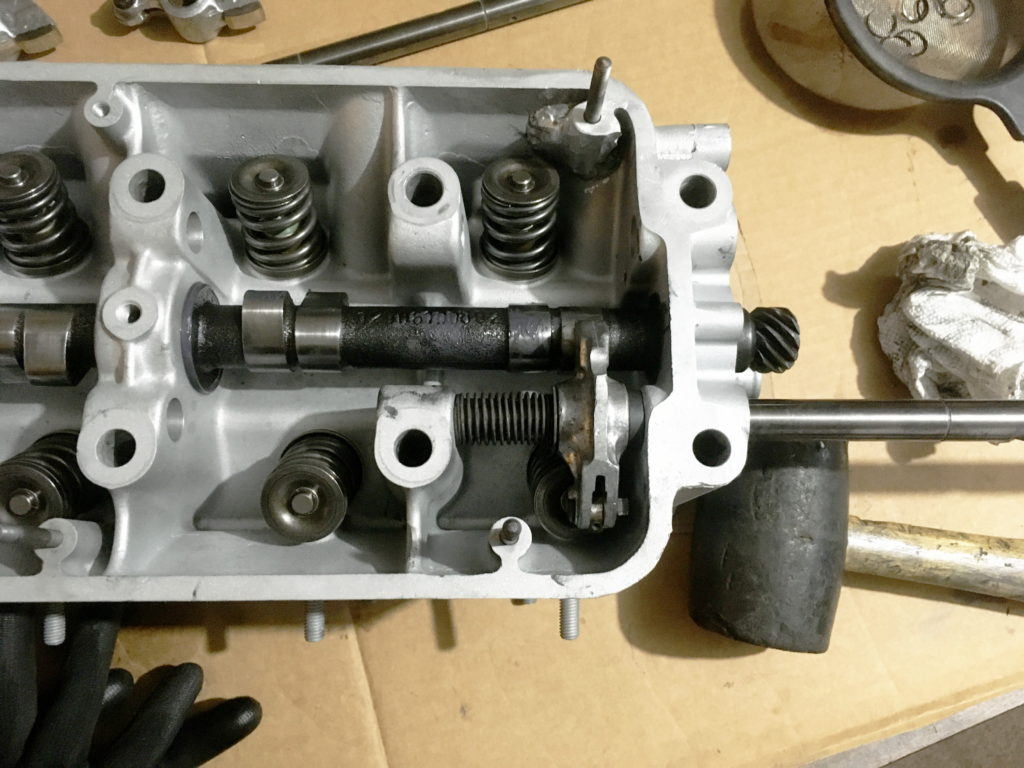
The intake rocker shaft being knocked in, with the valve-train components (spacer, rocker arm, washer, spring) for the #4 intake valve slid on. Note how the #4 cam lobes are pointing down, ensuring that there’s no pressure on the valve spring as the rocker arm is slid onto the shaft.
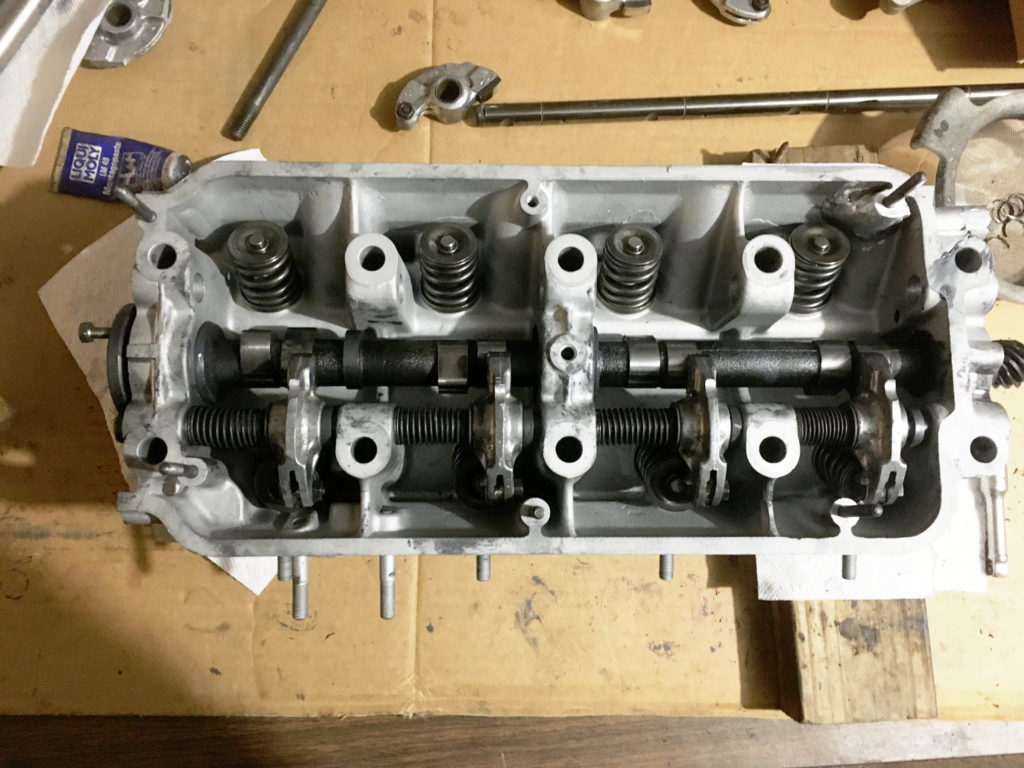
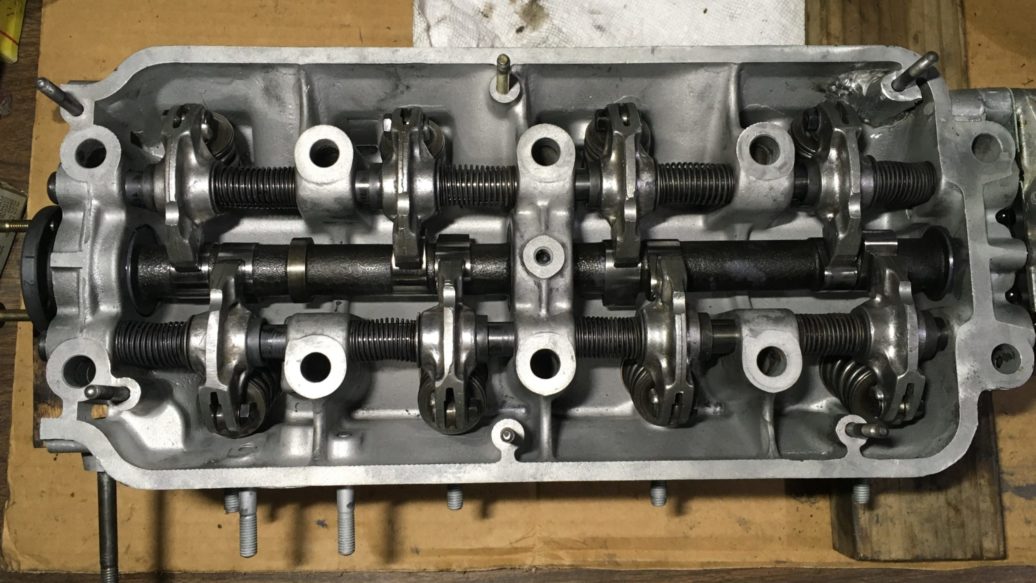
The fully-stuffed intake side of the valve train. Note the bolts in the left end of the camshaft. They’re there so that you can put a screwdriver between them and rotate the cam to point the lobes down as the end of the rocker is passing the valve whose components you want to slide on.
The most challenging part of reassembly, at least for me, is ensuring that the rocker shafts are banged in so that the notches at the ends holding the camshaft retaining plate are pointing straight down, and the indented portions of the rocker shafts that the head bolts slide past are pointing straight out the sides. Due to the fact that the shafts are an interference fit in the head, it’s very difficult to rotate them once they’re in, even using—shudder—Vise Grips. Plus, because the notches point down, you can’t see them until the shafts protrude from the front of the head, and by then, if they’re not pointing straight down, it’s too late. I think the best you can do is watch the orientation of the indents as you’re tapping in the shafts, verify that they’re pointing to the side, and if they need correction along the way, use rubber and Vise Grips on the end of the shaft and twist it while you’re tapping it. I imagine it’s sort of like docking a supertanker.
After the intake side was in, I banged in the exhaust shaft and threaded on its components. After double-checking that everything was correct, I rotated the cam through its cycle, allowing me to slide the rocker arms against their retaining springs and insert the little semi-circular clips that sit in the concave portions of the spacers. I then coated a fresh distributor- housing gasket with a thin application of Aviation Form-A-Gasket, attached the housing to the back of the head, slid the cam-retaining plate into the slots in the front of the rocker shafts and the cam, and bolted it in place.
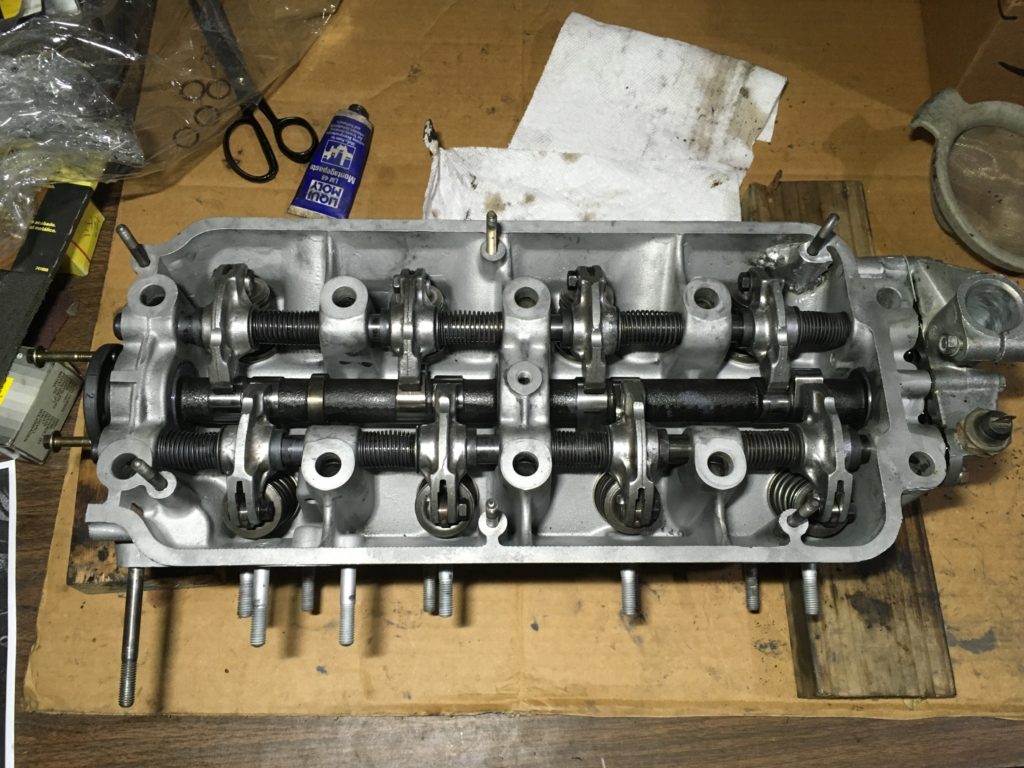
The head is ready for reattachment.
Next week, unless something else intervenes, I’ll drop the head back on the block.—Rob Siegel
Rob’s new book, The Best of The Hack Mechanic, is available here on Amazon, as are his seven other books. Signed copies can be ordered directly from Rob here.