Years ago, I was pulling the head off Kugel, my dear departed Chamonix ’72 2002tii, in order to prophylactically replace the head gasket before a 3,000-mile trip. My friend Lindsey Brown, shop foreman at the Little Foreign Car Garage in Waltham, Massachusetts, and a professional 2002 fanatic, gave me one of the little nuggets of advice he’s famous for: “Never pull a head off an engine unless you’re prepared to deal with whatever you find.”
Sure enough, I found score marks on the cylinder walls, and a head-gasket replacement turned into a block-in-car cylinder re-hone and re-ring, and if you’re doing that, you’d be an idiot not to replace the rod bearings as well. It was an insane amount of mission creep for a car that was running perfectly fine.
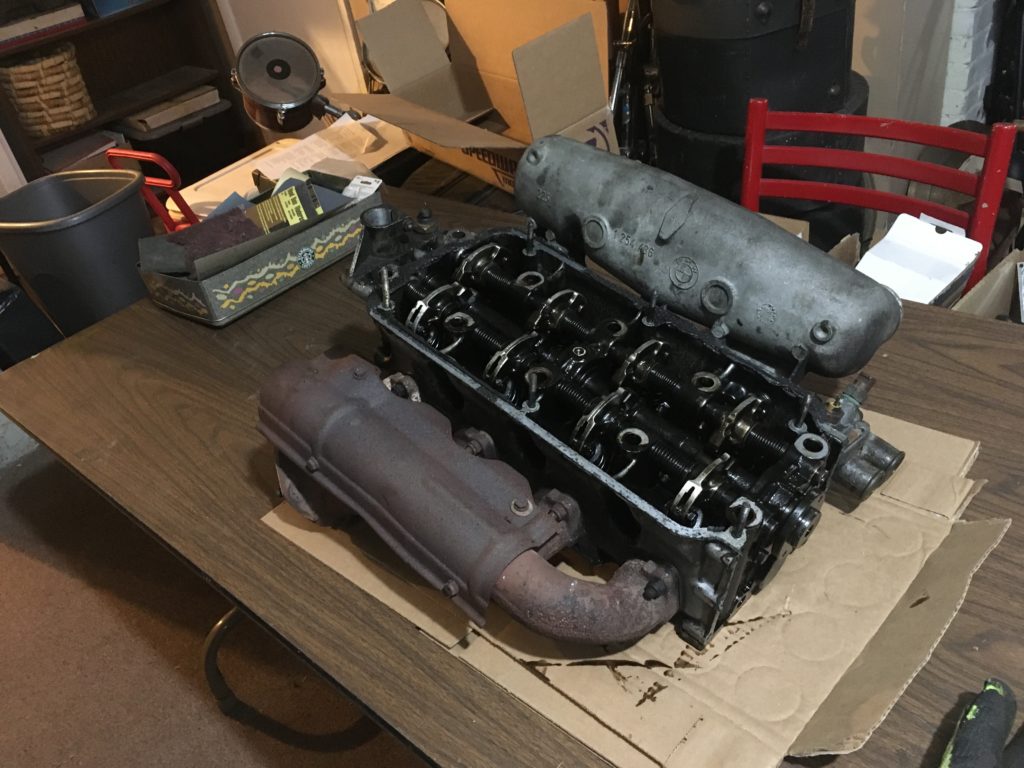
So it was with some trepidation that last week I pulled the head off Louie, my Agave ’72 2002tii, primarily to deal with the fact that the head is cracked above the #4 spark plug. Fortunately, the cylinder walls looked fine, allowing me to dive into cylinder-head disassembly without sliding down the slippery slope into the block.
As you’ve likely seen in my photos, my garage is a cramped space; there’s no room for a dedicated workbench. Disassembly of a head occurs either on a milk crate on the floor or on a folding table brought in from the basement. However, a cold snap moved into Boston, and while I do have heat in the garage, I try not to run up the natural-gas bill unless I really need to. Plus, overlapping the head disassembly was some work I need to do on the Lotus Europa transaxle that also would be way more comfortable at a table. So in the interest of both ergonomics and economics, I erected the table in the basement and set up shop there.
The basement was way warmer than the garage.
This strategy, however, quickly ran into a problem. I easily removed the intake manifold, but pulling the exhaust manifold—which had likely never been off the car. and whose nuts were now rust-welded to the studs—required soaking the nuts in SiliKroil penetrating oil and applying heat to them with a torch. My wife, Maire Anne, has an exquisitely sensitive sense of smell, and while I don’t think of SiliKroil as a light volatile smelly solvent like gas, starting fluid, or brake cleaner, she could smell it all the way up to the third floor of the house. I realized that since there’s no exhaust fan in the basement, using the torch was out of the question. So back out to the cold garage I went with the head.
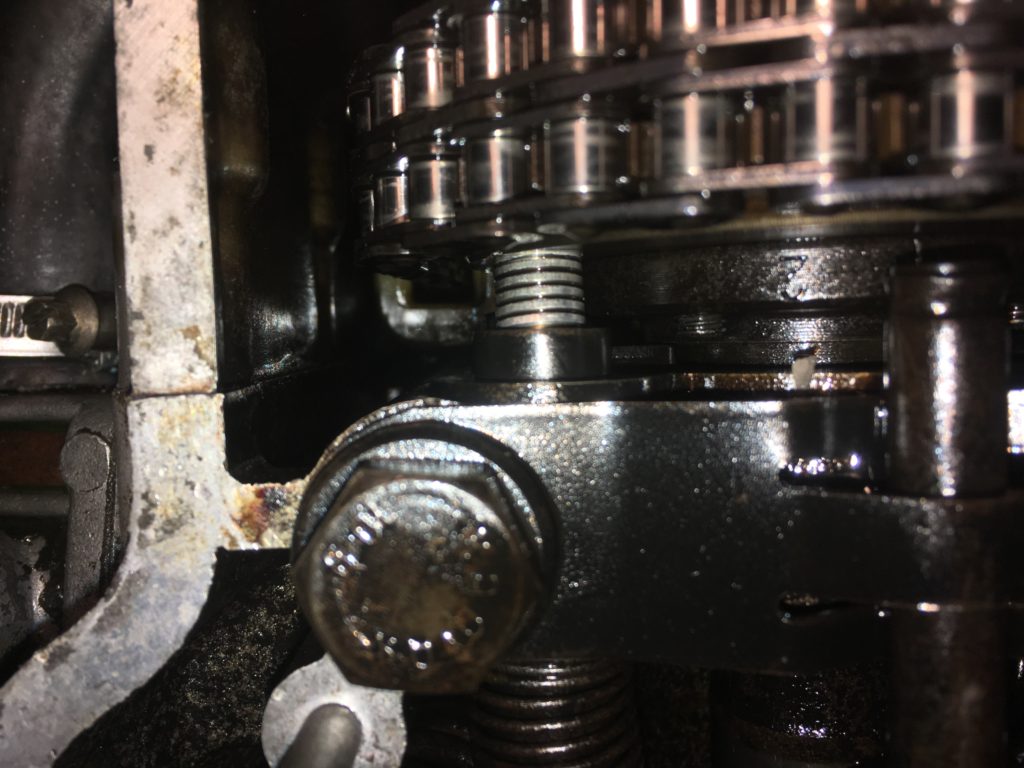
The copper nuts holding on the exhaust manifold take a 12-mm wrench, but with age and rust, they literally shrink in size, as does the threaded stud they’re screwed onto. You can try using a slightly smaller socket to see if it’s a better fit on the shrunken nut—a 7/16″ socket is a skoshe bigger than 11-mm. Unfortunately, on most of the eight nuts, the curve of the manifold prevents getting a straight shot at them with a standard socket and a ratchet; for some of them, there’s just enough clearance for a very short socket and a breaker bar, but for others, only a box-end wrench, or—gack!—Vise Grips will work.
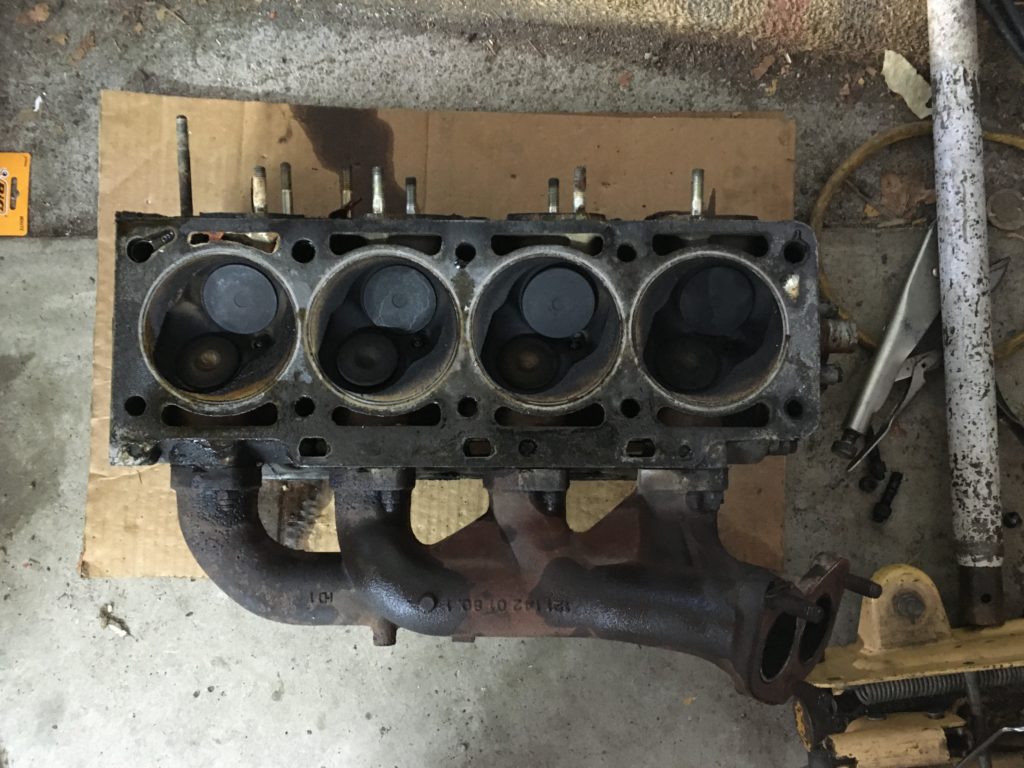
You can see how the curves of the exhaust manifold get in the way of putting a ratchet and socket on the nuts.
You can try soaking the studs in a good penetrating oil like SiliKroil (and for the hundredth time, WD40 is not penetrating oil), but really, what you need is heat. There’s a detailed chapter in my first book, Memoirs of a Hack Mechanic, on removing stuck nuts. In it, I talk about the different mechanisms by which heat actually works. There’s little doubt that heat takes advantage of the differential rate of expansion of the nut and the stud—that is, hold the torch’s flame on the nut, not the stud, and it’ll expand it slightly, reducing its death grip.
However, if you’ve ever heated a nut red-hot with a torch, you’ve seen that the stud in the middle is likely also glowing, so the idea that only the nut is hot and expanding seems fanciful. Yes, both the nut and the stud expand, but the expansion is a percentage of an object’s size, and the nut likely expands more simply because it’s on the outside and therefore larger.
In addition, I subscribe to the idea that another advantage of heat is that, regardless of expansion, it helps break the bond of corrosion on the threads.
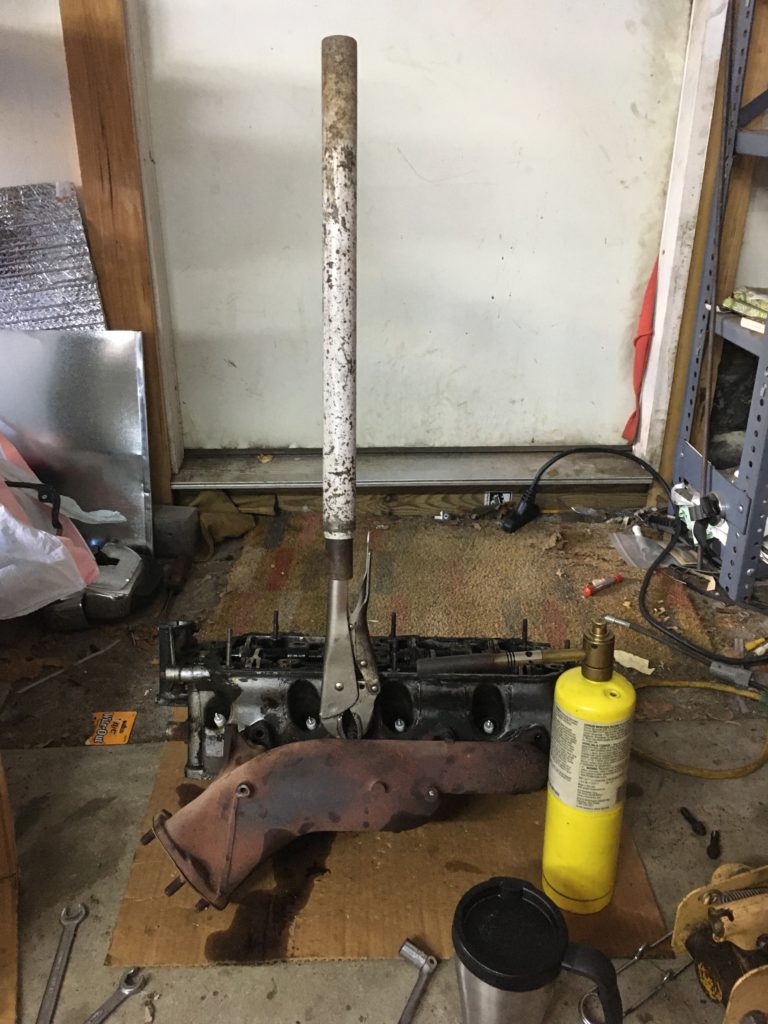
In any case, heat—and lots of it—is your friend. You want to get the nut glowing red, and you typically can’t do that with a propane torch. MAPP-gas torches are available at hardware stores, and on small nuts like these, they’re generally effective enough to do the job. Oxyacetylene setups will get things way hotter, to the point where you can turn both the nut and the stud to taffy and twist them off, if you’re not careful. This is not what you want. I have a small oxy-acetylene setup, but it was buried in the back of the garage, so I just used MAPP gas.
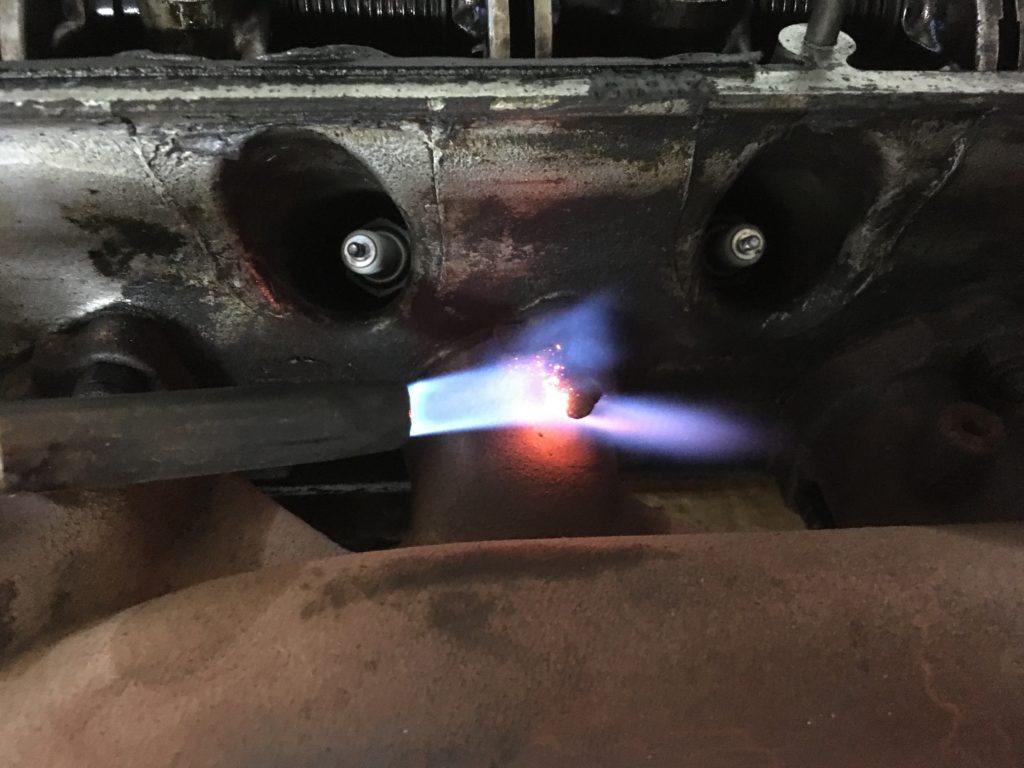
MAPP gas usually works well enough to get small nuts like these off.
Out of focus, but definitely red: You can see what I mean about the stud glowing, too.
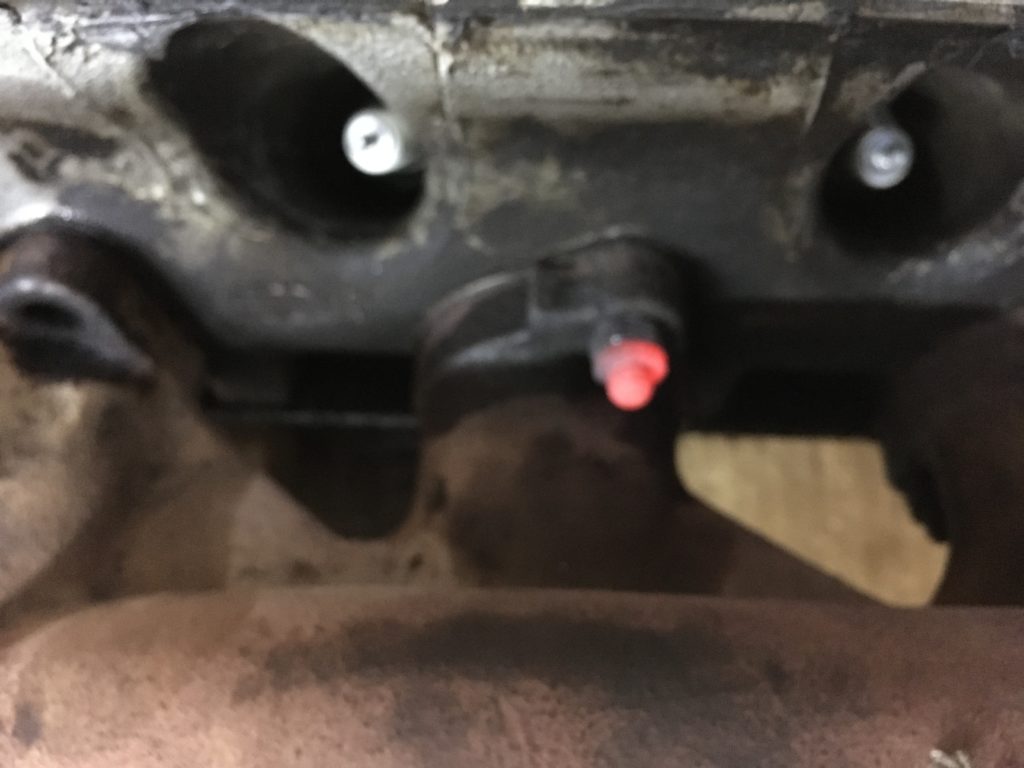
What I do is heat the nut red, let it cool slightly, apply my dwindling supply of Goodson Oil Gallery Wax Sticks to the threads (Goodson appears to have discontinued these, but they do sell beeswax), wait a little while, then put leverage on the nut. But even when using heat, you often need patience: If the nut doesn’t spin, don’t force it, because if you snap off the stud flush with the head, your immediate future is one of drills, taps, Helicoils, and pain.
On the other hand, if, instead of the nut turning, the heat conducted its way down the stud, broke the bond of corrosion between it and the head, and the stud unthreads from the head, that’s absolutely fine. However, because of the overhanging curved portion of the manifold, unthreaded studs with stuck nuts become captured, can’t be withdrawn through the hole, and instead need to be cut off with a Dremel tool.
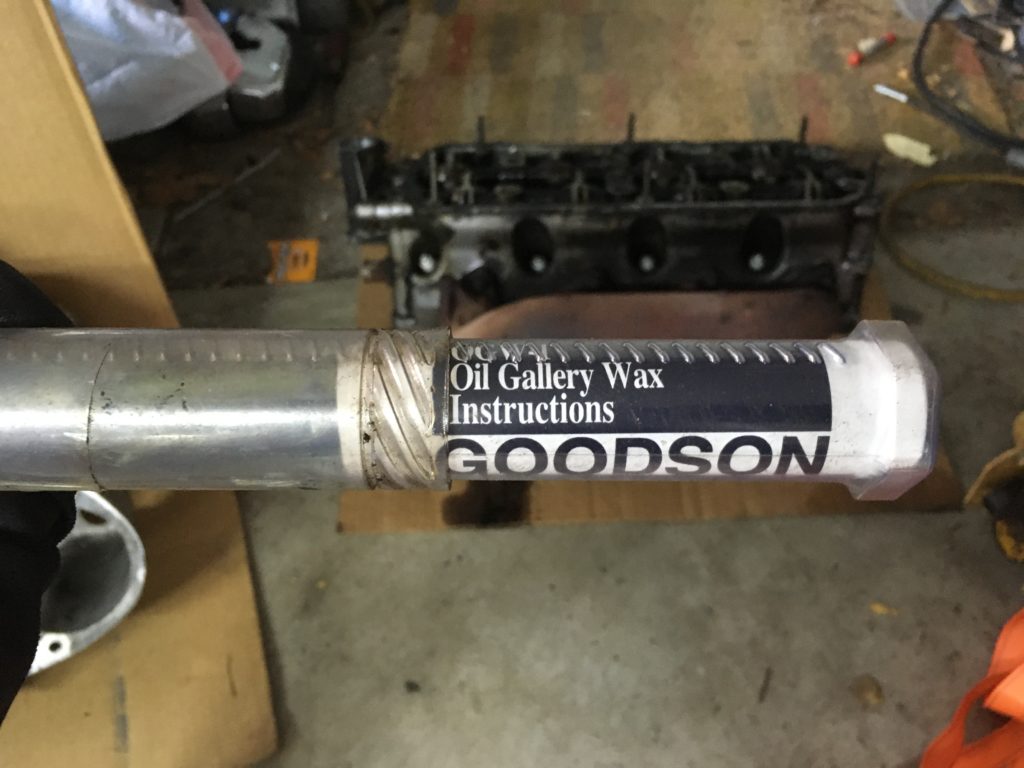
It will be a sad day when I’ve used the last of my Goodson Oil Gallery Wax Sticks.
One of the eight exhaust manifold nuts was particularly stubborn. Its corners were rounded, requiring me to put Vise Grips on it. After four applications of heat and wax, and when even the Vise Grips were finding dwindling nut surfaces to bite into, I ignored my own advice about patience and went for it, leverage-wise, and put a pipe on the end of the Vise Grips. Fortunately, instead of snapping, the stud surrendered. (Note that an alternative strategy is cutting the nut and stud off with a small cutting wheel on a Dremel tool and then removing the body of the stud with Vise Grips or a stud extractor.)
Do as I say, not as I do.
The distributor housing and the cam-retaining plate are removed next. This exposes the ends of the rocker shafts, allowing them to be knocked out with a drift made of soft metal like aluminum (you want something soft so that the drift will deform as opposed to the end of the rocker shaft). By my measurement, the diameter of the rocker shaft is about 0.61 inches’ you want a drift that’s slightly smaller than that. I believe that my aluminum rod is 9/16″, or about 0.56″. I ordered it on McMaster-Carr many years ago.
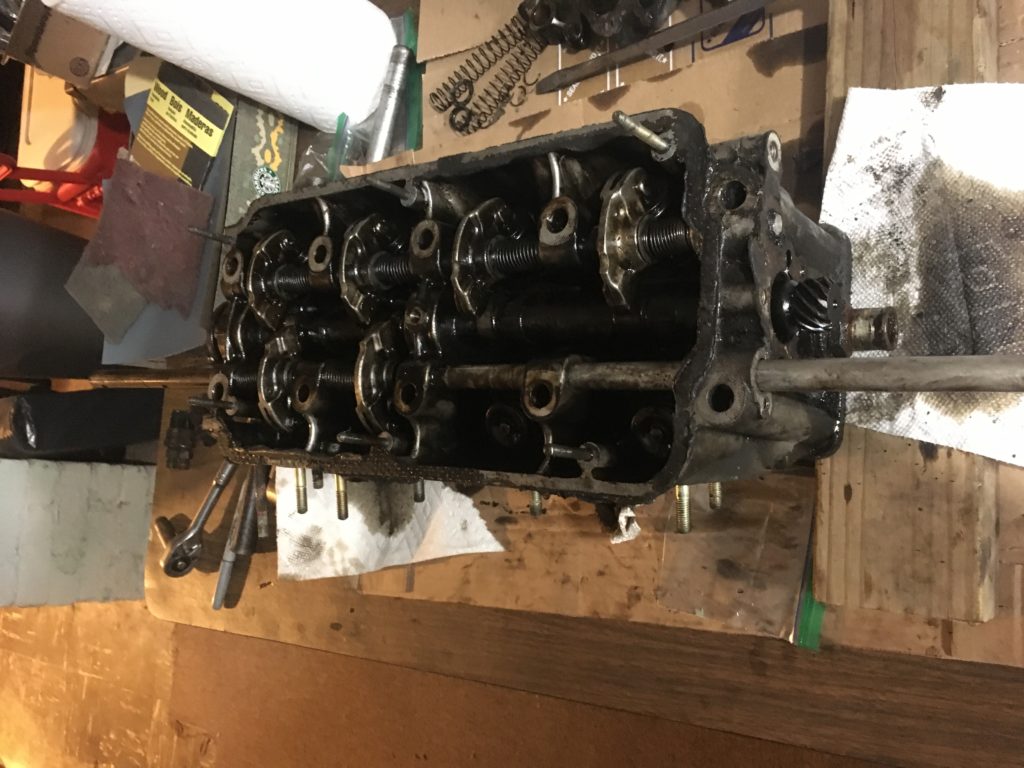
Knocking the rocker shaft out with an aluminum drift.
Many folks who disassemble a valve train for the first time wonder how they can get the rocker shafts out, because the fact that half of the valves are open at any time means that the cam lobes are putting the rocker arms under tension. There is a special tool to depress all the valves together and let you pull out the cam, after which there’s no tension on any of the rocker arms, but you don’t need it. Instead, you can rotate the cam to take the pressure off each rocker arm as you withdraw each rocker shaft from it. The steps are:
- Thread two 10-mm bolts into the front of the cam so that you can position a screwdriver across them and use it to turn the cam.
- Rotate the cam one cylinder at a time to top dead center (both valves closed) to take the tension off its rocker arms. Then slide the rocker arms sideways on the shafts and remove both semi-circular clips. Do this for all four cylinders.
- Now choose a rocker shaft, intake or exhaust. It doesn’t matter which you start with.
- Working from the rear of the head, rotate the cam to set the rear-most pair of valves (for cylinder #4) to top dead center to take the tension off their rocker arms.
- Use the aluminum drift and a hammer to carefully tap the back of the rocker shaft, driving it forward. You really, really don’t want to smack it with a driving force, because if you do, soft aluminum drift or not, it can mushroom the end of the rocker shaft, and that’s going to make it incredibly difficult to remove the shaft from the head. It’s also going to ruin the bushings in the rocker shafts as you drive it through them. Patience: tap tap tap. If you move the shaft 1/32″ at a time, that’s great.
- At regular intervals, inspect the end of the aluminum drift. It will mushroom. Trim it back down with a file so that it doesn’t scrape the insides of the rocker arms as it passes through them.
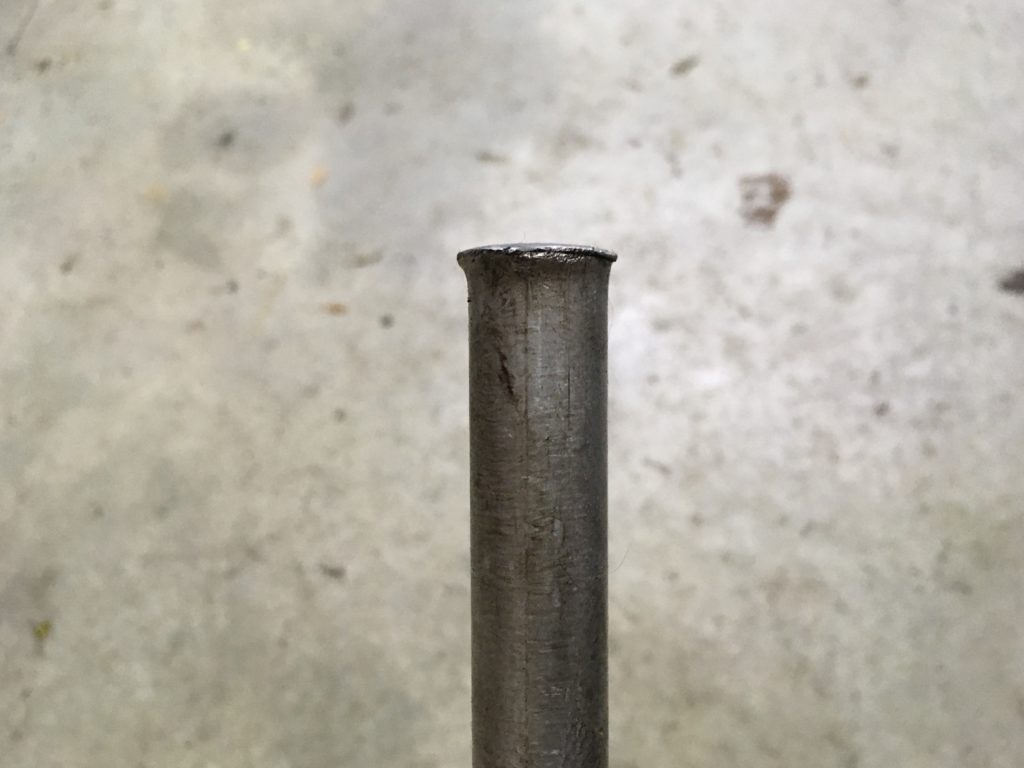
This is the back end of the aluminum drift, the side that I tap with a hammer. Inspect the forward end that’s pushing on the rocker shaft. If it is even slightly mushroomed like this, dress it back with a file.
- As the shaft passes through the passageways in the head, opens up a gap, and gives you clearance, slide the valve-train components (concave spacer, rocker, washer, and spring) off.
- Rotate the cam and repeat for the next pair of valves.
- Repeat for the other rocker shaft.
As I prepared to begin knocking the exhaust rocker shaft out, I noticed that there was a silver protrusion into the area that had been covered by the distributor housing. I realized that this was the plug that’s supposed to be at the end of the exhaust rocker shaft. As I said last week, one of the reasons for pulling the head was that years ago the plug at the end of the intake rocker shaft had threatened to jump into the timing chain. I’d pushed it back in and installed a bracket to prevent it from falling out, but I wanted a more permanent solution. It was interesting that the same failure had also occurred on the exhaust rocker shaft. I certainly won’t be reusing either rocker shaft when I reassembled the head.
The loose plug on the intake rocker was a known problem…
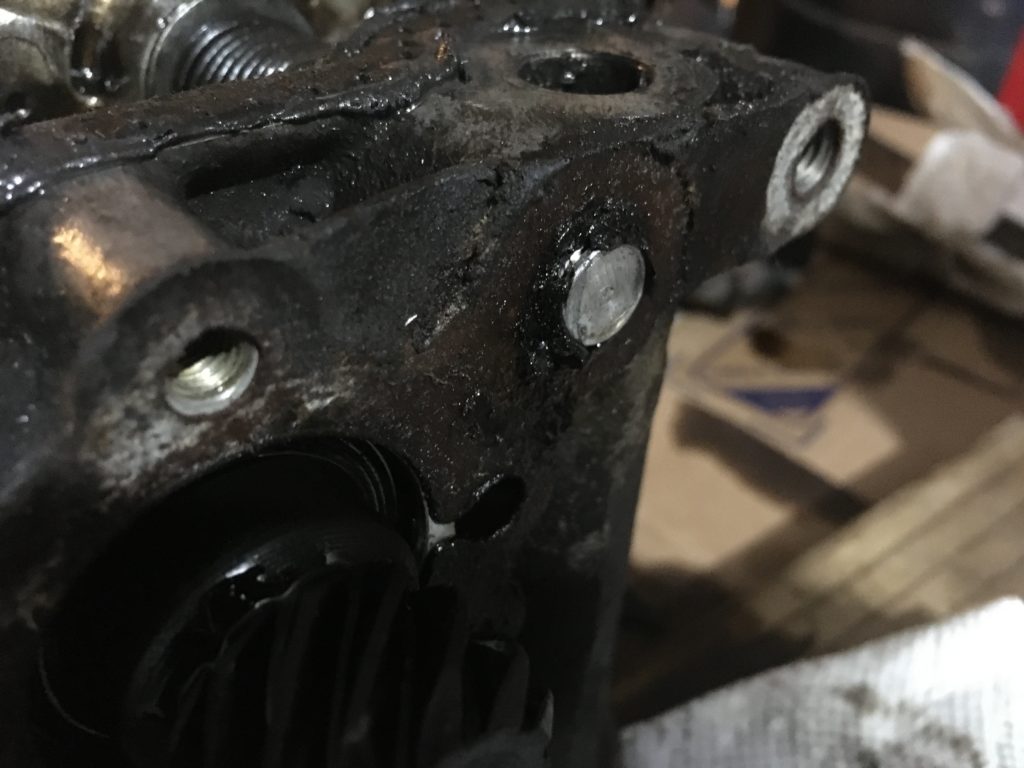
…but the one at the end of the exhaust rocker was a surprise.
With careful tap-tap-tapping on each rocker shaft, I knocked them out.
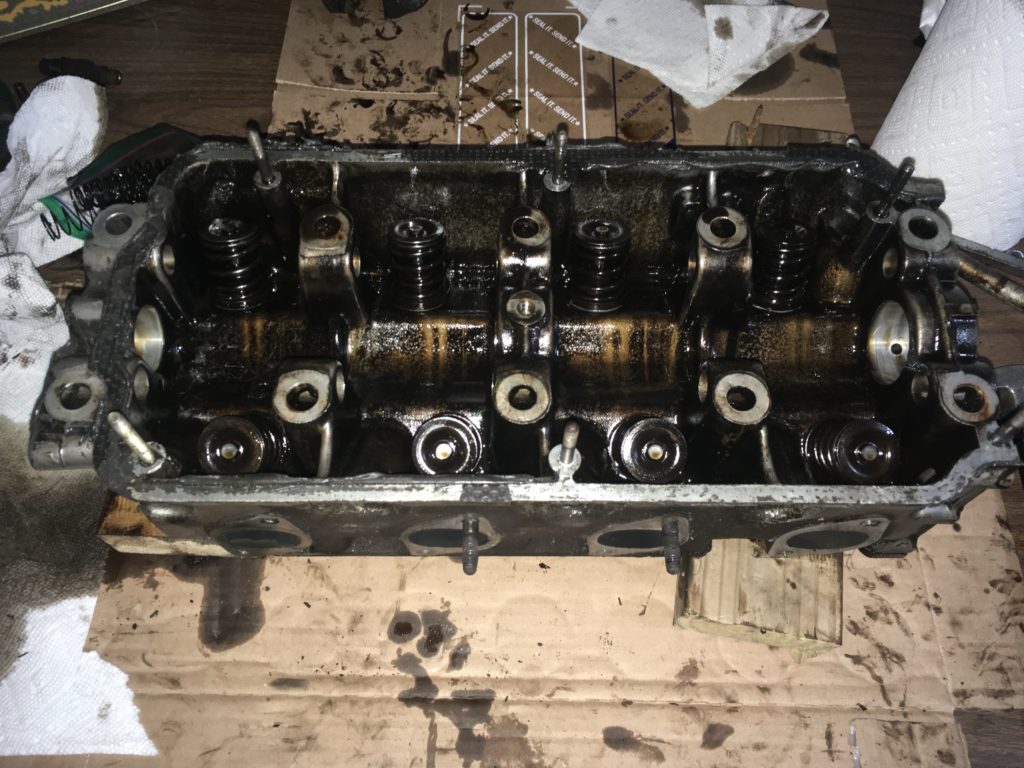
Success!
I could use a valve-spring compressor to pull the valves and springs out, but I left them alone. My plan is to take the head to my local machine shop (Century Automotive Machine in Waltham, Massachusetts) for an inspection. Hal, the machinist, doesn’t have the equipment to weld the crack, but he can check the wear on the valve guides, throw the head into the hot tank, glass-bead it, check it for straightness, inspect the valves, and then return the head to me. In the meantime, I’ll start getting estimates for having the crack repaired. Having the head clean will allow me to e-mail photographs of the crack to machine shops. My hope is to reuse as much as possible (obviously, not the old rocker shafts) and try to hold the line at this being a head-crack repair-and-freshening as opposed to a complete rebuild.
So far, so good. Even with all that oil and varnish, I’ve stayed off the slippery slope.—Rob Siegel
Rob’s new book, The Best of The Hack Mechanic, is available here on Amazon, as are his seven other books. Signed copies can be ordered directly from Rob here.