Last week, I finally got the faux tii’s fuel system buttoned up using a less than spotless but adequately cleaned fuel tank and a rebuilt fuel pump that led me into o-ring hell but emerged pumping and not leaking, which was all it really needed to do. I sometimes needed to remind myself that the goal of all of this wasn’t to resurrect and drive the car, but to be able to start and run the injected engine so I could ascertain its health.
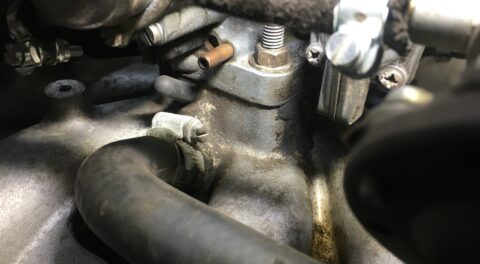
The steps in starting a long-dormant engine are described in my book Ran When Parked, but basically you want clean air entering the intake (no acorns, mouse nests, or whole dead mice getting sucked into the engine), clean oil, clean fuel, and clean coolant. Next, you want to lubricate the cylinder walls prior to cranking. I unscrew the spark plugs and use a Wizard of Oz-style oil can to give a few squirts of oil through the plug holes. However, I found that I couldn’t get the plug socket down the hole for #3 cylinder. I’ve had this happen before, and it’s almost always due to the presence of a piece of Bakelite that cracked off the end of the spark plug connector. When I photographed down the plug recess with my phone, that’s exactly what I found.
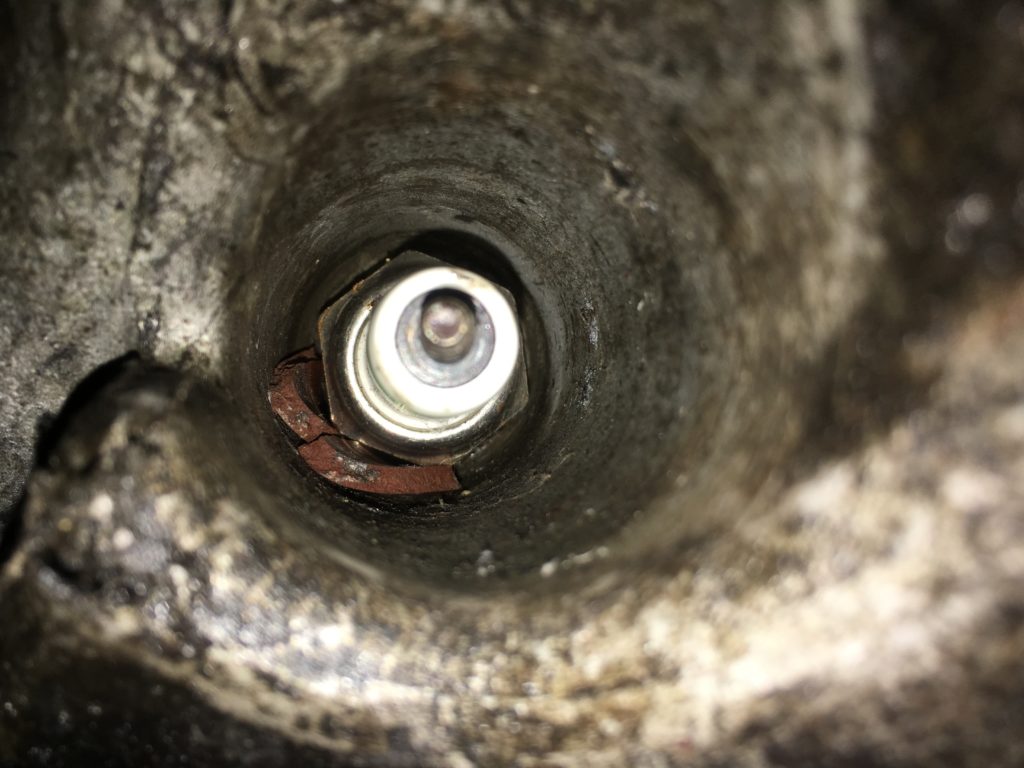
Cracked-off pieces of a plug connector will prevent the socket from seating around and removing the spark plug.
A couple of swipes with a hooked coat hanger and blasts with compressed air later, and it was removed. With all the plugs out, I squirted in oil and rotated the engine a few times by grabbing the fan blades and muscling them around.
Part of Rob’s Twelve-Step Engine Rehabilitation Program at this point involves pulling off the valve cover, inspecting the valve train, and adjusting the valves. If the head has never been off the car, what you generally see is a 45-year accumulation of brown varnish. But instead of seeing that, I smiled as I was greeted by a surprisingly pretty and clean cylinder head and set of valve train components.
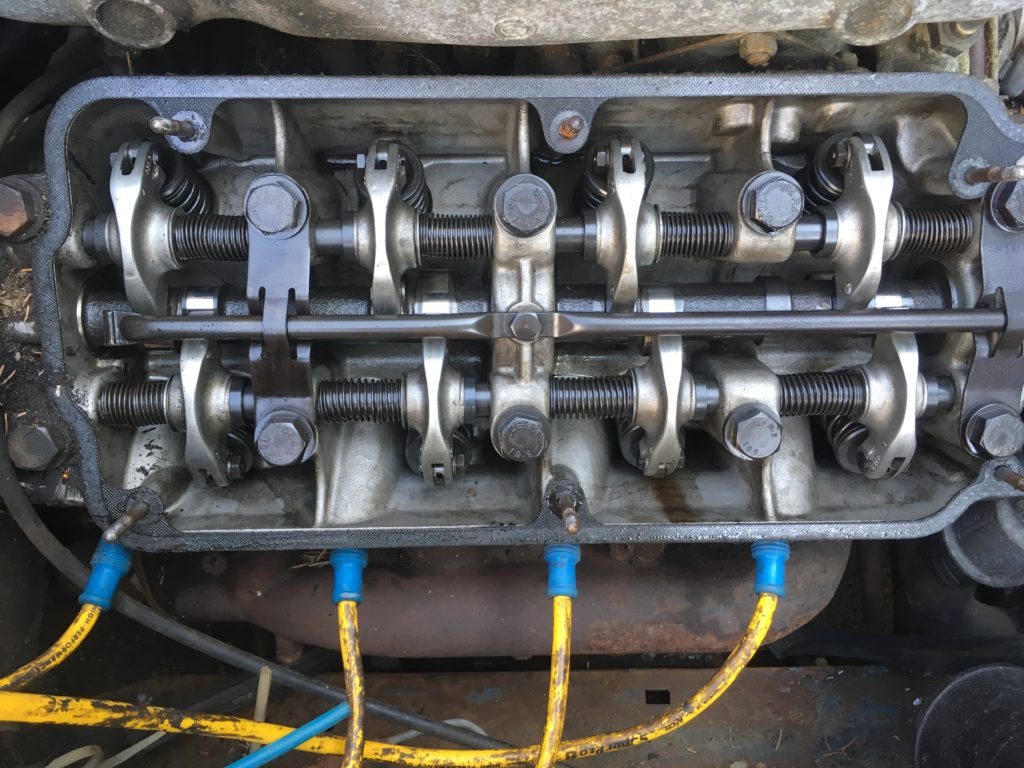
You never know what you’ll find when pulling the valve cover on a long-dead engine. This one looked quite yummy inside.
While I was examining the valve train, I had another pleasant surprise: I noticed that the camshaft was stamped “Dr. Schrick.” So someone had not only turned this car into a faux tii by installing a tii injected engine, they’d also hopped up that engine with a Schrick cam. I’d need to pull off the front cam gear and look at the stamped number to tell which duration Schrick cam it is, and since that requires pulling off the upper timing cover, I left that task for later (or never).
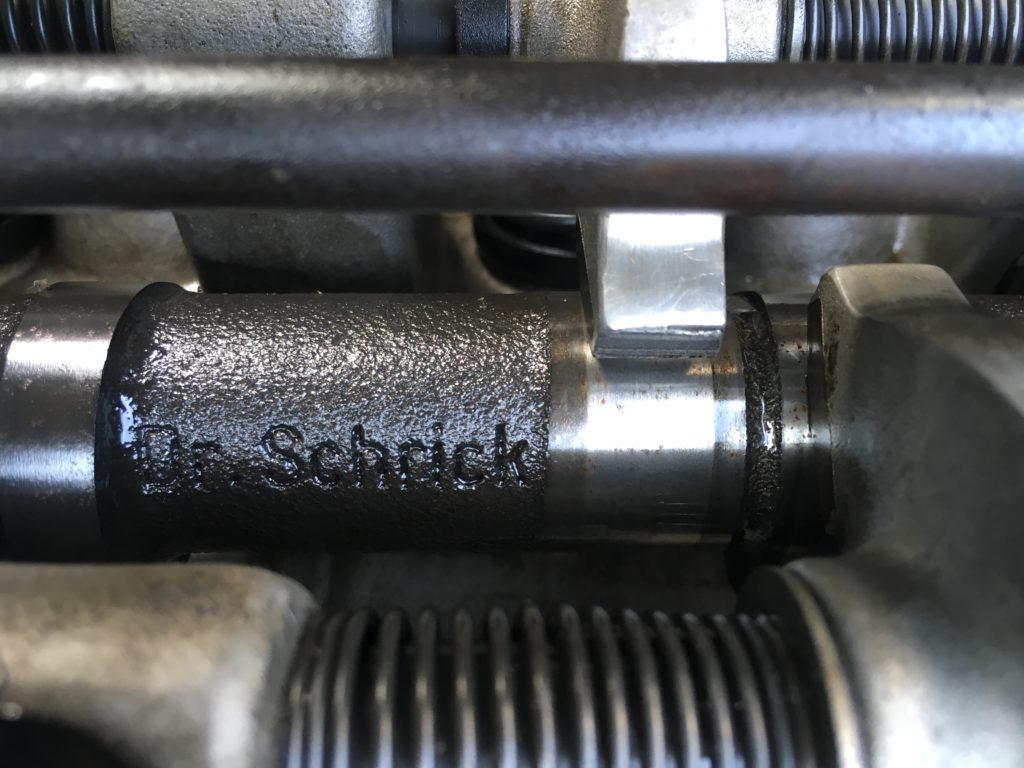
I’d say “score!” but that’s a bad word to use around a camshaft.
Since, while adjusting the valves, you need to look at the cam lobes to know when each cylinder is at top dead center (TDC), and since you’ve already taken the spark plugs out to make rotating the engine easier, at this point, if the engine’s condition is unknown, I usually perform a leakdown test on each cylinder at TDC. Cracked pistons or bent, or otherwise non-sealing valves will show up both as anomalously low leakdown numbers as well as air audibly escaping through the valves and out the crankcase, exhaust, or throttle body. I didn’t see any zero leakdown numbers, or hear anything that made me think the car had engine damage. Before reinstalling the valve cover, I took the oil can and gave all the rockers and shafts a good direct soaking in fresh oil.
Next was the oil change. The faux tii’s dipstick showed nice clean honey-looking oil, as if it were changed shortly before the car sat, but most of the time when you look at the dipstick on a car that’s sat for years, you see well-aged black goo, and the $25 for a five-quart jug of Castrol 20W50 and a fresh oil filter is money well spent. Even though the oil looked fine color-wise, it seemed thin to me, as if someone had poured in 5W30, so I changed it and the filter.
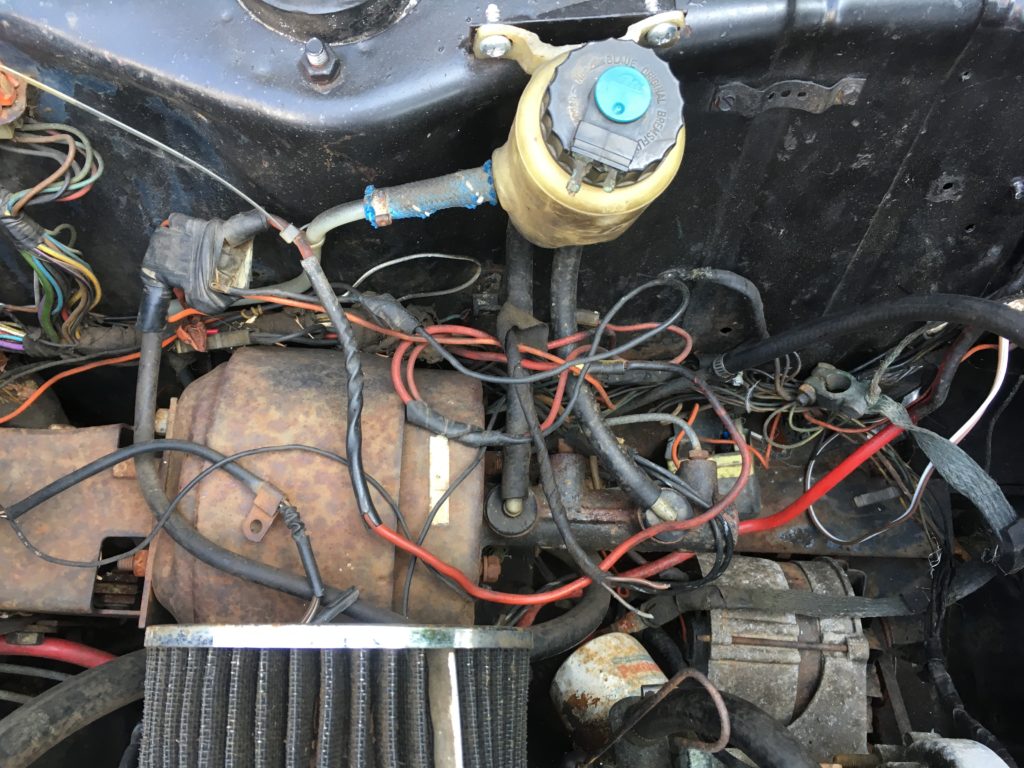
So, cylinder walls lubricated, oil and filter changed, valves adjusted, clean fuel, non-leaking fuel system, no acorns in the intake, all check. The next step is spinning the starter motor and verifying the presence of spark. Usually this means putting in a fresh battery, replacing the battery cables or at least cleaning their terminals, cranking the engine over, and holding a plug wire 1/4″ from ground to make sure there’s spark, and then installing fresh spark plugs. However, I first needed to deal with fact that the wiring in this car appeared to be a total unmitigated disaster.
Yeah…
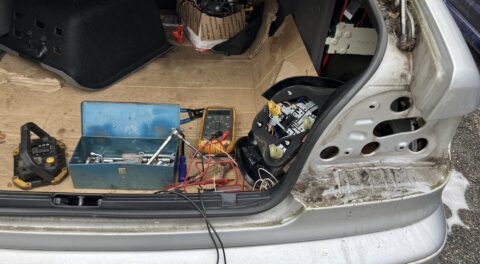
There were several major issues. For starters (bad pun; sorry), there were actually three positive battery cables wired to the threaded post on the starter solenoid, including one that ran through the firewall and emerged in the trunk.

Three! Count ’em! Three!
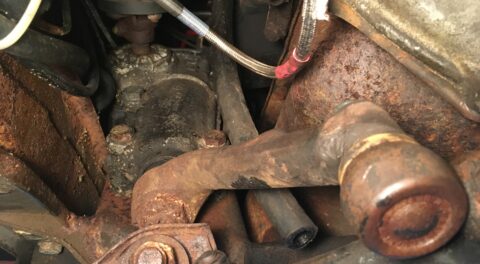
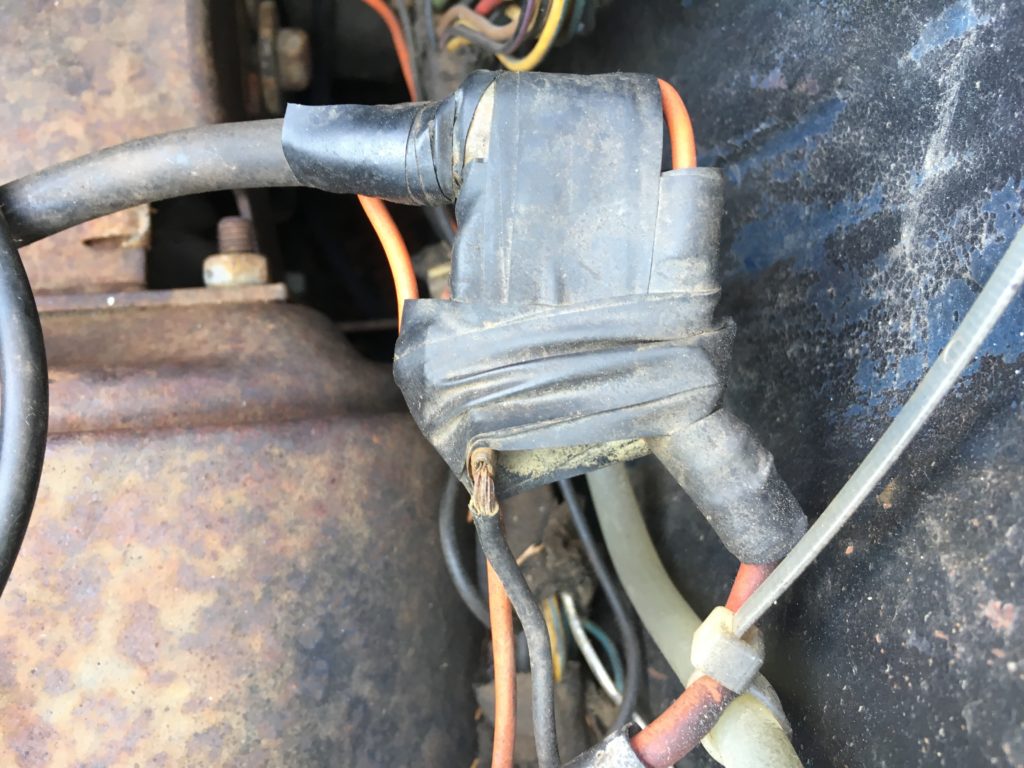
It looked like someone had begun trying to relocate the battery to the trunk, but had abandoned the process. The red positive battery cable emerged in the trunk, but there was no negative cable or battery hold-down tray. As I’ve said, this car is a 2002 with a transplanted tii engine. Because tiis have the injection pump where the alternator normally is, the alternator is instead down lower in the engine compartment. In fact, it’s under the battery tray, something that’s a pain in the butt because you can’t remove the alternator from the top; you need to loosen the front sway bar and pull it out from the bottom. Looking at this mess, I deduced that it was possible a prior owner began to drop the tii engine in, realized that the battery tray was in the way, yanked out the tray, put the motor in, and then began dealing with the battery location but never finished it. It looked like the way the owner tried to deal with the connections to the alternator and the fusebox was to leave the original positive battery cable screwed to the starter solenoid and simply wrap the battery terminal on the cable in electrical tape so it wouldn’t short out against the body. You can see in the photo below that a frayed wire was already exposed.
Yeesh!
As I looked further, I found that the fusebox had been unscrewed and lifted up, and several of the wires underneath it were frayed or broken.
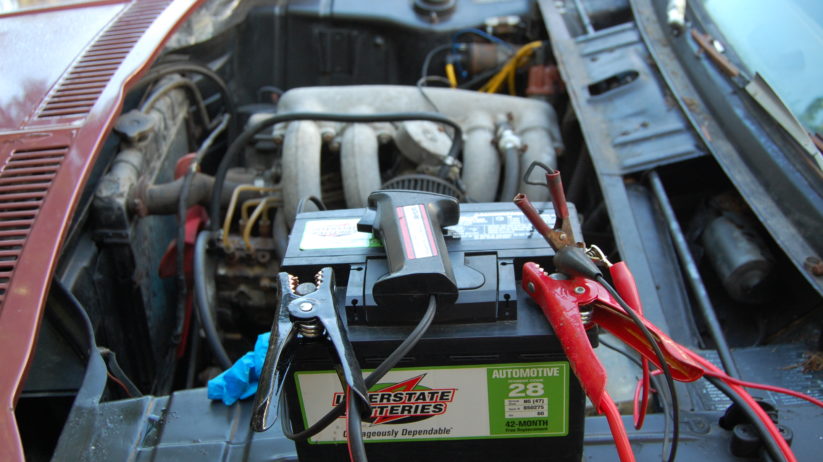
Not only was I not thrilled about the prospect of connecting a battery to this booged-up mess, pumping current into it, and risking an electrical fire, there wasn’t even a place for the battery to sit that the existing cables would reach. Since the goal was simply to get the engine running, I did something I’ve done before—I bypassed the car’s entire electrical system by connecting a battery to the starter motor using jumper cables (red to the thick threaded post on the solenoid, black to the body of the starter), directly connecting battery positive to the ignition coil’s hot side (the one labeled “15” or “+”), and momentarily touching the ignition spade connector on the starter solenoid to battery positive. I explain this “start and run a car using four wires” process in detail in this video. On a tii, you also need to wire the electric fuel pump directly to the battery, and momentarily touch the hot lead of the cold start valve to battery positive. I later replaced the fragile jumper cables with secure extra-long battery cables, but still left the car’s entire electrical system bypassed.
Before I started the engine, I first unscrewed the radiator cap and checked the radiator. One wants to see green healthy-looking coolant, but this is far from guaranteed, as one can find the radiator empty, or full of brown rusty-looking gruel, or with so much oil in it from a blown head gasket that it resembles a milk shake. The coolant looked absolutely fine. Note that when you’re sorting out a car to drive it long distances, it’s common to have to replace the radiator, water pump, thermostat, and every hose. Here, though, this wasn’t a cooling system sort-out. Instead, the goal was simply not to overheat the engine during a few minutes of running, for which a radiator full of clean coolant, an intact fan belt, and a freely-rotating fan are usually sufficient.
With the battery connected, the long-dead engine started fairly easily. Usually a cloud of blue smoke accompanies first starts, as the oil you’ve squirted into the cylinders burns off and the rings take a while to unstick from the grooves in the pistons, but there was almost a complete absence of oil fog out of the exhaust. When I put my hand in front of the tailpipe, I felt the presence of even, strong exhaust pulses. I idled it for about five minutes, at which point some oily crud began burning off the exhaust manifold. The video can be seen here.
With the engine warm, I pulled the plugs and did a quick compression test. I revealed reasonably even readings of about 150 psi, very respectable for a just-revived engine.
Well then.
All of this was eerily reminiscent of Old Blue, the decade-dead ’73 tii I bought and revived a few years back. Like this car, Old Blue looked like hell but had an engine whose valve train was surprisingly clean and held a reground performance cam. When I got Old Blue running and drivable, I was astonished to find that it was the fastest tii I’d ever driven. However, despite Old Blue’s distressed exterior appearance, it had good bones, with a remarkably solid undercarriage. In contrast, nothing about the health of this faux tii’s engine changed the fact that the car had so much floor and frame rail rot that it was almost definitely a parts car, or at least it was to me.
Still, I began wondering if, rather than sell it as a 2002-shaped container holding a running tii engine, I should try to drag it over the line to the point where it was driveable.
We shall see next week.—Rob Siegel
Rob’s new book, Just Needs a Recharge: The Hack MechanicTM Guide to Vintage Air Conditioning, is available here on Amazon. His previous book Ran When Parked is available here. Or you can order personally inscribed copies of all of his books through Rob’s website: www.robsiegel.com. His next book, Resurrecting Bertha: Buying Back Our Wedding Car After 26 Years In Storage, will be released in the fall.