Last week, I talked about how black oil and a bit of a valve train tick guilted me into giving Rene—the ’73 E9 3.0CSi coupe I’ve been blessed to own since 1986—some long-overdue R and R, which in this case meant repair and raintenance (writers can perform this sort of magic; don’t try it at home). But when I began to engage the valve adjustment, I was confronted with two issues. The first was that, in addition to all of the L-Jetronic injection stuff that overhung the valve cover and needed to be removed or swung out of the way, when I tried to lift the cover up, there didn’t seem to be enough clearance to remove it; it hit the underside of the throttle body, something I vaguely recalled from the last time I adjusted the valves, which was an embarrassingly long time ago. The second was that the usual 2002 method for rotating the engine (grabbing the fan blade) wasn’t possible, as the E9’s M30 engine has a fan clutch. In the past, I would’ve put the car in gear and rocked it, but these days doing so will instantly anger up my back. The other engine rotation solution it is to put a 36-mm socket directly on the crankshaft nut, but there wasn’t enough clearance between it and the radiator to fit the one I had.
Now, the engine in this car is a bit of a Frankstein’s monster. It’s an M30B32 motor that I happened into for a song in 1990. Although my car is a CSi that originally had D-Jetronic injection on it, the D-Jet had already been removed when I bought it and a pair of Weber 32/36s had been installed in its place. The low-mileage motor came to me with the original Motronics on it, but it came from a 533i that tumbled over a guardrail and took a swim in the Charles River, so even if I wanted to use the Motronics, that wouldn’t have been the smartest move unless I also wanted the electrical gremlins that likely came with the water immersion. So, I stripped the engine down, cleaned and re-sealed it, and slapped the Webers on it. But because Motronic cars don’t have a traditional mechanical-advance distributor (they instead have computer-controlled spark advance and a “distributor” cap and a rotor that sends the spark to each plug but doesn’t advance it), in order to use it with the Webers and the E9’s distributor, I needed to grind off the two prongs that originally spun the Motronic front-mounted rotor, install an adapter nut that mates to a conventional distributor drive gear, and use an older M30B30 front upper timing cover with the hole for the distributor to slide into.
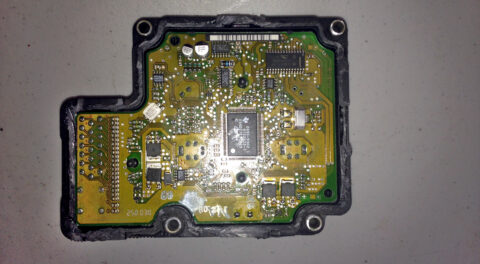
An example of the upper timing cover and its Motronic cap that distributes an already-advanced spark that, on my retrofitted engine, had to be replaced with one that could host a conventional distributor.
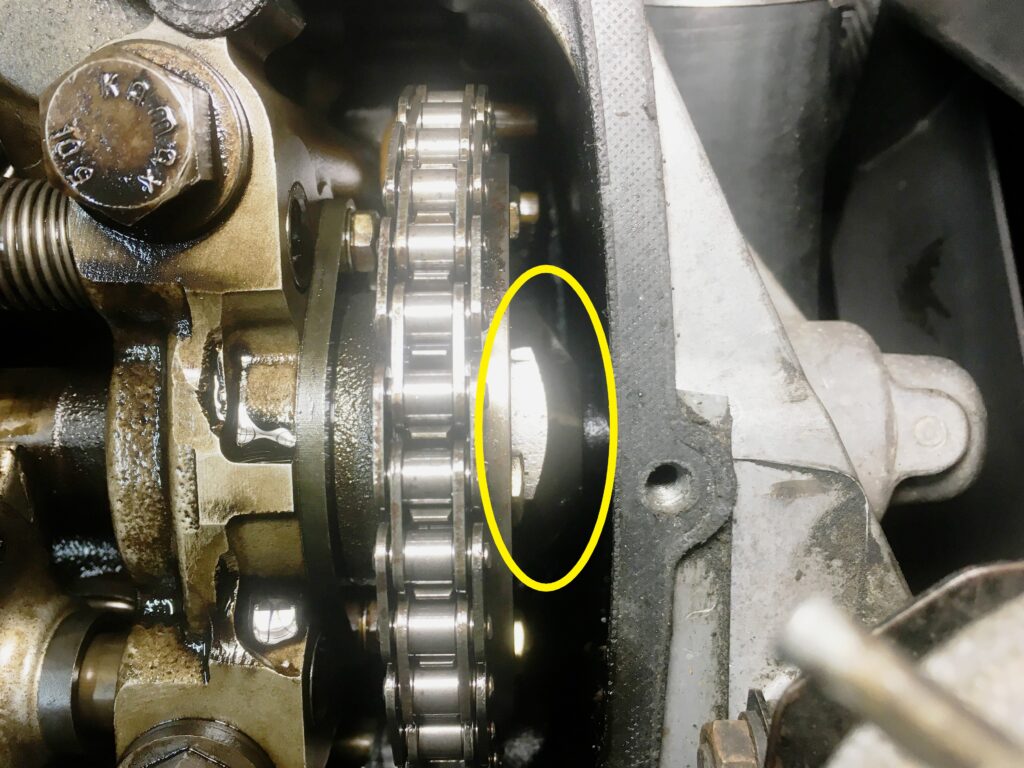
The adapter on the front of the cam in my car that allows it to have a formerly Motronic engine with a conventional distributor. The distributor can be seen at lower right.
I drove the car with this configuration of the de-Motronicized 533i engine and the Webers on it for about ten years. Then in 1999, my good friend Terry Sayther talked me into installing an L-Jetronic injection and electronic ignition setup from a 1980 E12 528i (he didn’t really need to twist my arm; I’d been floating trial balloons about re-injecting the car anyway). Terry sent me all the parts from a 528i, and between help from him and FirstFives.org guru Peter Florance, I got the L-Jet installed and running. It has required zero repairs or mods in the 23 years since.
But every once in a while I need to remind myself that this is neither a stock U.S. carbureted 3.0CS engine nor a stock Euro D-Jetronic 3.0CSi engine; it’s a Motronic 533i engine that I backdated for Webers and a conventional distributor, and that ten years later I retrofitted L-Jetronic injection onto—a system that was more modern than the car, but older than the engine.
Got all that?
When the E9’s valve cover couldn’t easily be removed, I remembered something. For a period of time around 1990 when the new engine still had the Webers on it, it was also wearing the Motronic valve cover, but I found that it didn’t fully seal and leaked oil in the front because the bolt holes for the non-Motronic and Motronic valve covers, upper timing covers, and gaskets are in two different places (the non-Motronic bolt hole is dead-center front; the Motronic one is offset slightly to one side). My recollection was that that forced me to put the original valve cover back on the engine, which was why when I wrote about having to move the E9’s original numbers-matching engine out of my mother’s garage before we sold the house, that engine had been sitting for decades with no valve cover on it.
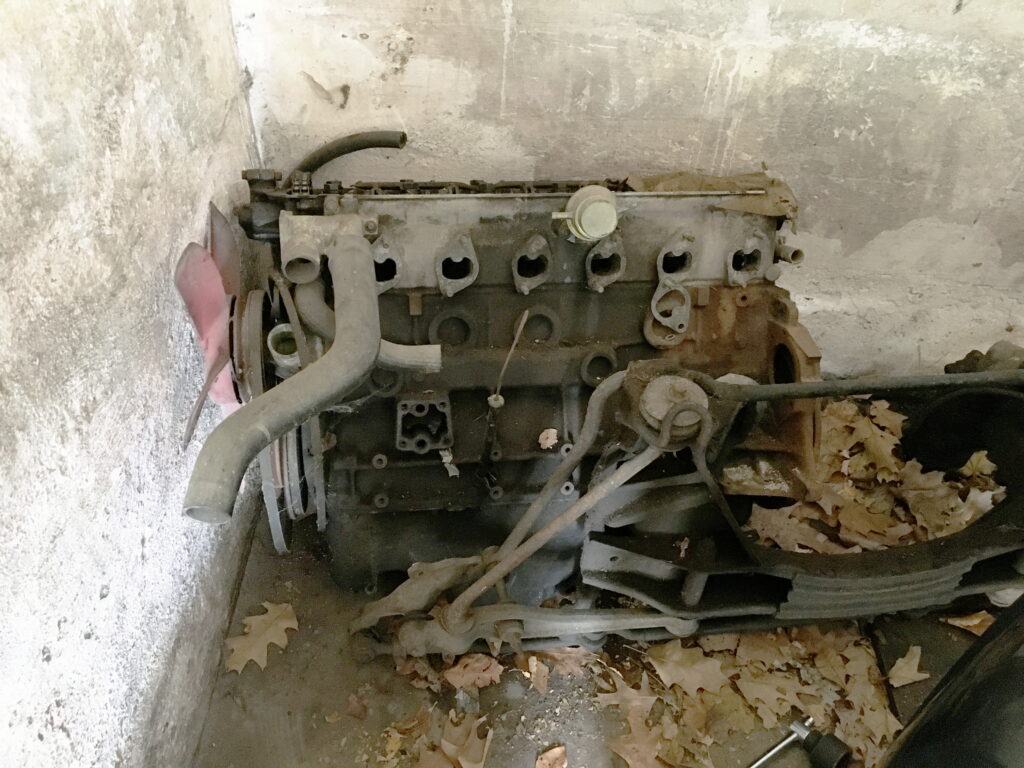
The original engine sitting uncovered like this for decades was my badge of shame.
As I later mentioned in a subsequent column, when I cleaned out my mother’s basement, I found an M30 valve cover, and covered up the motor, which is now sitting under a tarp at the end of my driveway.
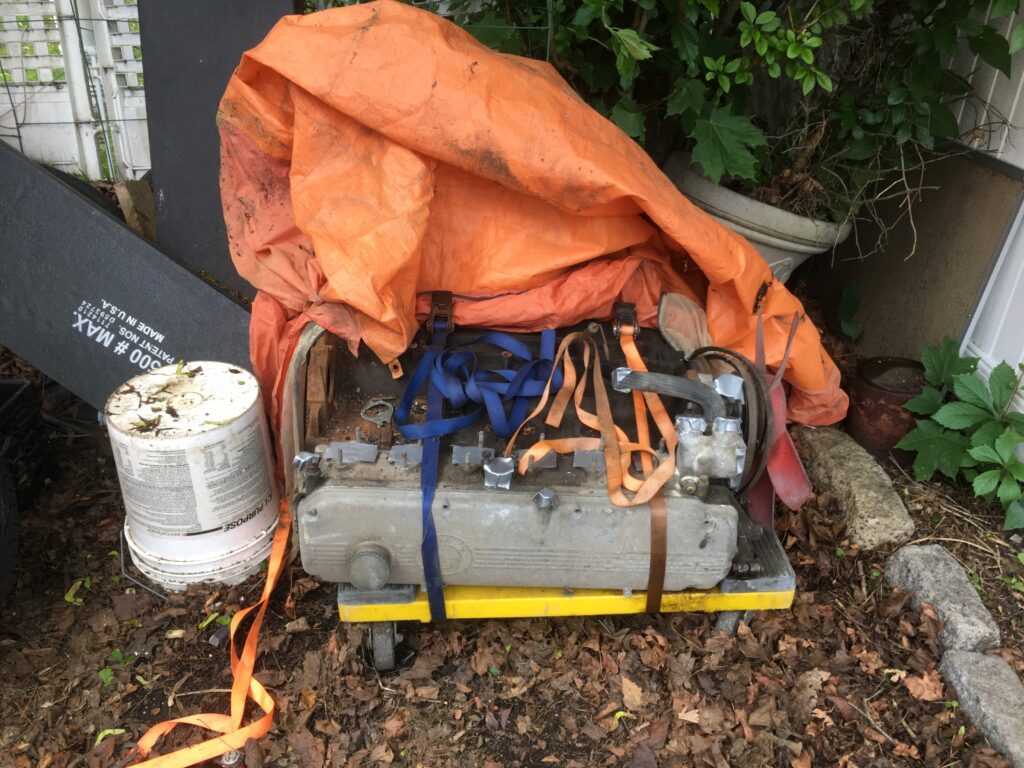
Better.
Take all that and park it for a moment (like the dead numbers-matching engine itself).
Because the valve cover was hitting the underside of the throttle body, I thought I’d just pull the throttle body off the intake manifold. It’s only held on by four 10-mm nuts and a few hoses. So, I did that, and to my amazement, I found that I couldn’t slide it off its studs because its bottom hit the valve cover. This was a very odd bit of a Catch-22. I couldn’t easily get the valve cover off because it hit the underside of the throttle body, but I also couldn’t get the throttle body off either because it hit the cover. Thinking back almost 25 years when I did the fuel injection retrofit, it would’ve made sense that to keep the dirt out of the valve train, I installed the valve cover first and then the entire intake manifold and throttle body, but not being able to remove the throttle body struck me as bizarre.
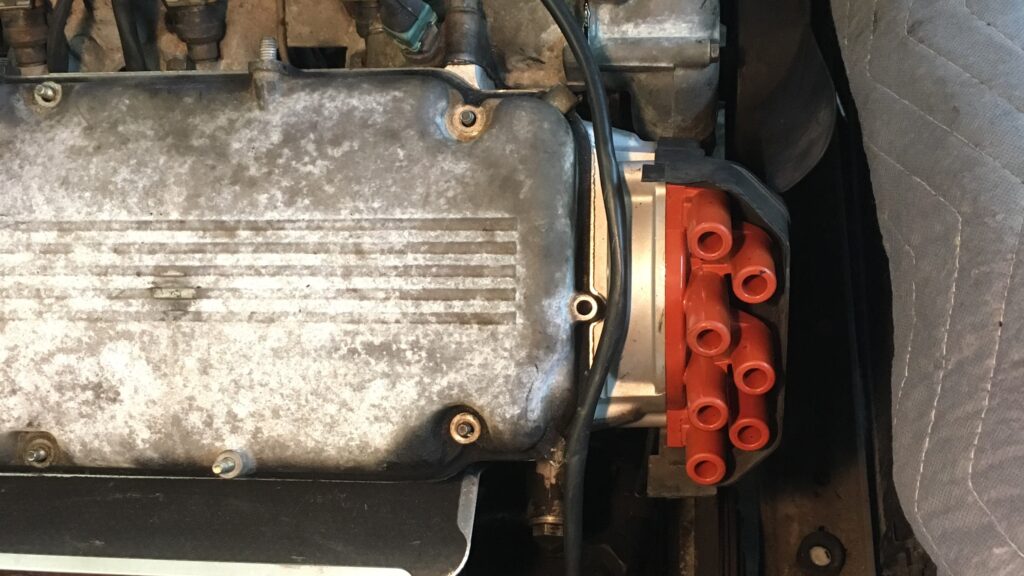
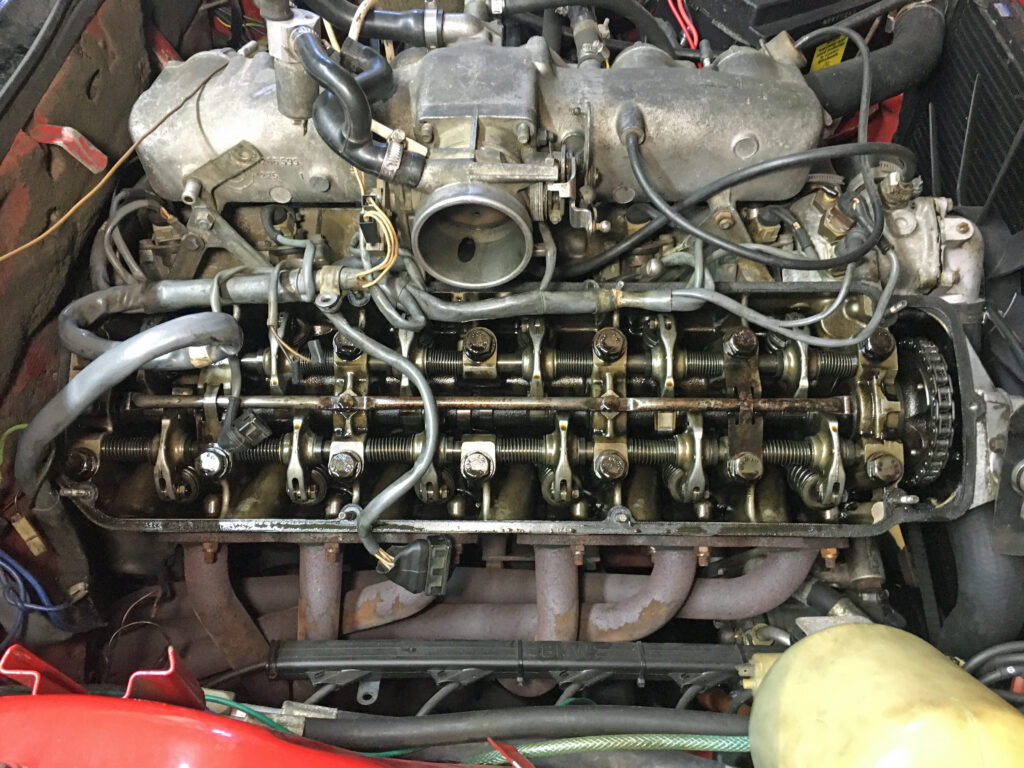
At this point the light bulb went on that the cause of both of these clearance issues might be that, because of all this valve-cover swapping, I had installed a valve cover that wasn’t meant to go with the L-Jetronic injection. However, that proved to be wrong, because if you look at the photo of the engine in the car below, it clearly shows that the auxiliary air valve is bolted directly to a flat mounting boss on the cover. So the valve cover that’s difficult to remove definitely goes with the L-Jet.
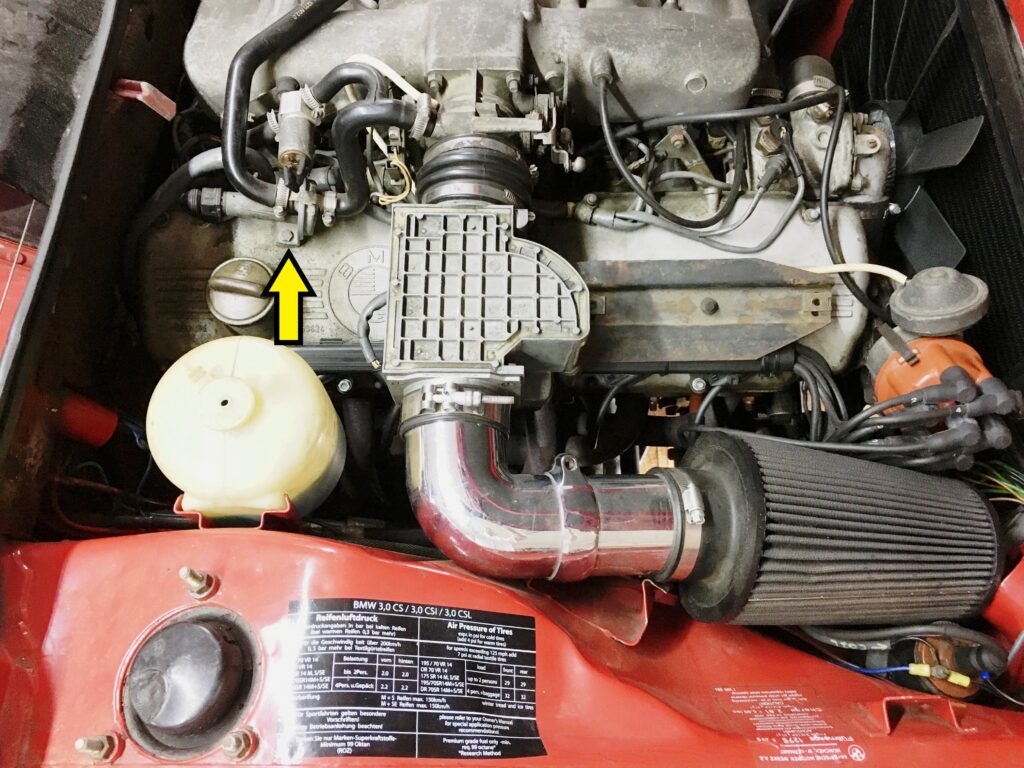
The mounting boss that shows that this is an L-Jet-specific valve cover.
The other thing that was odd was that when I tried lifting the valve cover up, the right front corner hit the body of the distributor. This also rang a bell from whenever the last time I adjusted the valves was.
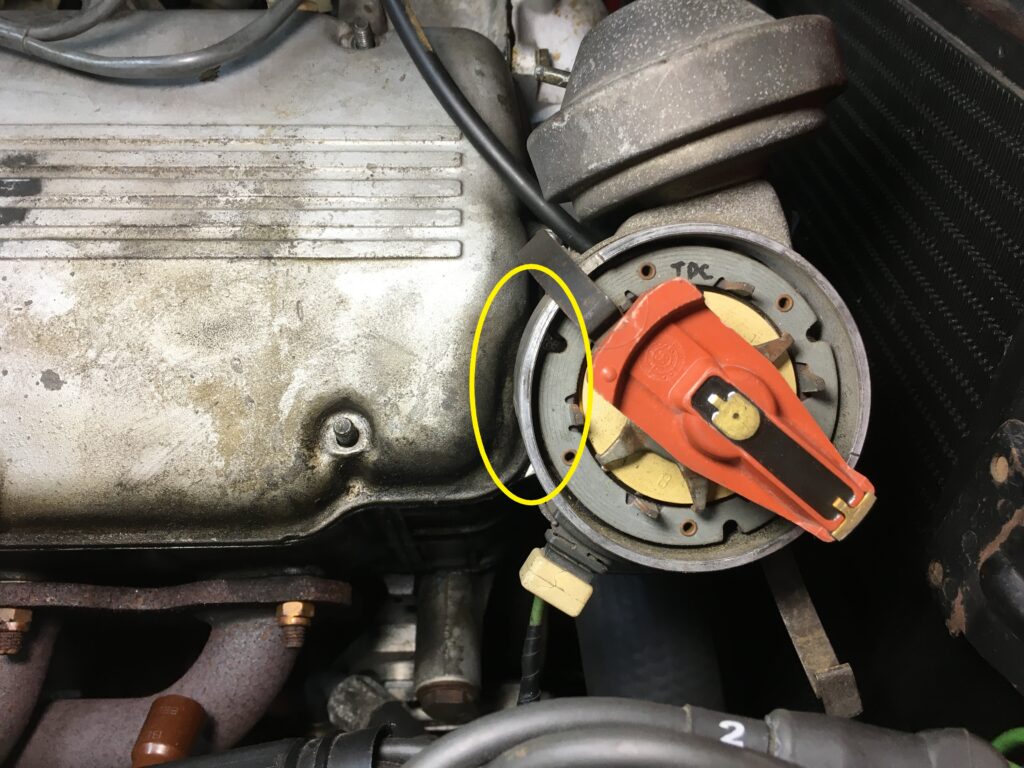
The yellow oval shows where the distributor body prevents the valve cover from being lifted up.
And this is where I happened into the second Catch-22. Normally, if I’m going to disturb an engine’s timing by lifting or removing the distributor, I’ll want to set the engine to Top Dead Center (TDC) first. While you can do that by looking at the timing mark on the crankshaft or flywheel, those are difficult to see on this car due to the retrofitted/Frankenstein nature of the engine. So normally I’d do it by looking at the cam lobes. But I couldn’t because the very reason I was in this odd corner was that I couldn’t easily lift the valve cover off.
Regarding the distributor overhang, I think this is just the way it is. I have several M30 distributors. Some have smaller bodies that likely clear the valve cover, but others—and not just the factory electronic-ignition ones like this one—have wide bodies. But the valve cover issue is odd. I contacted FirstFives’ Peter Florance for the first time in decades and asked him about the valve cover clearance issue, and he noted that my M30B32 head has studs that the valve cover has to be slid over, and wondered whether the D-Jet and L-Jet engines used bolts instead. Then I asked pro wrench Paul Wegweiser who owns a very original 3.0CSi as well as a Bavaria. He said that both have valve cover studs, and he thinks that all M30 engines do.
To make one more attempt of getting to the root of it, I lifted the tarp off the E9’s original D-Jet engine at the end of the driveway, and found that there are no valve cover studs on the head. Then again, the date code on the head is ’75, so it’s not original.
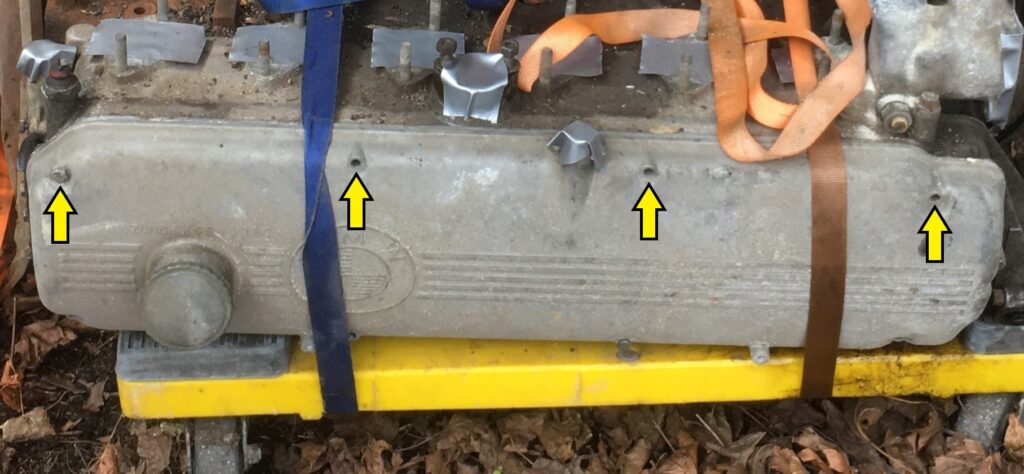
No studs here, but I’m not certain what it proves.
Needing to simply move forward, I cleaned the edges of the valve cover, wiped any dirt off overhanging sections of the wiring harness, and blew everything off with compressed air. Then I marked where the distributor was, lifted it up a few inches, then muscled the valve cover up and out of the way. It was tight, but by lifting the side closest to the passenger side fender higher, it tipped the side with the throttle body clearance issue lower, and out it came. As I did it, I remembered having to do it this way the last time—and perhaps the only time—I’d adjusted the valves. (In my defense, this is a car on which I’ve only put about 13,000 km—about 8,000 miles—since the injection went in.)
Finally!
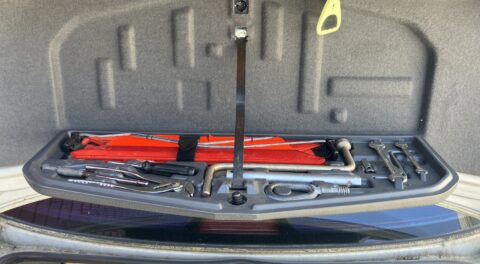
Regarding the issue of how to rotate the engine to adjust each pair of valves, at the end of last week’s piece I joyously posted this photo of a BMW special timing-chain-grabbing engine-turning tool that I knew I owned but hadn’t seen in years.
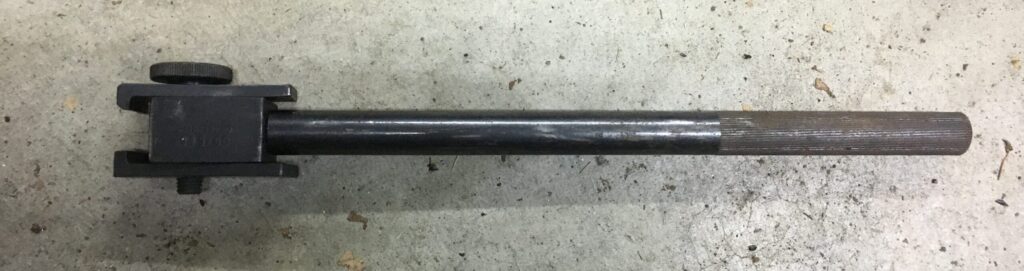
I was so glad to find my long-lost BMW tool 11 3 100.
Unfortunately, when I looked at the tool, I realized that it’s meant for double-row timing chains, which is what a 2002 M10 engine and an E3, E9, or E12 M30 engine would have. However, as you can see from the closeup of the adapter nut above, the Motronic engine that’s in my car has a single-row timing chain, and the tool is too wide to grab it. Fortunately I found a shorter 36-mm socket in the garage that gave me enough clearance to put it and a ratchet directly on the crankshaft.
And, with that, I was finally able to adjust the E9’s valves, which is what had kicked off this trip down the rabbit hole in the first place. All the exhaust valves were too tight (that is, they didn’t have enough clearance), and #4 intake was loose, which may have been the source of the audible ticking I heard. I wrote last week that I’d ordered a new valve cover gasket. I opened up the package and looked at it, looked at the head, and immediately saw that I’d mis-remembered which grave had been robbed to make Frankenstein’s monster and I had ordered an E28 533i gasket, not the older-style with the centered hole. D’oh!
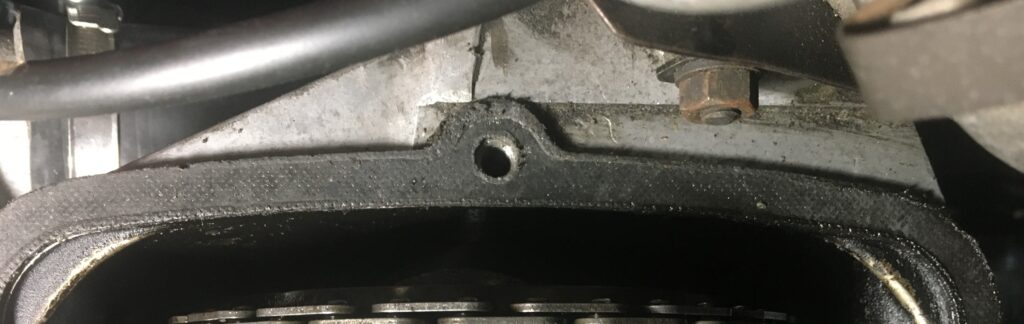
Centered hole in timing cover…
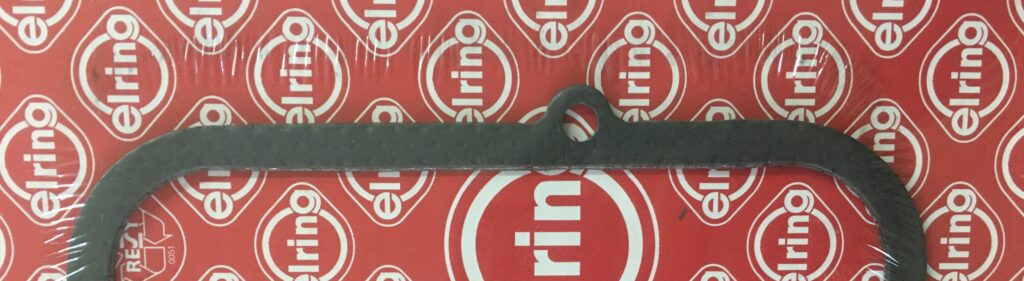
…and non-centered hole in gasket.
With the valves all adjusted, I could simply re-use the existing gasket, slide the valve cover back on the studs, tighten everything up, and call it done. But I think I’ll take this opportunity to see how difficult it is to unscrew the studs in the back and replace them with bolts, which would make it easier to do this next time, which I vow won’t be as long.
So, I may just let this little adventure run on to a 3rd part.
—Rob Siegel
____________________________________
Rob’s newest book, The Best of The Hack Mechanic, is available here on Amazon, as are his seven other books. Signed copies can be ordered directly from Rob here.