Last week, as part of my effort to transfer and modernize the Clardy a/c system that had been in my friend Jose’s totaled car into his newly purchased Pastellblau 2002, I finished installing the compressor and the parallel-flow condenser and fan. It was time to install the part that’s unique to the Clardy system—the evaporator assembly.
As I’ve written elsewhere, no 2002 had factory a/c. Instead, there were three dealer-installed systems—Behr, Frigiking, and Clardy. The Behr systems closely resemble the factory-installed systems that were in E9 coupes and Bavarias, and as such, to most people, look the most “factory.” The Frigiking systems look kind of aftermarket, but they’re conventional in that, like the Behr, the evaporator and fan are inside a housing that sits wholly on the transmission hump and under the dash. The Clardy is unique in that a honking-sized fan hangs out into the passenger footwell. Both the Clardy evap assembly and its console look a little weird, but that big fan moves a lot of air, so if you’re more concerned about cold than weird, you find the Clardy evap assembly (and its modern version, the one sold by ICE AC) intriguing.
Another essential detail about the Clardy evap assembly is that it has a modern aluminum block-style expansion valve rather than the weird little copper expansion valve that looks like it’s part of a toilet in a steampunk-themed bathroom. And, unlike the Behr system where the expansion valve is deep inside a plastic housing, on the Clardy it’s on the outside, meaning it can be replaced without removing and disassembling the evaporator assembly. In addition, the block-style expansion valve uses modern o-ring fittings, not the leak-and-crack-prone flare fittings of the other systems. These two things are huge plusses for the Clardy evap assembly.
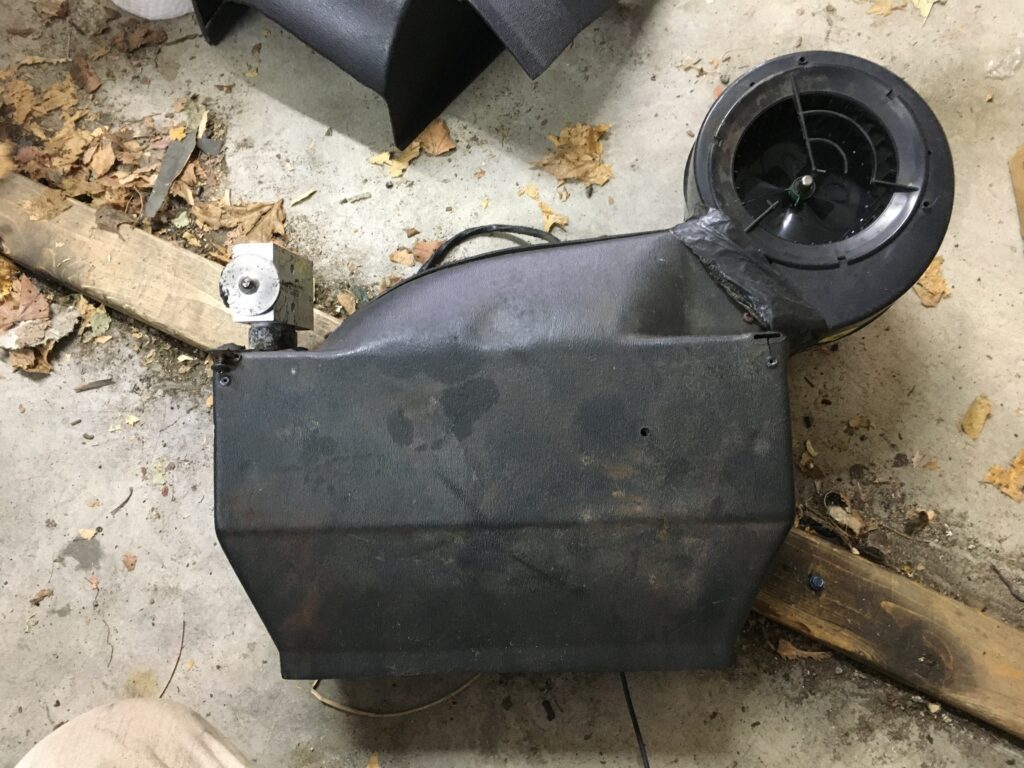
The Clardy evap assembly with its right-facing fan and left-facing external expansion valve.
However, there are a few things that make its installation a pain.
The first is that, unlike the other two systems that sit on the transmission hump, the Clardy evap assembly is suspended from the heater box by two little brackets which you need to screw into the corners of the heater box. So installation requires holding the assembly in place, marking the location of the holes in the brackets, drilling pilot holes for the screws (egads!), screwing them in (egads a second time!), and hoping the 50-year-old plastic doesn’t crack.
The other is that, since that big fan is on the right side of the evap assembly, the external expansion valve is on the left, so the hoses have to come through the firewall, go behind the evap assembly, and get attached to the left side. It’s a little awkward.
So I had at it. I removed the old expansion valve, flushed the core out, and installed a new valve with new o-rings. But in the process, I noticed that one of the little brackets was missing, and that the plastic section of the evap housing that originally held it was cracked.
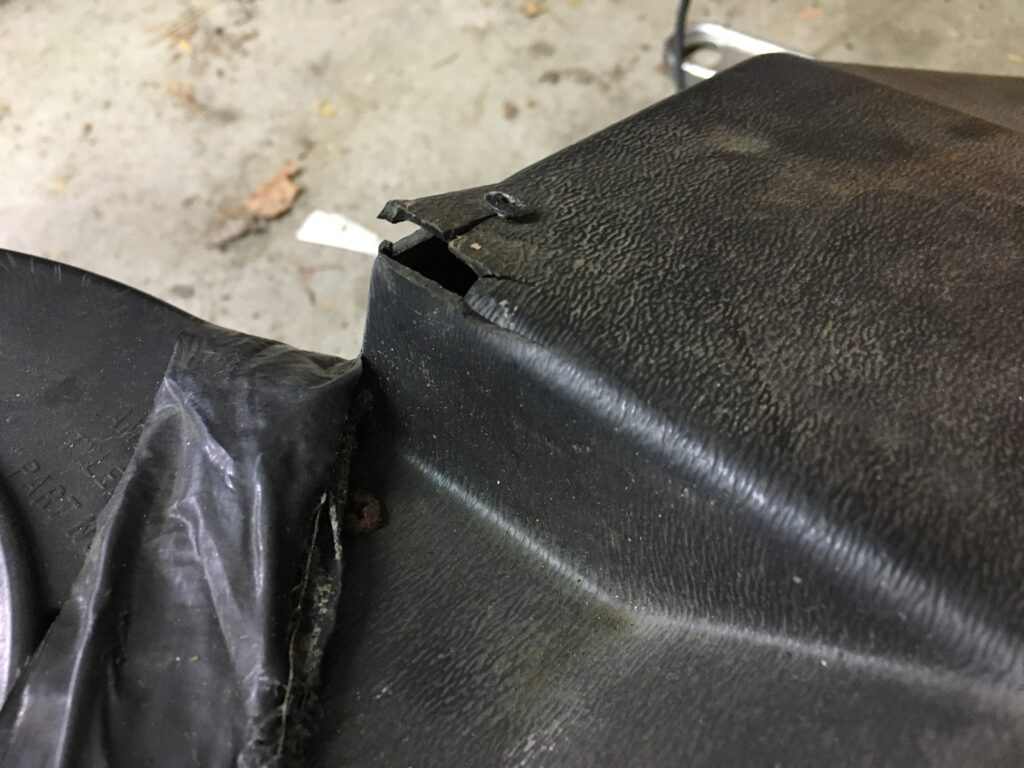
There’s supposed to be a little bracket there.
I fabricated a bracket and epoxied it in place, with a screw and a piece of Gorilla tape holding the crack in the plastic closed while the epoxy was curing.
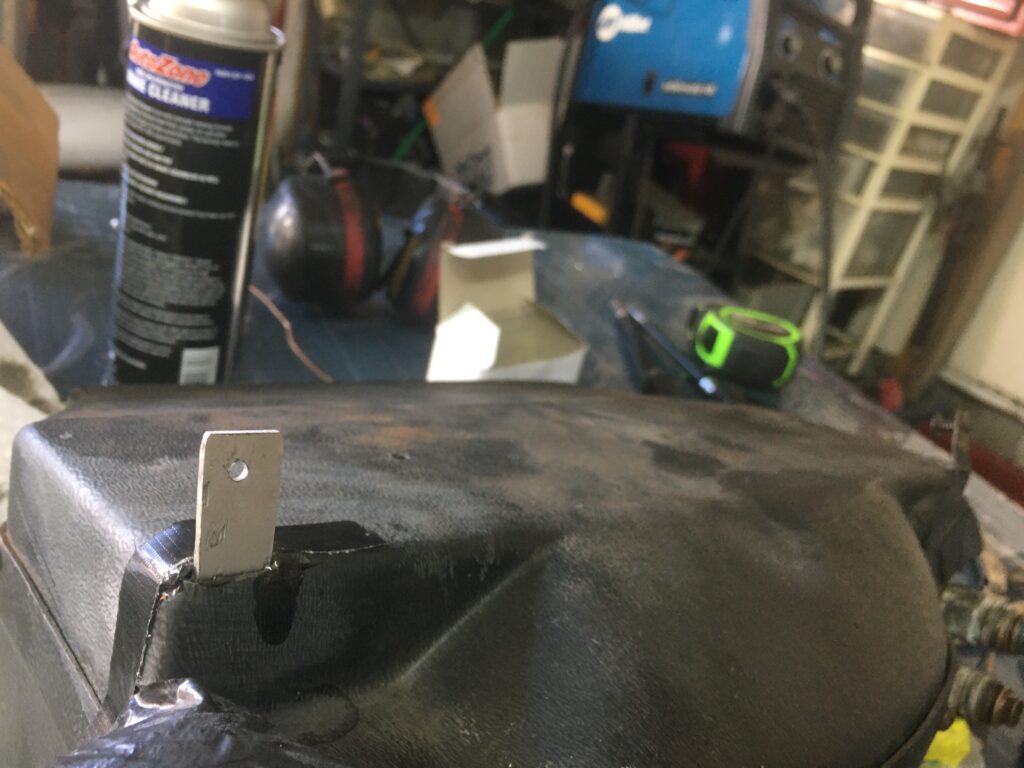
The existing bracket on the other side of the evap assembly can be seen in the background.
With both brackets in place, I fit the evap assembly into the car, marked and drilled the holes in the heater box to hold it, and screwed it in.
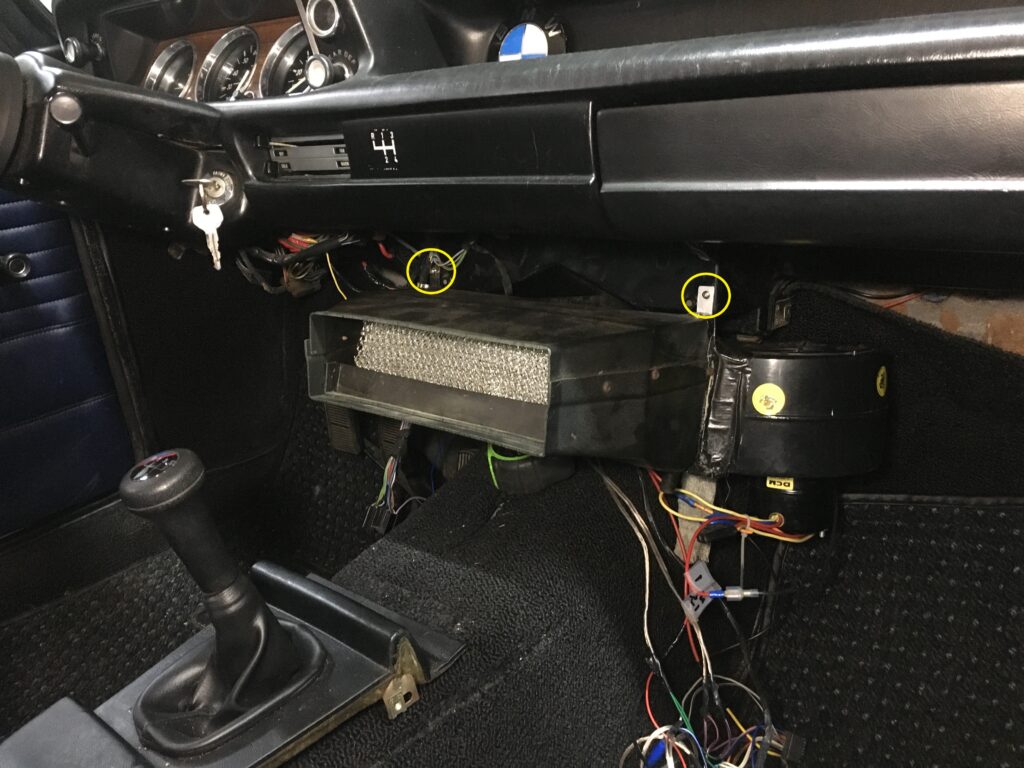
The yellow circles mark where it’s screwed into the corners of the heater box.
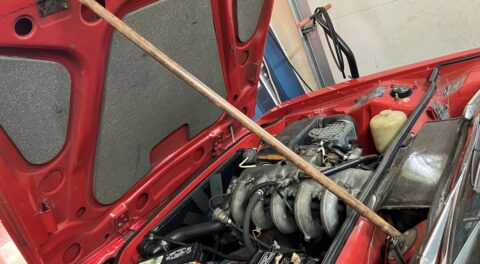
With the evap assembly, compressor, condenser, and receiver-drier installed, hose fabrication commenced. I go into great detail in my book Just Needs a Recharge on hose fabrication. There are only four hoses—compressor to condenser, condenser to drier, drier to evaporator (here, the expansion valve), evaporator (expansion valve) to compressor—but it takes a fair amount of time to get them right. As I mentioned last week, this car previously had a/c in it, so the holes were already punched in the firewall and the nose for the refrigerant hoses, but one of the nose holes was at the bottom, a location I’d never seen before. For the expansion valve, it was obvious that 90-degree fittings were needed, but for others, I tried straight fittings, 45s, and 90s, factored in things like the motion of the engine rocking on its mounts, and picked what worked best. An additional requirement was that Jose has a set of headers he’s eventually going to install in the car, so the drier needed to be mounted in the nose instead of against the passenger-side inner fender, and the hoses needed to be routed up high in the engine compartment rather than resting on the frame rail where they’d likely be close to the headers.
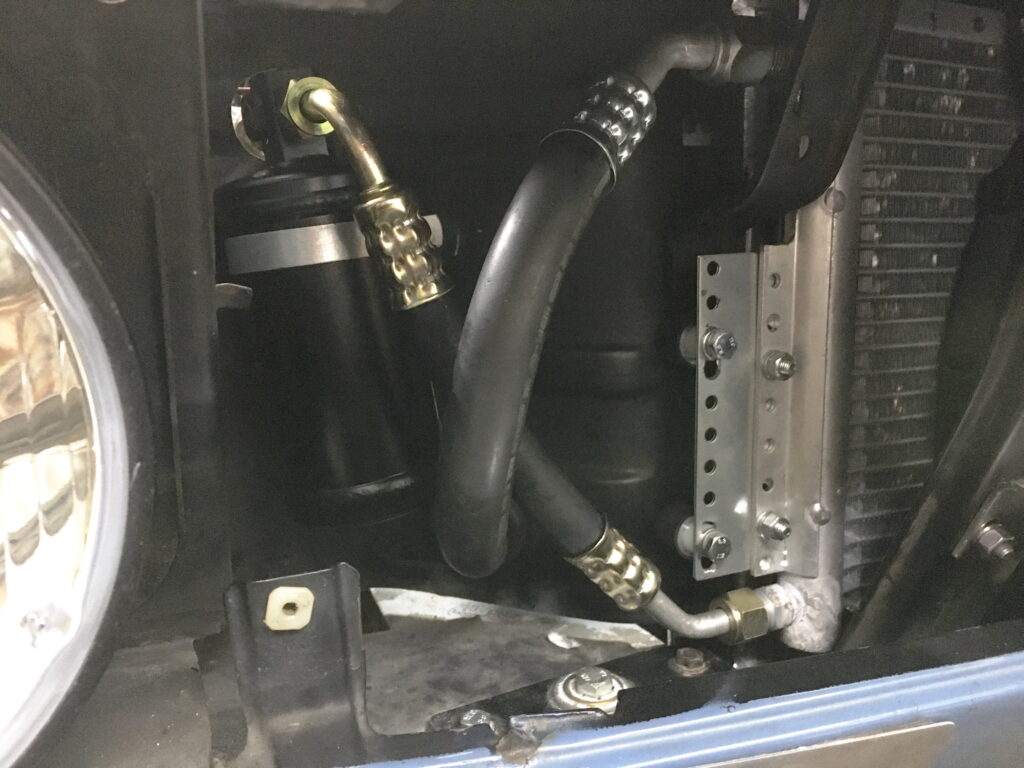
Given the unusual bottom location of one of the hose holes, this was a fairly clean installation.
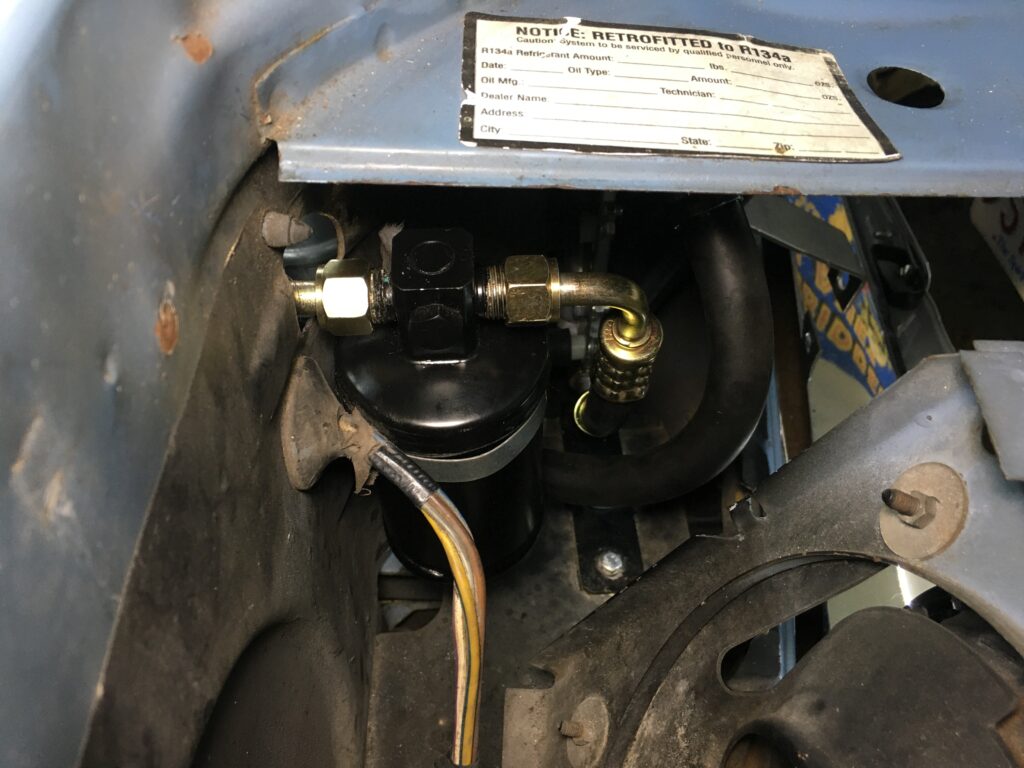
I’ve done this inside-the-nose drier mount several times. It works well.
I try whenever possible to use compressor fittings with integrated charging ports, but this car posed a challenge. It has an old Sanden compressor whose fittings are oriented in a V configuration instead of being parallel with each other. This precluded using the 90-degree charging fittings I’ve relied on before, as the discharge fitting hit the vertical extension of the frame rail that big-bumpered cars like this one have. I ordered a set of 45-degree charging fittings, but the suction fitting hit the compressor bracket. However, the combination of one 90 and one 45-degree fitting worked perfectly, something I wouldn’t have been able to tell unless I had both sets in my possession.
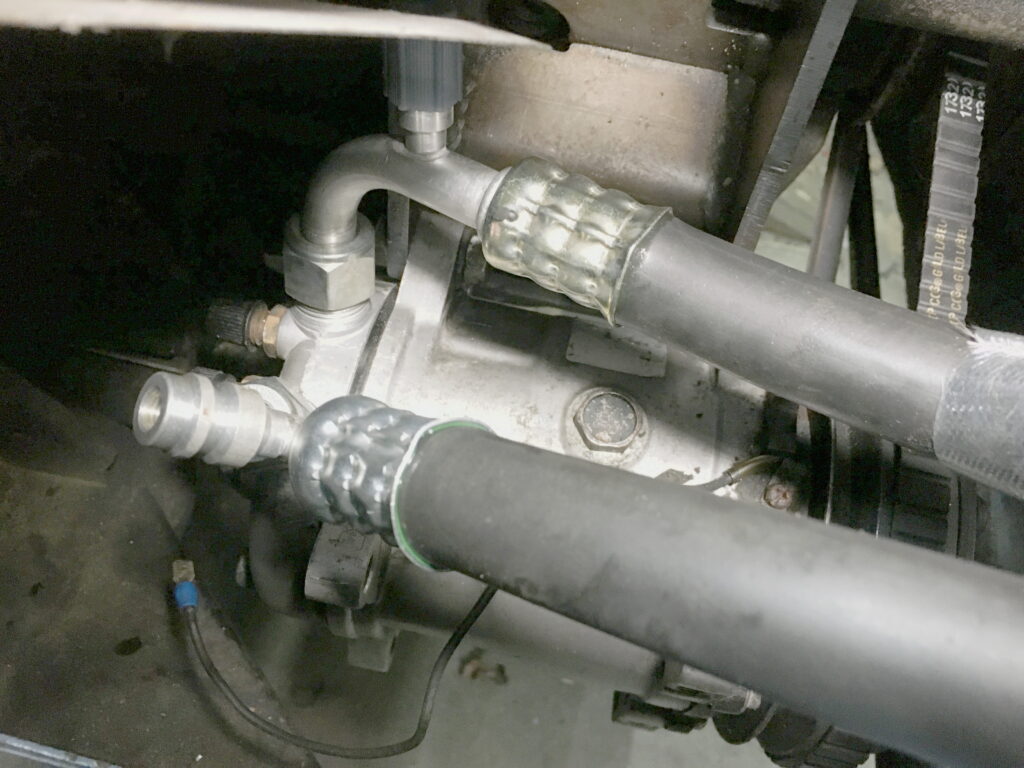
One 90 (top) and one 45 (bottom) compressor charging fittings. Who knew?
I had a little surprise when I tried to tighten everything up. I’d put everything together with o-ring fittings, and so, unlike flares, they don’t need to be tightened with a dying strain, and thus any amount of clearance is usually sufficient to get a wrench on a fitting and snug it down, but I’d somehow left myself no clear way to access the fitting at the bottom of the condenser. I joke that I own a set of crow foot wrenches (two sets, actually—metric and English) because the once every two years you need them, you’re glad that they’re in the drawer. This was one of those times.

The crow foot wrench for the win. And no, that crimp isn’t leaking dye. You use a little refrigerant oil to lubricate the fitting before crimping it, and some squeezed out.
I leak-tested the system by pressurizing it to 100 psi with nitrogen and leaving it overnight. When, in the morning, the needle hadn’t budged, I declared it leak-free. I then wrapped the expansion valve and the fittings connected to it in cork tape so moisture wouldn’t condense on them and drip inside the car. I also drilled the needed hole for the evaporator drain tube to allow the moisture that condenses on the evaporator core to drain out.
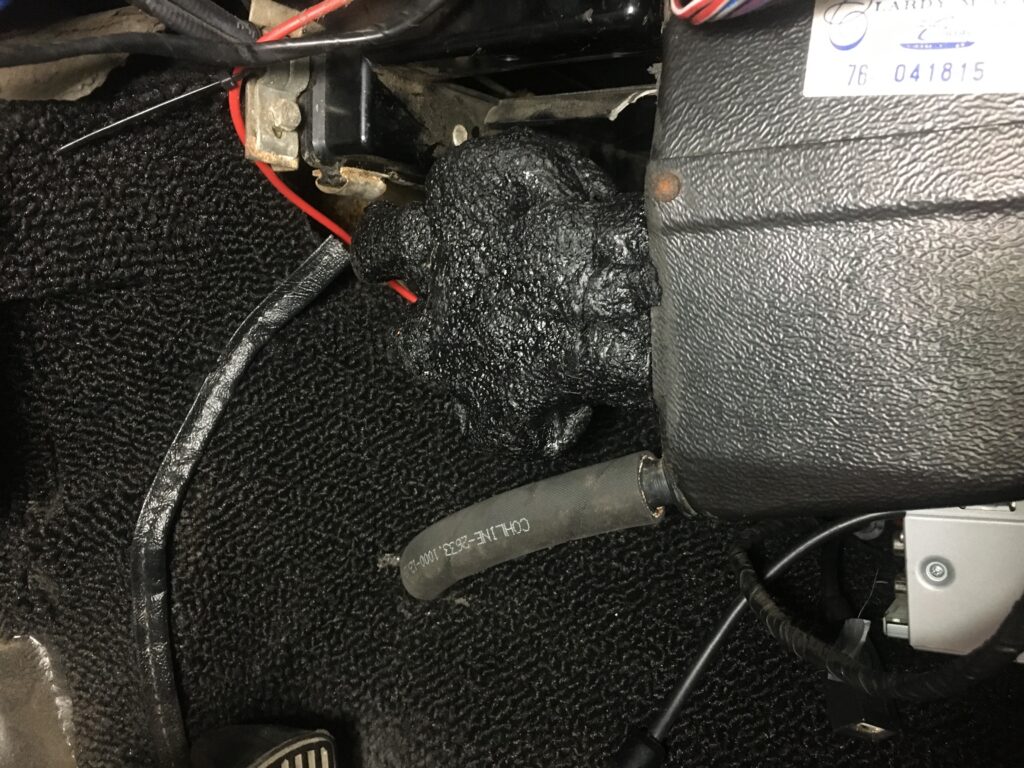
The wrapped-up expansion valve and its fittings are beneath the cork tape.
I used my vacuum pump to evacuate the system, temporarily connected the faceplate to allow the temperature and fan-speed controls to function, and began charging the system with R134a. To my surprise, the compressor didn’t come on. The culprit turned out to be the temperature control switch itself. It was easy to tell—I couldn’t hear it click shut no matter where the knob was turned, so 12 volts was entering the switch but never leaving. A multimeter set to measure resistance verified that continuity was never being established. Fortunately, the Ranco A10-6490 temperature control switch isn’t unique to the Clardy system—it’s a generic available part. By chance, I found a spare in my box of a/c stuff.
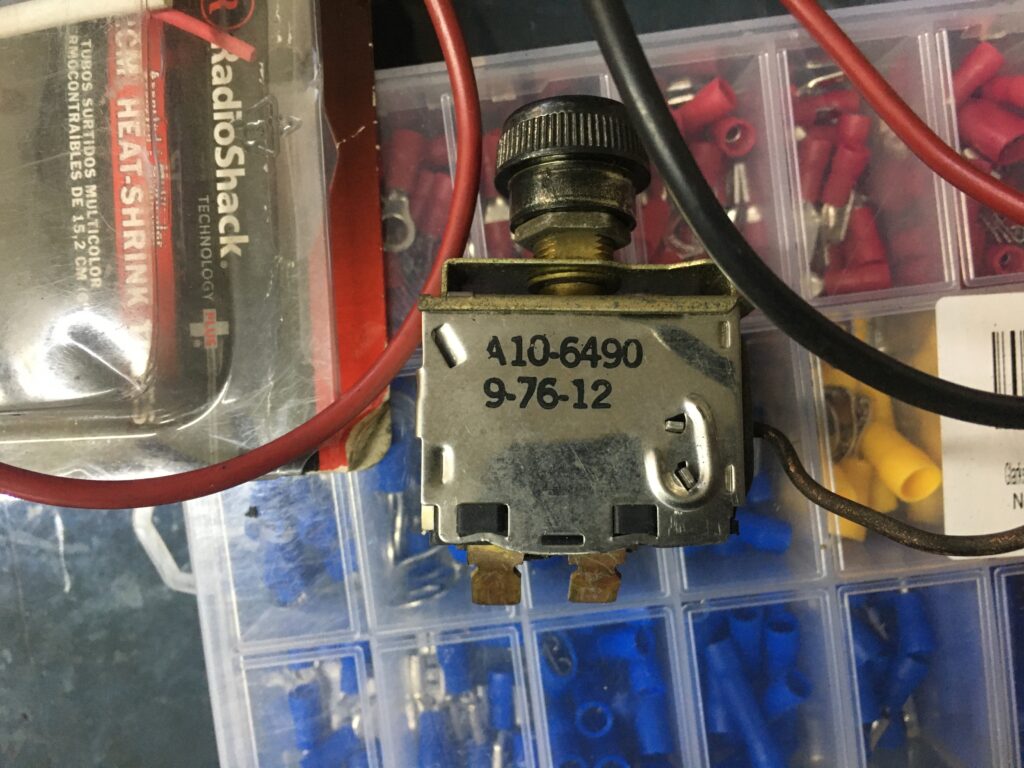
Gotcha.
With everything functional, I began charging the system. As I said at the start of this series, when I resurrected this Clardy system in Jose’s other car eight years ago, I was very impressed at the fact that it got nice and cold with just one can of R134a shot into it. Nowadays R134a comes in “California cans” that have an internal flap inside that self-seals them when disconnected. This is great in that it allows you to keep fractional cans around, but it takes forever to empty a can when charging. Nonetheless, when it was done, I was getting 20° vent temperatures. Of course, it was probably 55° in my garage, so that’s a bit misleading.
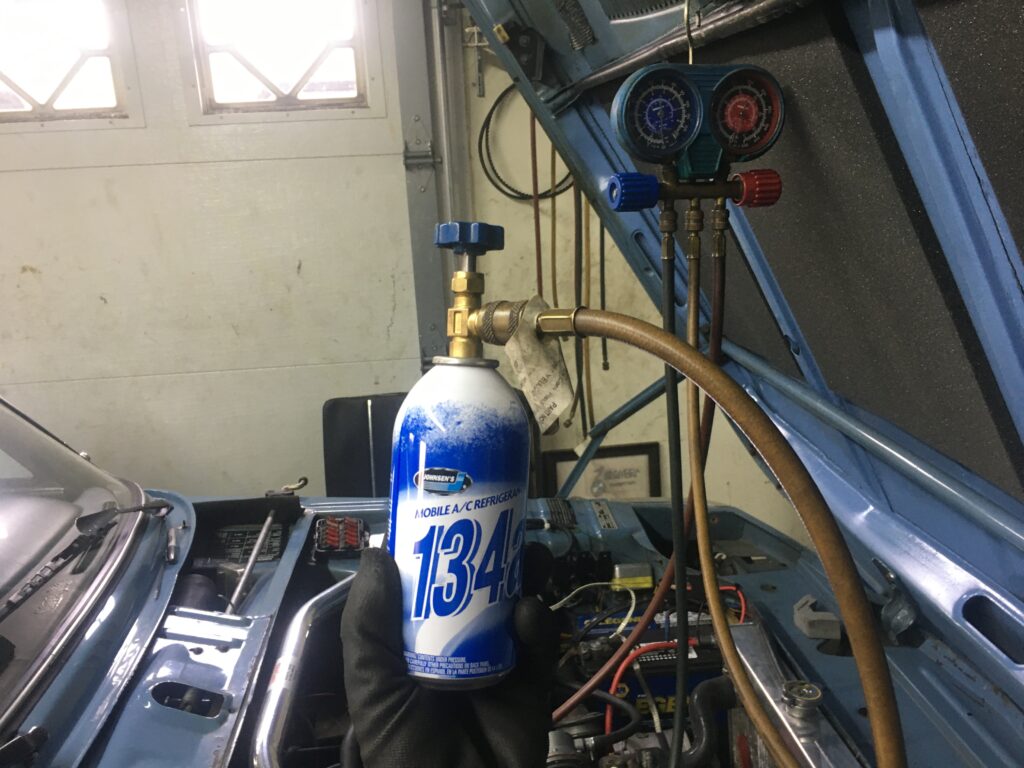
To quote Wilma Flintstone and Betty Rubble, “Chaaaaaaarge it!” (That doesn’t date me too much, does it?)
I had a minor surprise when I tried buttoning up the console. As I said, the hoses need to run through the firewall and behind the evap assembly to connect to the expansion valve on the left. I’d done this on my own 2002tii a few years ago, and found that it’s tight but do-able. On this car, I’d shoehorned the fatter of the two hoses into place, but left the smaller one lazily draped over the blower fan motor and forgot to properly position it. With the hose in that location, the side panel, which already sticks out pretty far, was like a tail alerion set to hard right.
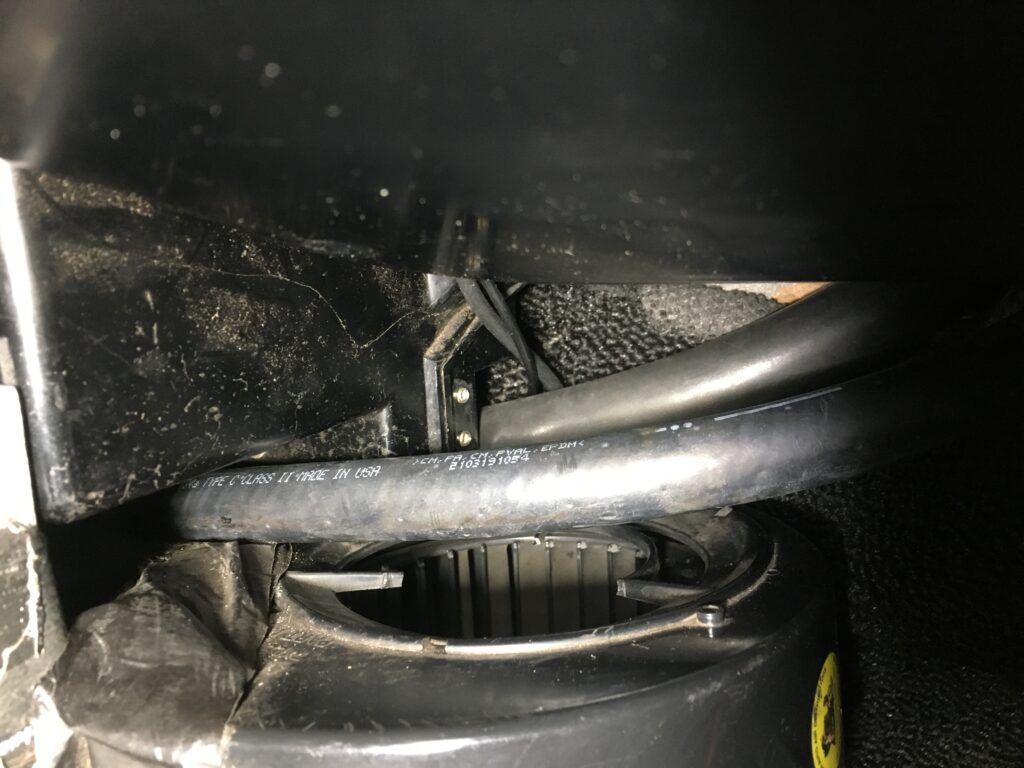
This was careless of me.
With some amount of cursing, prying, and shoving, I was able to get the errant hose behind the evap assembly, and the side-piece decently seated.
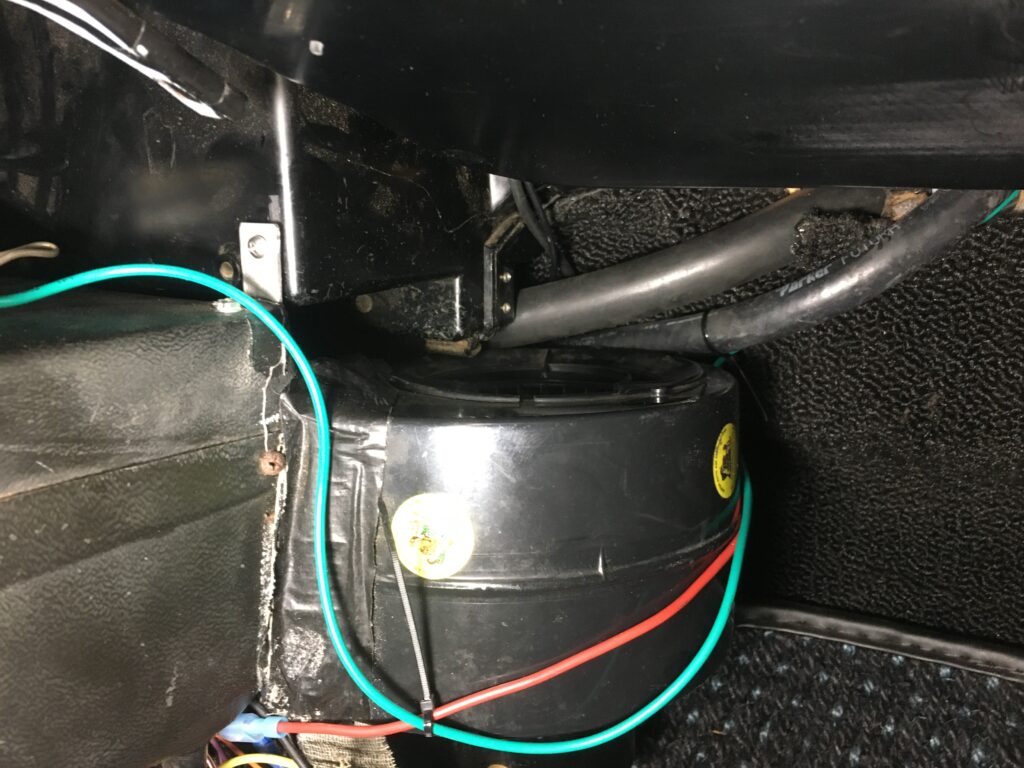
Much better.
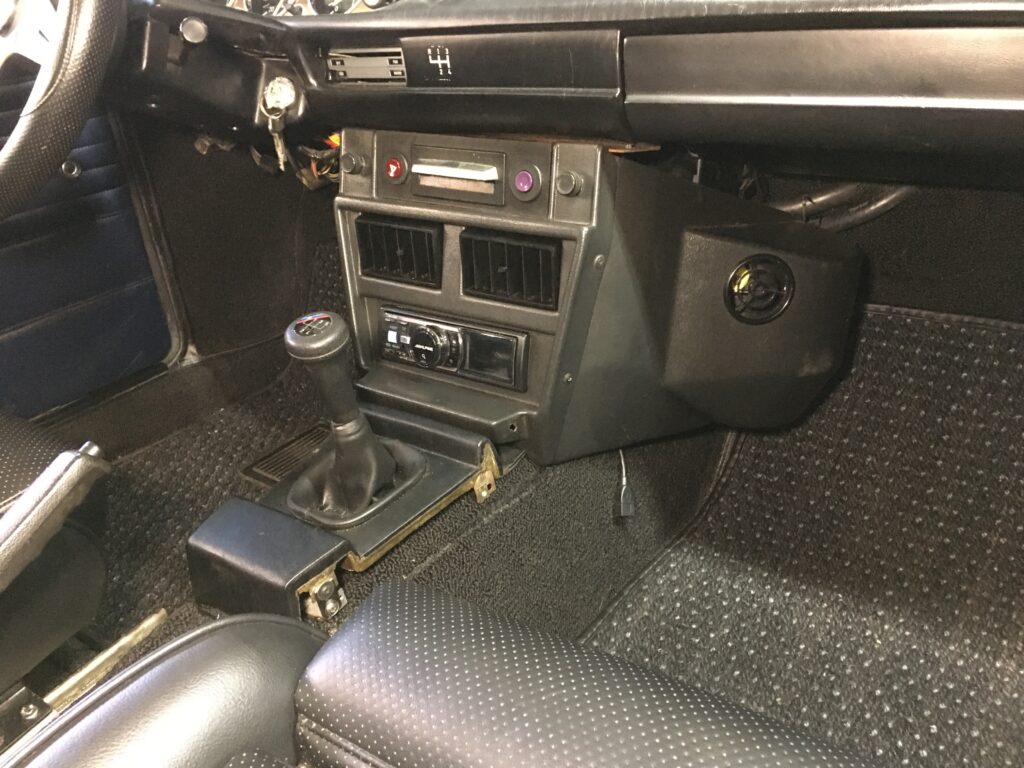
Not bad. The right-side console panel is as tight-in as it’s going to get. The faceplate is slightly crooked, a task for another day. And the Clardy-specific side pieces for the shift surround are currently AWOL.
Because of the potential installation of headers, before I crimped the ends onto the engine compartment hoses, I passed them through heat-resistant sleeves. With everything complete, I secured the hoses up high on the right inner fender with little screw-down zip tie mounts.

This was uncharacteristically tidy. I usually just let them dangle in my cars.
And with that, I drove the car out to Jose’s house in Worcester, returned it, and picked up my E9 which had been sojourning in his garage (it was the only way to make space for his car in my garage).

Everyone’s happy.
I’ve had questions regarding the level of effort required to retrofit a/c into a 2002. Since this was work for which I was being paid, I kept careful track of time. I worked on the project a bit at a time, every day for 17 days, and spent a total of 38 hours. While some of that was non-a/c-specific—I replaced a leaky elbow under the brake reservoir, tightened up a sloppy shifter, transferred over his Alpine head unit, tightened loose front wheel bearings, and corrected a few wiring faux pas—I didn’t need to spend time measuring and drilling holes in the firewall, so maybe those things are a wash. There’s no question that, if I had exactly the same car and was installing exactly the same components, there would be a time savings from knowing how the condenser would mount and what the hose fittings would need to be, but in the real world, every one of these installations has its own quirks. And no, I don’t routinely do this for other people. This was an exception.
The important thing is that Jose’s air-conditioned 2002 got wrecked, he wanted a cold car in which to drive to the Vintage in Asheville the week after next, and now he has one.
And now that it’s done, I can address an increasingly acute question—what am I going to be driving to the Vintage?
—Rob Siegel
____________________________________
Rob’s newest book, The Best of The Hack Mechanic, is available here on Amazon, as are his seven other books. Signed copies can be ordered directly from Rob here.