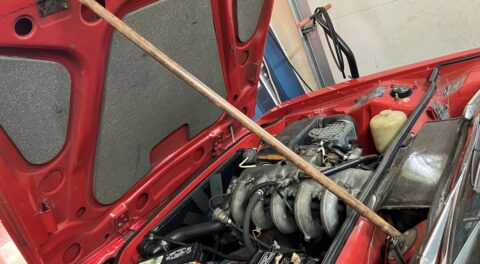
The time has come to get Hampton, the 48,000-mile ’73 2002 I bought last September, out of the garage to perform a cooling-system flush, test out the water-pump replacement, and decide how much else to do to it before I sell it. However, to do so, I need to start the car—and that has proved problematic.
When I bought the car after its decade-long stint in a barn on Long Island, it took a while to get it started. That’s not unusual, since the fuel system needs to be primed: Fuel needs to be drawn out of the tank through the gas lines, and fill up the float bowl in the carburetor. It typically takes a lot of cranking to start my Bavaria after it has sat for the winter. However, to get Hampton running after the purchase, I had to temporarily splice in an electric fuel pump.
This week I found that this problem had not gone away; I could not get gas into the float bowl. I thought that I’d troubleshoot it and fix it once and for all.
Most carbureted cars like the 2002, Bavaria, and 3.0CS have a mechanical diaphragm fuel pump that’s driven off the camshaft. The pump is mounted to the head; there’s a nylon spacer between the head and the fuel pump, and a little hole in the head for a pushrod to go through. As the cam spins, a lobe on the cam moves the pushrod forward and back, and the other end of the rod moves against a spring and a plunger at the base of the fuel pump. This moves the rubber diaphragm up and down, which creates the pumping action which in turn creates a vacuum in the fuel line on the input side of the pump, drawing gas out of the tank and pumping it into the float bowl in the carburetor. There’s also a little check valve inside that opens and closes with each pump so that the just-pumped gas doesn’t get pushed right back to the tank.
Several things can go wrong. If the rubber diaphragm splits, obviously the pump won’t work. The diaphragm in the pump also can dry out and lose its elasticity with age, pumping less and less fuel until it can’t keep up with the demands of the engine, and the float bowl runs dry. When this happens on a 2002, an E3, or an E9 and it strands you, one old trick is to unbolt the fuel pump, remove the nylon spacer, and shave it on the asphalt, removing some material to make the spacer slightly thinner, which effectively makes the stroke of the rod slightly longer, perhaps eking a bit more life out of the pump. Back in the day I and others routinely used this trick to save stranded 2002 owners.
When replacing the mechanical fuel pump on these cars, a common source of confusion is that there were early and late fuel pumps, and they used pump rods of different lengths. The early-style pump, originally used on 2002s with a single-barrel Solex carb, had a zinc-colored dome (no flange or screws) and was not rebuildable. It had a lever that was recessed into the base of the pump, and used a long 107-mm pushrod to reach it.
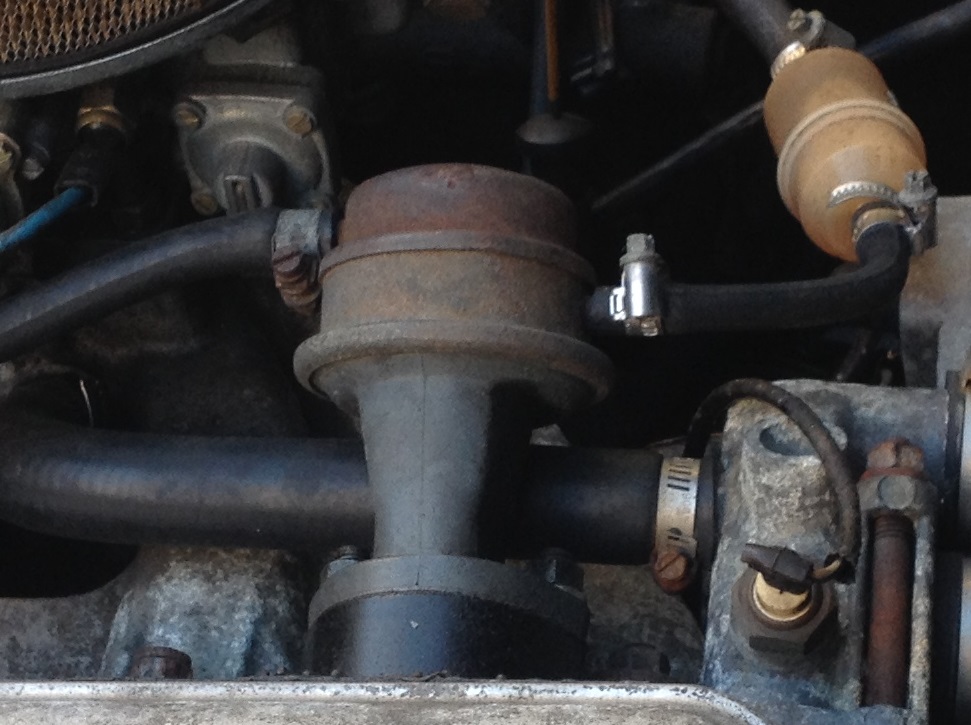
The earlier-style non-rebuildable fuel pump.
The later pumps, used on the ’72 and later cars with the two-barrel carb, had the dome held on by a flange and screws which could be removed to replace the diaphragm, and had a spring and plunger that protruded out past the base of the pump; it used the shorter 88-mm pushrod.
Over the years, both the early and late-style pumps have gone in and out of availability, so you’ll see early cars with late pumps and vice-versa all the time. As long as the pump and rod match, there’s no issue—but they won’t work if mismatched. The later pump couldn’t even be attached if a long rod was in place, but an early recessed-lever pump could bolt up to the nylon spacer with the short rod in the middle, and it wouldn’t work because the rod wouldn’t reach the lever.
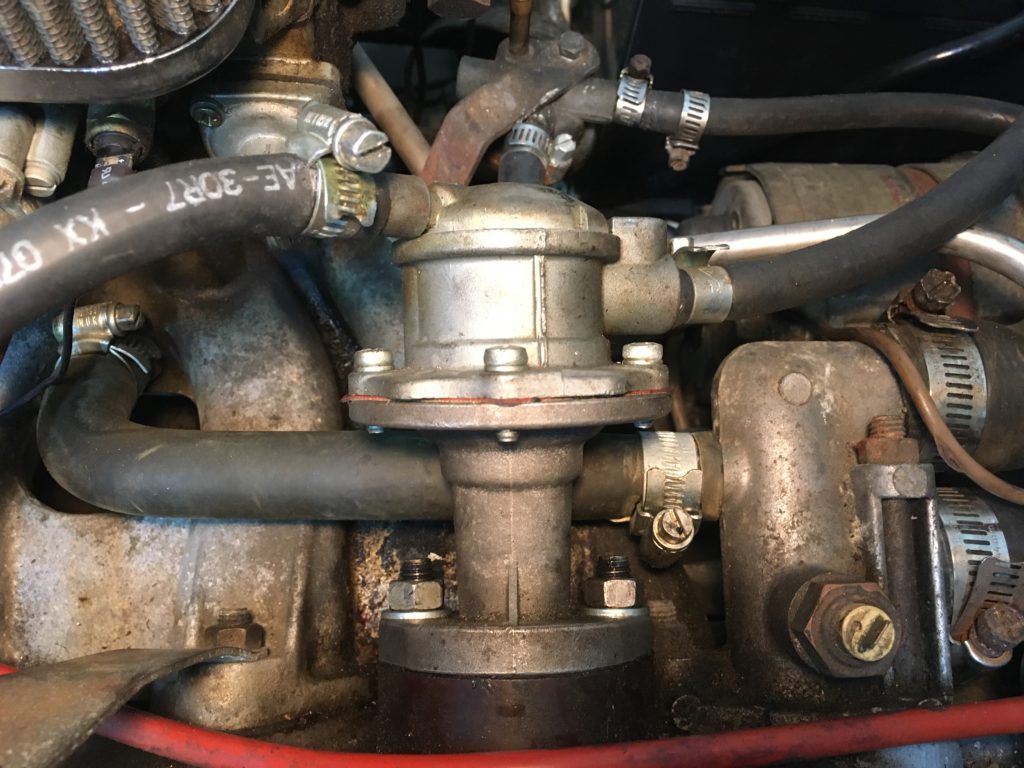
The later-style pump with the removable dome.
(Note that just because these later-style pumps are rebuildable doesn’t mean that they’re easy to rebuild. Posts on BMW2002faq.com mostly say that the Pierburg pump are similar to the ones used on VW Beetles, and thus that rebuild kits and information can be sought out in the Volkswagen world. However, posts I read on TheSamba.com highlighted problems in quality and compatibility of parts in pump rebuild kits.)
A common problem, particularly on cars that have been sitting for years—or decades—is that the old rubber fuel lines dry out and become porous. This is particularly common with the original short braided-cloth-covered fuel line in the trunk connecting the pick-up tube in the gas tank to the plastic or metal feed line. When this happens, the mechanical fuel pump sucks air through the side of the rubber line, which prevents it from establishing enough of a vacuum to draw gas out of the tank and up to the engine.
This appeared to be exactly the problem Hampton that was experiencing, since I blew through the fuel filter to make sure it wasn’t restricted, and found that the car would run once I primed the lines and carb with an electric pump. However, I replaced all of the fuel lines with fresh rubber, and the problem did not go away.
One way to deal with this is to permanently install a low-pressure electric fuel pump. This ’73 2002 still has its original emission controls, including the fuel return line and the excess pressure valve that plumbs it, so in theory I could even install an electric fuel pump without needing a pressure regulator. However, due to the low mileage and originality of the car, that’s out of the question.
I had another Pierburg mechanical fuel pump in the garage, so I swapped pumps—and it made no difference. Of course, I laughed to myself when I realized that the just-swapped fuel pump was probably only kicking around the garage because I’d pulled it out of another car because it was dead. So I went back to basics and did what I did with the Lotus when I resurrected that car after it had sat for 40 years: I tested the mechanical fuel pump directly to see if it moved gas.
It’s not hard to do.
The first thing to do is remove the fuel pump from the car and move the lever manually. If it’s an old-style pump with a recessed lever, you probably need something like a non-marring wooden or plastic dowel to reach it. If it’s the newer protruding spring-and-plunger type, you can hold the fuel pump in your hand and push the plunger down onto a piece of wood. You should clearly hear the pumping action of the diaphragm sounding vaguely like if you inhale and exhale short and sharp with your lips pursed together. If you don’t hear this, the diaphragm is probably shot. The pump I’d just swapped in made no sound at all, but the original one sounded fine.
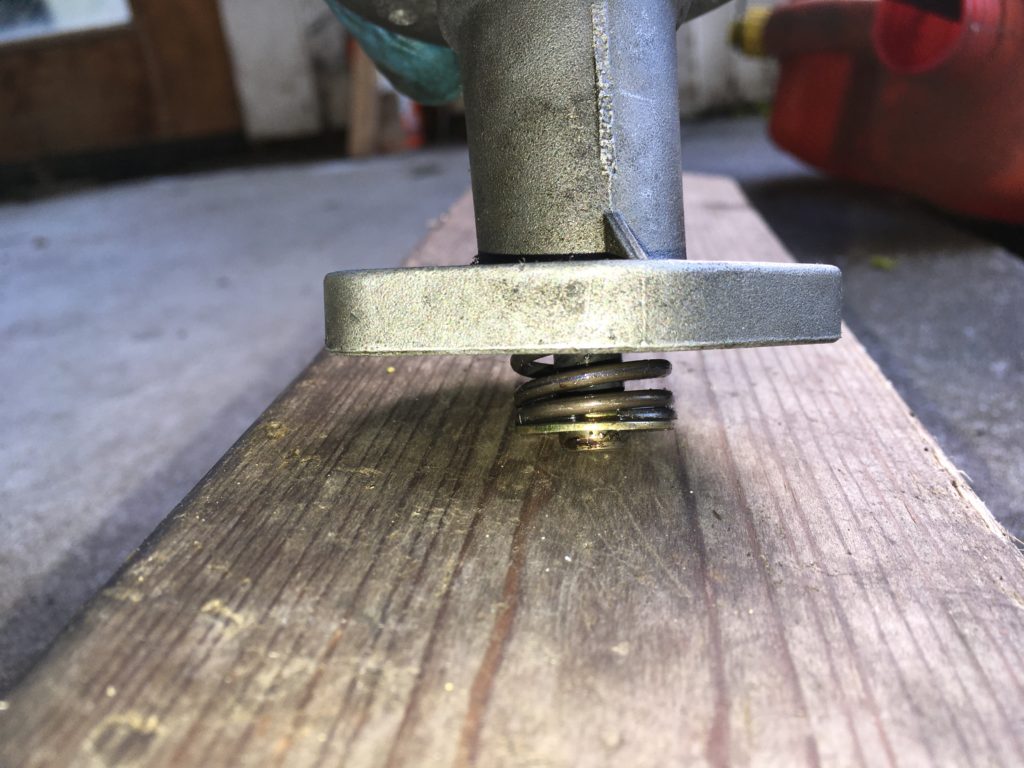
Preparing to push the fuel pump down on a block of wood to move the spring and plunger.
Next, put fingers over both the inlet and outlet ports of the pump while moving the lever. You should feel suction on the inlet side, and some amount of pressure on the outlet side. If you hear the diaphragm but don’t feel pumping action, the check valve could be bad or the pump could be clogged.
Next, take two lengths of rubber fuel line, put them on the pump, and actually use the pump to suck fluid while you work the lever or spring that moves the diaphragm. If you like, you can do this with water, but I use gas, as it eliminates the concern about getting water into the float bowl once you reinstall the pump. Put some fuel in a small can or bottle, put the inlet hose in it, put the outlet hose in another bottle, and work the diaphragm (in my case, I worked the pump down and back up on a block of wood). If the rubber lines are short, it should quickly draw fuel in and spit it from the output line. If it does, the pump itself is probably okay.
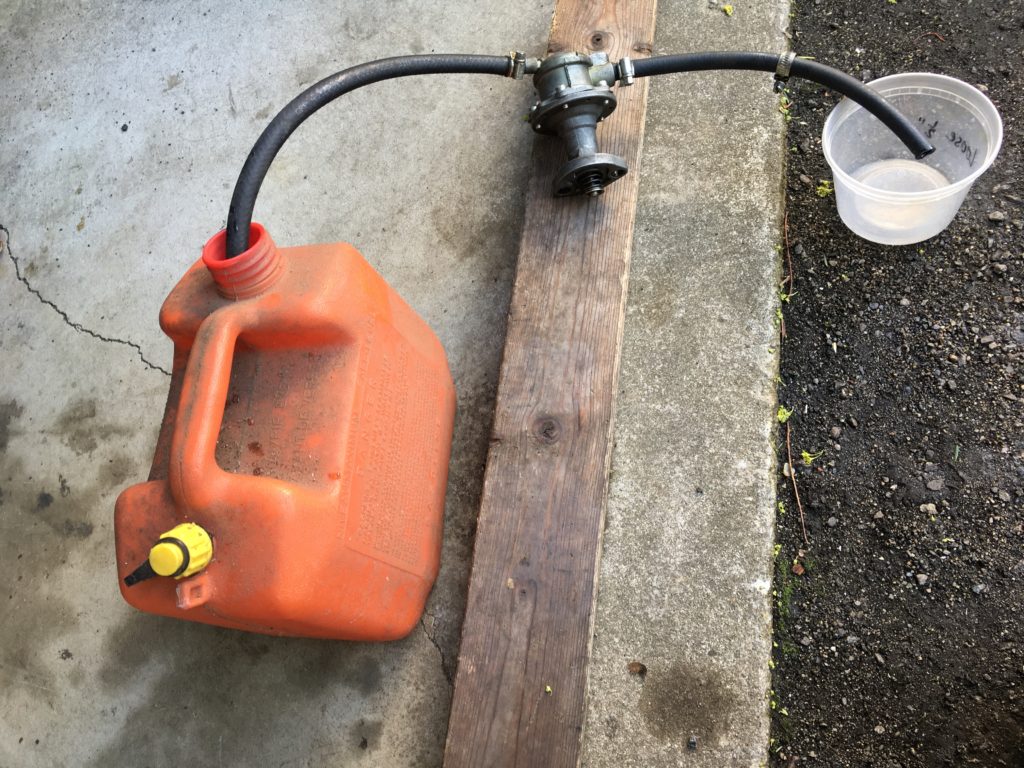
My standalone test setup to see if the pump moves gas.
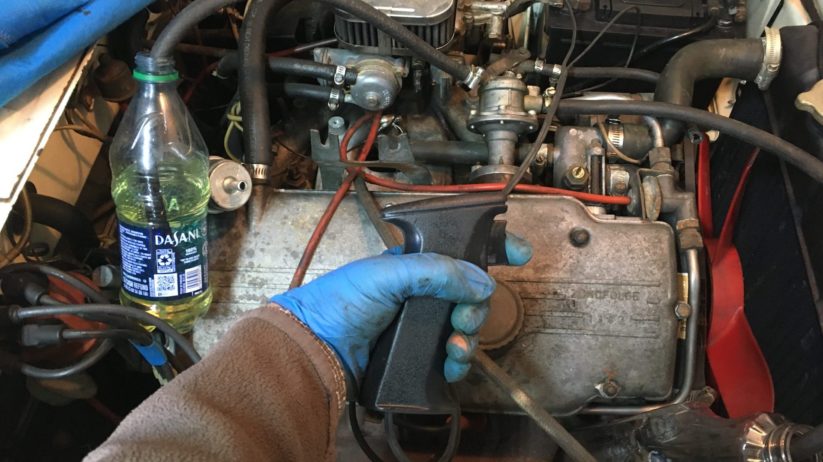
Next, repeat this test with the fuel pump re-installed on the engine. That is, reattach the pump to the head, but feed it from a gas can using a short piece of hose, and collect its output in a bottle. In doing this, you’re introducing the variable of the pump’s being driven off the engine. It’s easiest and safest if you connect a remote-start switch to the starter so you can hold the feed bottle and hose in place while pulling the trigger. I also removed the spark plugs so that the starter could spin quickly for this test. Have a fire extinguisher handy, as you should whenever you’re dealing with gas around electricity.
If the fuel pump squirted gas in the previous test (while out of the car) but doesn’t do so now, it is probably due to the nylon spacer and/or fuel-pump rod. If the pump had previously been working on the car, it can’t be that the rod is the wrong length. (I suppose it’s also possible for the rod itself or the cam lobe it runs on to have worn down, but that would be grabbing at straws.)
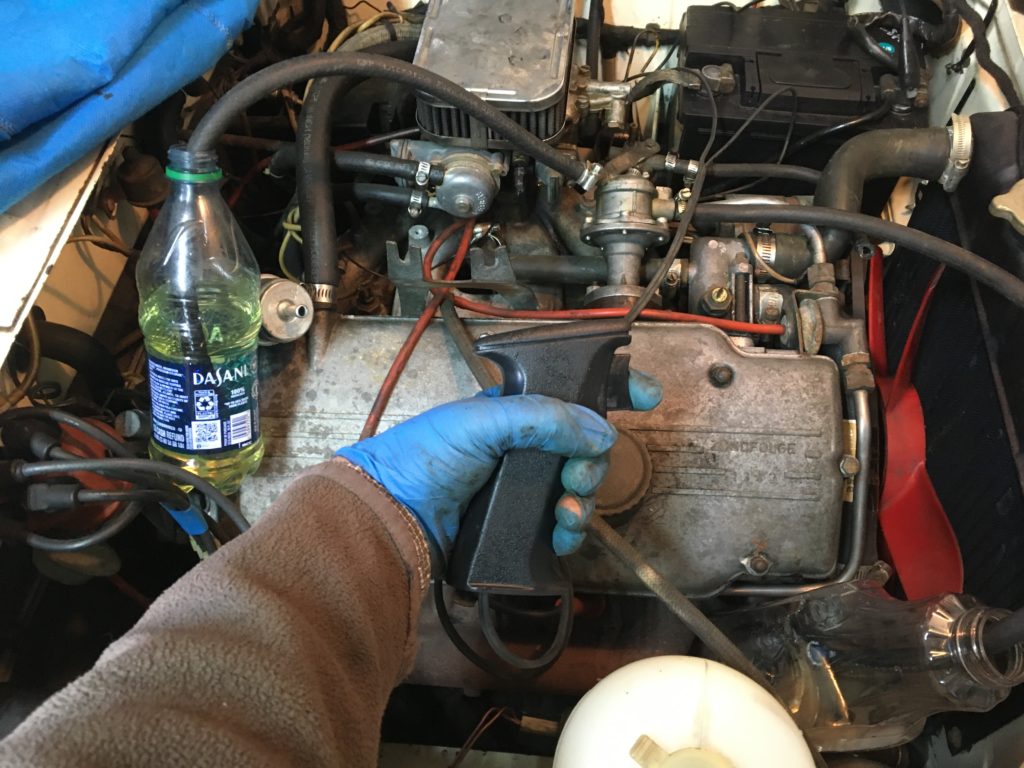
The in-car test setup: You can see the metal fuel filter disconnected from the inlet side of the pump sitting to the right of the bottle.
I tried this, and it still pumped fine. Hmm.
Next, you begin reintroducing the rest of the car’s fuel plumbing. Keep in mind that if the needle valve in the carburetor’s float bowl is stuck shut, the fuel pump may not be able to pump against it, so it’s important to test with the pump’s output redirected into a container. I reconnected the fuel line that runs from the gas tank through the firewall to the fuel filter and then to the pump inlet, and retested: Still no pumping, just as before. I re-tightened all the clamps on the gas lines, both in the trunk and in the engine compartment. No difference.
The fuel filter currently in the car is a metal one. At times like this, it’s nice to have one of the clear or translucent plastic ones, since you can see when gas is drawn into it. Unfortunately, I didn’t have one. I removed the hoses and the metal fuel filter, and connected a new section of rubber fuel line from the plastic line coming through the firewall directly to the inlet of the fuel pump, tightened the hose clamps, and spun the starter.
Fuel. What the—?!
I reconnected the filter back on the inlet side and cranked. No fuel. Gotcha!
I blew through the metal-canister filter again to verify that it wasn’t in the least clogged. Initially, I thought that it must have a pinhole leak in it that was drawing in air. Obviously, I wasn’t going to suck through it, but I held my finger on the output side while I blew, and felt no leak. So what was going on?
I still hadn’t fully figured it out when I began writing this piece. I wanted to include photos of both the old and new-style fuel pumps. I found the photo of the old-style pump in a folder of pics of a long-sold car. I noticed that the photo showed a plastic fuel filter on the output side of the fuel pump. Having just worked on Hampton, a very original car, where the filter was on the input side of the pump, I knew that the plastic filter must be in the wrong place and almost cropped it out of the photo.
Then I realized that I wasn’t in fact sure where the filter should go. After all, I’ve had mostly tii’s, not carbureted 2002s, the past ten years. I did some reading on BMW2002faq.com and learned three things:
- No carbureted 2002 originally had a factory fuel filter. I was skeptical, but I looked on realoem.com for a ’73 2002, and what it lists for “fuel filter” is the fuel screen inside the fuel pump. I called Paul Wegweiser at Maximillian Importing Company (BMW Mobile Tradition), and he verifies that this is true: They originally had no external fuel filter.
- One school of thought is that if you have a fuel filter, it should be on the input side of the fuel pump—between the pump and the firewall—because it protects the fuel pump from rust from the gas tank, and if the filter leaks, it’s better for it to leak there, where the leak will make it suck air and thus stop pumping, than to have it on the pressurized pump output side where it will just continue to spill fuel.
- On the other hand, if the filter is on the input side, it creates a large cavity of air that isn’t supposed to be there, and may be difficult to prime out.
That last bit was obviously of piqued my attention. I searched further and read two posts that interested me greatly. The first was from FAQ poster JimK, who wrote, “Having a pumping-systems engineering experience of 40 years, filters are never put on pump suction sides, only strainers, if anything at all. Look at the original design. It’s typical and effective. It didn’t have a pump discharge filter, but adding that one helps to keep the small orifices, like the idle jet, free of obstruction.”
The second, from poster TobyB, said: “Actually, the right answer is that you should confirm that your tank strainer is in and working, and then you should (wait for it) use a metal filter after the pump.
WHAT?!
Yeah, see, since the filter is usually full of mostly air, if you put it before the pump, it can seriously hinder the operation of the pump.
WHAT?!
Yeah, the pump is an impulse-style, so it can suck a bit of vacuum on that air in the filter, then release it before it (in turn) pulls fuel from the tank. See, if the pump pulled a constant vacuum, the air wouldn’t be a problem, but since it oscillates, the air in the filter can act as a cushion and really mess with it. That’s why electric pumps want a good filter in front of them: They can’t handle any junk, but can pull a partial vacuum in the filter to draw fuel. Mechanical pumps want a screen or other pre-filter to keep crap out of their valves (they can’t handle rust flakes, as I have proven at the side of the road several times), but they don’t want that canister full of mostly air acting as a damper.
I moved the filter to the output side of the fuel pump. It now pumps gas fine.
Mind. Blown.
I’ve since spoken with a few 2002-owning friends about this, and I can’t universalize my experience and say that putting the filter before the fuel pump will always cause it to fail. Paul Wegweiser says that he currently has a big metal canister fuel filter on the input side of his carbureted 2002 and has experienced no problems.
So I postulate this: My no-fuel problem was partially because I had a big metal-canister filter on the input side of the fuel pump creating a pocket of air, partially because the fuel pump is old and perhaps not pumping up to spec, and partially because the starter motor is old and a little weak, and not spinning the engine perhaps as fast as it could. And maybe on top of that there’s some pinhole air leak that I haven’t found yet. You take any one of these issues away and the problem goes away, but you exacerbate any one of them and the problem becomes acute.
Hey, it’s a theory.
At any rate, I can now put the fuel filter on the output side of the fuel pump, start Hampton, and back it out of the garage. Happy times.—Rob Siegel
Rob’s new book, Resurrecting Bertha: Buying Back Our Wedding Car After 26 Years In Storage, is available on Amazon here. His other books, including his recent Just Needs a Recharge: The Hack MechanicTM Guide to Vintage Air Conditioning, are available here on Amazon. Or you can order personally-inscribed copies of all of his books through Rob’s website: www.robsiegel.com.