Last week, I discussed the broken rocker arm in the Lama, the 1987 E28 535i that I bought because I thought I could make a little money on it. Before deciding to pull the head, I did some tests. The compression was 155-155-145-135-155-155, showing that the cylinder with the broken rocker arm had slightly lower compression. A leak-down test produced numbers of about 3%, except cylinder #4, which was at about 6%; the cylinder with the broken rocker was letting slightly more air escape. This all made sense, but it raised the unfortunate possibility that #4 intake valve was bent. However, I listened for air escaping out the intake and exhaust, and I didn’t hear any. With no evidence of bent or otherwise egregiously non-seating valves, I began to think that I could pull the head, knock the rocker shafts back far enough to replace the broken rocker arm, and simply drop the head back on.
However, I was keenly aware of one of the best pieces of advice I’ve ever received. My friend Lindsey Brown, shop foreman at the Little Foreign Car Garage in Waltham, once told me, “Never pull a head off unless you’re prepared to deal with whatever you find.” After all, in addition to the broken rocker arm, the car did generate quite a bit of visible oil smoke. The cylinder walls could be scored. The #4 cylinder might have ingested a piece of the broken rocker that battered the bejesus out of the walls, piston crown, and combustion chamber.
As I said last week, a 2002 head is small enough and simple enough that I can have everything disconnected and pull it off by myself in a couple of hours, but the six-cylinder head on a 1980s Motronic car like an E28 has many more connections. Plus, the head with the exhaust and intake manifolds attached is much heavier than an 02 head, probably weighing about 80 pounds. You can reduce that weight, of course, by pulling off the manifolds, but since I was thinking that I was simply going to replace the broken rocker and drop the head back on, I wanted to keep removal of the ancillary components to a minimum.
I circled around the job for a few evenings, sizing it up and making sure that I wanted to go in, but at some point, you realize that time will pass whether you’re doing a pain-in-the-butt repair or not, so you might as well just suck it up and have at it, so that once the time has passed, the repair will be done. At least that’s how I think about it.
Operation Decapitate Lama was a go.
The most time-consuming part was chasing down all of the electrical connections and carefully peeling back portions of the wiring harness. In particular, the wiring to the starter and alternator appeared to be snaking down between the block and intake manifold, and thus needed to be unthreaded and pulled upward. With 31 years of all that Florida heat, the sheathe of the wiring harness had become quite brittle, and more than once I heard it audibly crack as I was manhandling it.
Eventually I got everything detached, and it was time to lift the head. Of course, these days I’m a 60-year-old man with a bad back, so simply reaching in and lifting the head and manifolds was out of the question. I’d previously sunk a 3/8″ hook into one of the garage’s ceiling joists to help me pull 2002 heads (that’s heads, not whole engines), but the E28 is longer, so the hook was in the wrong place.
I sank another hook into a joist above the center of the Lama’s engine compartment, hung off it with my weight to test it, threaded a chain around the exhaust and intake manifolds, then used my Warn PullzAll electric winch to lift the head up. (The video can be seen here.) As is often the case, there were a couple of connections I’d missed; with the head suspended in midair, I could just reach in and detach them. This is part of the value of using the winch. I then swung the head onto padding I’d placed on the nose of the car; from there, my son Ethan helped me carry it over to the table.
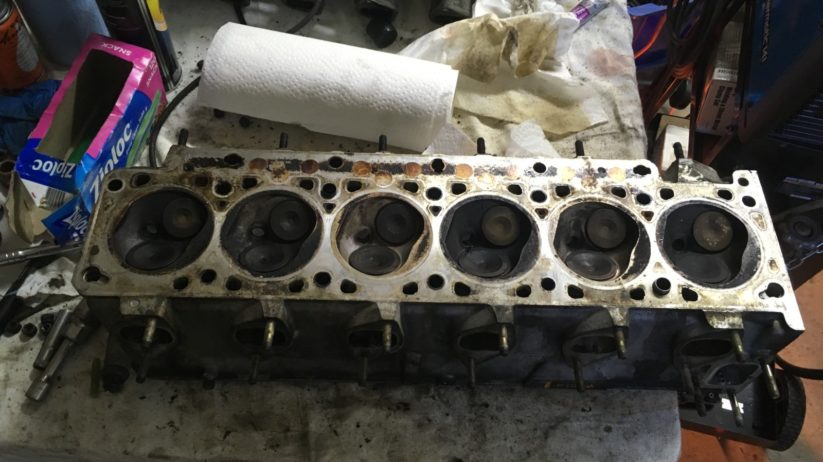
With the head off, I immediately grabbed a light and peered into the cylinders. Things looked good. The hone marks were still plainly visible, and there was no scoring or burning. And #4 didn’t show any signs that it had ingested any broken bits of rocker. However, as I moved the light around, I could see that all six pistons showed small marks where the intake valves had kissed them—the #4 piston, almost certainly not coincidentally, had the most prominent mark. Still, I thought, any contact must have been pretty small, since the leak-down test did not reveal air hissing out the intake manifold.
I then turned the head over and looked at the valves. I thought I could see the slightest indication of contact on the outside edge of the #4 intake valve, but it wasn’t visibly bent. On the rest, I saw nothing.
Could be worse.
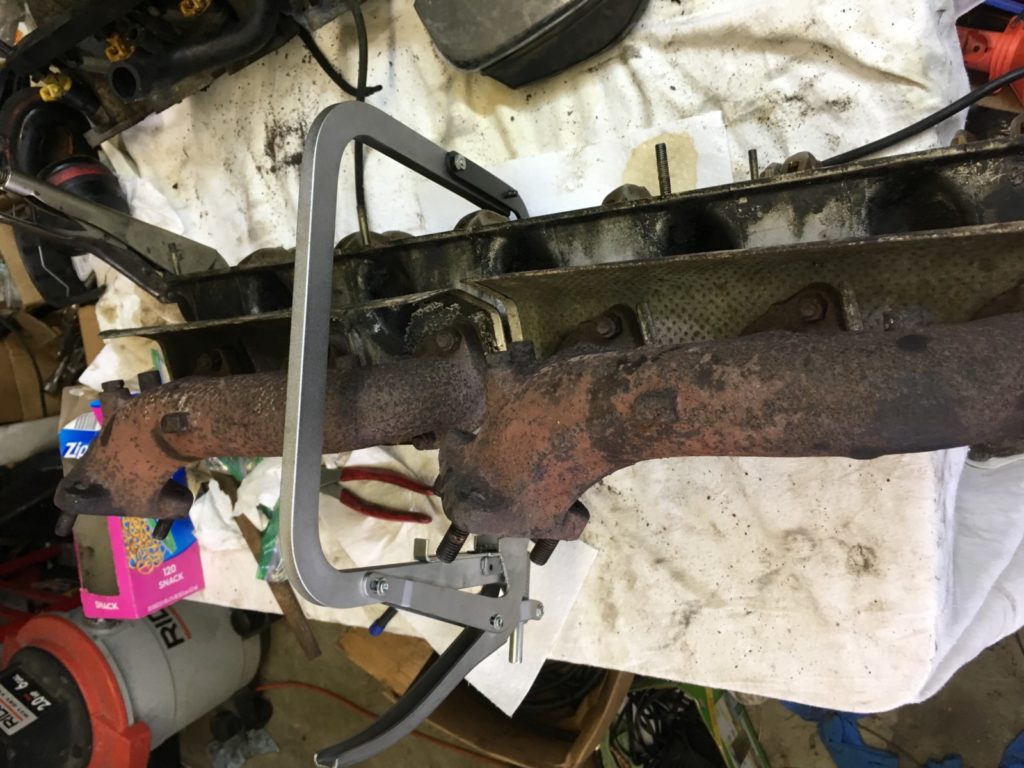
I then set myself to the task at hand: replacing the broken #4 intake-valve rocker arm. BMW M30 engines have two-piece rocker shafts; on both the intake and the exhaust sides, there is a front and a rear shaft. The #4 rocker arm is the forward-most one on the rear shaft. To get the shafts out, you need to remove the rocker cover plate from the back of the head, undo the clips holding the rockers in place on the shafts, and knock the shafts out with an aluminum drift. You want to tap on the drift as gently as possible, because if you smack it hard, you mushroom the ends of the shafts, which makes them extremely difficult to remove, and damages the rocker arms as the mushroomed ends pass through them. You can instead use a slide hammer with an attachment that threads into the end of the shaft, but I don’t own one. The intake side is easier to remove than the exhaust side, because on the intake side, once you unclip the rocker arms, you can slide them off the cam lobes, thus relieving the shafts of the tension they’re under when the arms are on the lobes.
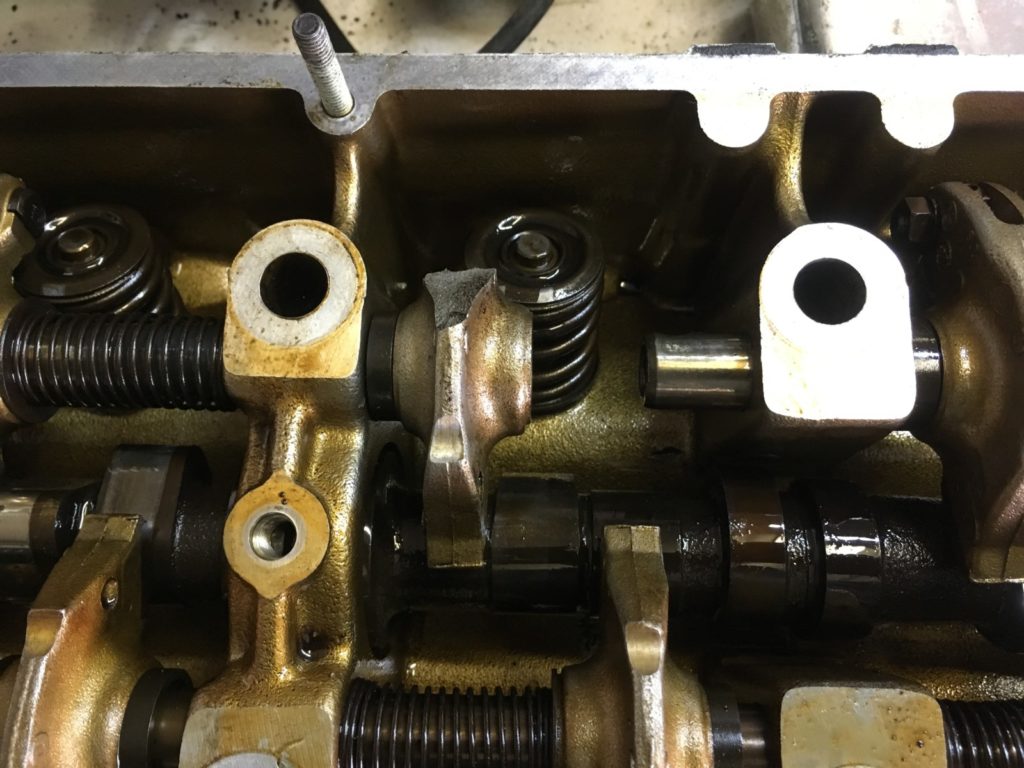
Using an aluminum drift, I tapped on the front shaft enough to get the end of the rear shaft protruding from the back of the head.

I knocked the shafts back just enough to grab the rear one.
I then grabbed the end of the rear shaft with a Vise Grip. I first tried using non-marring pliers, but they just didn’t have enough bite. I figured that any bite marks from the Vise Grips could be filed off, and besides, since I was only grabbing the end, any marks wouldn’t be on a part of the shaft that the rocker arms ran on anyway.
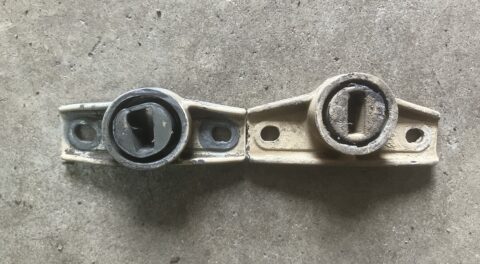
By using the Vise Grips to twist and pull the rear shaft back, I was able to create enough of a gap for the broken rocker arm to fit through. Then I simply reached in and plucked it out.
It was a beautiful moment.
With space made to remove the broken rocker arm…

…I simply reached in and pulled it out. Rarely has success felt so clean and sweet.
Now, with that triumph behind me, I was at a crossroads. All I had to do was slide a new rocker arm on the shaft, tap the shaft back in, clean the surface of the head, and drop it onto a new head gasket.
Did I do that? Nooooooo.
In my defense, I was totally doing the right anti-Hack thing. Think about it: The #4 rocker arm had broken. The #4 cylinder had lower compression and worse leak-down numbers than the others. The #4 piston had a deeper kiss mark than the others. The #4 valve had what I thought was visual indication of contact.
I could go forward in denial, or I could test whether the #4 valve seat was leaking. I decided I’d be an idiot if I didn’t test it. As I often say, I try not to be an idiot.
It’s pretty easy to check for yourself whether valves are sealing against their seats. You can use light, liquid, or liquid and air. If the manifolds are off, the quick test is to simply turn out the lights, shine a flashlight in the port, and check for light around the seat. A better test is to pour some low-viscosity fluid into ether the port or the combustion chamber and see if it leaks past the seat; water will do, but a solvent like acetone or brake cleaner is better.
But better yet is to combine the liquid test with compressed air and look for bubbles. (If the head is at a machine shop, they’ll use air to pull a vacuum around each of the combustion chambers.)
Since I still had both the intake and the exhaust manifolds on the head, I couldn’t pour anything into the ports, so I screwed the #4 spark plug back in to seal the hole, tipped the head so the intake valve was level, and poured acetone until it covered the valve and the seat. I watched and saw the level slowly drop. The #4 intake valve seat was clearly leaking.
Damn.
Assuming that the valve was slightly bent, I ordered a new intake valve. In the meantime, I read up on removing valves and lapping them in. I’d never done this; I’d always simply knocked out the rockers and taken the head, with the valves and springs still in it, to the machine shop. I found that a nearby Advance Auto Parts rented a decent-quality valve spring compressor. I grabbed that as well as a valve-lapping tool and some grinding paste.
The rented valve spring compressor allowed me to reach around the still-attached exhaust manifolds.
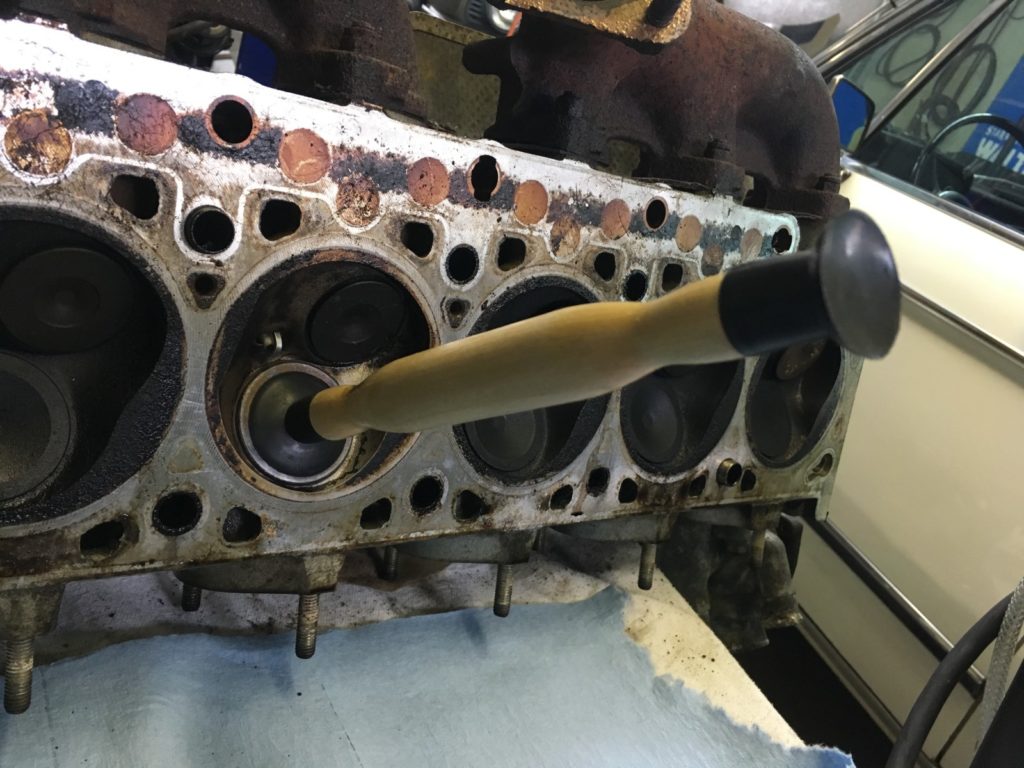
With the gap still present between the rocker shafts, and with the rocker arm still removed, there was just enough room get the valve spring compressor on top of the #4 intake valve. I compressed it, used a magnetic screwdriver to remove the two little locking collets that secure the top of the valve in the retaining cup, released the compressor, pulled the retainer and the valve springs from the top, withdrew the valve from the bottom, and smiled at having done something new.
I watched a few videos on valve-lapping, then tried it myself. I smeared the valve-grinding paste around the edge of the new valve, put some oil on the stem, inserted it into the guide, affixed the suction cup to the underside of the valve, and rocked it back and forth between my hands, rotating it by 90 degrees every ten seconds, until I heard the abrasive sound smooth out. I then withdrew the valve, checked that there was a gray ring around the edge, and cleaned the paste off both the valve and the seat.
Cool.
My first attempt at lapping a valve appeared to be successful.
I reinserted the valve and reassembled the springs and retaining cup. I squeezed the compressor and was about to insert the collets, but just then, the compressor slipped and the two valve springs and the retainer shot across my war zone of a garage. My eyes followed where the springs went, but the retainer was swallowed by the entropy.
I searched for a bit, decided it was hopeless, and called my local BMW dealer. They said they could have one the next day. I put the $7 part on order. I then hunted around a bit more and found the retainer behind the dead Lotus. On the second try I got the valve and springs installed without launching anything.
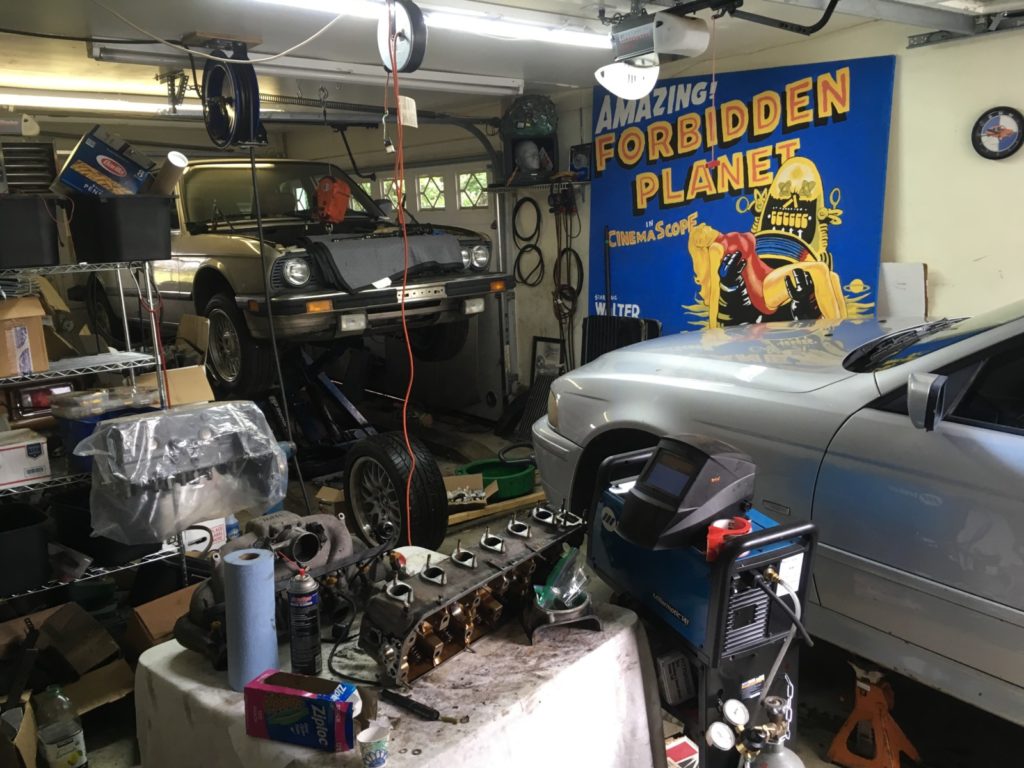
Incredibly, I found the nickel-sized valve-spring retainer in THIS.
With a new #4 intake valve installed, all I had to do (again) was slide the new rocker into place and button things up, but I thought that I really should check the other intake-valve seats for leaks. After all, there were kiss marks on all of the pistons, not just #4.
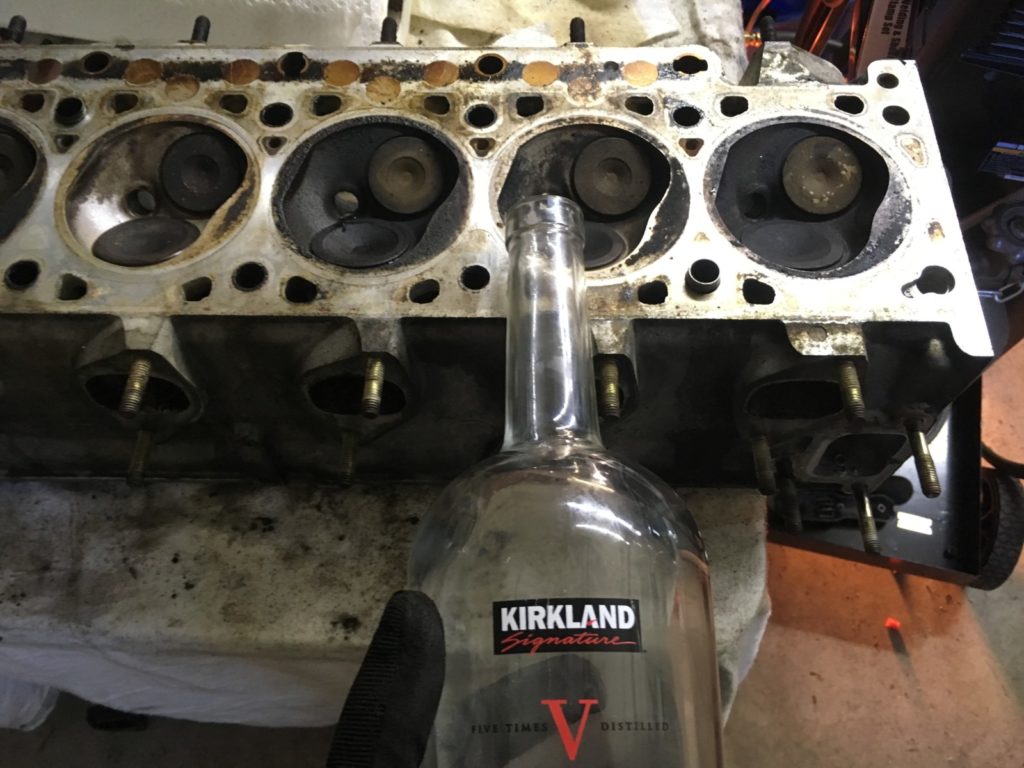
Fortunately, because this was the intake side and all of the rocker arms had been moved off their cam lobes, all the intake valves were closed at the same time, so I could fill all six combustion chambers with acetone simultaneously. But I realized that the better way to do it was to pull the intake manifold off and fill the ports instead, because then you can actually see the leakage through the valve seats. I propped the head up on some pieces of wood so I could fill the intake ports with acetone and then look at the valve seats with my phone.
To my surprise, the brand-new #4 valve I’d just lapped in was dripping. And so was #2.
Damn a second time.
I re-lapped the #4 intake valve and got the drip to stop, but if I was going to lap #2, I needed to remove it, which meant that I needed to access to the top of its retaining cup, which meant that I needed to knock the intake shafts completely out. I didn’t like it, but I reasoned that it would give me an opportunity to change all of the intake valve-stem seals.
As my friend Dohn Roush said, “The name’s Creep. Mission Creep.”
I took a deep breath, then knocked both intake shafts all the way out, tapping the aluminum drift gently so as not to mushroom the shafts’ ends, and getting perhaps 1/32 of an inch of motion with each tap. I pulled out the #2 intake valve, lapped it, and re-did the acetone test on all of the intake ports.
#2 and #4 were no longer actively dripping, but they were weeping. “Damn” no longer cut it as a reflector of my mood.
I walked away from the garage and tried to think.
The car has 133,000 miles on it. If it weren’t for the broken rocker, I’d never have pulled the head off and never would’ve known that the valves were leaky. The machine shop would probably charge me $400 in labor for a proper valve job (hot-tanking, bead-blasting, and milling the head, and cutting the valve seats). If the goal was simply to flip the car, it was money I’d never get back. Plus I’d need to knock out the exhaust rockers and remove the exhaust manifolds, and these components surely wouldn’t come off without a fight.
I drove down to Century Automotive Machine to chat with Hal, whom I use for all my machine work. I described the non-sealing intake valves and asked if I was an idiot to think that I could simply bring in the head to him to get those two valves to seal.
“Well,” Hal laughed, “I’m not going to tell you you’re an idiot.”
“But?”
“But….”
Hal then proceeded to tell me that, basically, I’d be an idiot to do that because (a) the fact that several valves wouldn’t seal after being lapped twice was an indication that the valves were bent or the seats needed to be re-cut, (b) the exhaust valves were likely in the same condition or worse, and (c) long, straight BMW aluminum heads usually need to be milled to get them to seal correctly against a new head gasket.
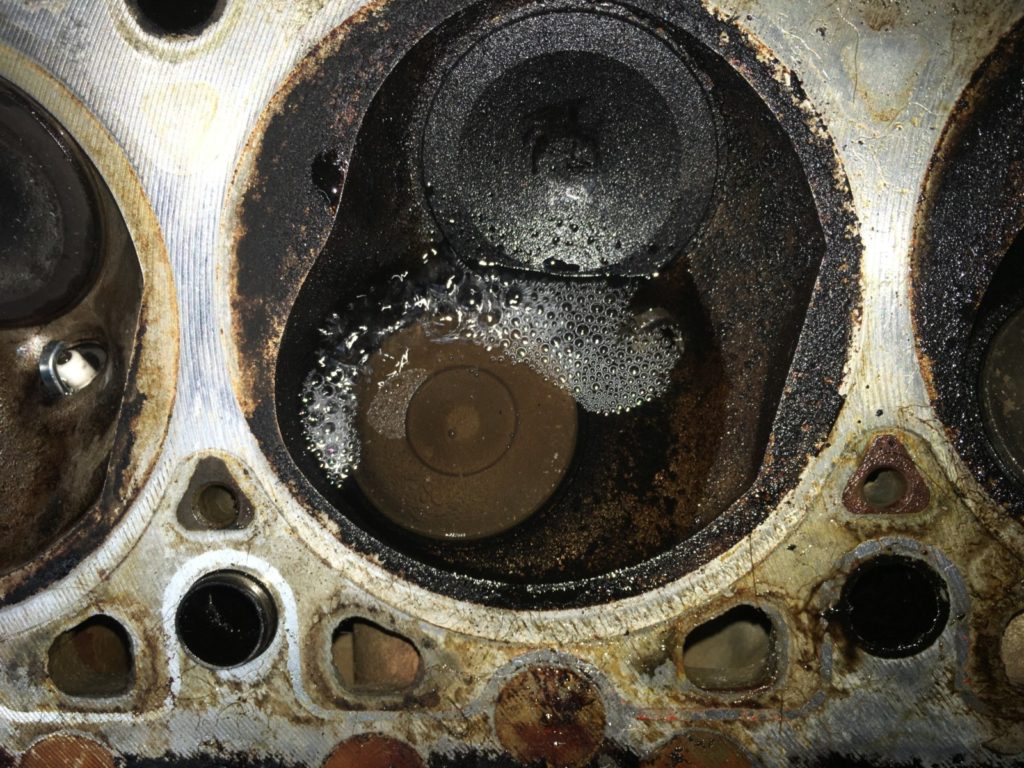
I went home and decided to check the exhaust valves. I thought that if I saw no indication that they were leaking any worse than the intakes (meaning if they were weeping but not dripping), I’d reassemble the head and slap it back on. As I said, the manifolds were still on it, so I couldn’t fill the exhaust ports with solvent. Plus, I was out of acetone. I rooted around in the garage and found a bottle of Costco vodka (don’t ask, and hey, alcohol is sort of a solvent, right?). I screwed all six spark plugs back in, rotated the cam so that two of the exhaust valves at a time were closed, poured vodka into two of the chambers at a time, watched, and repeated. I didn’t see any obvious indication of leakage.
Yes, I totally did this.
But then I retested by blowing compressed air into the ports and looking for bubbles coming through the valve seats. Although the exhaust manifolds were still on, my air gun has a wand that’s long enough that I could aim it into each of the three branches of each of the two manifolds. I re-filled the chambers with another two dollars worth of Costco vodka, blew air up the manifolds, and to my dismay, saw a plainly visible stream of bubbles out the seat of #5 exhaust valve seat.
The words I used were considerably bluer than “damn.” (Hint: There were two, and the first one rhymed with “other.”)
What is seen cannot be unseen.
I was standing right at the water’s edge. It was time to either back out, or dive completely in. In I went. Well, what would you do? Would you knowingly install a head with leaky valve seats?
I carefully knocked out the exhaust shafts (unlike the intakes, they’re under tension even when you unclip the rocker arms) and pulled them out, along with the camshaft. I removed the exhaust manifolds, which, as anticipated, required heating up the twelve rusty copper nuts cherry-red with an oxy-acetylene torch. I pulled out the #5 exhaust valve, lapped it, re-installed it, tested it, and found that it still wept slightly.
With all of the rockers out, all twelve valves were closed. With both manifolds off, I could direct the compressed air much more accurately. I turned the head upside down, vodka-ed up all of the chambers one last time, and blew compressed air directly at both the intake and exhaust valve seats. Eight of the twelve valves leaked to some degree; the leakage ranged from the tiniest streams of bubbles to looking like a kid was blowing into his ginger ale through a soda straw.
I wasn’t happy about it, but the path was clear. The head was already off and fully disassembled. I had data showing that a majority of the valves were leaking, and lapping them wasn’t solving the problem. It no longer mattered that the valve j tb cost $400 and I’d never get it back, it needed a valve job.
Off to the machine shop we went.
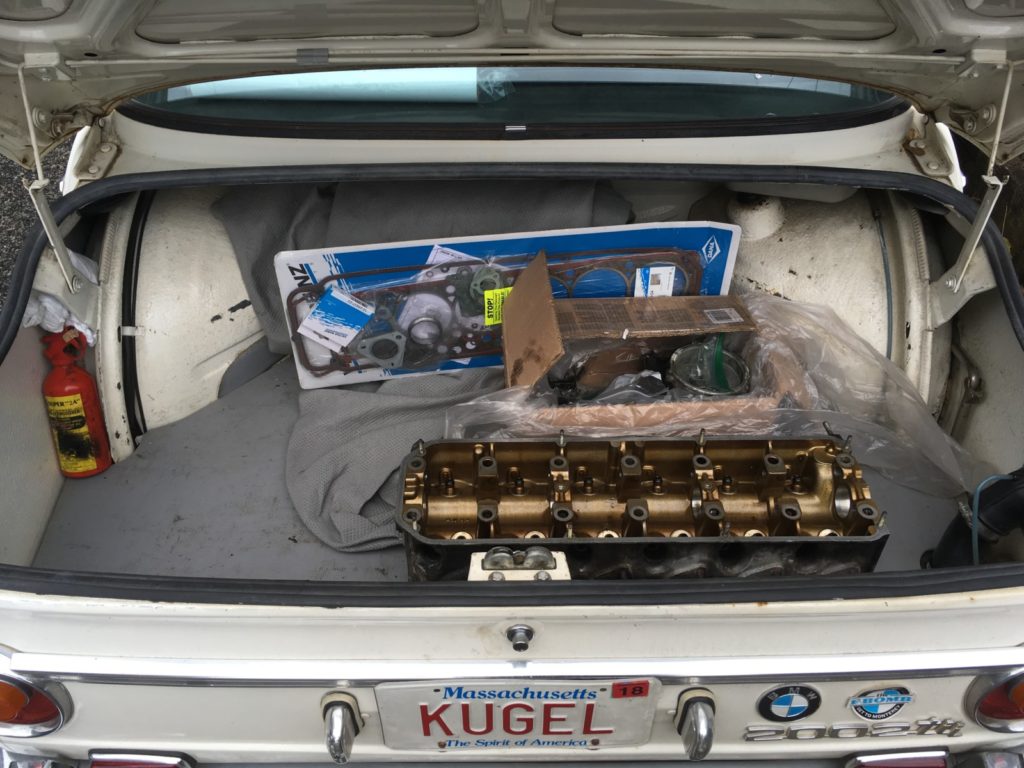
It was oddly satisfying to use Kugel the ’72 tii to transport the Lama’s head.
Unless Hal finds more bent valves or bad guides, I should have the head back next week, and I can begin the Lama’s recapitation. (Note to myself: Trademark “recapitation.” I should get a dollar whenever anyone uses it. Hey, 400 times and it pays for the valve job!)—Rob Siegel
Rob’s new book, Just Needs a Recharge: The Hack MechanicTM Guide to Vintage Air Conditioning, is available here on Amazon. His previous book Ran When Parked is available here. Or you can order personally inscribed copies of all of his books through Rob’s website: www.robsiegel.com.