A few weeks ago, I described my efforts to remove the old Ziebart rustproofing that looked like it was sprayed with a firehose in the engine compartment of Hampton, the 48,000-mile ’72 2002 I bought from its original owner last fall. A product called Klean-Strip Prep-All Wax & Grease Remover, combined with several rolls of paper towels, easily twenty cleaning sessions, and two years of life off the ligaments in my right elbow did an excellent job of softening the nasty black stuff and taking it off—one square inch at a time.
Cleaning the right side of the engine compartment was fairly straightforward, since the washer bottle and ignition coil can be easily removed, giving unfettered access. The left side, however, with the battery tray, brake master cylinder, and hard brake lines in the way, was far more challenging. Initially I thought, “There’s no way I’m pulling the master cylinder, and besides, no one but me is ever going to look down in the crevice between it and the body to see if there’s still undercoating in there,” but it’s funny how things you never thought would bug you, well, bug you. Fortunately, I found that by wrapping paper towels on the end of a stick, I could get down into that crevice and clean the undercoating off without having to remove the brake hydraulics. It was oddly satisfying.
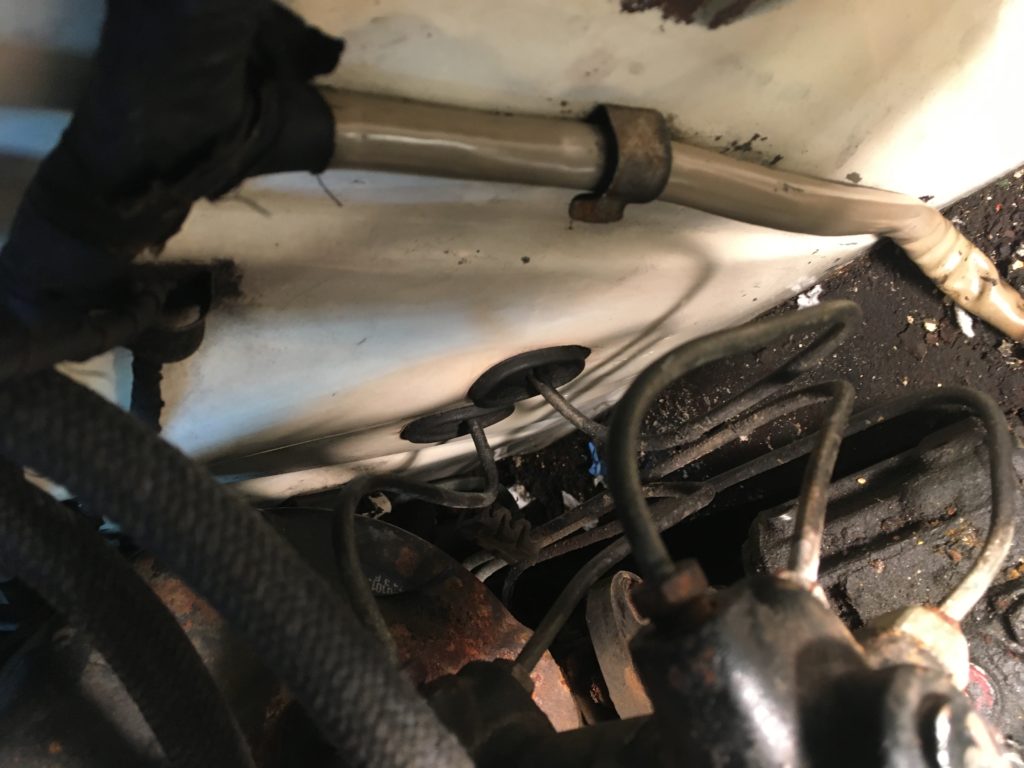
I never expected to clean the undercoating this deep down, but I did.
Unlike the master cylinder, though, the battery tray was easily removable; four 10-mm bolts and it was out. I cleaned beneath it and called the Ziebart removal effort largely complete. Whew!
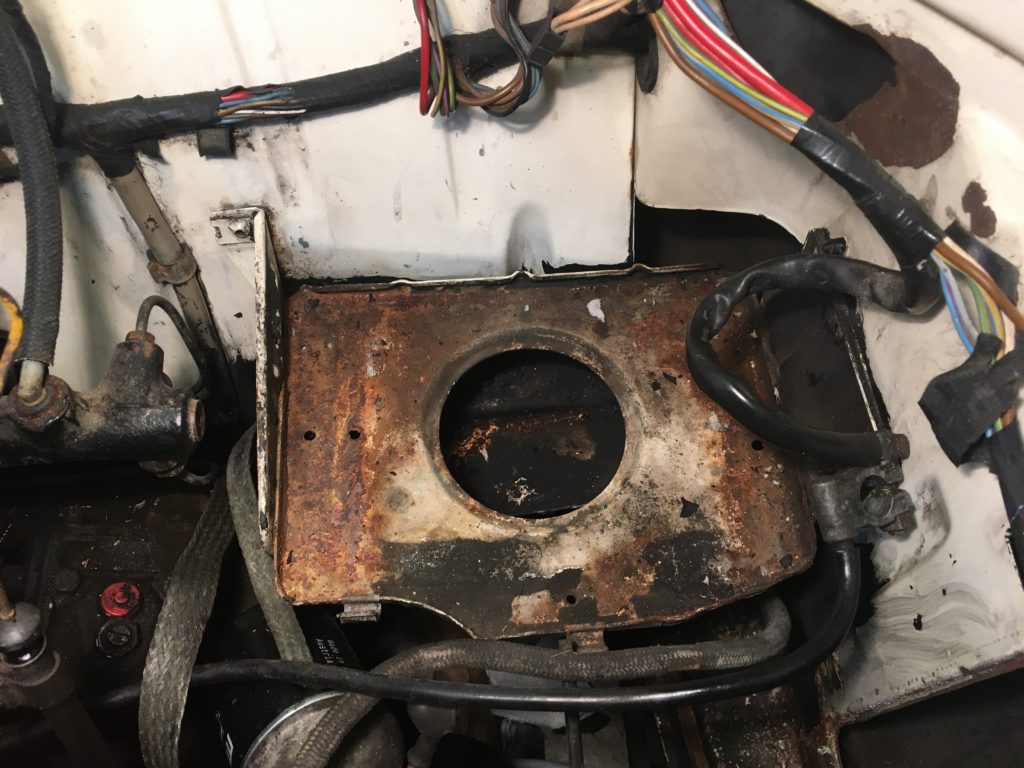
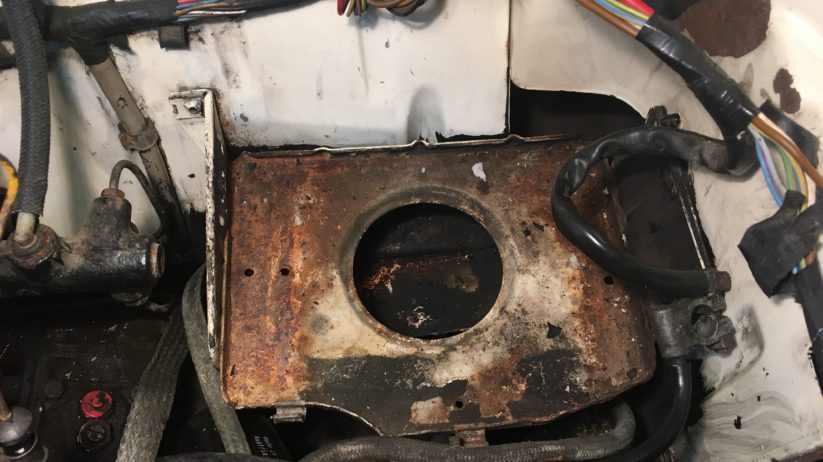
The badly corroded battery tray restricted access to the undercoating behind and beneath it.
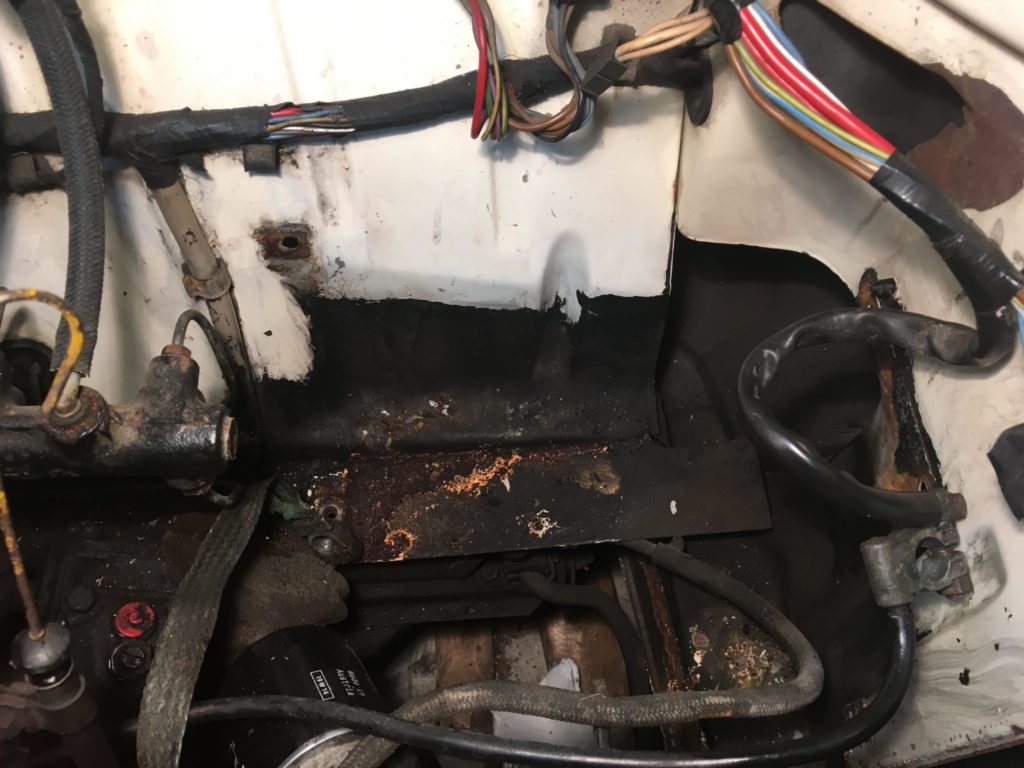
Even though it was difficult to see this undercoating with the tray in, I hated knowing that it was there.
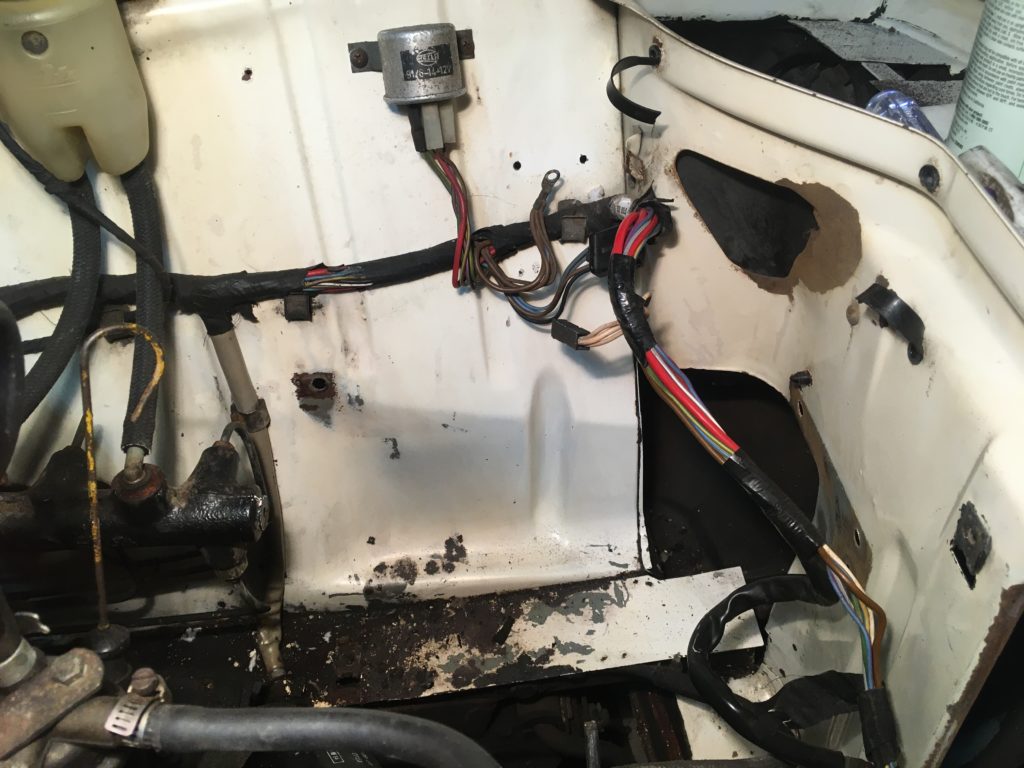
Not bad—not bad at all.
Now, as much as I did not want to get dragged down the slippery slope from cleaning to engine-compartment restoration, with the corroded battery tray already removed, it seemed crazy not to look into getting it sandblasted, right? And when I found a guy on Craigslist who said he’d do it for twenty bucks, it seemed crazy not to pull the trigger on it, right? I sent the fellow photos of the corroded top and undercoating-laden bottom of the tray to be certain that he knew what he was getting into, and he told me to come on out.
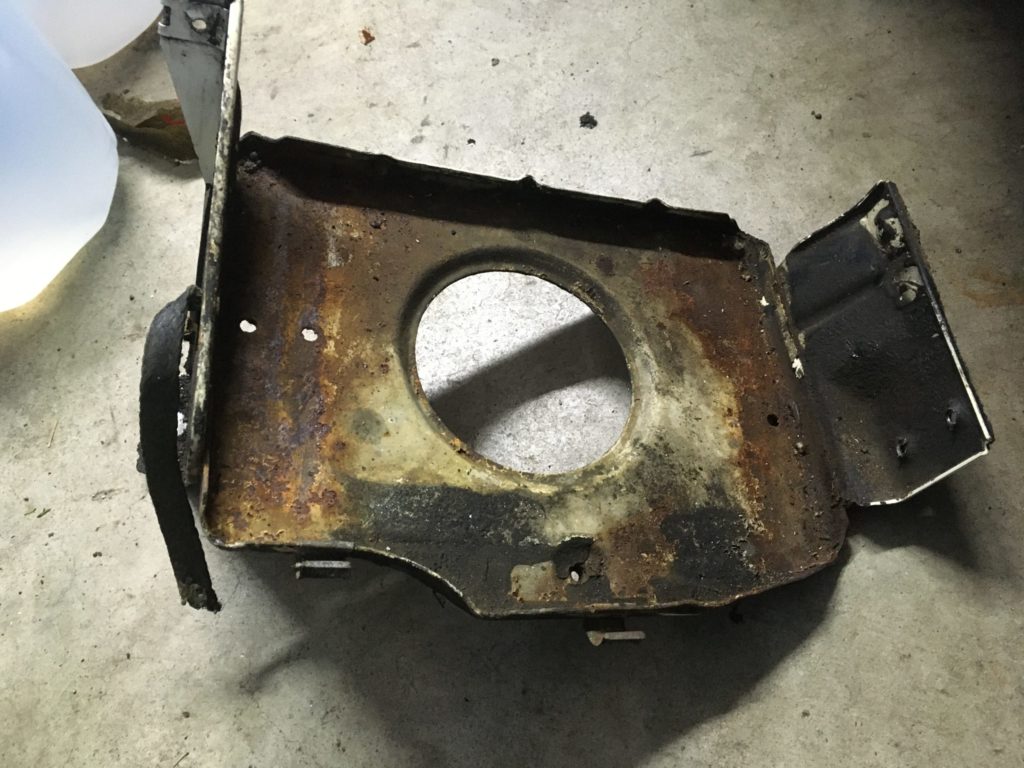
Yum. Crusty.
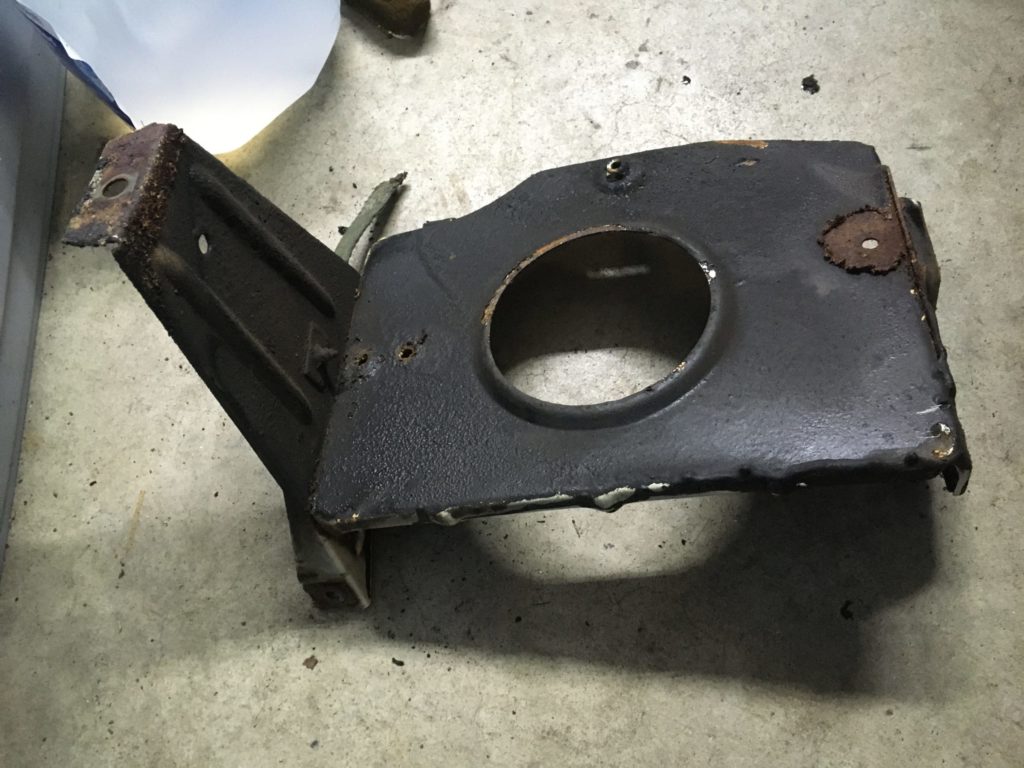
Ick. Undercoat-y.
So I threw the battery tray in a bag and drove the X5 to Holden Massachusetts, out near Worcester. The young man, mostly a motorcycle guy, had a big compressor and a Harbor Freight sandblasting cabinet in a barn, and made a little money on the side doing jobs like this. He put the battery tray into the sandblast cabinet and had at it, but it was soon obvious that the abrasive basically just bounced off the undercoating. He took the tray back out and got a lot of the undercoating off it using a torch and a paint scraper, but it still took a lot longer than either of us had expected. He was very patient, and the result was quite good, so I tipped him an extra ten bucks.
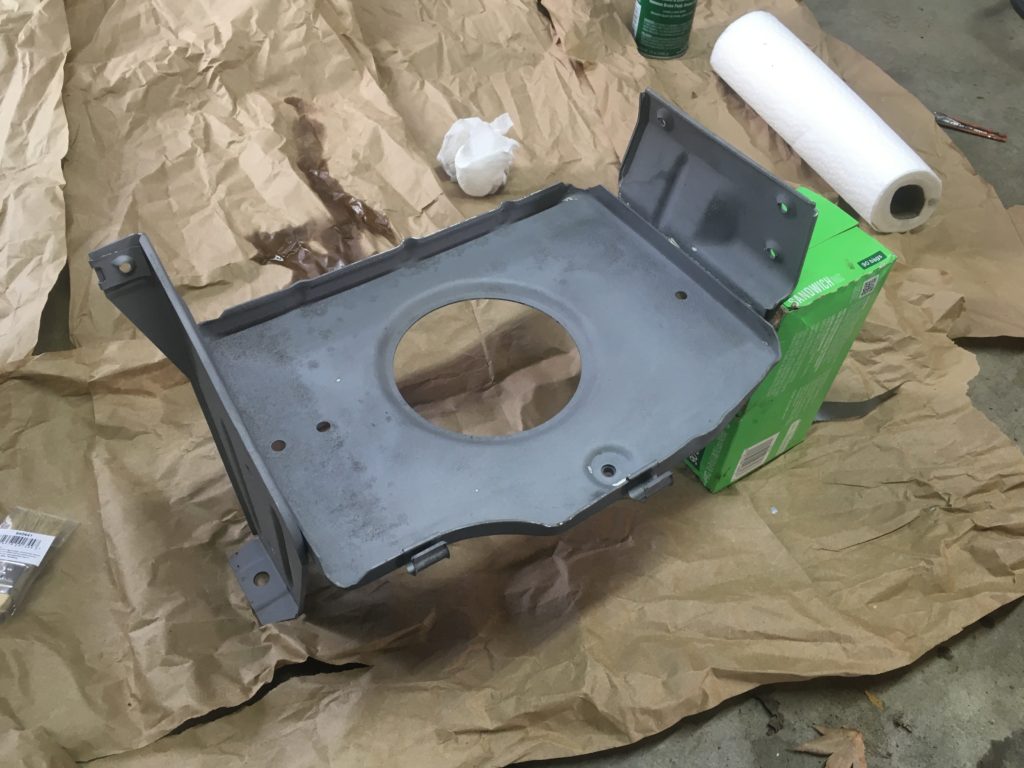
You have to love the look and feel of freshly sandblasted metal.
I did a quick Web search and found a spray can of Chamonix paint (paint code 085) for $29.95 that was ostensibly the same color as the paint on Hampton, and ordered it. Then I gave the tray a last wipe-down with brake cleaner, ran down to the local hardware store, bought a can of white rust-preventative enamel primer, and sprayed two light coats. When the Chaminox paint arrived, I laid down a coat (it only seemed to need one). I then placed the battery tray back in the engine compartment. And—
And the newly-repainted tray stood out like a sore thumb.
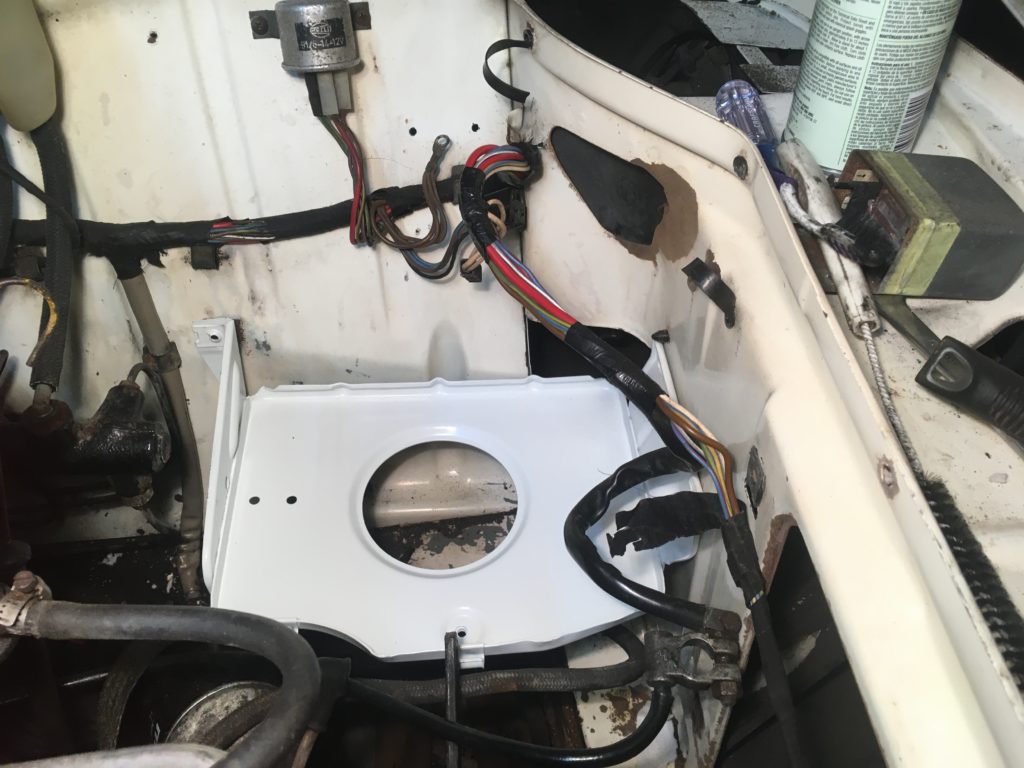
One of these things is not like the other.
I posted the above photo to Facebook, and the responses varied from, “That looks more like Alpine White than the creamy Chamonix” (I agree, but it’s a much closer match if I hold it against the hood) to, “Yeah, but still looks way better than it did” to “Use some abrasive rubbing compound on the rest of the paint in the engine compartment to cut through that layer of embedded grime” to “Just rub some dirt and oil on it and it’ll look fine” to—from pros—”Welcome to my world. It’s incredibly difficult to match any paint, much less heat and time-faded paint.”
No one said, “That’s what you get for buying paint solely on the basis of lowest cost, you wanker,” but I suppose no one had to.
I’m actually less troubled by the tray itself than by the implications for other spot-painting. If you look above the right corner of the tray, you’ll see an area of surface rust near the hole where the corner of the battery is supposed to tuck in; you’ll also see some around the opening for the radiator. I’d planned to wire-brush these areas, use some Loctite Rust Neutralizer on them, then spot-paint them, but I now know that if I do, they’ll jump out to the eye.
The problem is that with a 48,000-mile one-owner survivor car like this, everything needs to hang together to maximize its value. I did all that work cleaning the Ziebart undercoating from the engine compartment so that when I advertise the car, people won’t see the coating and immediately assume that it’s hiding accident damage and bad bodywork, as I did when I first saw it. But going beyond that, you really want any intervention to either be as minimal as possible, or as whole-hog and correct as possible. What you don’t want is for something to look obviously half-assed. The non-color-matching battery tray isn’t really that big a deal, since the battery itself will hide much of it, and since it’s easy to understand unbolting the tray and sandblasting off the corrosion that they all eventually get. But the bits of surface rust on the nose itself, those are harder to know what to do with. I usually walk right up to the water’s edge on issues like this, then decide that the decision is better left to the next owner, and walk myself back.
We shall see which way this goes.—Rob Siegel
Rob’s new book, Resurrecting Bertha: Buying Back Our Wedding Car After 26 Years In Storage, is available on Amazon here. His other books, including his recent Just Needs a Recharge: The Hack MechanicTM Guide to Vintage Air Conditioning, are available here on Amazon. Or you can order personally-inscribed copies of all of his books through Rob’s website: www.robsiegel.com.

