It took me the full ten days from the onset of my first symptoms to test negative for COVID, but by the end of the week, I was up and around again. I figured that the basement and garage qualified as self-isolation, so I began chipping away at putting the FrankenThirty’s compressor back together.
When we last saw my Behr wing cell compressor, I had fully disassembled it on the workbench to clean out the black, gritty matter that turned out to be the remnants of a sponge originally used inside the case to retain oil. I was aided by a well-photographed 2015 DIY post on BimmerForums as well as the exploded parts diagram on page 144 of the 2013 Santech catalog. Both of these listed the Santech /Omega seal kit as part MT-2107, which I found on eBay for the princely sum of $17 shipped. I was, however, stymied by the nonavailability of the carbon shaft seal kit (MT-2052) that slides onto the compressor shaft inside the housing. Careful reading of the Santech catalog showed that the MT-2107 kit I’d purchased was supposed to come with both the “carbon shaft seal o-ring” that looked like it sat beneath the carbon ring assembly and the “shaft seal seat o-ring” that looked like it sat above it, but the eBay description had only a stock photo, not the exploded parts diagram below.
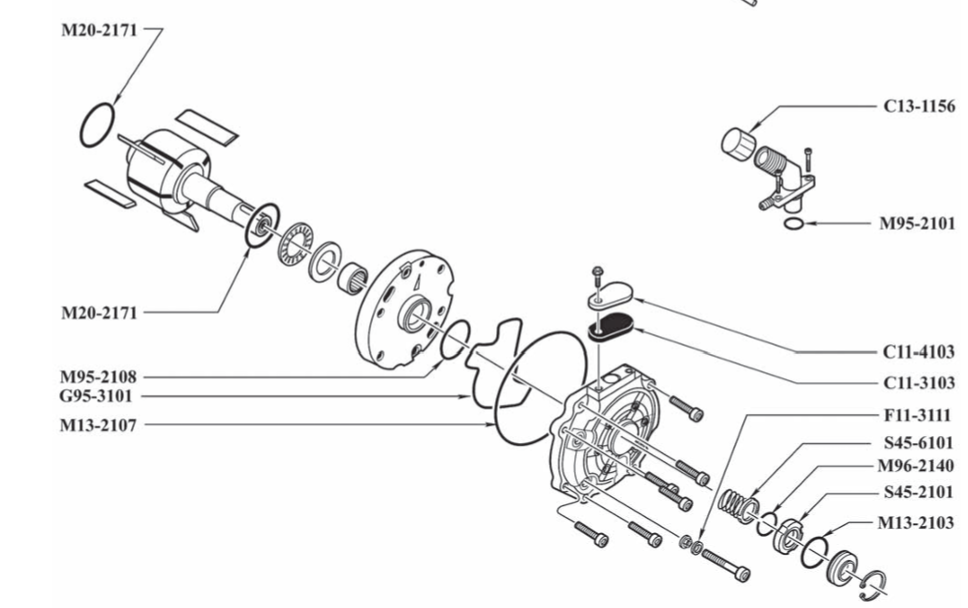
The blowup from the 2013 Santech catalog. The parts for the carbon shaft seal are on the lower right. M13-2103 was a bit of a mystery.
When the seal kit arrived, I carefully went through and parsed its contents. The big seals for the compressor cover and the thick ones for the vanes were clear, but the smaller ones confused me.
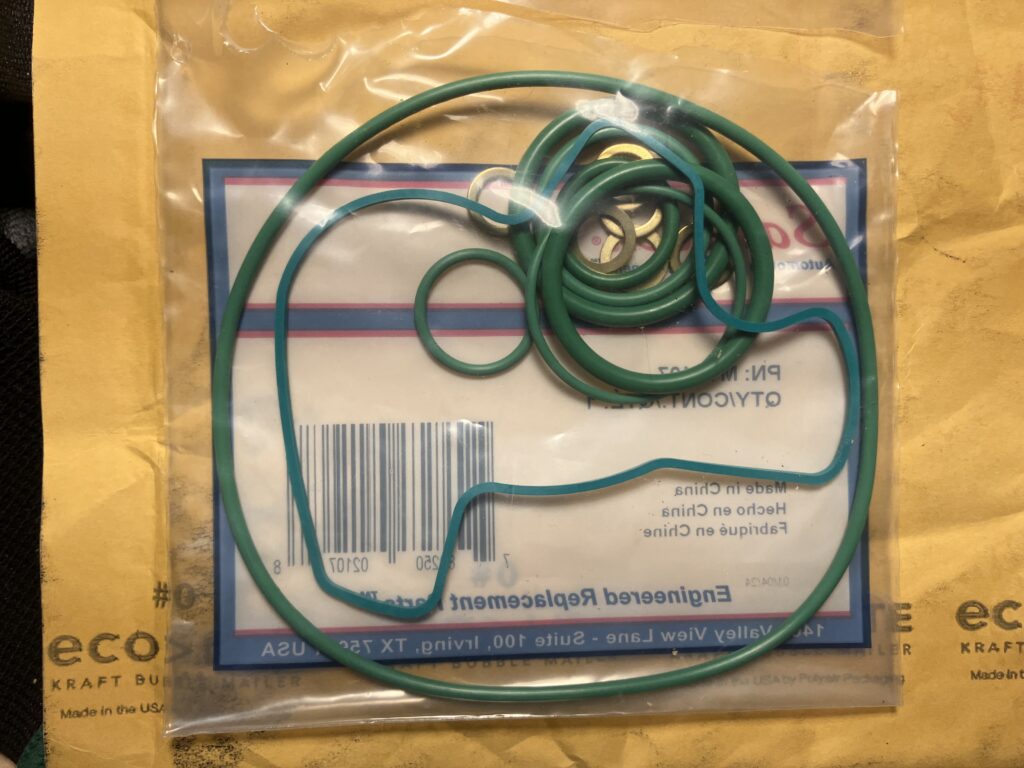
What treasures have we here?
Fresh new compressor vane seals in place.
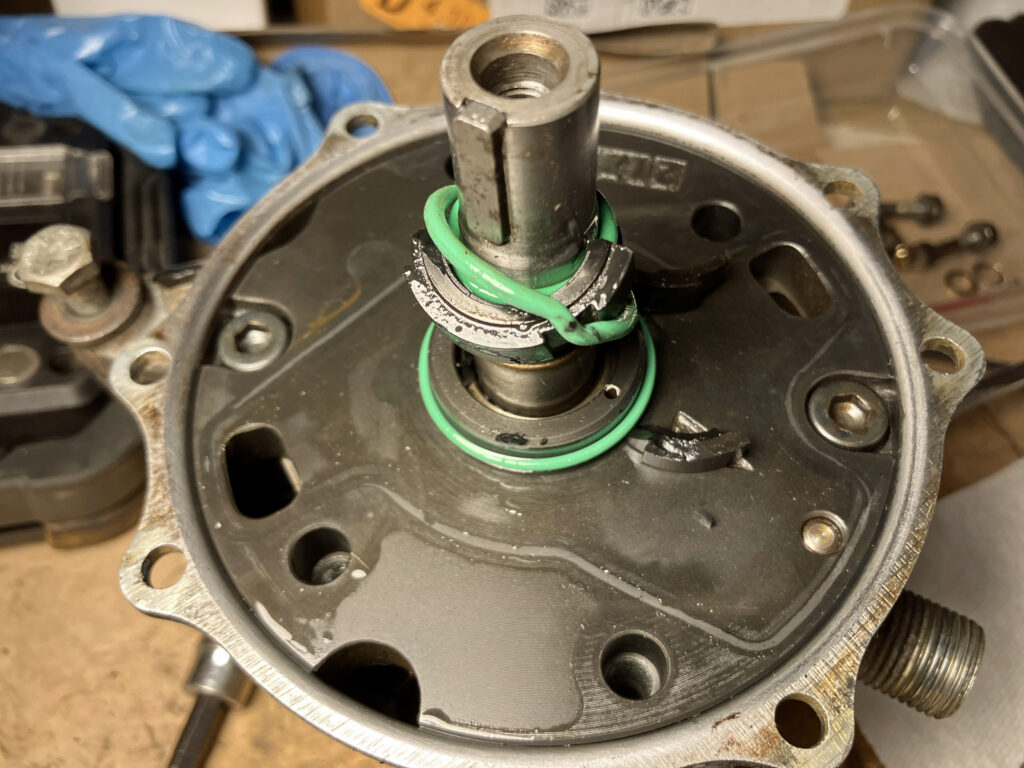
By trial and error, I figured out that the thinner of the two small seals was M95-2101, which sealed up the angled suction port that bolts onto the top of the compressor. That left a small and a large seal that was supposed to flank the carbon shaft ring. I could see an old black o-ring seal inside it, but I hesitated to take a hooked pick to it to pull it out since if I damaged anything, I was in trouble. But while fiddling with it, I discovered that the carbon ring consisted of two pieces, the lower of which dropped out to allow access to the o-ring inside. I pulled the old black o-ring out, cleaned inside, and inserted the new green one.
Booya!
That left only M13-2103, the “shaft seal seat o-ring.” The exploded parts diagram showed it sitting above the carbon ring, but I recalled no such o-ring there when I pulled things apart, and there was no groove on my carbon ring for it to snap into. I looked carefully at the photos on the 2015 BimmerForums DIY post and found one pic that showed the seal. I’d initially missed it because the seal blended in with the green dye in the compressor oil.
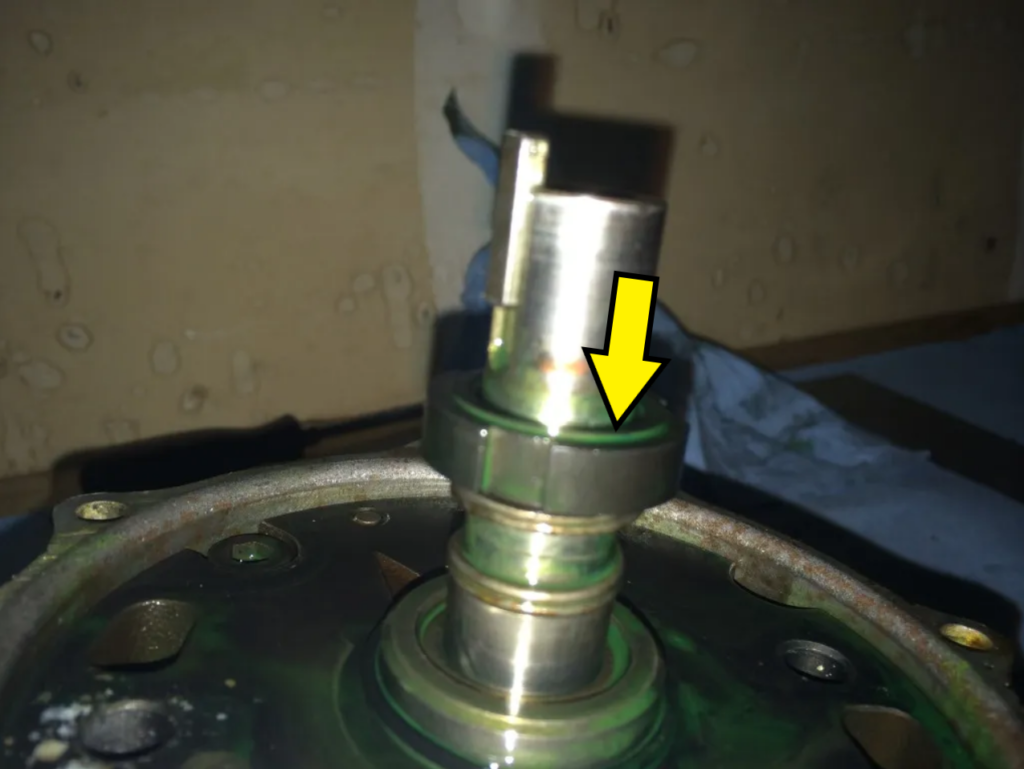
Photo courtesy xx138xx, BimmerForums, 2015.
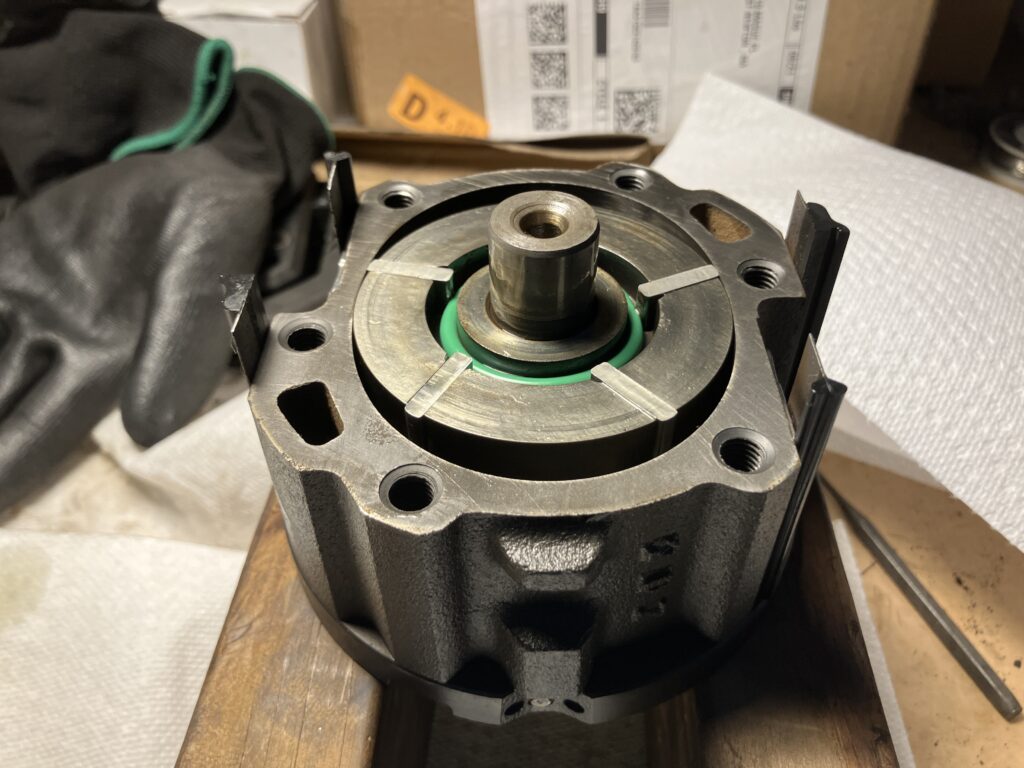
I still didn’t like the way the seal just seemed to hover on top of my carbon ring, but when I inserted it into the upside-down cover of the compressor, it seemed to feel at home.
That’s better.
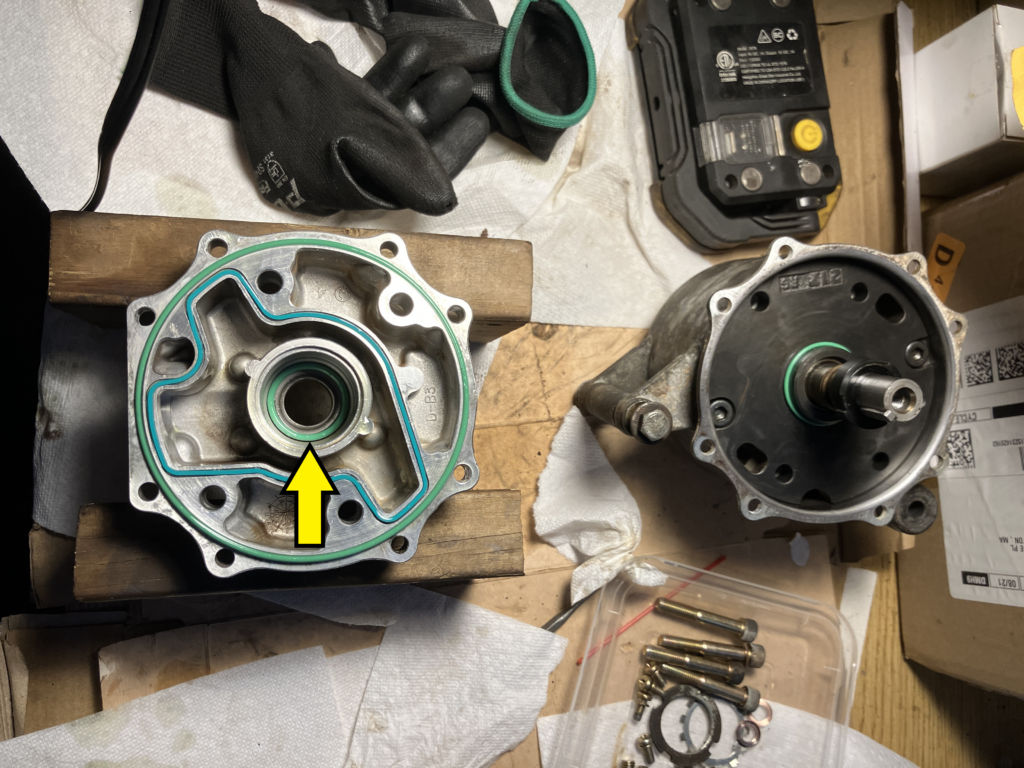
The large irregularly-shaped seal in the photo above didn’t want to sit squarely in its groove. To prevent it and the shaft seat o-ring from falling out, I put the compressor cover on two short 2×4″ wood pieces to allow room for the compressor shaft beneath it and carefully lowered the compressor body into it. I pressed it into place and lifted it up a few times to reassure myself that none of the seals had jumped their grooves and shifted, then assembled the eight 10mm nuts and bolts around the cover. Once those were in place, I turned the compressor over to install and torque down the four 6mm Allen-head bolts that secure the compressor core.
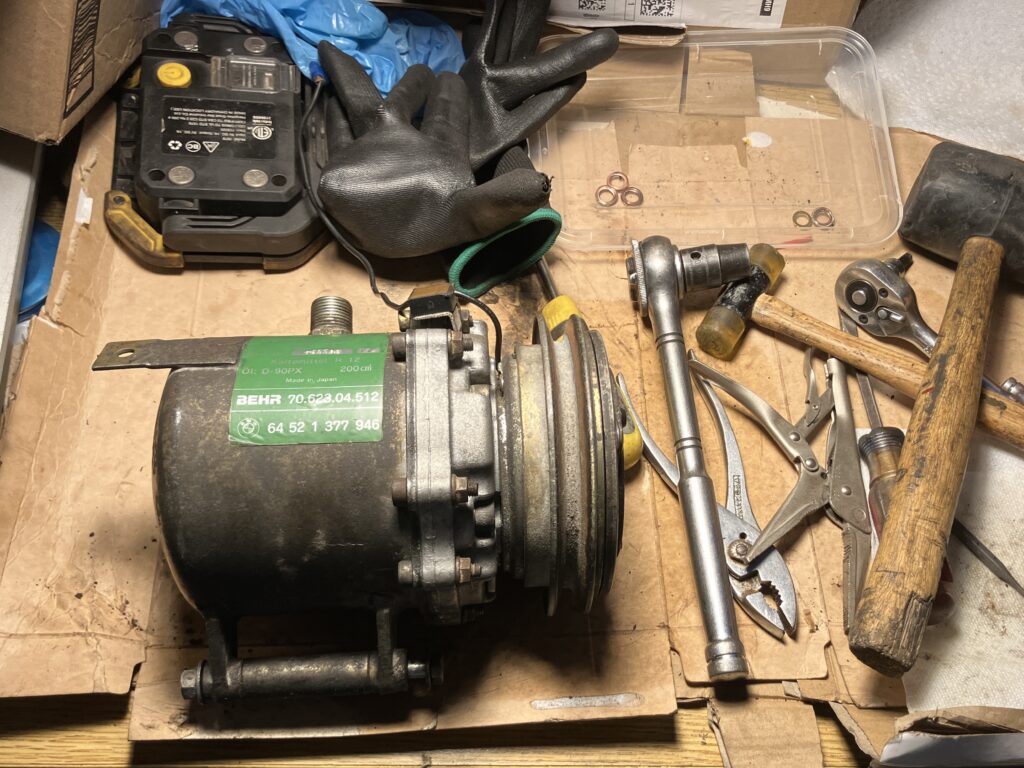
With the hard work done, I reattached the pulley and the clutch to the nose of the compressor and filled it with 6oz of Ester oil, compatible with both R12 and R134a. My hope is to reassemble the system and charge it with good old-fashioned Freon, of which I still have a couple of cans.
Fini. Or is it?
However, while I was writing this piece, I began to second-guess the issue of the shaft-seat o-ring—the fact that I recalled no such o-ring there when I pulled things apart and that there was no groove on the carbon ring for it to snap into or sit in. I looked carefully at photos I took during disassembly and convinced myself that I could see the old, flattened, and hardened black o-ring occupying the groove that the new green one should sit in. I began to think that it was better than even odds that I should’ve pried the old one out of its groove; I didn’t, and thus, the new green seal was sitting on top of the old one and would cause problems. I again searched online for photographic documentation of the carbon ring and the seal on top of it, and the only photo I found showing the seal in place was the one from the BimmerForums DIY piece shown above.
Was this the flattened, hardened black o-ring that I should’ve removed? Sure looks like it, right?
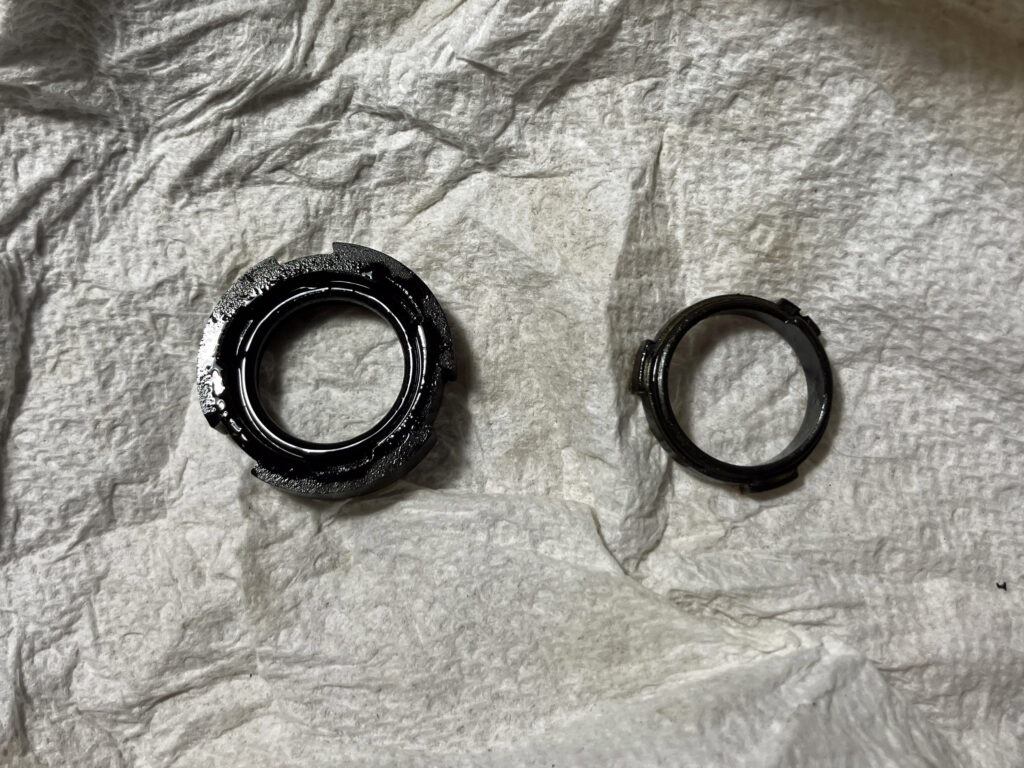
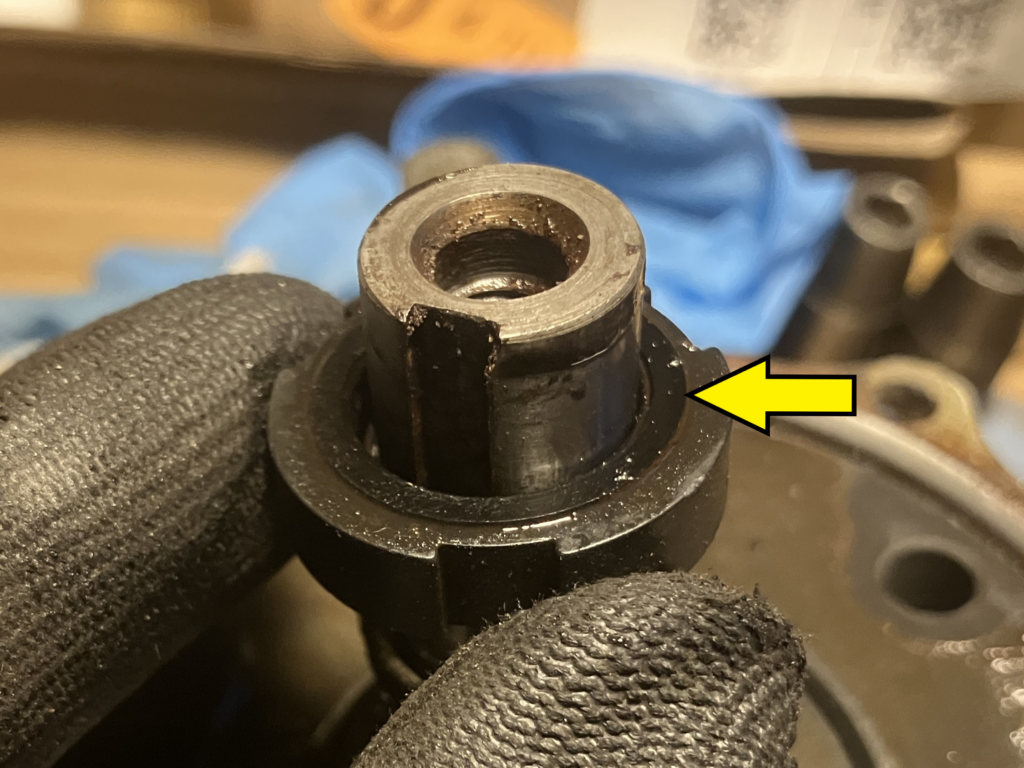
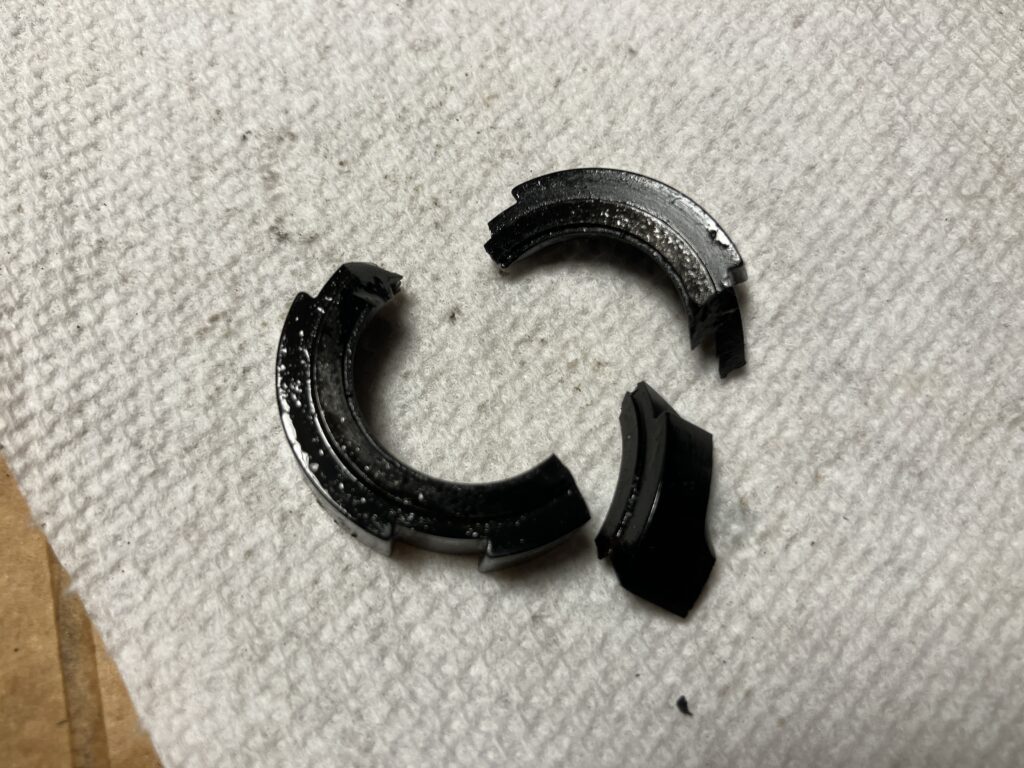
I needed to know if I’d screwed things up, so I took a deep breath and pulled the nose of the compressor back apart, which went quite a bit faster than it did the first time as everything was now all nice and clean and lubricated. Off came the clutch and pulley, then the cover, at which point I gasped when I saw my unobtanium carbon ring seal shattered into pieces.
NNNNNNnnnnnooooo…
Obviously, something went badly, and things got awry when I installed the cover and torqued things down. Most surprisingly, a close examination of the broken carbon ring shows that I was incorrect in thinking it still had the original black o-ring sitting in a groove. It didn’t. There is no real groove. So, oddly, while I was right to have pulled things back apart, I was wrong regarding the reason why I did it.
Hmmm.
So… was my compressor never supposed to have that thick shaft seat o-ring in front of the carbon ring? I’m not sure.
More to the point, with the carbon ring apparently unobtanium, I appear to have reached the end of the line in terms of rebuilding this compressor.
As Rosanne Rosannadanna said, “It’s always something.”
At least I’m only out seventeen bucks.
—Rob Siegel
____________________________________
All eight of Rob’s books are available on Amazon. Signed, personally inscribed copies can be ordered directly from Rob here.