A few weeks ago, I posted about selling off some parts, including an instrument cluster from an E9 2800CS. I described testing the instruments so I could maximize the cluster’s sale value, and found that all worked except the clock. With a little pre-Christmas time on my hands, I thought I’d check off that box.
I’d been in E9 Clock Land once before—about ten years ago, I fixed the dead clock in my ’73 E9 3.0CSi. I recalled that to do so, I needed to replace both of the clock’s capacitors. I wrote a piece about it here on e9coupe.com. I found the article, and it referenced another piece on the Pelican Parts forum. I’d completely forgotten, though, that first photo in that piece showed two types of clocks. These are shown below, with the “type I” being the older-style electrically-wound mechanical clock, and “type II” being the newer-style electric clock.
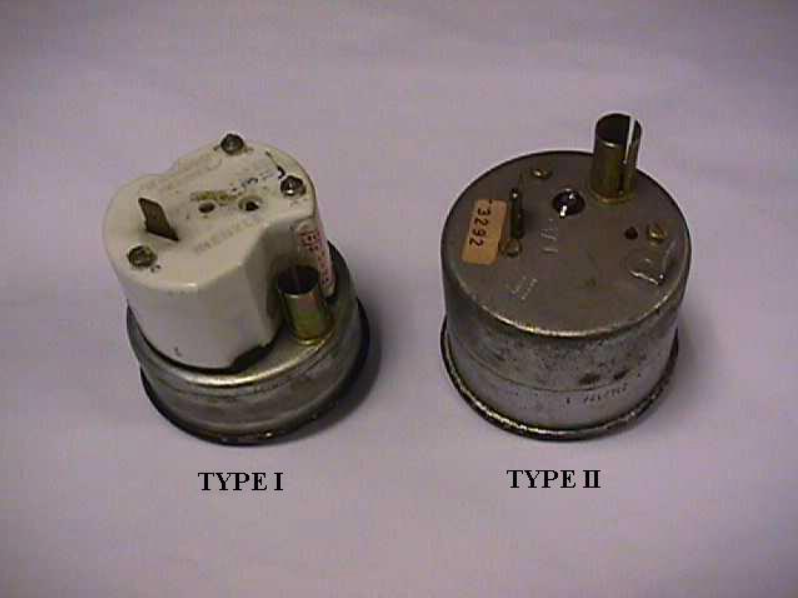
Photo courtesy of Pelican Parts
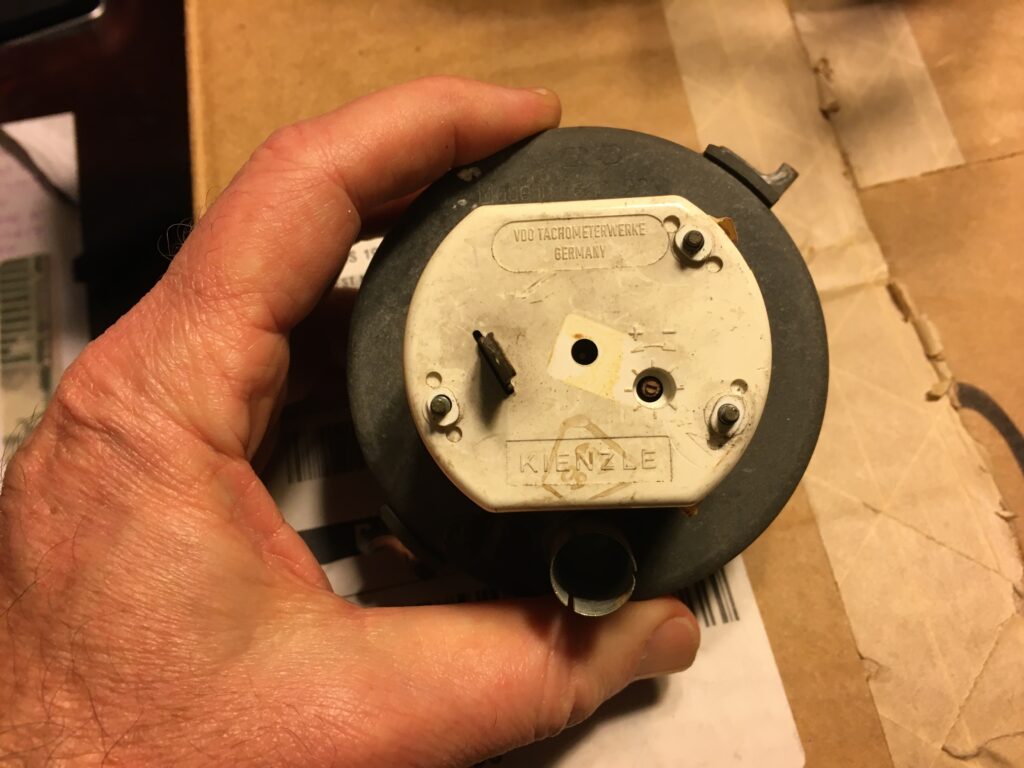
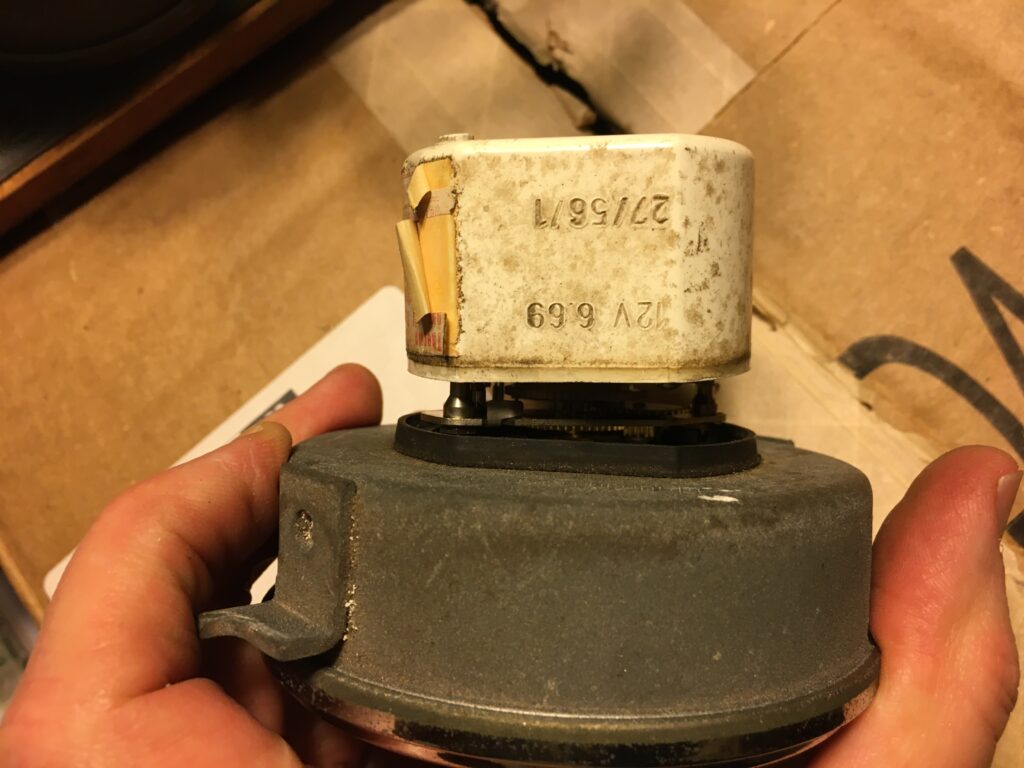
I then looked at the back of the clock in my instrument cluster, and realized that it was the older “type I” style. That made sense, as I’d pulled the instrument cluster out of, I believe, a 1970 2800CS. But it meant that the internals of the clock, and its repair, were completely different from what I’d done a decade earlier.
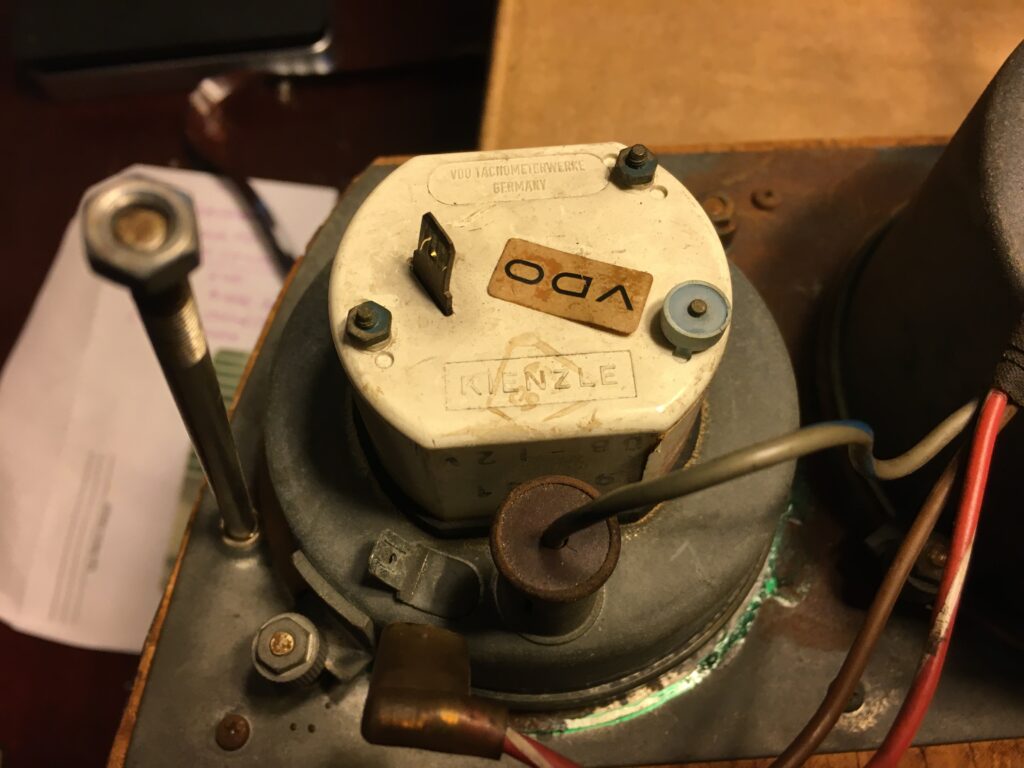
Yup, older.
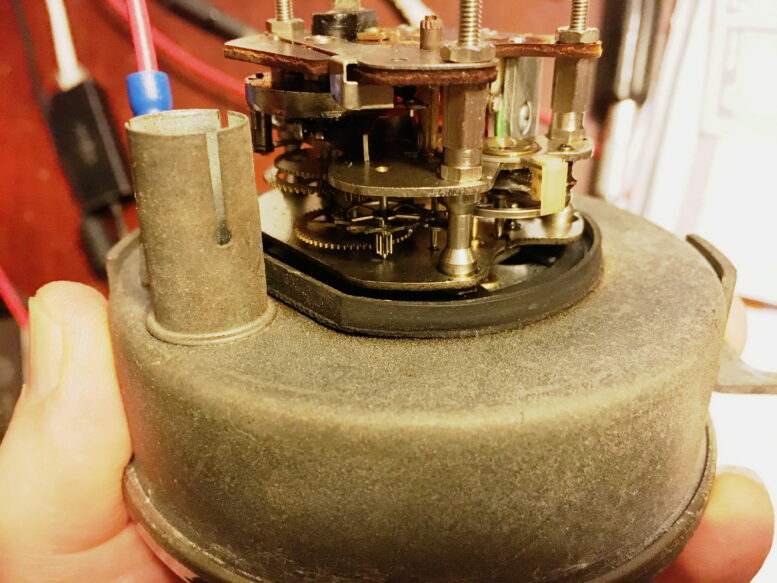
I read on both e9coupe.com and Pelican about the the older clock. Although it has a VDO sticker on it, the clock is actually made by Kienzle and was used in a variety of European cars. It’s charmingly anachronistic in that it uses an internal electromagnet to wind what is, at its heart, a mechanical clock. The electromagnet is energized by 12V. As soon as it’s energized, it pulls one end of a swiveling plate toward it. The motion of the swiveling plate winds the clock. The other end of the plate has an electrical contact face on it, acting like half of the contact points on a distributor. So, as soon as the plate moves to wind the clock, the electromagnet is disconnected. The gears inside the clock then turn for about 30 seconds until the contact faces meet again, which passes current to the electromagnet, repeating the cycle. Neat, huh?
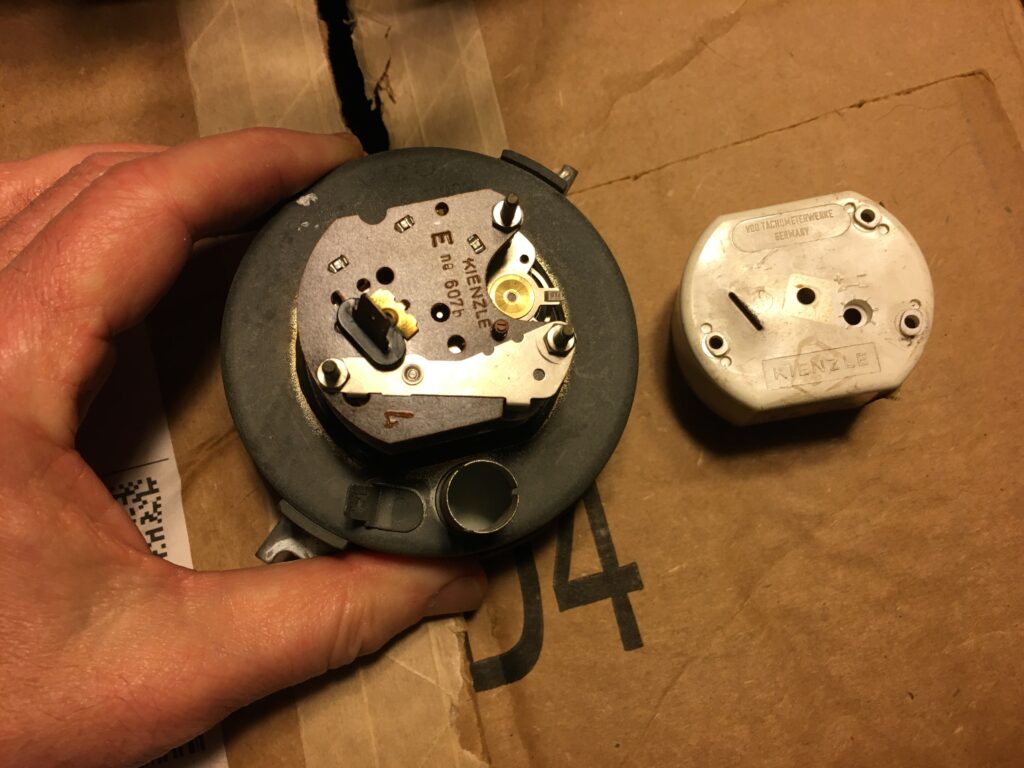
Unlike the newer-style clock which requires the crimp around the bezel at the face to be pried off, the Kienzle clock is easily opened by removing the three tiny nuts on the back. The one at the lower right stumped me for a bit, as it’s enclosed in a plastic anti-tamper cover, which you basically need to destroy to take off. But with the nuts undone, the cover just slides off the back.
Off with its, you know, nuts.
Up we go…
Ta-DA!
With the cover off, I could see that the exact model was the Kienzle 607b, and in this wonderful Google-driven world, searching for it yielded further information on what the common failure mode was. On some sites it’s referred to a cracked solder joint. Other sites reference an intentional fusible link. Regardless, repair consists of finding the location of the joint, identifying that it’s an open connection, and either recreating the fusible link with low-temperature solder or else permanently wiring the pieces together knowing that if the clock has another electrical issue you’ve now made it likely that it’ll completely fry. The procedure is shown in an excellent post on e9coupe here.
It took me a while to find the location of the so-called fusible link, because mine was fine. For an example of what it looks like if the solder at this location has broken, look at the pics in the e9coupe link in the paragraph above.
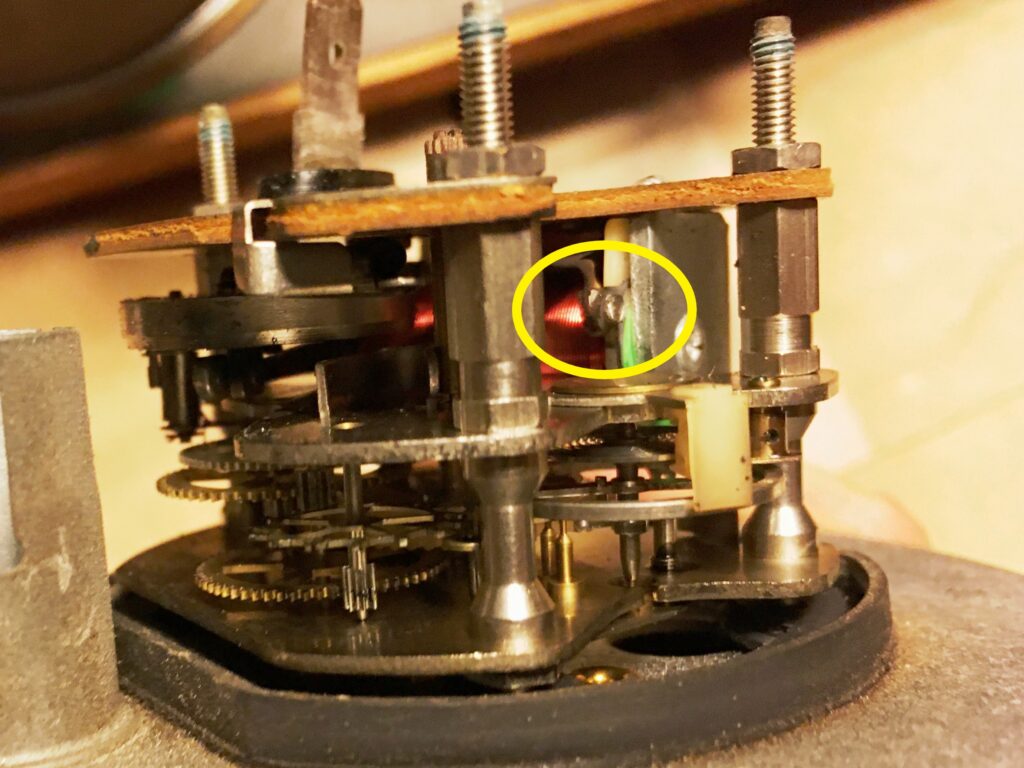
There it is.
I began to wonder if there was actually anything wrong with my clock at all, as I realized that it was quite possible that when I tested it last week by applying power and ground, I was using the benchmark that the clock (the “type II” clock) in my ’73 3.0CSi always ticks when powered, and there was no ticking sound from the clock in the spare cluster. So I grabbed a little 12V power supply, cobbled together some wiring, and connected power and ground. As soon as the 12V wire touched the clock, I heard a short sharp CLICK, then nothing, and I could see no motion of any of the clock gears. I concluded that the electromagnet did its thing, rotated the little swiveling plate, and wound the clock, but something else was preventing the gears from turning.
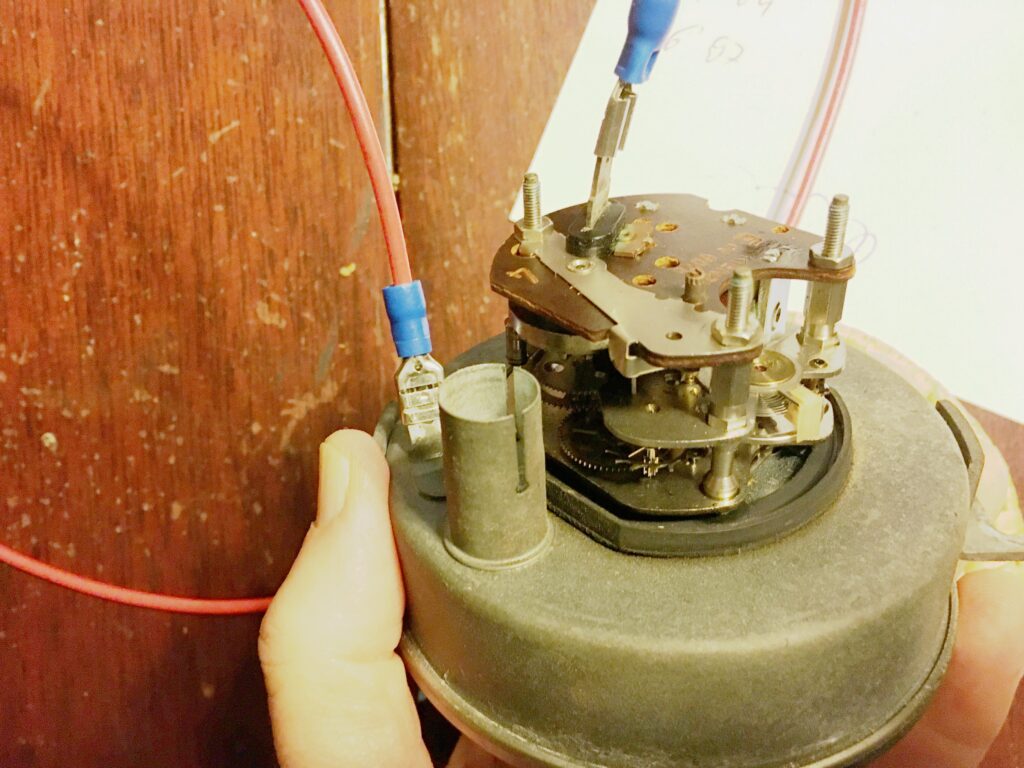
Power applied, and then… nothing.
I read all the Kienzle 607b-related DIYs I could find, and all of them talked about failures of the electromagnet. None mentioned what my clock was experiencing.
Then I searched YouTube, and found this 12-second video of the motion of the swiveling plate before and after cleaning and lubrication. Boy, though, the idea of actually disassembling this little jewel of engineering to clean it gave me the heebie-jeebies. Then I re-read some of the DIY procedures, and saw that one of them mentioned giving the clock internals a spray of WD-40 before putting the cover back on. I did the old “It couldn’t really be this easy, could it?” thing, prayed to the powers of lubrication, gave it a few squirts, re-applied power, and the little gears began turning.
IT’S A CHRISTMAS MIRACLE!
I stood over the clock and watched a few cycles of the contact faces closing, the electromagnet being energized, the swiveling plate pulling the faces apart, and with a 30-second countdown, the faces slowly combing back together. I should’ve made my own little video. I let the clock run for about twenty minutes and watched the movement of the hands just to make sure all was copacetic, then put the cover back on. For the record, if you power your “type I” clock, it is nearly silent aside from the 30-second CLICK; I heard no tick-tick-ticking sound like with the “type II” clock.
As I’ve long said, there are few things more satisfying than taking something that wasn’t working, laying hands on it, and through observation and action, completely solving the problem.
Now that it’s fixed, anyone want to buy a NOW FULLY FUNCTIONAL E9 instrument cluster? You know it’s what you really want. You can fund it by discreetly returning those socks and underwear and that solar-powered apple peeler. And maybe the gift certificate to the high-performance driving event.
—Rob Siegel
____________________________________
Rob’s newest book, The Best of The Hack Mechanic, is available here on Amazon, as are his seven other books. Signed copies can be ordered directly from Rob here.