For the nearly eight years I’ve owned my 2003 530i stick sport, I’ve needed to unlock the trunk manually with the key, as neither the remote release button above the driver’s left knee nor the microswitch behind the rubbery pad above the license plate worked. In addition, whenever I started the car, the message center on the instrument gleefully reported that the trunk was open, which it wasn’t. It seemed obvious that both were the fault of the trunk actuator, which is a fairly trivial repair. I put off replacing it in the same way one might put off eating the last piece of Thanksgiving pecan pie—e.g., knocking off this simple repair that would completely solve this small problem was something I looked forward to. But when I dropped off my middle son and his wife at the airport a few months ago and had to shut the engine off, pull out the key, get out of the car, walk around to the back, and manually unlock the truck so they could get their bags, I thought that maybe it was time to eat the damned pie.
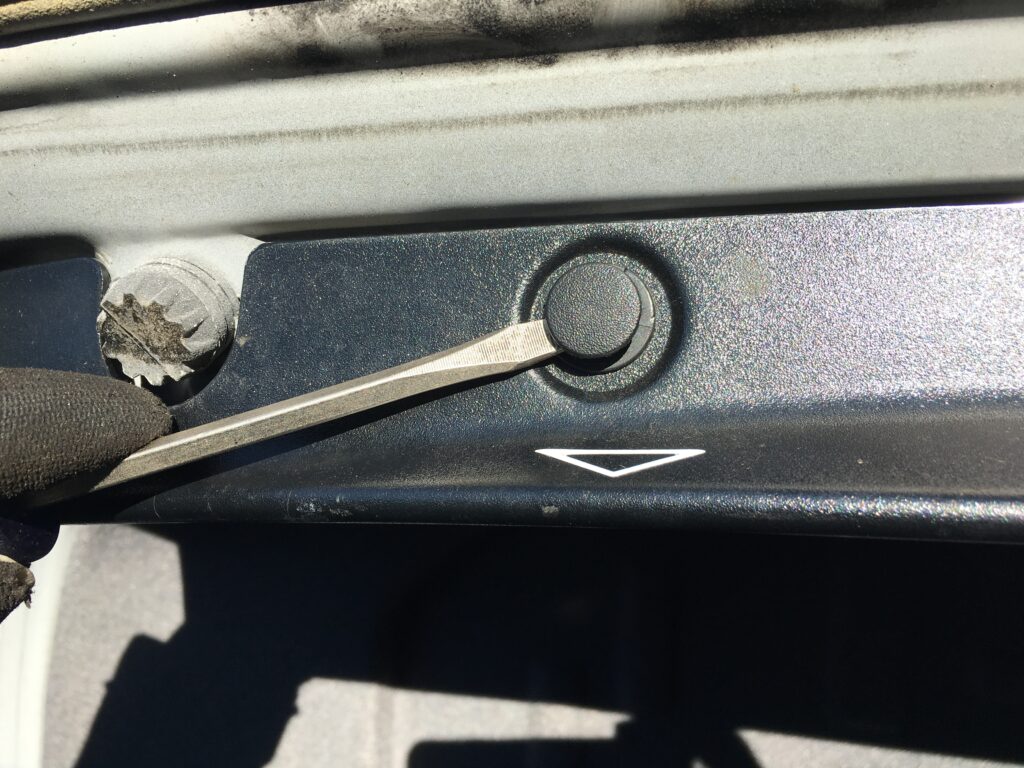
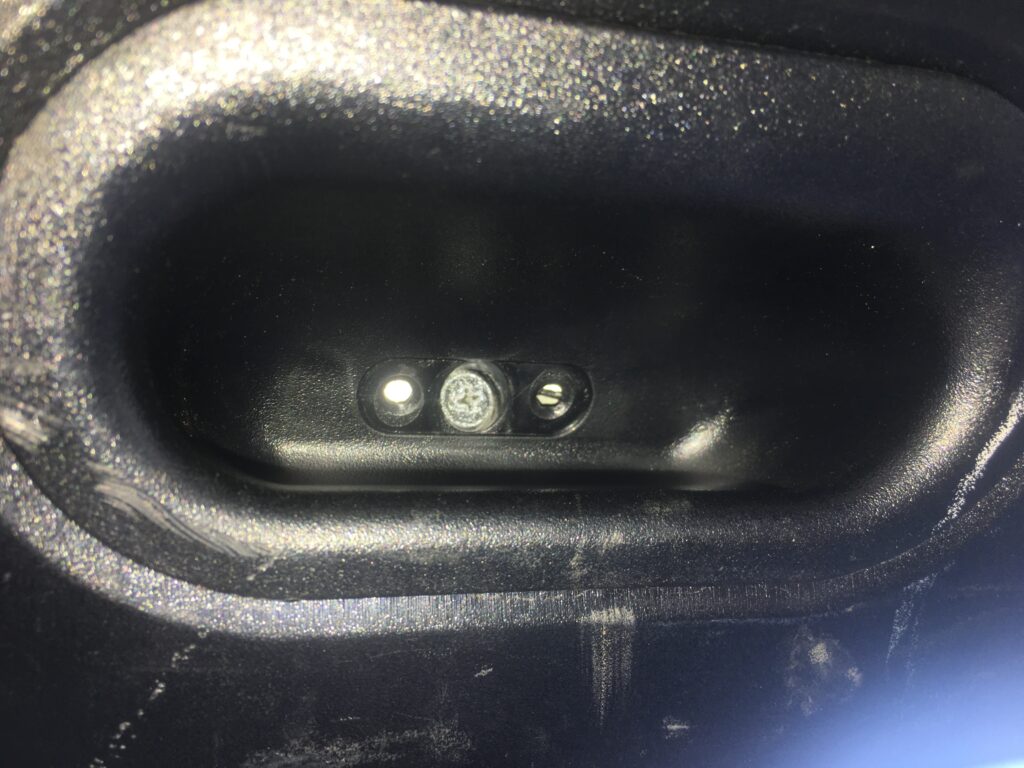
I found that un-branded actuators are as cheap as $18 on eBay, but FCP Euro had a a proper OEM VDO trunk actuator for $42, so I clicked and bought. On a 60° late October day, I had at the task. Replacing the actuator requires removing the trunk latch, which requires pulling off the access panel covering the inside of the rear-facing part of the trunk lid. It’s obvious that you need to pop out the two push-in fasteners, but you only stumble on the fact that a Phillips-head screw in the recessed lift grip needs to be removed when you find that the panel is still held fast. With all three out, the panel should hang downward, but there are four snap-in fasteners that need to be popped out of their holes by curling your fingers around the back of the panel and tugging down.
Two of these…
…and one of these.
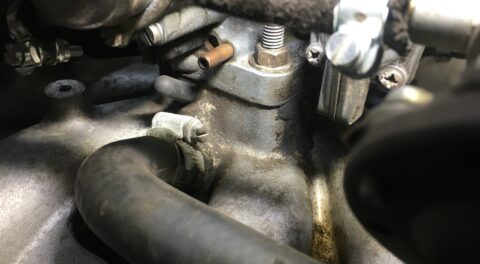
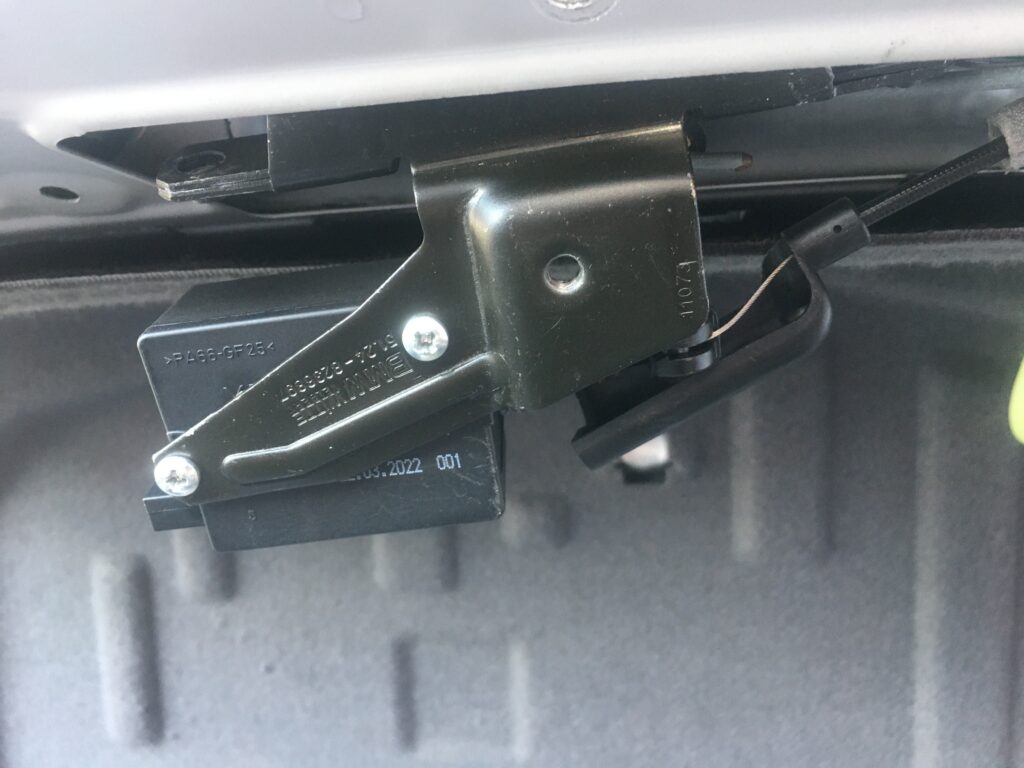
With the panel off, the trunk latch and the actuator are exposed. In the photo below you can see how the actuator is held to the latch by two Phillips-head screws, but you can’t get at one of them without unbolting the latch. You pull the electrical connector out the back, then unscrew three Torx T30 bolts, one of which is visible in the photo.
You’d think you can pull that actuator out, but you can’t without lowering the latch.
The latch and actuator hanging down.
Once you unscrew the actuator from the latch, you need to pop off the collar holding the cable to the little piston.
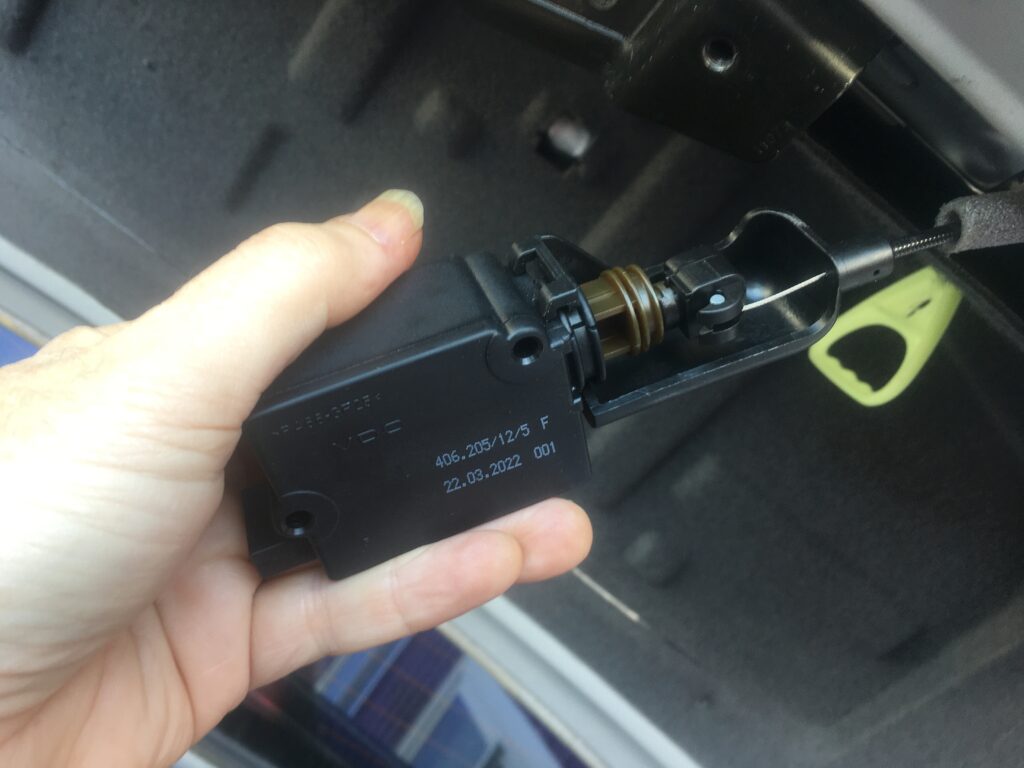
So close…
As they say, installation is the reverse of removal, so in went the new actuator, and back in went the Torx bolts holding the latch to the trunk lid. End to end, this was maybe twenty minutes. I’ve long said how much I love these small easy wholly-contained repairs where you completely fix a problem from start to finish (e.g., I can’t fix health care, but I can get my trunk to pop open without sliding down some slipperly slope). Before I put the access panel back on, I tested my repair by closing the trunk lid and reaching up with my fingertips to push the microswitch behind the rubber pad.
To my surprise, I heard the faint click of the microswitch, but the trunk lid stayed put.
My first thought was… bad microswitch too? Unlikely I went inside the car and mashed the big pushbutton lower left of the steering wheel.
Crickets.
Hmmmmn.
I read online to see if there was a trunk actuator fuse that might have blown, but read only about the three central locking fuses, all of which were okay.
Then, while I was futzing around inside the trunk, I realized that the trunk light wasn’t on. In a wonderful bit of Zen-like quantum entanglement, this caused the light bulb above my head to go on—this wasn’t an actuator problem. It was a systemic problem with electrical components in the trunk lid. And that meant…
Oh crap.
Not you…
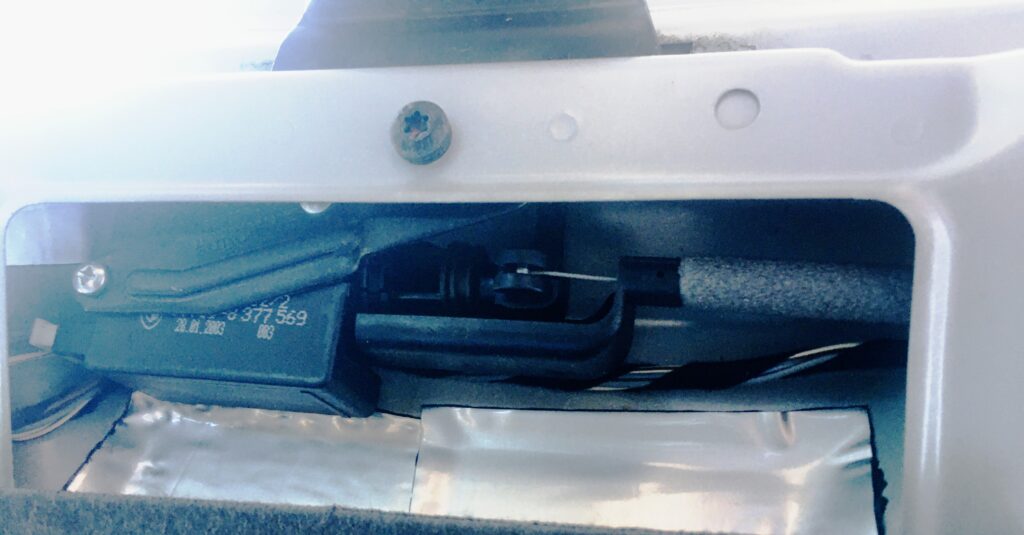
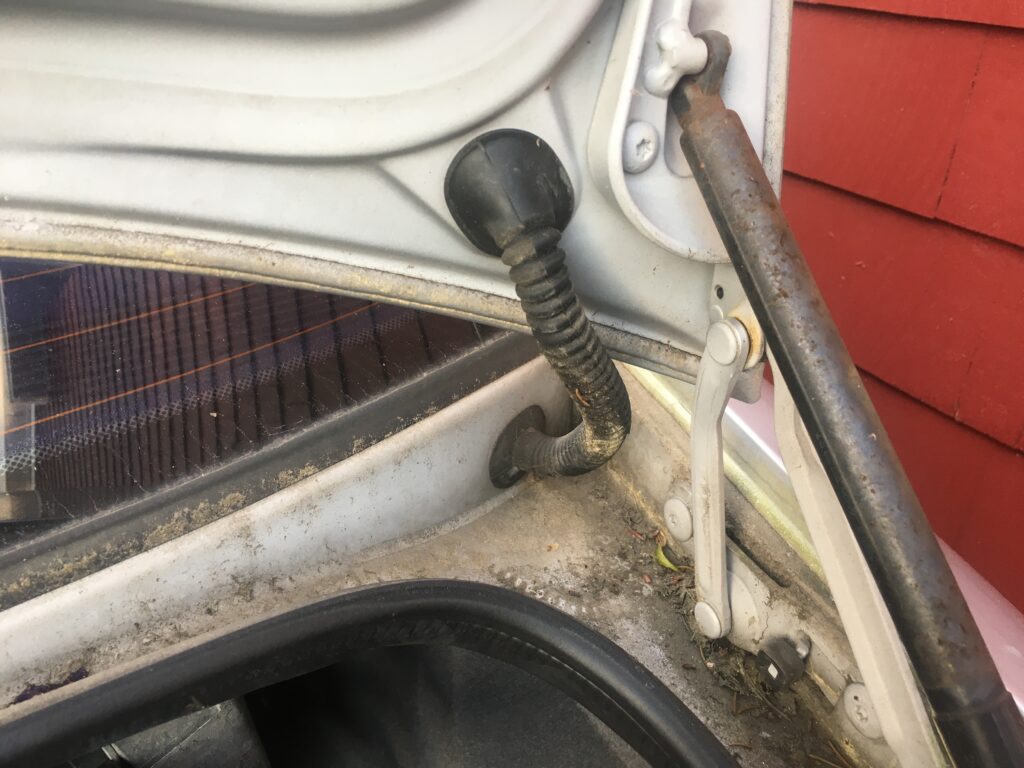
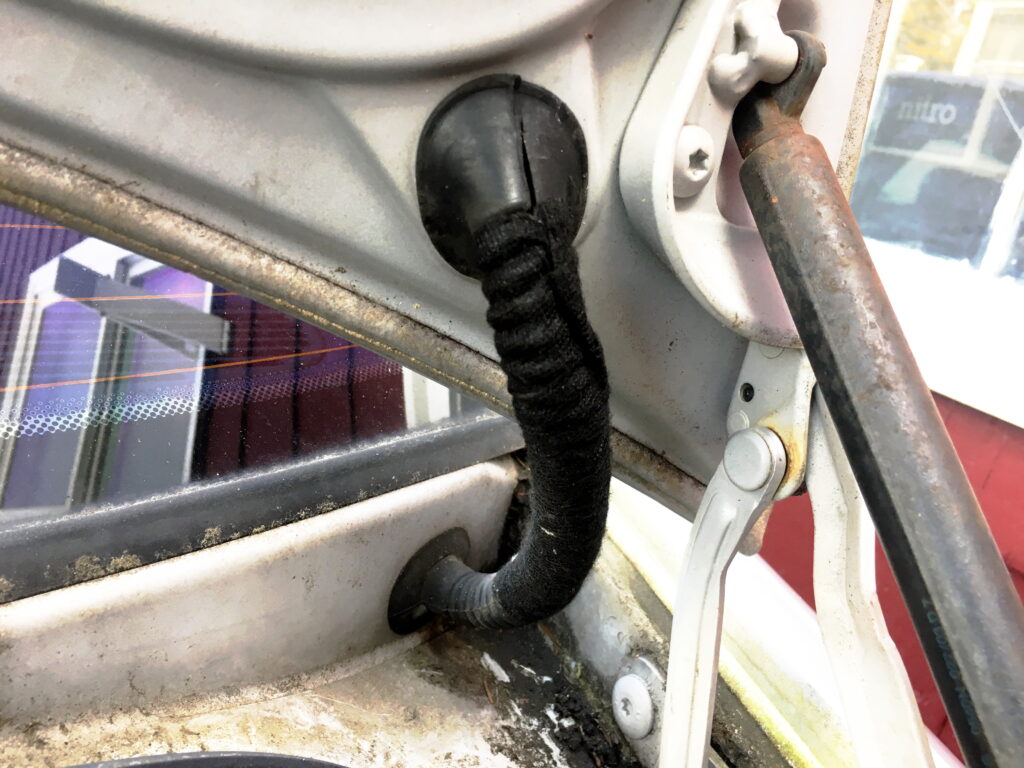
In general, it’s pretty rare for a wire to break inside a wiring harness (it’s much more common for wires to break off at the connectors), but the glaring exception to that rule is portions of wiring harnesses that are attached to doors, trunk lids, and rear hatches and have to bend as they open. My E39 and E46 wagons both suffered broken wires in the hatch harness, and I was dimly aware of the known problem in the E39 trunk harness, but it wasn’t on my radar. And really, it should’ve been, as the actuator not working and getting the message that the trunk is open is a clear indication of more than one thing being wrong. I pulled back the rubber boot that protects the wires leading into the lid, peered inside, and immediately saw the problem.
Hello slippery slope.
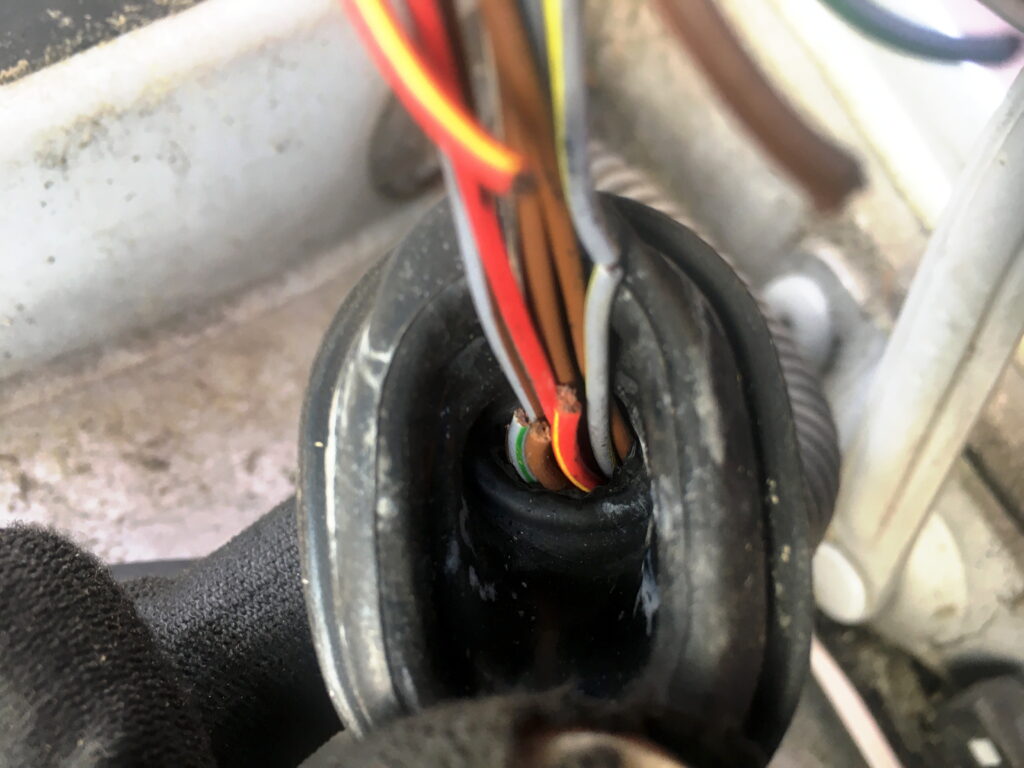
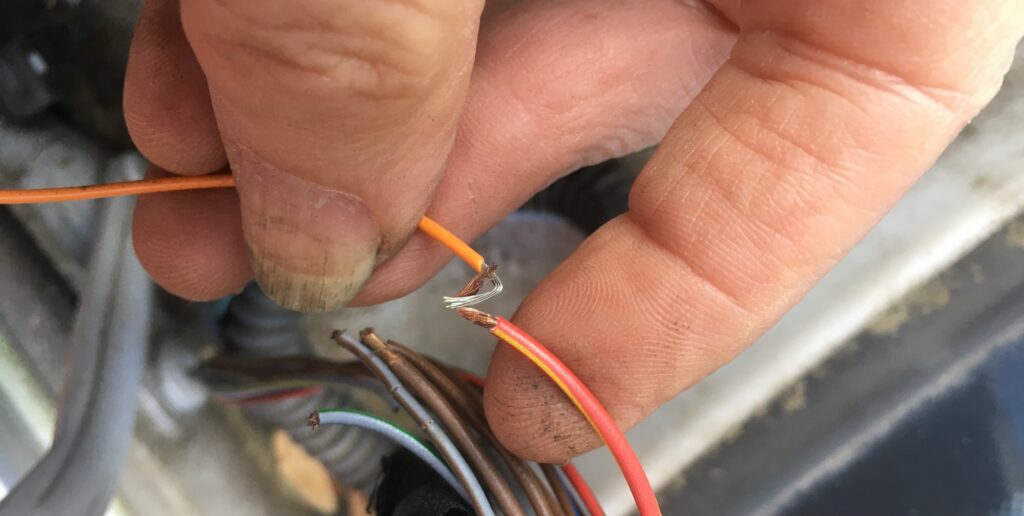
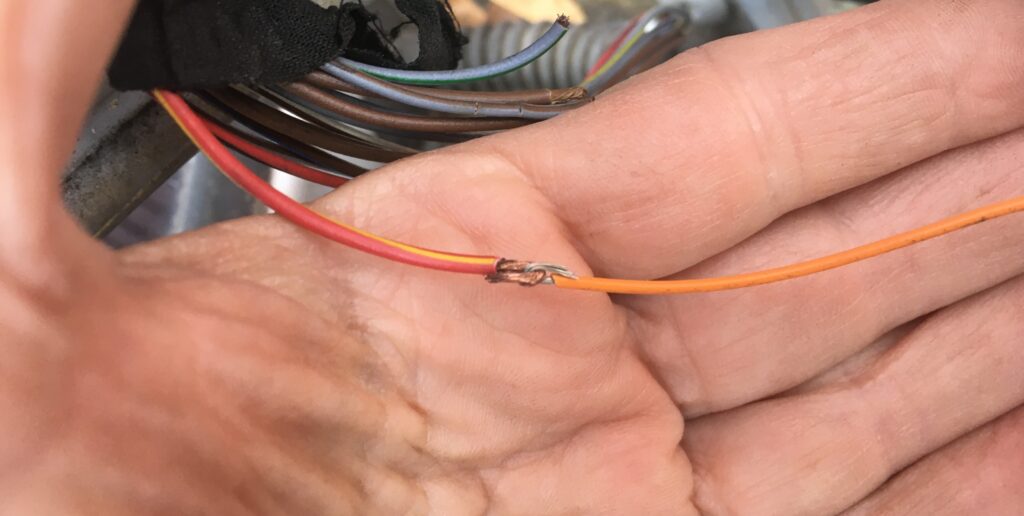
I took a small pair of scissors and carefully slit open the rubber sheath. I found five wires broken near the top, one broken at the bottom, and two more with 360° cracks in their insulation.
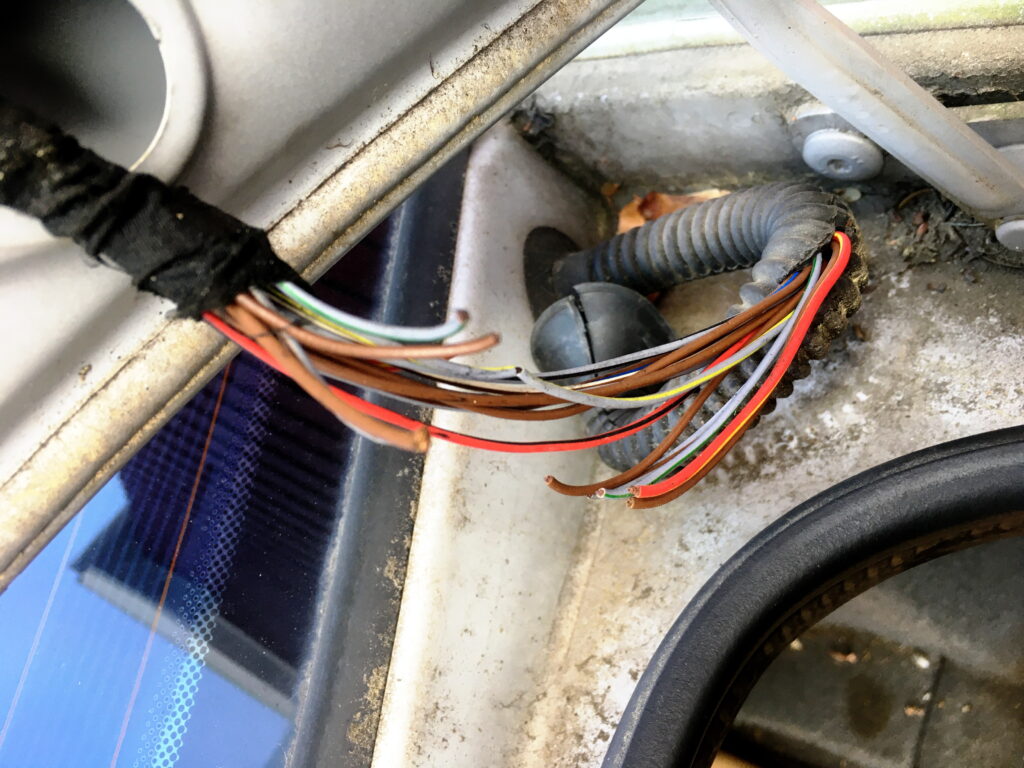
Yikes!
There are a number of excellent DIY articles about this problem, one of which is here, so if you want more information, click away. My goal was to fix this in the driveway while I still had warm fall weather, as garage space for a protracted repair was at a premium.
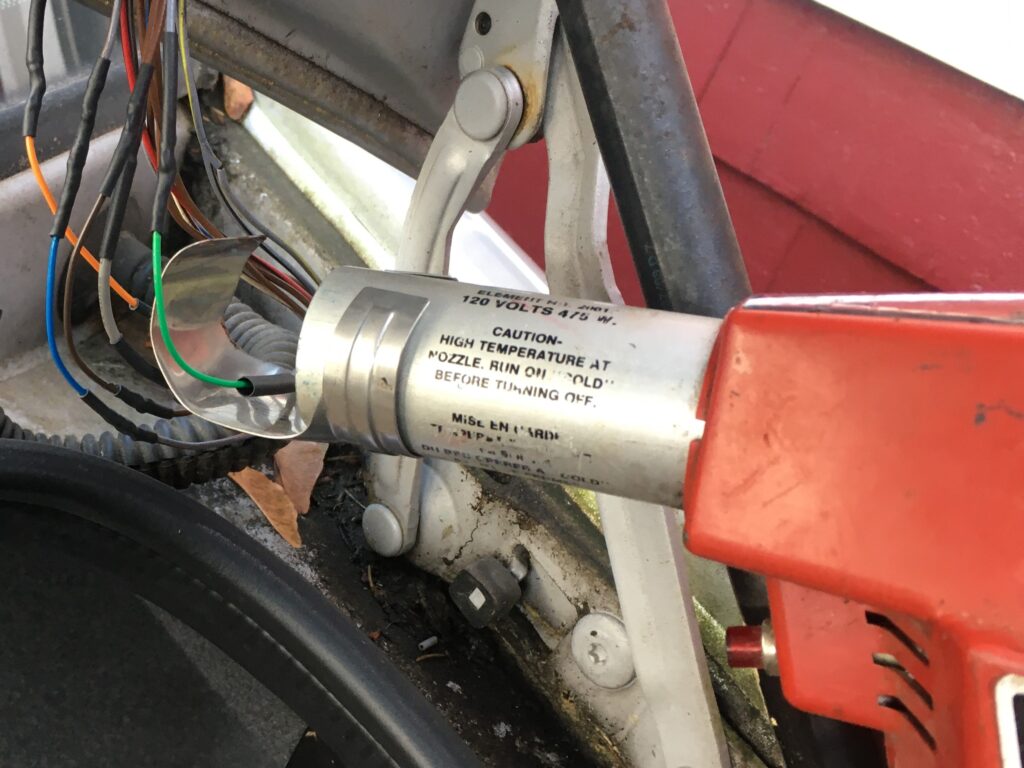
Despite my having written an electrical book that talks in detail about wiring repairs, I don’t do work like this often. Long story short, broken wires can be spliced back together using butt-splice crimp connectors, heat-shrink solder connectors, or via manual soldering and use of heat-shrink tubing. Each has plusses and minuses. Using butt-splice crimp connectors is fast, but they’re big and rigid, making them a poor choice for this kind of problem where multiple wires are broken inside a wiring harness right next to each other. Plus, they’re not weatherproof. Heat-shrink solder connectors have a ring of solder inside that you pass the stripped ends of both wires through and then heat the connector with a heat gun to melt the solder, but there’s the possibility of “cold-soldering” the joint (not having the solder flow into the strands of the wire), and because the ends need to be overlapped, it shortens the wire. Manual soldering also shortens the wire, but if you do it right using added splice wires, I think it produces the highest-quality electrical connection.
So I had at it. I found wire the same gauge as that in the harness, cut a bunch of 2-inch splice wires, slid the heat-shrink tubing over the end of the original wire, stripped the end, bent it and the end of the splice wire in a hook, mated them and folded them over, soldered them using flux to wick the solder into the joint, then slid the heat-shrink tubing over the joint and shrunk it in place.
Hook ’em…
…fold ’em…
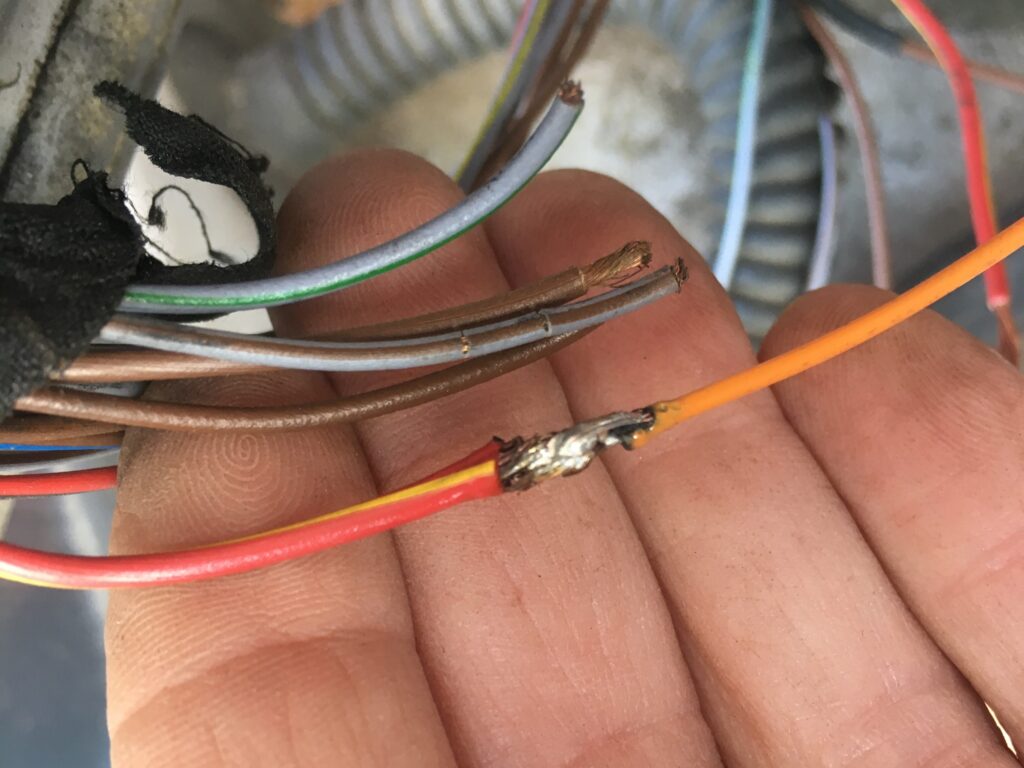
…solder ’em (yeah not a great joint but good enough)…
…and shrink ’em.
Some of the DIYs say that you should take this opportunity to cut and splice all 13 wires in the harness. I didn’t do that; I fixed only the ones that were broken or were about to break. You can make your own decisions. The result wasn’t going to win any awards, but after two soldering sessions, everything broken had been repaired.
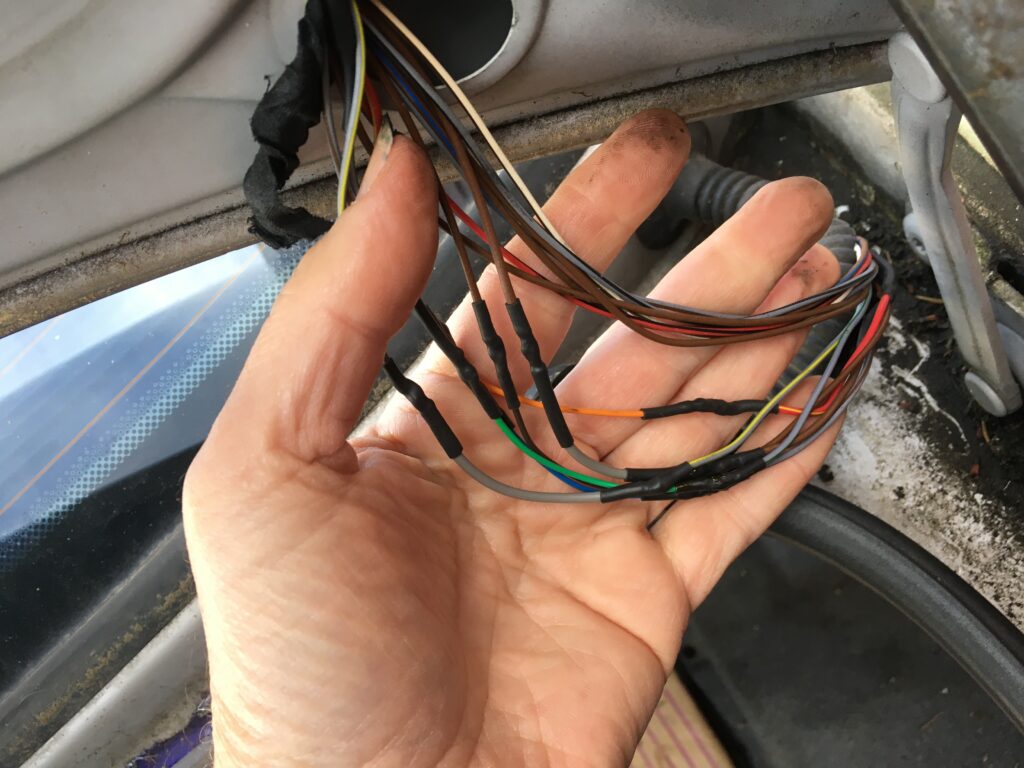
My literal handiwork.
Making sure not to pinch any of the hanging wires, I carefully closed the trunk lid, reached above the license plate, and pushed the rubber-covered microswitch.
Pop!
I then repeated the test with the push-button below the steering wheel. Same result.
Cool.
Lastly, I cajoled the different-length wires inside the rubber loom and wrapped it in the kind of self-adhesive cloth tape that I use to cover fraying 2002 engine harnesses. I still need to seal up the part of the boot that I slit open.
Done, sort of.
So it wasn’t exactly the twenty-minute quick-hit-and-run repair I thought it was going to be. Or like pulling that last piece of pecan pie out of the fridge. It was more like having to fight off a family of rabid racoons who also wanted it. But it’s great to have the trunk actuator working, and not to see that incorrect “trunk open” message every time I start the car.
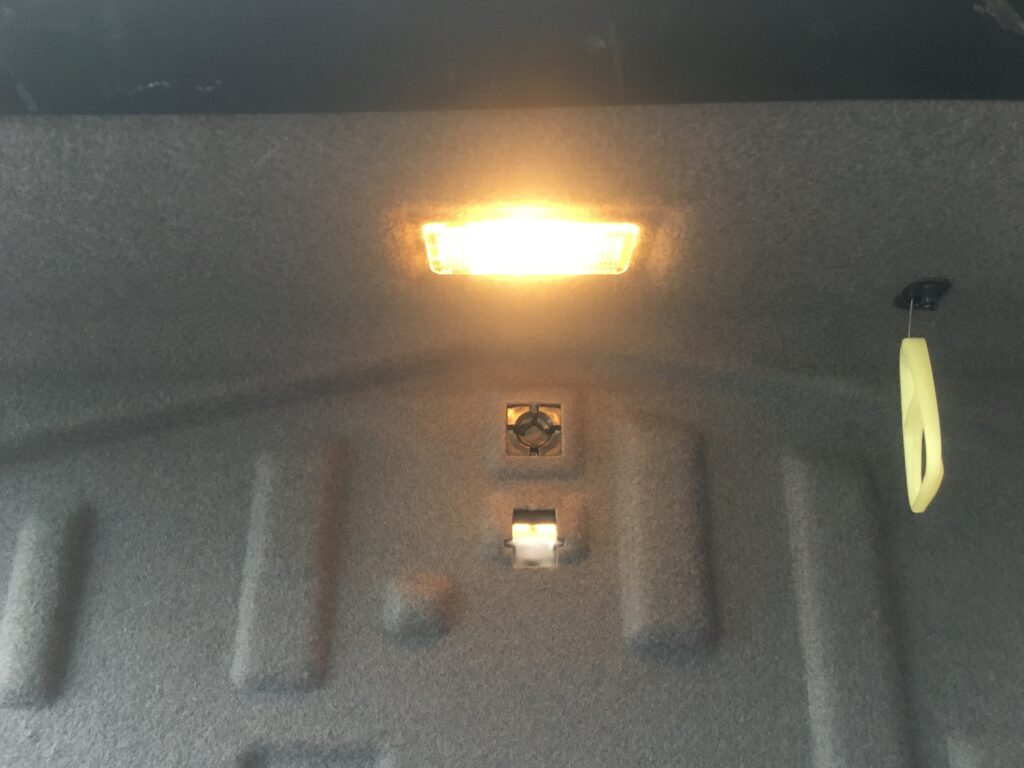
And yes, I’m happy to have the light bulb go on—the one inside the trunk.
And no, I didn’t check whether or not the actuator I removed was really bad or not. If it wasn’t—and it probably wasn’t—whatever. I don’t get things like this wrong often, and even if I did, the cost of the harness repair itself was effectively zero other than a few extra hours of my time.
Really, the worst thing about the repair was that the pecan pie analogy is making me hungry, and my wife isn’t going to bake one until Thanksgiving :^)
—Rob Siegel
____________________________________
Rob’s newest book, The Best of The Hack Mechanic, is available here on Amazon, as are his seven other books. Signed copies can be ordered directly from Rob here.