Last week, I wrote about two simple repairs on my daily-driver E39 530i stick sport—replacing the chattering front rotors and the leaky valve-cover gasket—and how enormously satisfying it was to quickly and inexpensively solve both problems. Since then I have I continued along this path, filling my repair basket with low-hanging fruit.
First was Zelda my ’99 Z3. It had been a fairly mild winter, so the car did occasionally get driven (that is, it hadn’t spent six solid months in the driveway under its cover). At some point, when I drove it, I noticed that the ABS and the traction-control lights had come on—and stayed on. While I don’t care about ABS and traction control for my pleasure-cruising, stress-busting use of the car, I winced at this for two reasons. The first is that the car won’t pass Massachusetts state inspection this way, and that’s coming up in a few months.
The other is that this was one of the car’s issues when I bought it nearly ten years ago.
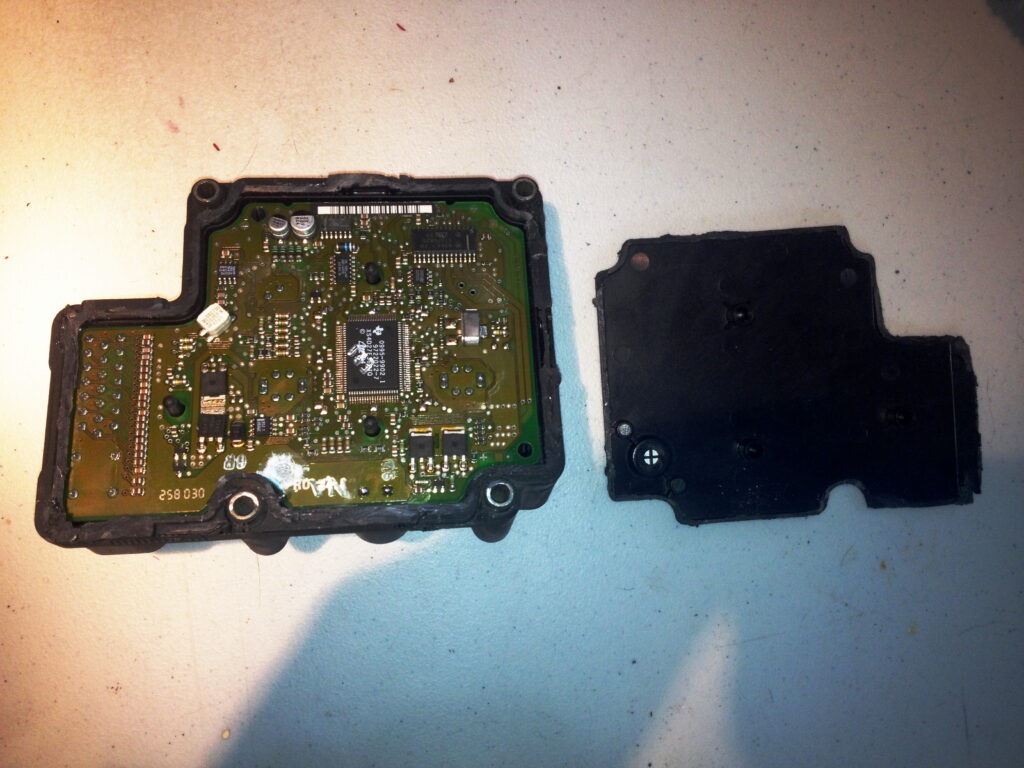
Back then, I hooked it up to my Windows XP laptop running BMW PA Soft V1.40, and it reported that the ABS pump was bad. I read on the forums and learned that the pump itself rarely fails; the problem instead is usually due to cracked solder joints in the control module that bolts to the side of the pump. Despite the module having, as they used to say, “No User-Serviceable Parts Inside,” the prescription is to cut it open with a Dremel tool, use a soldering iron to re-flow the solder, and glue the cover back on.
Even knowing what the problem likely was and having repaired it before, I wasn’t chuffed by the idea of having to do it again, so I didn’t jump straight to pulling the thing apart. Instead, I verified whether or not there were codes or faults that implicated the pump.
Ten years ago, this was an interesting project, but I had little desire to do it again.
Last year I bought a Foxwell NT510 BMW scan tool. These cost about $140 new on eBay, but I found one used for $60. I figured it would bridge the gap between the $30 generic OBD-II code reader which doesn’t read any BMW-specific codes, and having to stretch an extension cord from the garage to run my old XP laptop that still hosts BMW PA Soft 1.40 diagnostic software. (Really, the main reason I bought it was to keep it in the E39 530i in case the Check Engine light comes on while I’m driving so that I can quickly and easily plug in something that’ll give me more information than generic OBD-II codes.)
The NT510 is okay, but not great, and on the Z3, it has the same problem as any other scan tool: You can’t plug it into the OBD-II port. Instead, you need to connect it to an adapter that’s plugged into the round BMW-specific diagnostic connector under the hood, as you need to do with PA Soft. But I hooked it up, and was surprised that it read no ABS-related codes. Figuring that this was a shortcoming of the Foxwell, I pressed the old XP laptop back into service and was surprised to get the same result: ABS and traction-control lights on, but no faults or codes.
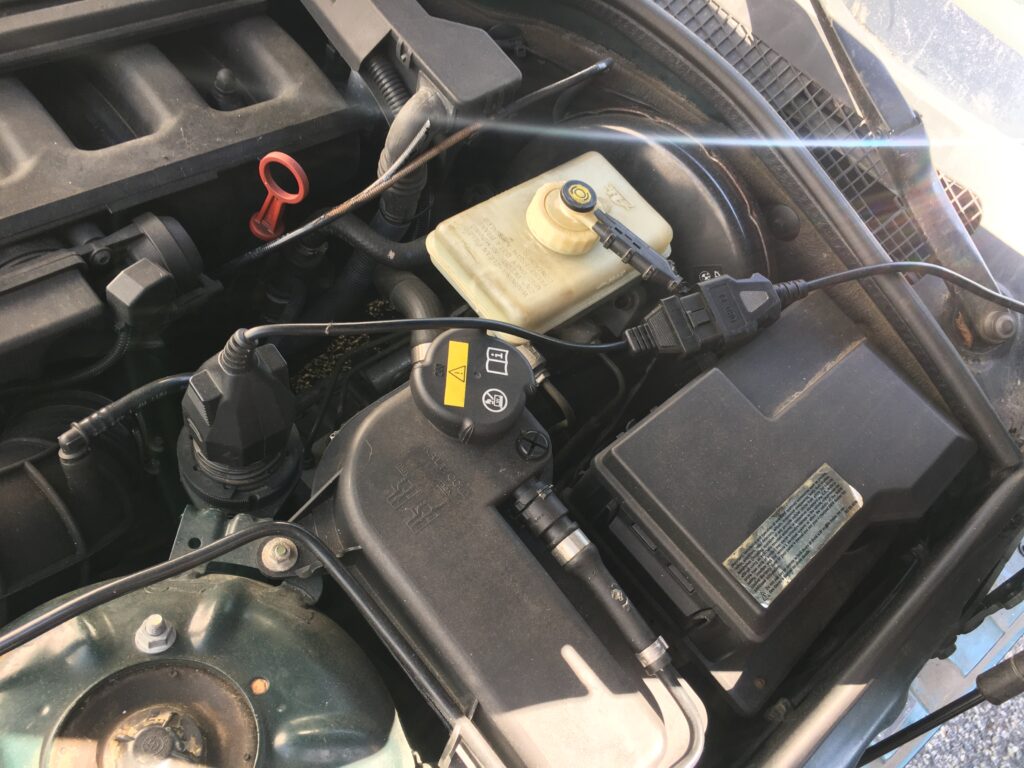
An adapter is necessary to connect a standard OBD-II code reader or scanner to the big round 20-pin diagnostic port.
I did some more reading on the forums and learned that a bad wheel-speed sensor can present itself this way. I was surprised, but hey—at least the go-to path didn’t have me slicing the ABS control module back open.
While it is possible to back-probe the connector on the wheel-speed sensor and test it directly (I describe how to do it in my electrical book), it’s a bit tricky, especially if you don’t have a handheld scope capable of displaying waveforms. I wondered if the Foxwell NT510 was advanced enough to read and display the wheel-speed-sensor data. To be clear, doing it this way is different from directly testing the wheel-speed sensor: The former tests if wheel speed data is being supplied to the car’s network of interconnected modules. The latter tests the sensor’s functionality directly. For example, if the sensor is fine, but a wire between its connector and the control module is broken, no data will be displayed on the scan tool, and if the sensor is replaced, the result won’t change. Still, many repair shops and do-it-yourselfers rely on the scan-tool data, since it’s quicker, and it’s right more often than it’s wrong.
Nonetheless, I searched on YouTube and found a couple of videos of people displaying wheel-speed data on the NT510. Like other facets of the NT510, this process is not transparent, and seemed to be trickier if the sensor wasn’t throwing a code, as in my situation. You select “BMW,” then “Diagnostics,” then “Modules,” then “Chassis,” then the second option for the ABS module (the first option doesn’t work), then “Live Data.” Initially I used the simple text display and tried to watch it as I rolled the car down the driveway, but the numbers revert to zero as soon as you stop moving.
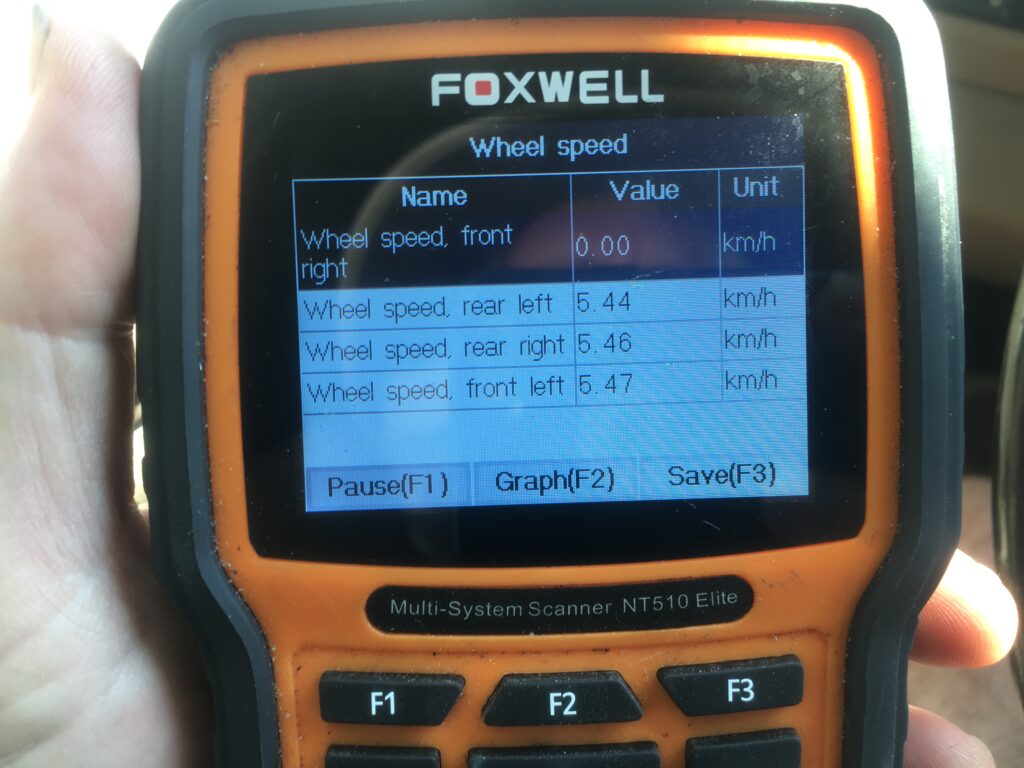
Wheel-speed text mode of the NT510: I photographed this and stopped before I crashed into the back of the truck in front of the Z3 in the driveway.
The graphic mode was a bit easier to deal with, because it stayed on the screen longer. Both modes verified that no data was coming from the right front wheel-speed sensor.
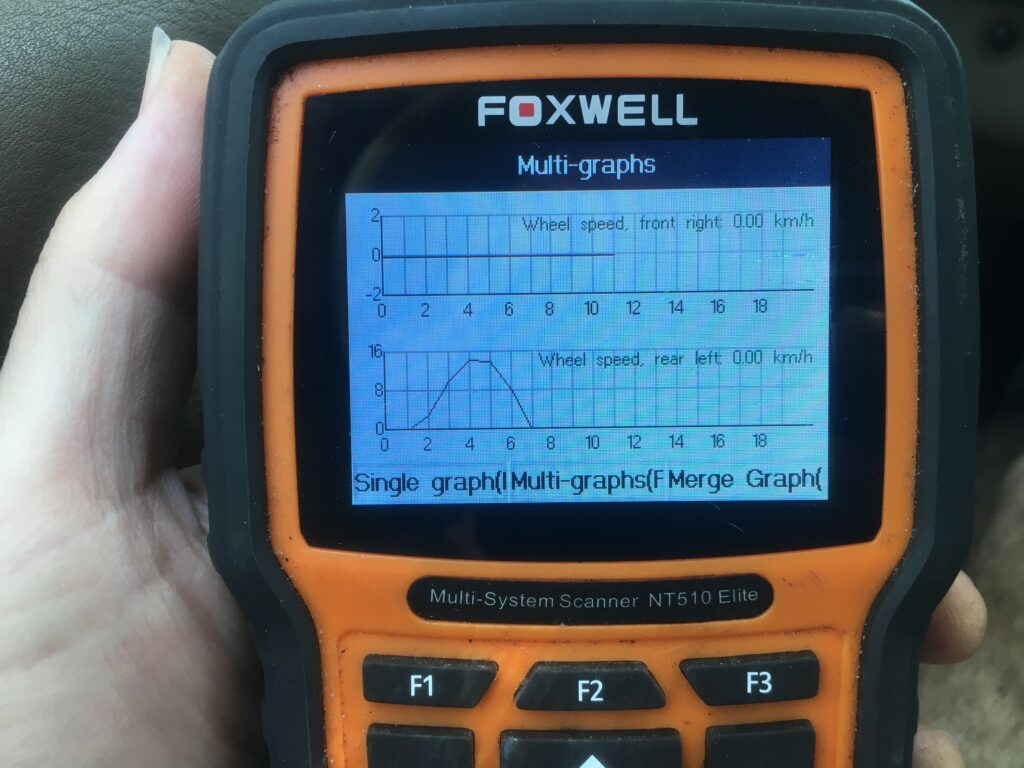
And the graphic mode.
In the “rhythm of repair” waters in which I so frequently swim (e.g., do you verify what you need before you order the parts, or guess?), $30 shipped for the wheel-speed sensor was short enough money to get one on order and on its way here, but the arrival date was delayed. I had some time on my hands, so I jacked up the car, set it on stands, and pulled the wheels off. I found no broken wires, and cleaning the connector and the sensor didn’t fix the problem. It was easy enough to swap left and right sensors. The problem moved with the sensor, so the sensor really is bad. When the new one arrives, I’ll install it, and this low-hanging fruit will have been plucked.
Next was Sharkie, my 1979 Euro 635CSi. The coupe had been sitting in storage for fourteen months, and prior to that it had seen almost no use since returning home from the Vintage in September 2021. On that trip, the air conditioning died; when I returned home, I found that one of the compressor fittings had loosened, but by that point it was already cool in New England, so I never closed the loop on recharging it.
So now I had at it. I hooked up the manifold gauge set and the nitrogen bottle, and pressure-tested it to 120 psi overnight to verify that the system was leak-free.
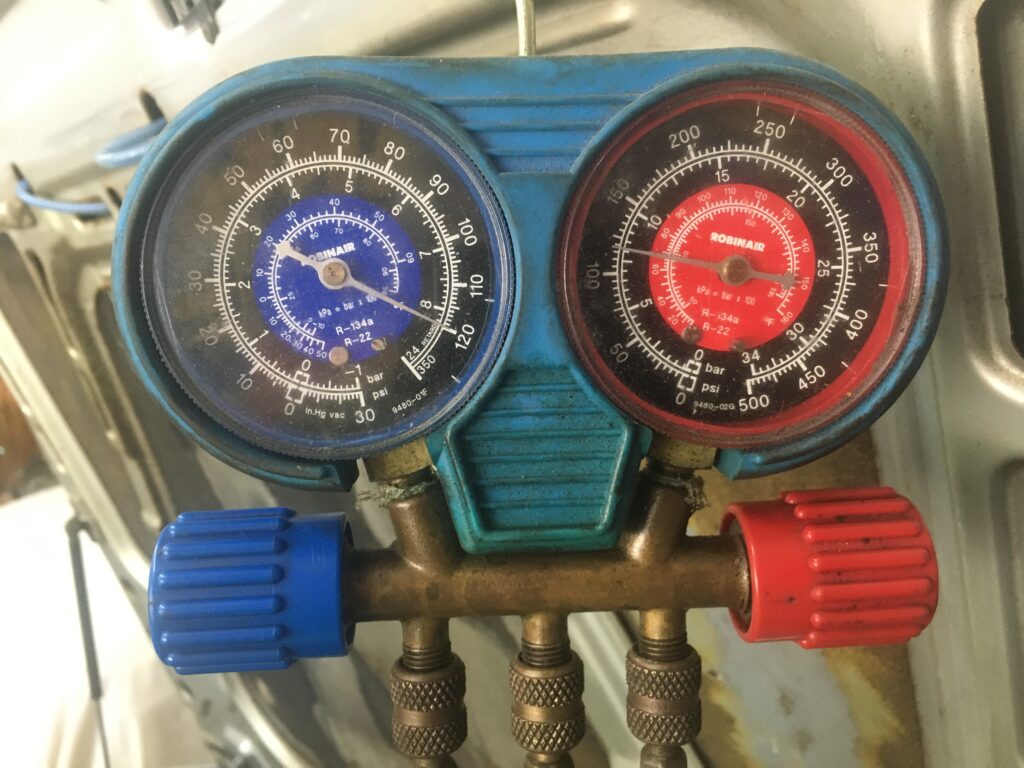
This needle shouldn’t move by more than one or two psi overnight.
In the morning, I found that the pressure had dropped by about 20 psi, an indication that it’s still leaking from somewhere. I sprayed Big Blu leak-detecting soap solution on all the connections, but did not see any bubbling. I used a UV light to look for leakage of the dye that was already in the system, and saw only the evidence of where refrigerant and dye sprayed out from the compressor-fitting leak in 2021. I would’ve shot some refrigerant into it and used my venerable old Yokagawa H-G10 detector to sniff it, but I was out of cans of R134a.
I guess this fruit wasn’t hanging so low after all. I back-burnered it, as there was another issue on Sharkie that I wanted to look at.
On the drive home from the car’s storage in the warehouse, I found that the blower fan—the one for non-a/c cabin air and heat—had a really annoying squeak. This was a long-standing issue that I’d completely forgotten about. Fortunately, the blower motor can be easily removed and replaced from under the hood (unlike the one in a 2002 where replacement requires removal of the damn heater box). I looked up what’s in a U.S.-spec ’79 635CSi, and found that the motor without the squirrel cages on it is just $49 from FCP Euro.
Rhythm-of-repair-wise, normally I’d just order it. However, this is not only an early E12-based 635CSi but a Euro one as well, and you never know when it uses a unique part until you try to fit the thing you already bought. So I opened it up to try to read a part number off the blower motor. This is about five minutes of work.
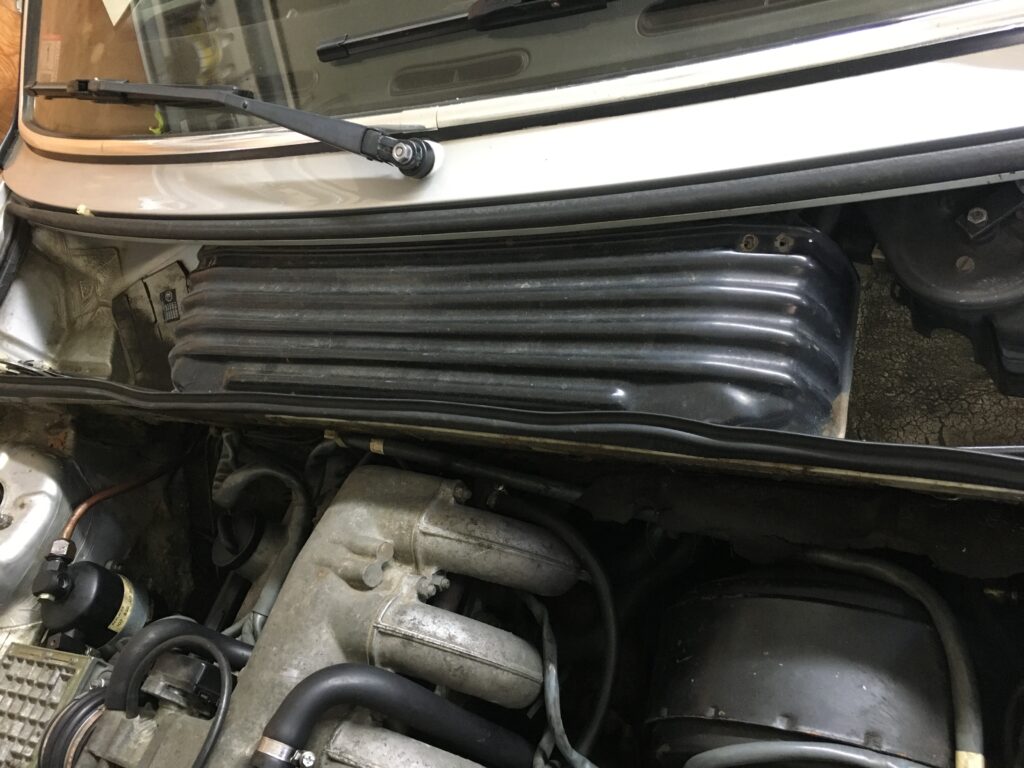
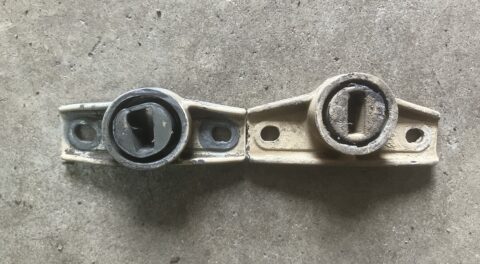
Eight screws to remove the metal shield…
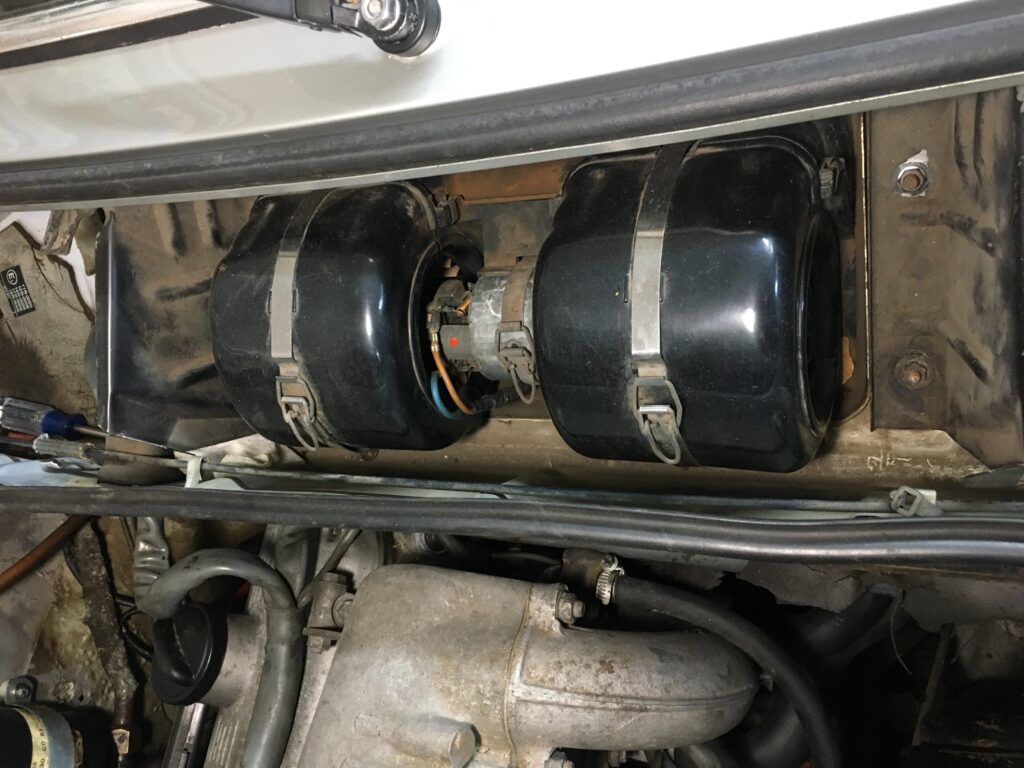
…and two straps holding on the plastic covers that protect the squirrel cages.
When I had the motor, shafts, and squirrel cages exposed, I spun the cages and didn’t feel anything sticky or rumbling. I turned the blower back on and verified that the squeak was coming directly from the fan (it was). I realized that with a can of SiliKroil and a flexible straw, I could access what appeared to be the bearings that the shafts ran on. I gave each of them a blast, then turned on the fan.
Silence.
This was a perfect example of following the oily path of least resistance; if the fan starts squeaking again in short order and I need to pull it back apart, I will have wasted perhaps ten minutes of my life by doing it twice.
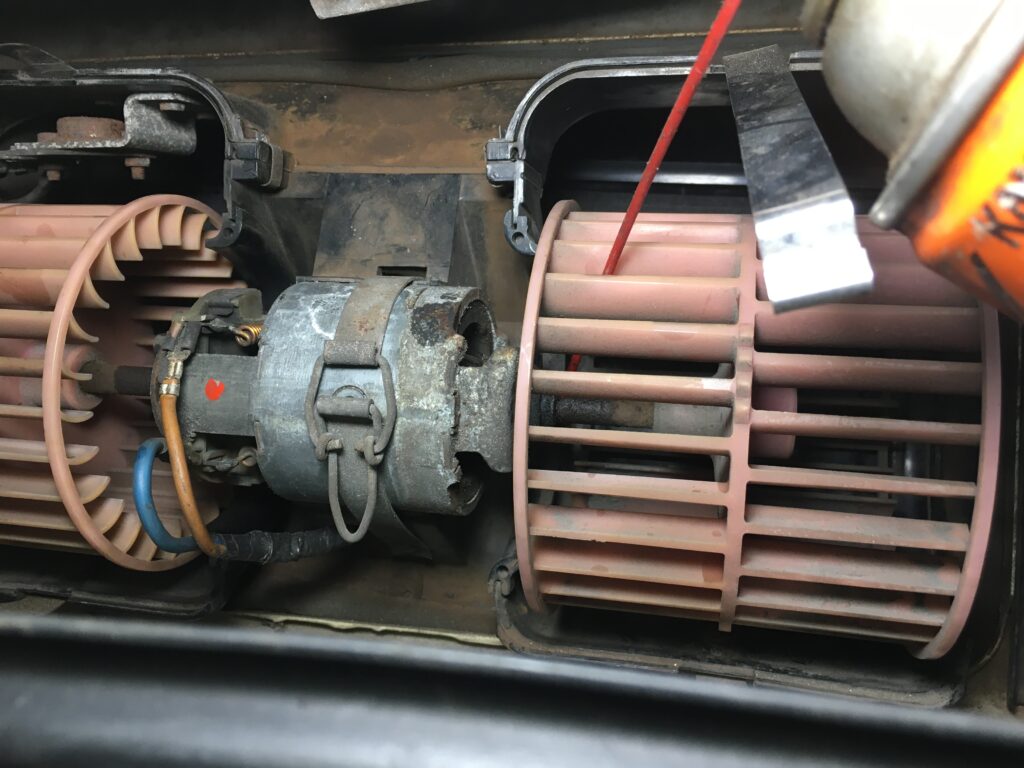
…and remove or lubricate as you see fit.
I’m liking this low-hanging-fruit approach to automotive repair. No weeks-long a/c retrofits, no frustrating endless iterations of do-it-yourself alignments on the Lotus, just quick in-and-out and done. I could get used to this.
Oh, right: The a/c in Sharkie still isn’t working.—Rob Siegel
____________________________________
Rob’s newest book, The Best of The Hack Mechanic, is available here on Amazon, as are his seven other books. Signed copies can be ordered directly from Rob here.