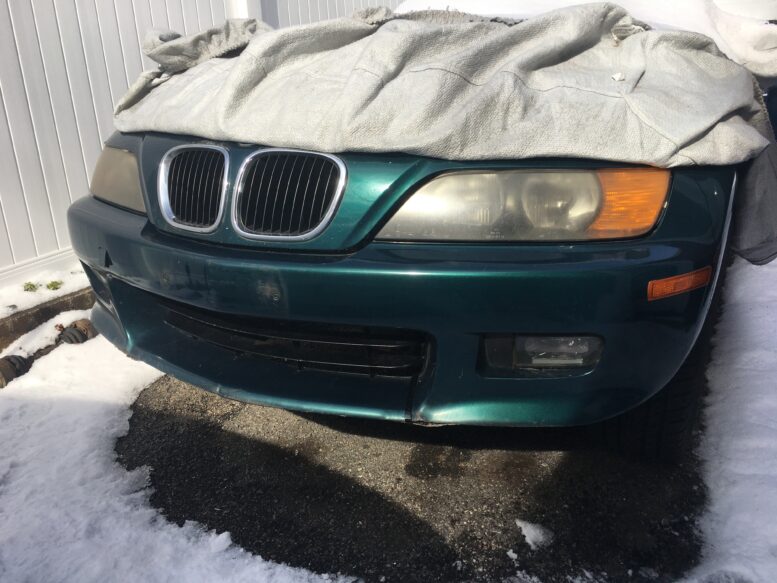
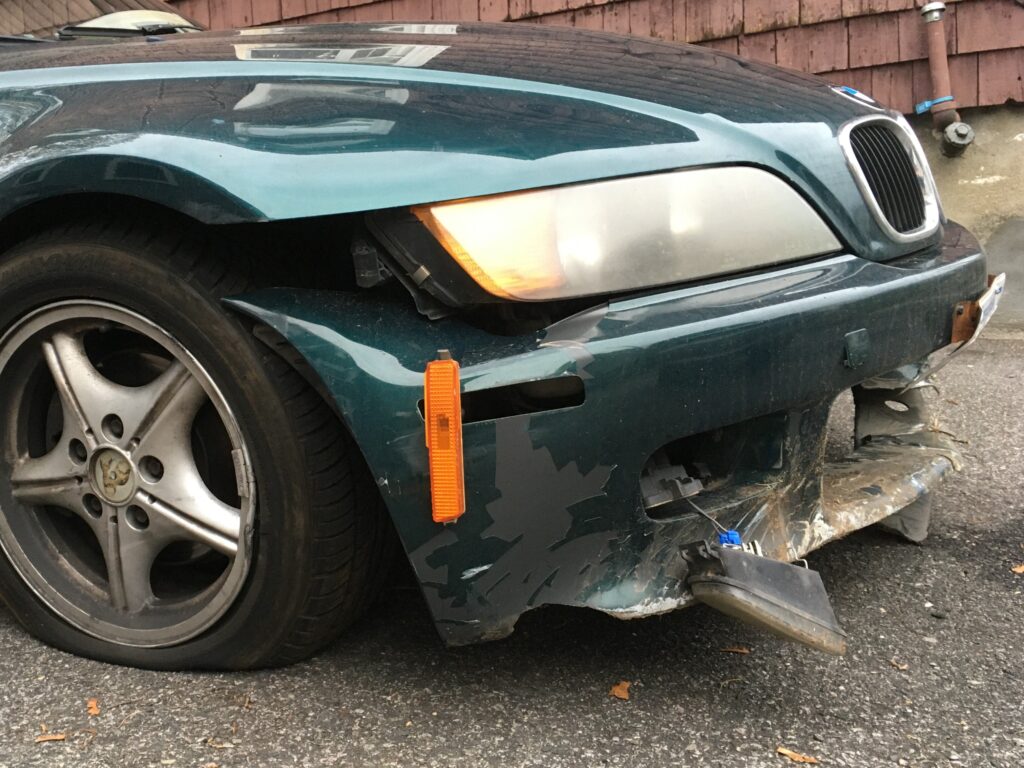
Last week I wrote about beginning the long-delayed replacement of the shattered front bumper cover on Zelda, my 1999 Z3, which had been damaged when the son of the woman to whom I sold the car a few years ago ran it into a median strip. After a year of searching, I’d beaten the odds and found a well-priced Boston Green bumper cover about an hour’s drive west of me. It had some splits yawning open where the bottom section meets the vertical face, but it was worlds better than what was on Zelda.
The seller also had the two front fender liners that I needed, and he agreed to sell me everything for a hundred bucks. Since $100 was what a pair of aftermarket fender liners alone would cost me, and since I was driving out that way anyway to pick up the orange spectrum Recaro office chair, I went for it.
The mild winter allowed me to do the ensuing work in my driveway—an essential requirement, since I didn’t have room for the car in the garage. The bumper cover—with the bumper still attached inside—came off easily, but by the time I disassembled it, snow had moved in, slowing my pace.
In addition to transferring over the actual aluminum bumper (what RealOEM calls the “bumper support”), the grille, the fog lights, and the corner-marker lights had to be moved as well. I found that all of these items had suffered damage in the curb strike; in particular, the passenger-side fog light was hanging by its wires.
Ouch!
I had zip-tied the broken fog light in place, and drove the car that way for a year, but a closer examination revealed that both of its mounting ears had broken off. One of the ears had snapped off the driver’s-side fog light as well. These fog lights are common parts; they fit both Z3s and E39s, and Chinese-made aftermarket units are available for as low as $35 a pair on eBay. However, owing to the bottom-dollar nature of this entire project, I first wanted to see if the zero-cost option of gluing the broken ears back on would be effective. I pressed a tube of JB PlasticWeld into service, successfully glued two of the three broken ears back into place, and mounted them in the bumper cover.
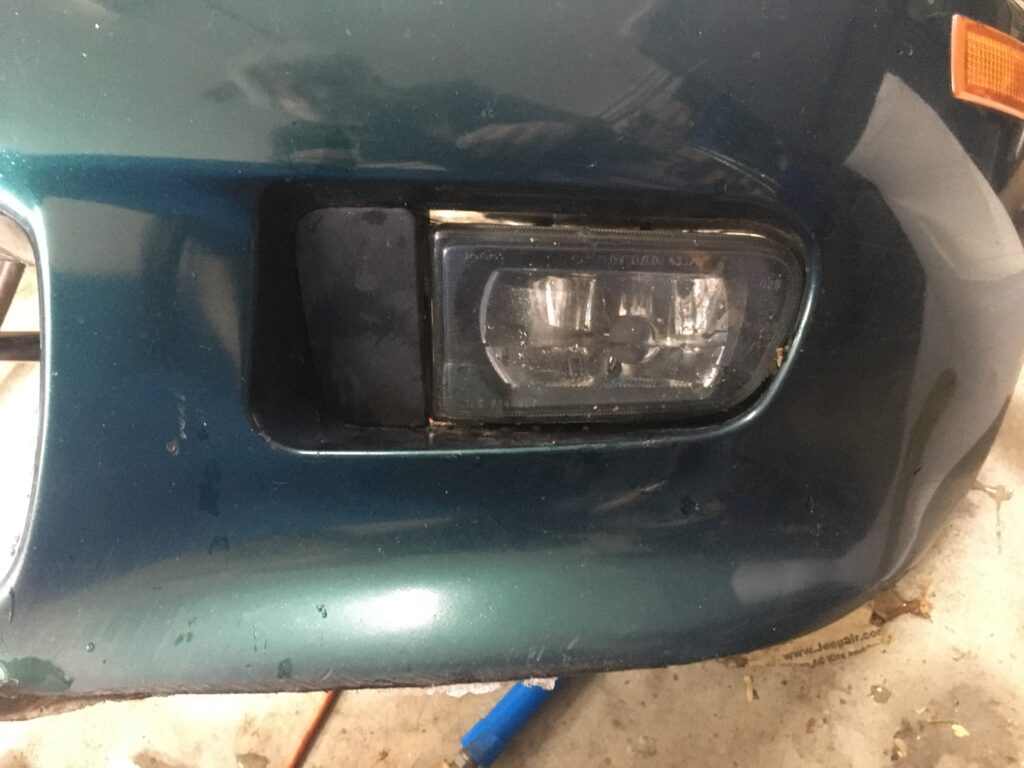
Success.
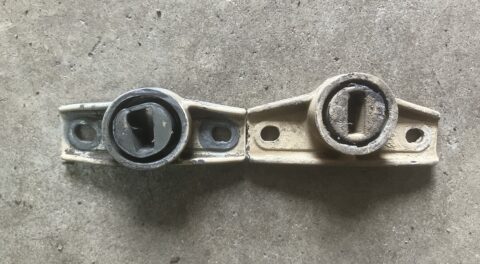
When the car suffered the median-strip impact, the grille had been knocked clean out, and had spent the intervening two years sitting in the Z3’s trunk. When I examined it, I found that a few of the tabs with holes for the fasteners had broken. And when I began fitting it to the replacement bumper cover, I found that over half of the little plastic posts that the grille is supposed to mount on were missing; it turned out that there were only four mounting points with both a little plastic post on the bumper cover and a little plastic tab on the grille.
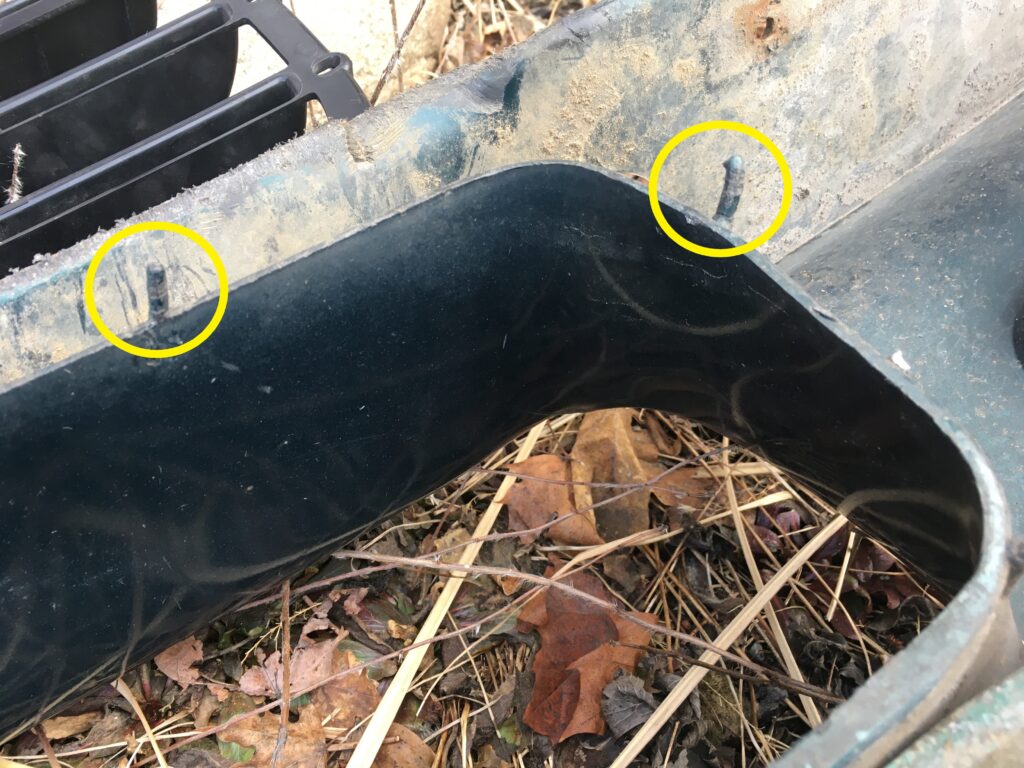
Two of the remaining grille-mounting posts.
The posts and holes are held together with little eraser-size press-on round locking clips, none of which survived the impact. I would’ve sworn that I’ve bought these before at my local Ace and True Value hardware stores, but when I went there, I couldn’t find them. I did, however, find something similar: little nuts that cut a thread in the plastic posts when you spin them on. This had the additional benefit of being easy to spin back off if I ever need to take the thing back apart.
In the photo below, beneath the bottom spin-on fastener, you can see a mounting tab in the grille for which there’s no post in the bottom of the bumper cover. You can also see how the whole bottom lip is hanging too low, due to lack of support from the missing grille fastener as well as from the split in the plastic. I briefly entertained visions of fashioning some sort of brace, but then instead installed a fat zip tie to support the lower lip.

The local hardware store to the rescue. Again.
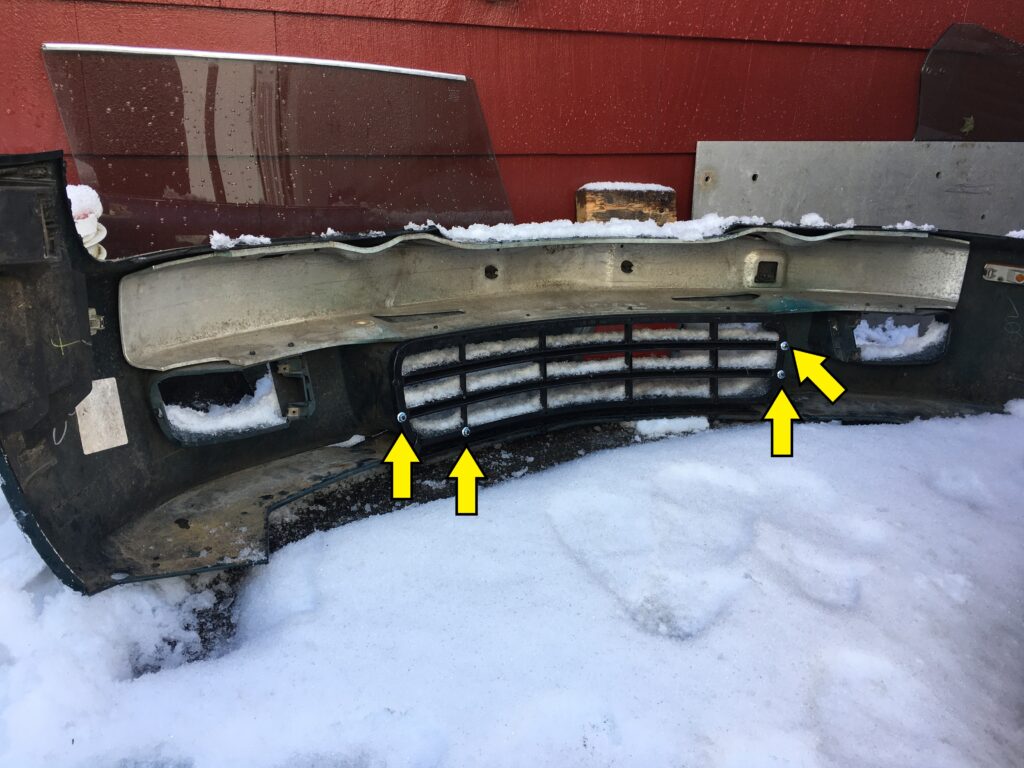
I’d prefer more than just four attachment points, but with two used parts, one of which survived the curb strike, you get what you get.
I also needed to install the inner fender liners. The passenger-side liner was completely shattered in the impact, leaving only fragments of broken plastic behind. A few of the little plastic expansion fasteners had been pulled out of their square holes as well. Fortunately, my local hardware store had ones that fit.
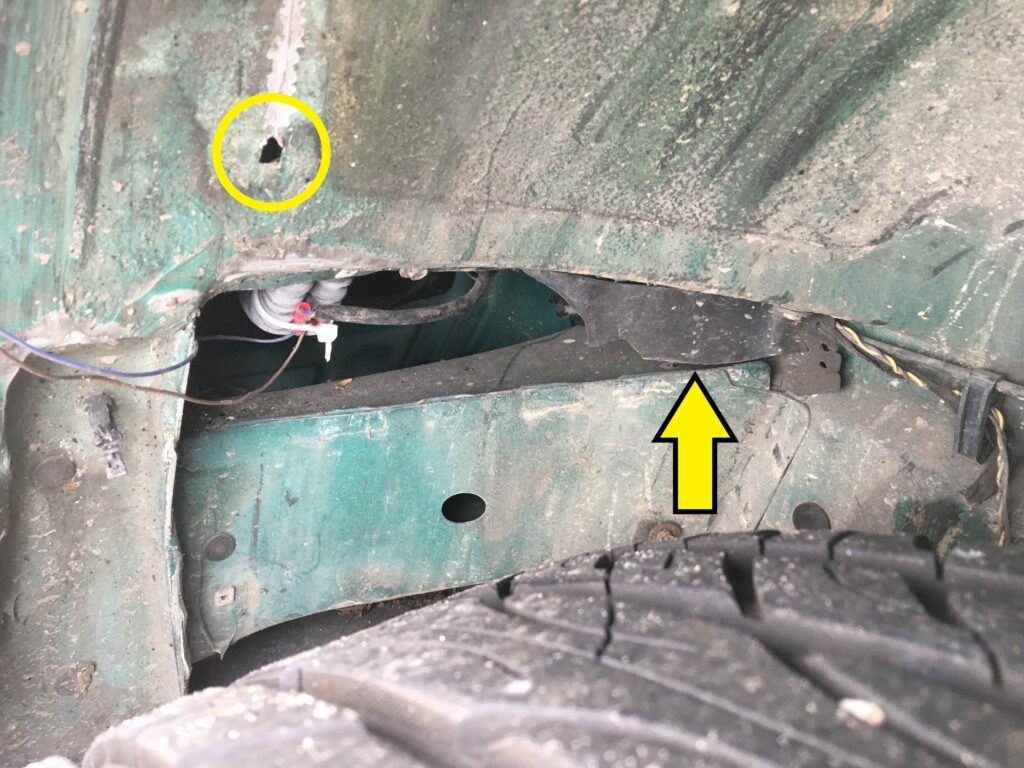
None of this sheet metal is supposed to be exposed. Note the plastic fragment of the liner (arrow), and the square hole where one of the plastic expansion fasteners is missing (circle).
Most of the driver’s-side fender liner was still there, but it had a couple of bites taken out of it.
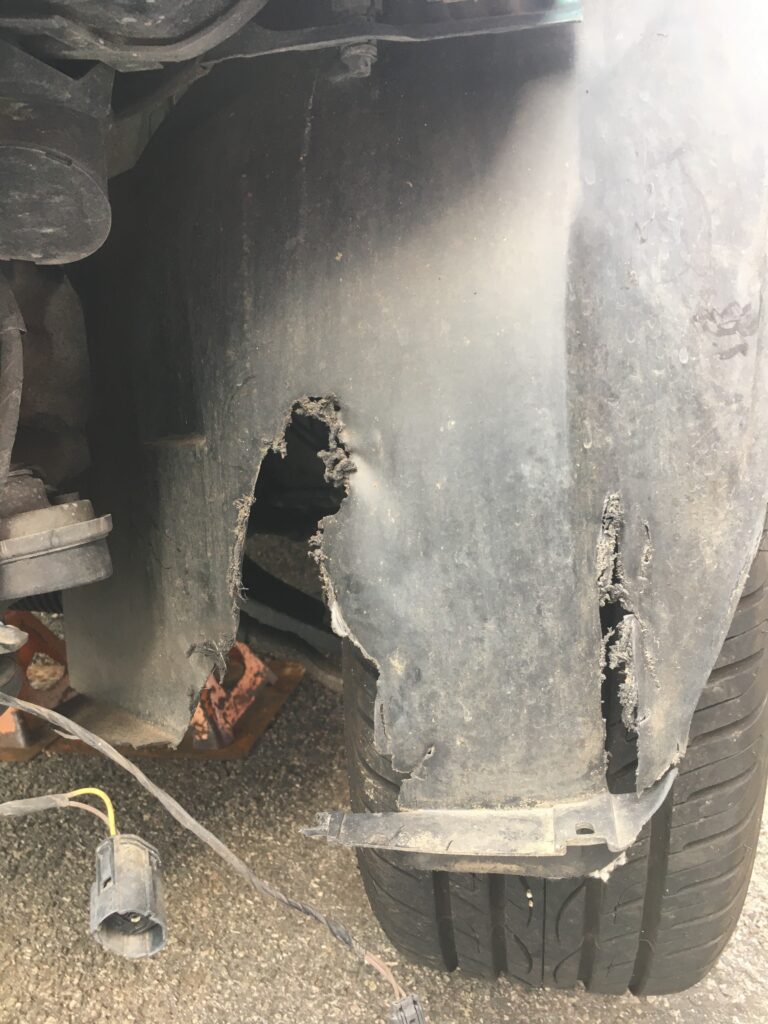
Nom nom.
While I normally have zero qualms about installing parts without first cleaning them when they’re only going to be in places that will instantly get dirty again, the replacement fender liners were from a New England Z3, and were literally coated with salt, inside and out. Mounting them that way would’ve caused black helicopters from the Society for Prevention of Cruelty to Z3s to swoop in on my house, so I rinsed them off and wiped them down before installation.
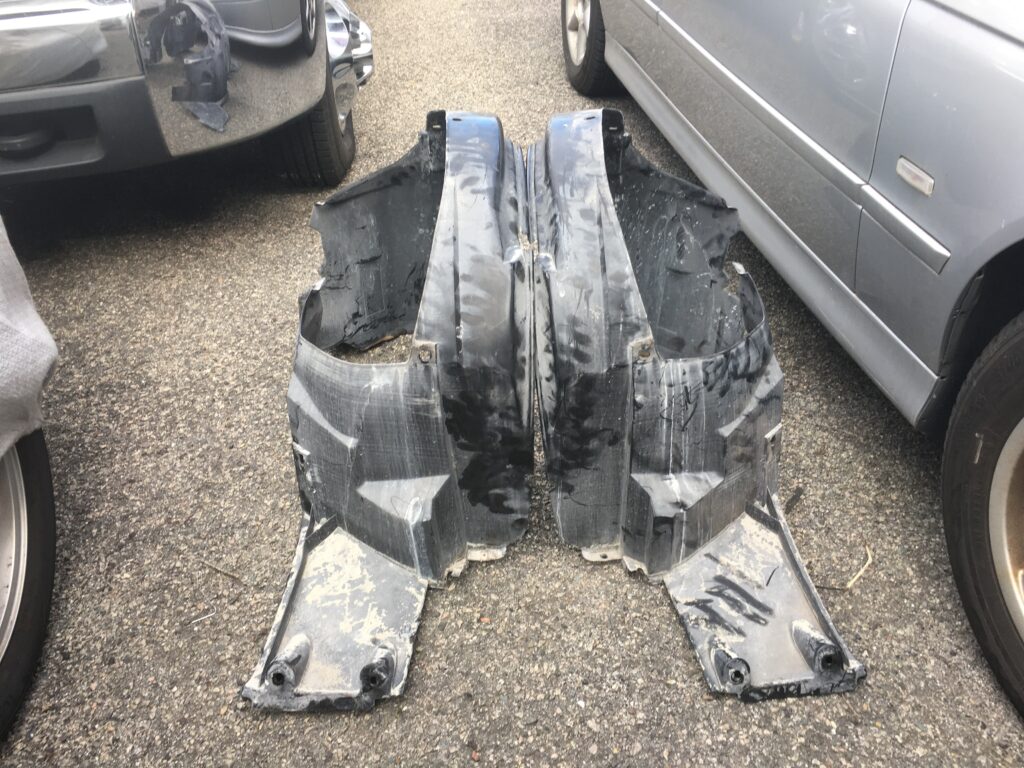
Salty dog, salty dog, baby, let me be your salty dog.
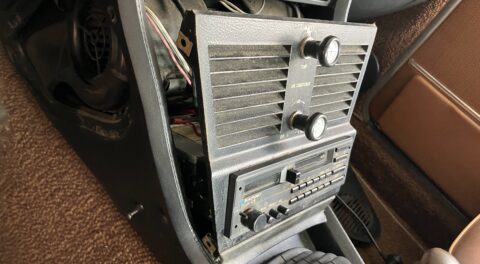
At this point, the bumper cover with the bumper, grille, fog, and corner lights installed was ready to be mounted as an assembly. Unfortunately, snow, followed by a rise in temperatures, then a thaw, then returning cold, froze the CoverCraft outdoor cover on the hood of the car! I really didn’t want the big bumper cover taking up valuable garage space, so I exposed enough of the Z3’s nose to slide the bumper cover into place. I still need to reinstall the Torx T-50 bolts holding the bumper to the brackets, screw in the little 8-mm fasteners affixing the corners of the cover to the fender liners, and connect the lights, but the headlight covers are all hazed and crying for a polishing, and it’ll be easier with the bumper cover off so the sandpaper doesn’t scratch it up. So I think I’ll leave it installed but unattached until another slug of warm weather gives me a window to use my $15 3M headlight restoration kit.
I just need to remember not to slam on the brakes if I drive it.

Before…
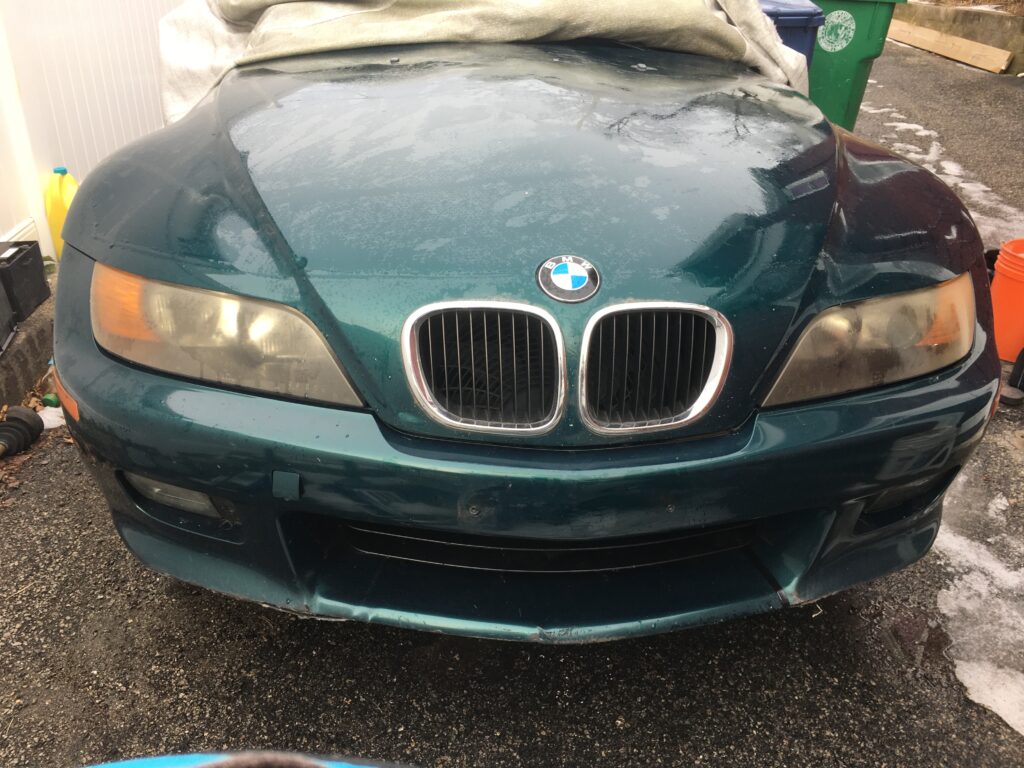
…and after. Yes, that’s a zip tie. Shut up.
I’m sure that some of you are reading this and thinking, “Why the hell would someone go to all this work to remove a damaged bumper cover, only to install another one that’s also clearly damaged?” Three reasons: First, this one is waaaaay better than the one that was on there. Second, it wasn’t that much work; if I need to swap the cover again, I could probably knock it off in a couple of hours, tops. Third, the way that I look at it, I needed to buy a pair of fender liners anyway. Aftermarket ones are as low as $100 a pair, but OEM liners are more like $240 per side. This hundred-dollar purchase got me an intact set of OEM liners, with a bumper cover that matches the paint on my car thrown in for free. That was at least $500 less than any buy-a-used-OEM-bumper-cover-ship-it-and-have-it-painted solution I could find. (To be clear on the math, last week I detailed how OEM used bumper covers on eBay whose damage is limited to light scuffs seem to start at about $400 shipped; getting a friend with a body shop to shoot it was $100, and we still have that $100 for an aftermarket set of fender liners.)
In the larger view, I try to walk this ridiculous line where I own thirteen cars yet continue to claim that I’m not a wealthy man (and really, I’m not, as my dwindling bank balance constantly reminds me). One consequence of this is that, as I often say, no car ever gets everything it needs, especially when the car is already a little bit on the ratty side, and the need is largely just an appearance issue.
Zelda’s ratty bumper cover bothered other people far more than it bothered me. Spending $600 to do it closer-to-right when the car is worth maybe three grand made no sense to me. This made sense to me.
If I find another Boston Green bumper cover in great condition for a great price, I’ll buy it in a heartbeat, but in the meantime, this solution made the car whole for a hundred bucks, a few fasteners, and a few afternoons of work. Even with the repair, the way Zelda looks would bring down the property values of any building within a hundred miles of Amelia Island, but in my world, this was a clear win.
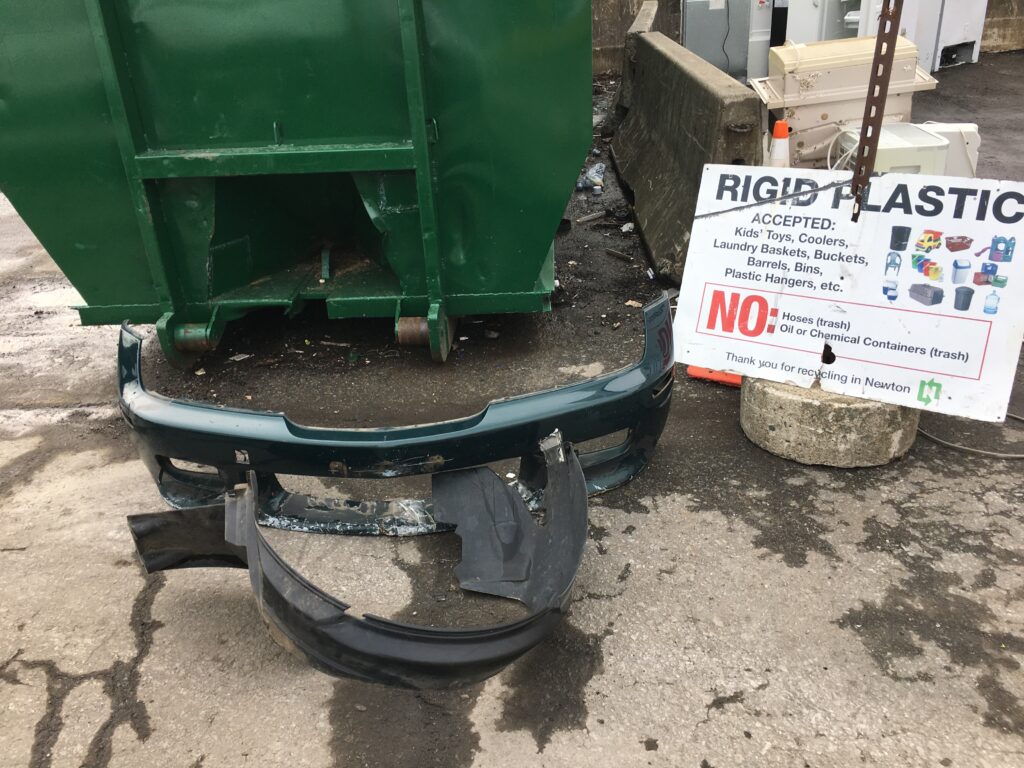
Buh-bye.Oh, and the best part of any job? That’s throwing away (or recycling) the old parts when you’re absolutely positively certain that you’ll never need them again.—Rob Siegel
____________________________________
Rob’s newest book, The Best of The Hack Mechanic, is available here on Amazon, as are his seven other books. Signed copies can be ordered directly from Rob here.