Last week, while describing how I fixed the window in my ’99 M coupe, I included the simple sentence, “So I kicked the Lotus Europa out of the garage for a few days and brought the M coupe inside.” I could’ve moved Chris’ ’72 2002tii–the “mitzvah” car I’m still in possession of while I wait for the Bring a Trailer auction to go live–but the idea of taking a one-owner car that’s been garaged for 25 years and leaving it outside didn’t sit right with me.
So out went the Lotus. I had no idea what havoc that would wreak.
For the most part, using a cover to keep the dust, particulate matter, and rodent footprints off the paint of a beloved car that’s garaged is a no-brainer: Roll the cover off when you use the car, roll it back on—there’s very little downside. However, long-term dead storage is a little more complicated, because years of high heat in something like a storage container can cause a tarp to stick to the paint, particularly if there’s other stuff piled on top of it.
Whether to cover a car that’s sitting outside is a matter of debate. If it’s a car that you love, it should be stored indoors, and you’re kidding yourself if you think that you can approach the level of protection that comes with indoor storage by throwing a cover on the car and having it sit in the driveway.
But in a world of finite resources and space, many of us don’t have indoor storage for every car, and we have to make decisions. My Z3 sits outside all year because it’s either that or sell it, and it’s a ratty car that’s not really worth much anyway. If you don’t cover a convertible, it will likely leak in the rain and then mildew, so I use a proper CoverCraft fitted cover that stays on in the rain and wind. As long as the cover and the car get some sun, things dry out, and mildew hasn’t been a problem. During spring, summer, and fall, the M coupe gets shuttled between storage and home, and while it’s home, it usually sits outside, uncovered, since I don’t have a custom-fitted cover for it, and since with a relatively modern hardtop car, I don’t really see the harm.
But whether a vintage car sitting outside, particularly one with distressed paint, should be covered or uncovered outside is a tough call. Yes, the right answer is, “Don’t let it sit outside at all–move it inside,” but the math of paying for indoor storage can be merciless. On the one hand, you hate to subject a rust-prone car like a 2002 to repeated direct contact with moisture.
But I’ve seen first-hand the damage that long-term outdoor storage under a cover or a tarp can do. Seven years ago, when I bought Old Blue, the ’73 2002tii with rust, good bones, and a lot of patina, I found that the decade it had spent covered in the owner’s driveway had caused the cover to bite into the paint, destroying it.
I pulled the cover off the long-sitting tii…
…to find this…
… and this.
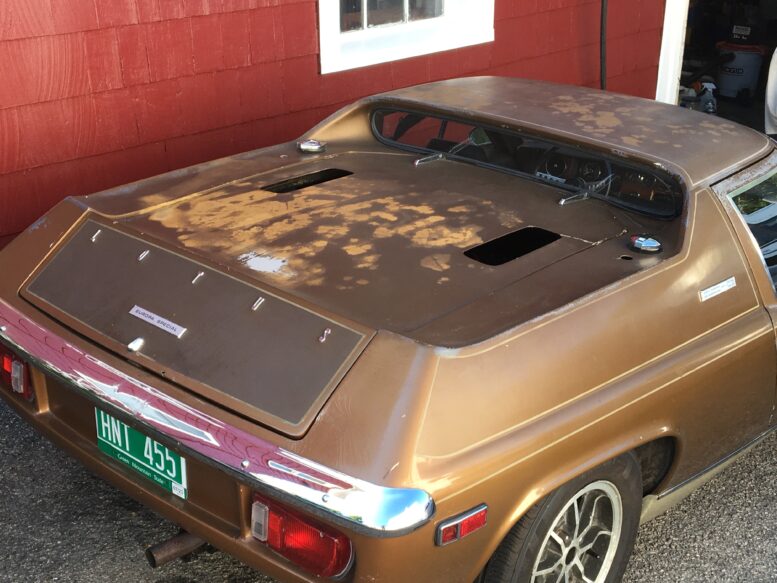
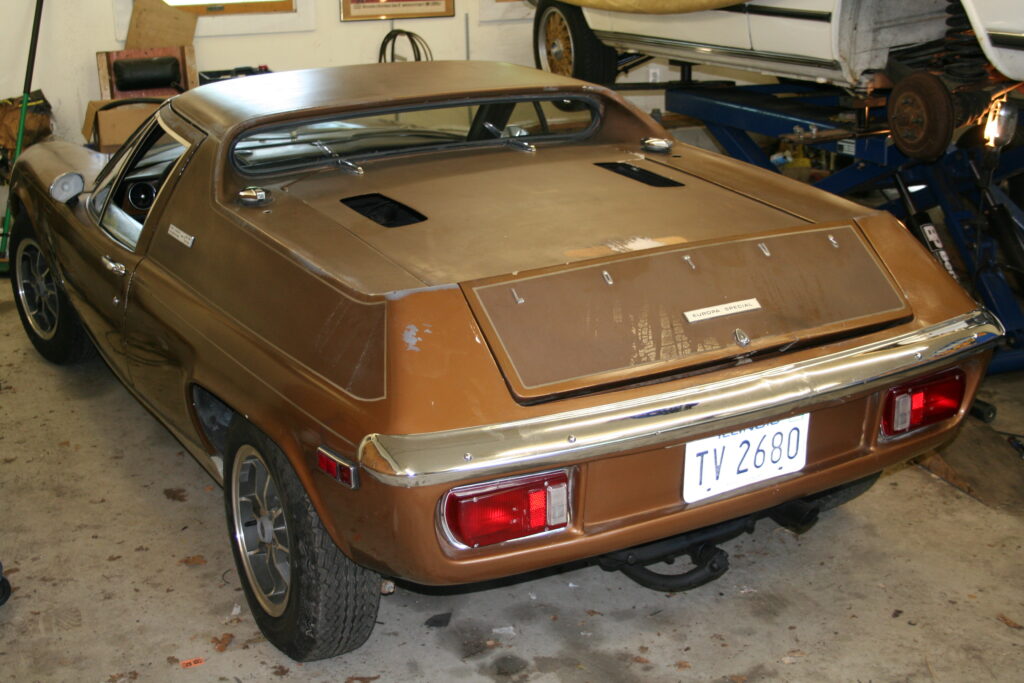
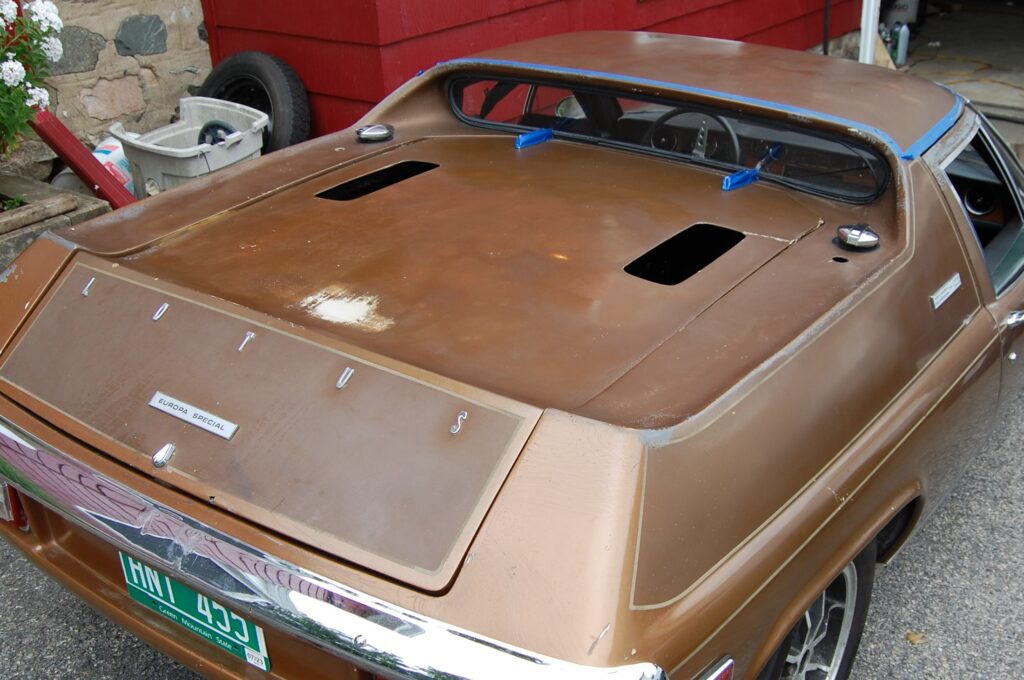
The ’74 Europa Twin Cam Special that Ben Thongsai helped me buy sight-unseen in Chicago in the spring of 2013 had spent 30 years under a tarp in a storage container. The heat caused the tarp to imprint its design on some areas of the paint, and rub the paint off some of the sharp edges of the car, but the finish was still largely intact.
When I bought the car and had it shipped to Boston, I rolled it into the back corner of my garage, then feverishly pulled the drivetrain out to address the seized engine. I didn’t cover it because it was an active project. But the months turned into years, and by 2019 the car was still uncovered—and now it had boxes piled on top of it. The grit and grime in the garage killed whatever was left of the shine, particularly on the roof.
But still, the car had the look of a survivor, not a rat-rod.
The Europa before its resurrection: You can see the dry paint on the deck lid as well as the wear from sitting under a tarp for decades.
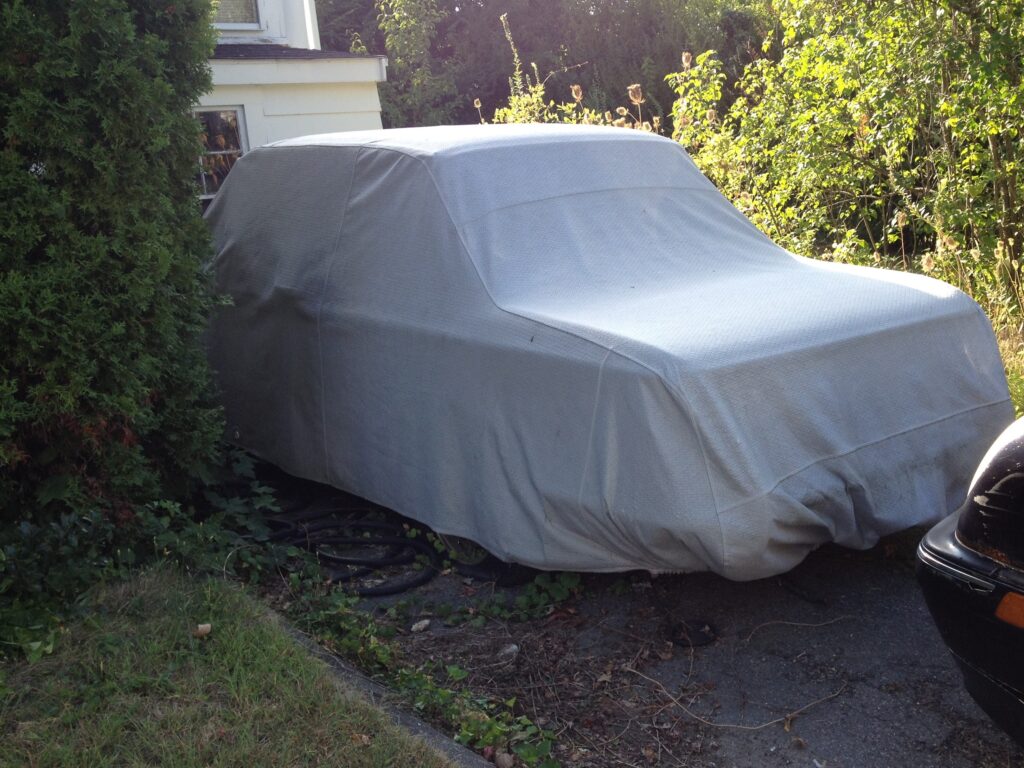
This spring, when I was moving the cars from my storage bays in Fitchburg to a warehouse in Monson, four of the five cars briefly came home and sat covered in the driveway for a few weeks. As part of that activity, the Lotus had to sit outside while I gave the stored cars some repair time. Yes, the Europa is a fiberglass-bodied car, but the thought of those Lucas electrical components sitting in the rain gave me the heebie-jeebies, so I bought a cover. It wasn’t a high-end custom-fitted cover like the CoverCraft on the Z3, but rather a “semi-custom” in the $125-to-$150 range. It was waterproof and lined, and the elastics tucked the cover’s front and rear under the nose and tail of the car well enough that it didn’t seem likely to blow off, so I thought that I’d bought what the car needed. I used it in June without incident.
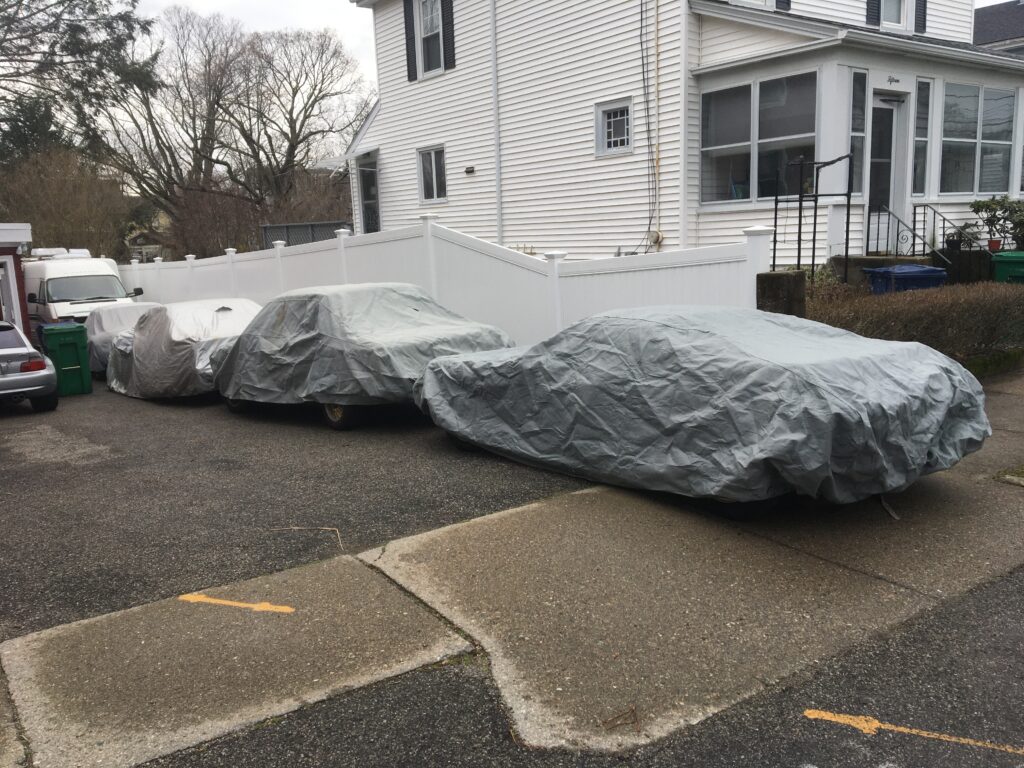
A gaggle of covered cars in the driveway this past spring: The Lotus is at the top.
So when I needed to work on the M coupe’s window for a few days and allowed it to take the Lotus’ space in the garage, and when I read that rain was forecast, I threw the cover on the Lotus. Why wouldn’t I? That’s what I bought the cover for.
Bad idea.
It’s been a hot summer here in Boston, with temperatures tickling the 100º mark and very little rain, so the rainy forecast was actually welcome. However, the heat, the moisture, and the Lotus’ bone-dry cracked paint proved to be a catastrophic combination.
I covered the car on Thursday. It rained that evening. I left it covered Friday and Saturday in high-90º temperatures. When I came out Sunday morning to uncover the car, I noted the standing water on the cover. “Good,” I thought, “the waterproof cover is doing its thing.”
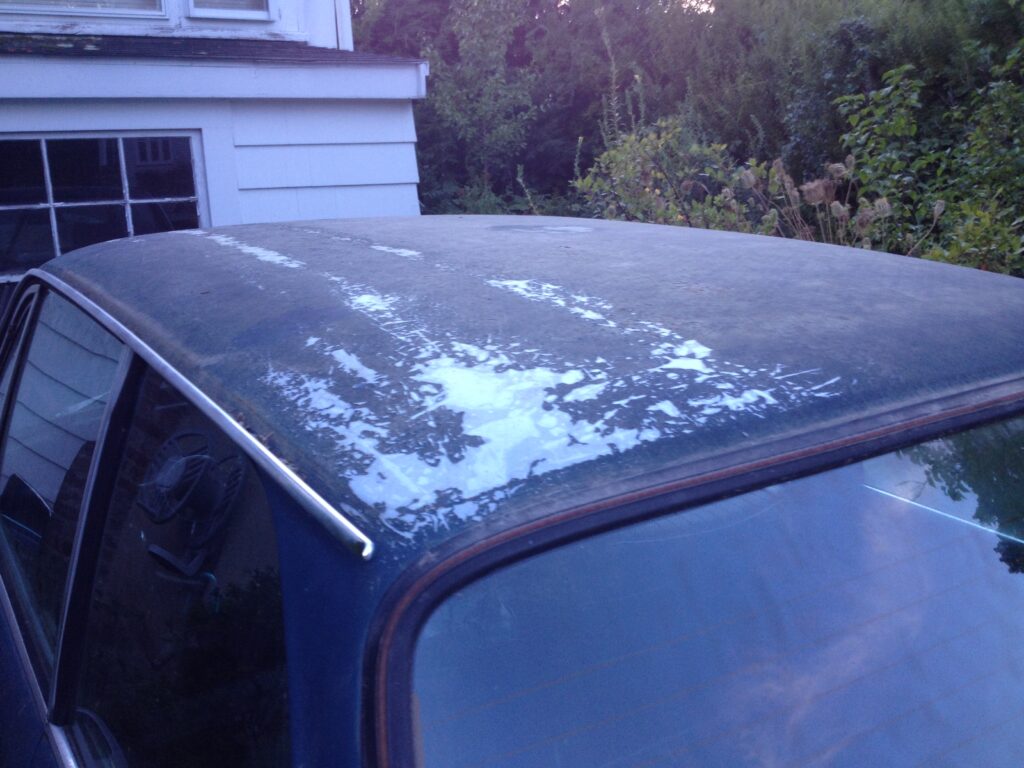
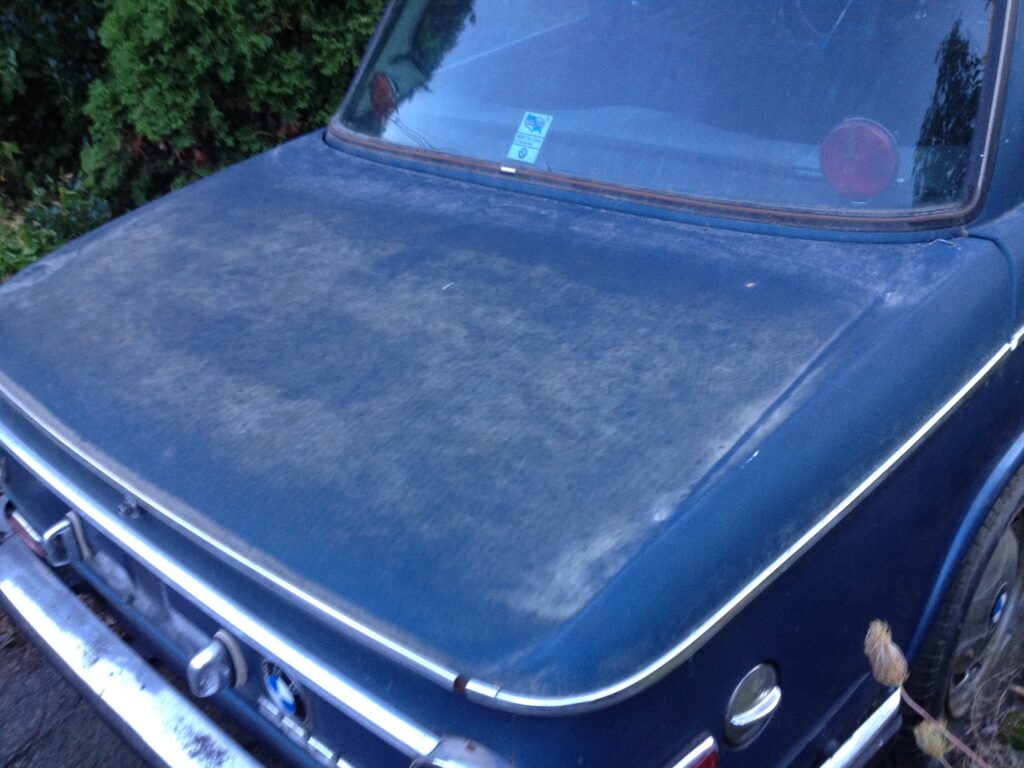
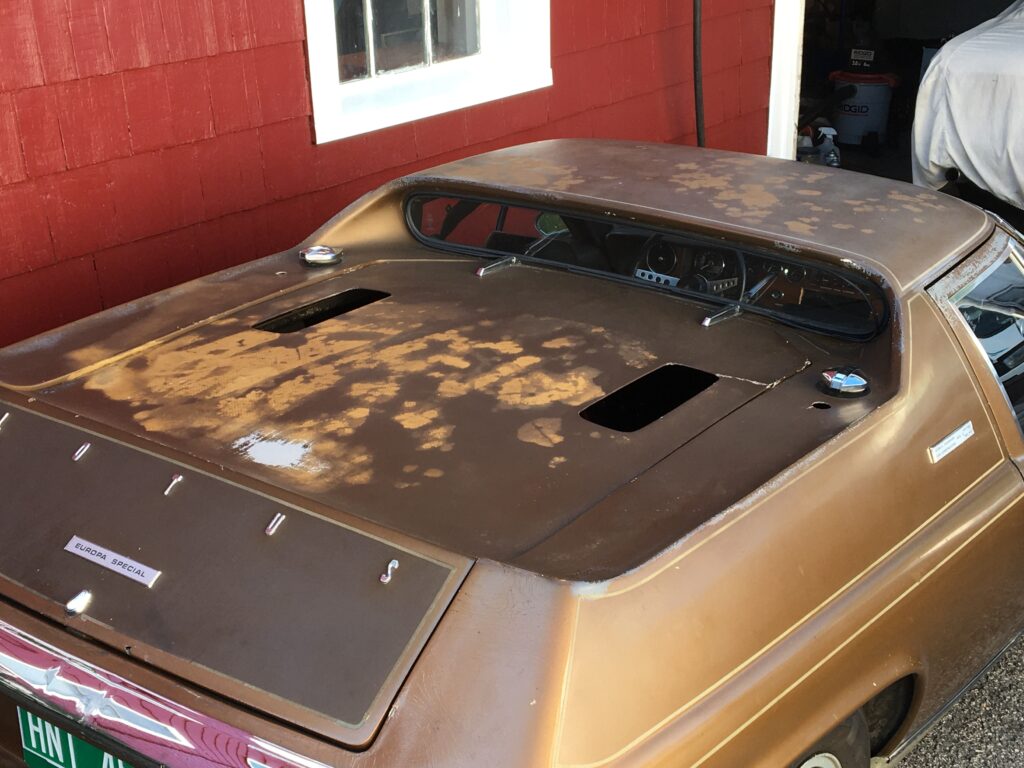
However, when I rolled the cover off, I was stunned to see this:
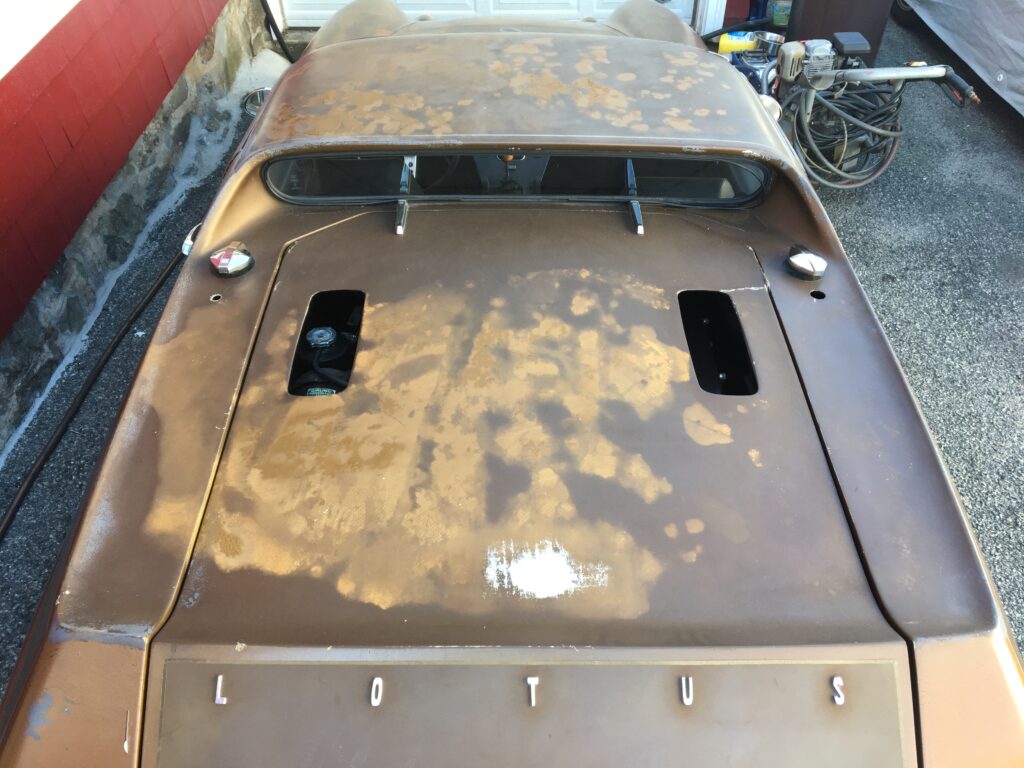
NNNNNnnnnnnooooo!
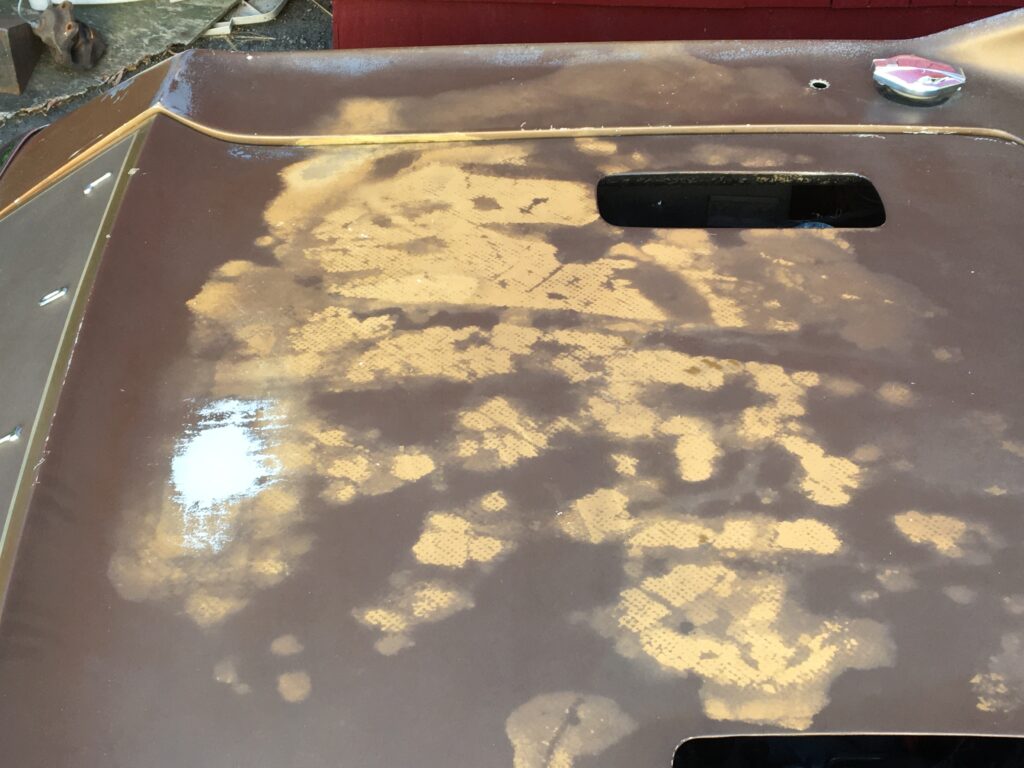
At first, I wasn’t even sure what I was seeing. Was this dirt or mud? My wife has tomato pots on the garage roof. Had some of the sediment flowed off the roof and onto the cover? It took me a while to accept that this was discolored paint, caused by water pooling on the big flat sections of the cover (primarily the deck lid and roof), soaking through it, and basically boiling in place because of the high heat.
The yellow streaks on the deck lid were horrifying.
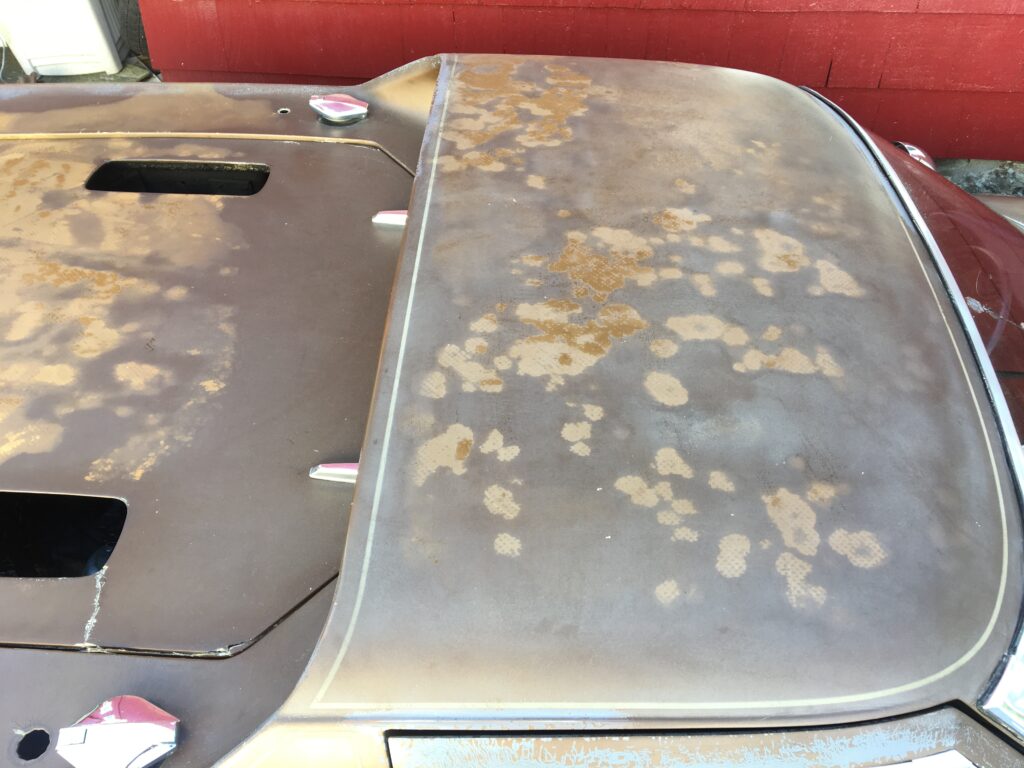
The roof looked like it had monkeypox.
I was livid: I love my survivor Europa. The last thing I wanted to do was to have it mistaken for an intentionally distressed over-the-top finish that’s the rage in rat-rod circles. (To be absolutely clear about this, I don’t fault the brand or model of cover in the least. I think that this could’ve happened with any cover that trapped moisture against dry unprotected paint in high heat.)
I wasn’t sure what to do, so I left the car out in the sun for the afternoon, hoping against hope that the discoloration might evaporate. It didn’t; if anything, the stained areas became brighter yellow and better delineated.

Gulp.
I put out a call on Facebook for advice, with the strict admonition, “Don’t say ‘that’ll buff out,’ because there’s too little paint left on this car to buff.” Comments poured in, including less-than-helpful ones lik,e “Now you can repaint it something other than that awful brown.”
As I poked and prodded the paint, I noticed that the yellow stains were a thin chalky coating that I could scratch through with my fingernail. Despite my thinking that the car didn’t have enough paint on it to risk compounding, I began to wonder if some abrasives would take the discolored sections out.
Now, I don’t really engage in “paint correction”—the in-vogue term for people with gorgeous cars obsessing about minor scratches and swirl marks before a concours—but I do have a Porter Cable random-orbital polisher and some Meguiar’s polishing compound that I bought when I had a badly-oxidized black 2002 in 2015. I tried the Meguiar’s on a rag, and it had very little effect. I ran down to AutoZone and bought a $7 can of Turtle Wax Heavy Duty compound, and that did yield hopeful results when applied by hand to a small section. However, when I tried using it with the polisher, it didn’t seem to have the muscle to cut through the yellow chalk.
Then I saw a comment someone made on my post: “Maybe some kind of household cleaner would work.”
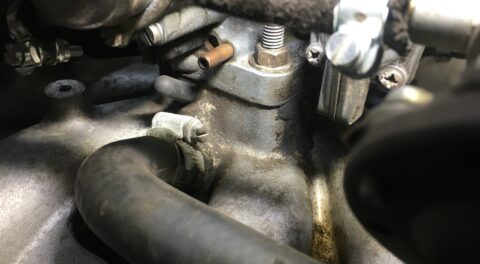
My knee-jerk reaction was “That’s dumb. This isn’t like using Mr. Muscle oven cleaner to take paint off brick.” (Which I’ve actually done, as well as used it to clean decades of grime off the Lotus’ transaxle). But then my mind hyperlinked from Mr. Muscle to Mr. Clean to the Mr. Clean Magic Eraser product. My wife raves about the Magic Eraser (basically a sponge filled with abrasive melamine foam), and I have to admit that whenever I’ve tried it, I’ve been quite impressed.
I Googled “Magic Eraser on car paint,” and found admonitions that while it’s very effective at removing paint scuffs (like if you clip the corner of the house with your bumper), it’ll put deep scratches in the paint that then need to be polished out.
With nothing to lose, I tried the Magic Eraser on a few sections on the deck lid. Holy cow. This thing cut through the yellow chalk with relative ease.
The Magic Eraser was very effective.
Unfortunately, if I wasn’t careful, it also cut through the paint, as any abrasive eventually will. And, as you can see from the photo above, it had the unintended side effect of turning the yellow chalk into a yellow liquid that then ran down into the cracks in the paint.
So I tried another suggestion: rubbing alcohol. I applied it full-strength on a folded paper towel. Like the Magic Eraser, it was also astonishingly effective at removing the yellow chalk, and when used carefully, could even lift some of the yellow that had run down into the cracks. Unfortunately, like the Magic Eraser, it could also remove a lot of damaged paint very quickly, and in one place, I rubbed straight through to the fiberglass. I tried diluting it to 25% and then 50% with water, but that didn’t lift the yellow chalk like the full-strength solution did. I used it very carefully.
The one-two punch of the Magic Eraser and the rubbing alcohol removed the bulk of the yellow staining on the deck lid. The effect on the circular pox-like stains on the hood wasn’t quite as dramatic, since those weren’t as chalky.
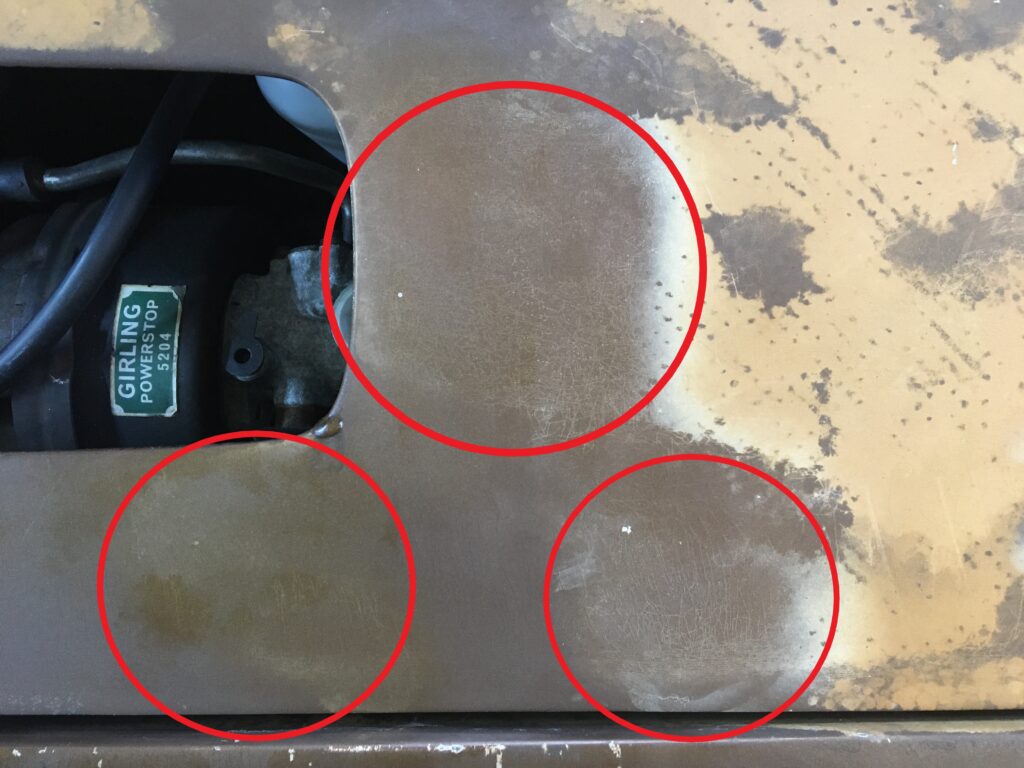
With most of the obvious stains lifted, I turned back to the orbital polisher. I hoped that I could use it to remove just enough paint to create a uniform finish. That wasn’t the case—the stained areas are still visible—but when viewed in the context of the overall condition of the patina on the car’s paint, it’s in the noise.
The damage before treatment…
…and after. The small white area to the left of the right-side vent is where I burned through the paint with rubbing alcohol. The big round area at the rear of the deck lid was there when I bought the car.
Obviously, the big takeaway message here is to be circumspect about throwing a cover over a car with dry cracked paint that’s bereft of any kind of protection—no wax, no clear coat—and subjecting it to high-heat, high-moisture conditions. It was astonishing to me that damage this dramatic could occur in only two days. I’m relieved that I was able to de-scar it by taking a few simple low-cost actions.
And, yes, the M coupe with the now-repaired window is now back in the driveway. The Lotus is back in the garage. And if for some reason I do need to move Chris’ 2002tii outside, and rain is predicted, I sure as hell won’t leave the cover on it.—Rob Siegel
Rob’s new book, The Best of The Hack Mechanic, is available here on Amazon, as are his seven other books. Signed copies can be ordered directly from Rob here.