Over the past few weeks, I’ve been writing about making my corner of the world a better place by helping two women who recently lost their husbands sell the 2002s that they wound up with. Last week I described helping find a buyer for the near-mint Malaga ’76 car by posting it on my Facebook page. FB friend Bob Ball knew someone who had looked at his Malaga ’76, but passed on it because it wasn’t nice enough. Ball put buyer and seller together; I spoke with the buyer and gave the car my blessing, sinces I’d actually seen and driven it, and papers were exchanged. The seller is waiting for the call from the shipper.
That left the other car, the original-owner Fjord ’72 tii.
Although I don’t usually work on other people’s cars, I took delivery of the car a few weeks ago, because I seemed to be the best person to cost-effectively knock off the triad of inspection needs, mechanical repairs, and prettying-up for sale. I’d hoped to have everything done by this weekend including photographing the car and submitting it to Bring a Trailer, but whether it’s your car or someone else’s, everything takes longer than planned, so I’m behind schedule.
While I’m trying to not go down the rabbit hole of sorting out the car as if I were about to road-trip it to the Vintage, I didn’t see a receipt for replacement of the injection belt, so I couldn’t help but pull off the upper plastic cover that encloses the toothed belt and have a peek at it.
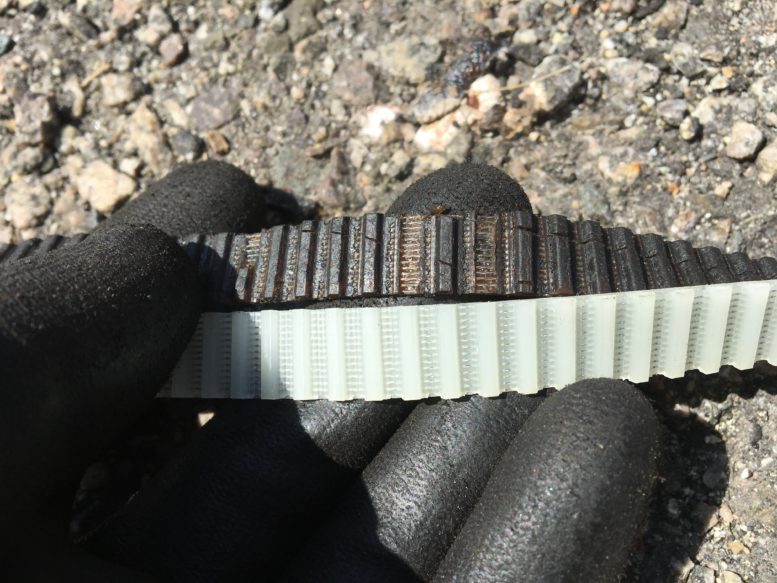
I did not like what I saw.
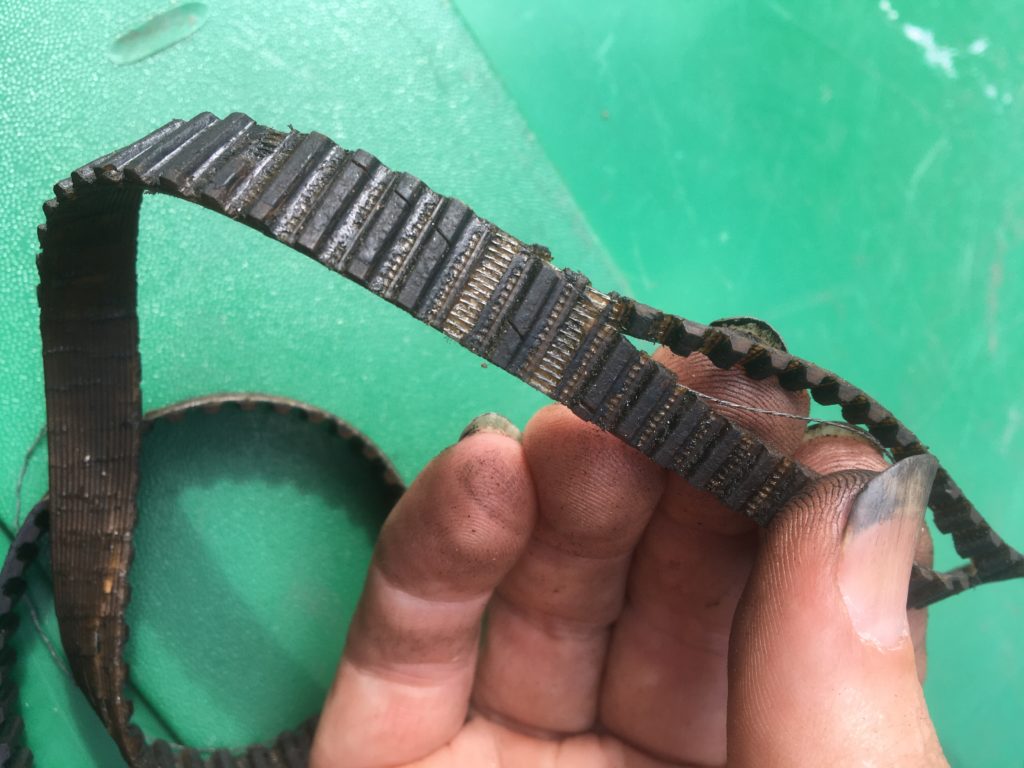
The belt was still functional, but it was going to be a shredded, stringy mess if it wasn’t replaced soon. There were loose fabric strands on the side of the belt, and when I looked at it closely, I could see that several teeth were missing. So I put a new $65 injection belt on order and began removing the old one.
Like a timing belt, the injection belt is toothed to eliminate slippage. But unlike a timing belt, there’s no tensioner; it’s designed to fit snugly and perfectly. The factory manual shows the use of a puller to remove the top cogged gear, but I’ve never found this necessary when replacing the belt; I’ve always been able to slide it on and off the gear with everything in place.
Before replacing the belt, you need to set the engine to top dead center for the #1 cylinder by looking at either the notch on the crankshaft pulley and aligning it with the pointer on the lower plastic injection-belt cover, or checking for the TDC mark in the bellhousing inspection window. (The former is usually much easier to see than the latter.) Then, since the crank spins twice as fast as the cam, you need to ensure that you’re at TDC for #1 at the top of its compression stroke, not its exhaust stroke. The easiest way to check is to pull off the distributor cap and make sure that the rotor is pointing toward the notch in the rim for #1 plug wire. If it’s not—that is, if the rotor is 180 degrees away—rotate the engine 360 degrees.
Nearly aligned TDC marks on the front pulley and lower plastic belt cover photographed on another tii.
Once TDC on the block and head have been verified, the position of the gear spinning the injection pump needs to be checked. There’s a thick line on the top of the aluminum extension to the upper timing cover that holds the injection pump, and there’s a thin line on the front of one of the teeth on the cog. If the engine is at TDC of the compression stroke, these two marks should be aligned. If they’re off by a tooth or two, they should be made to align when the new belt is installed.
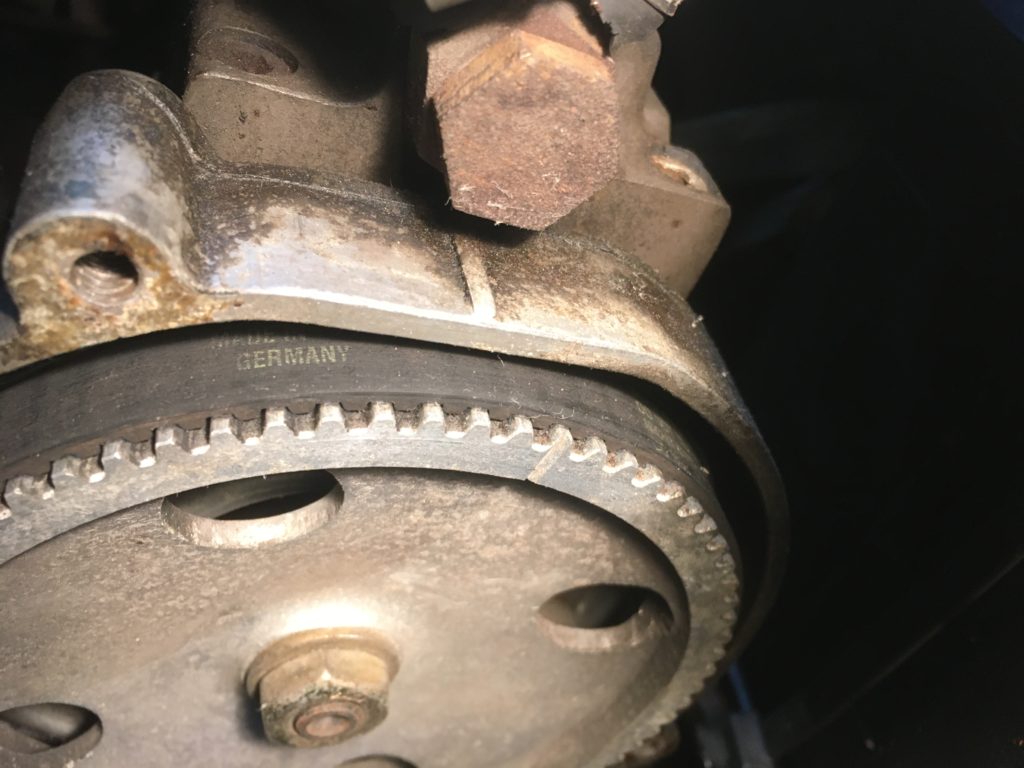
The fiducial marks for the injection belt on another car: As pictured, it’s off by a tooth or two.
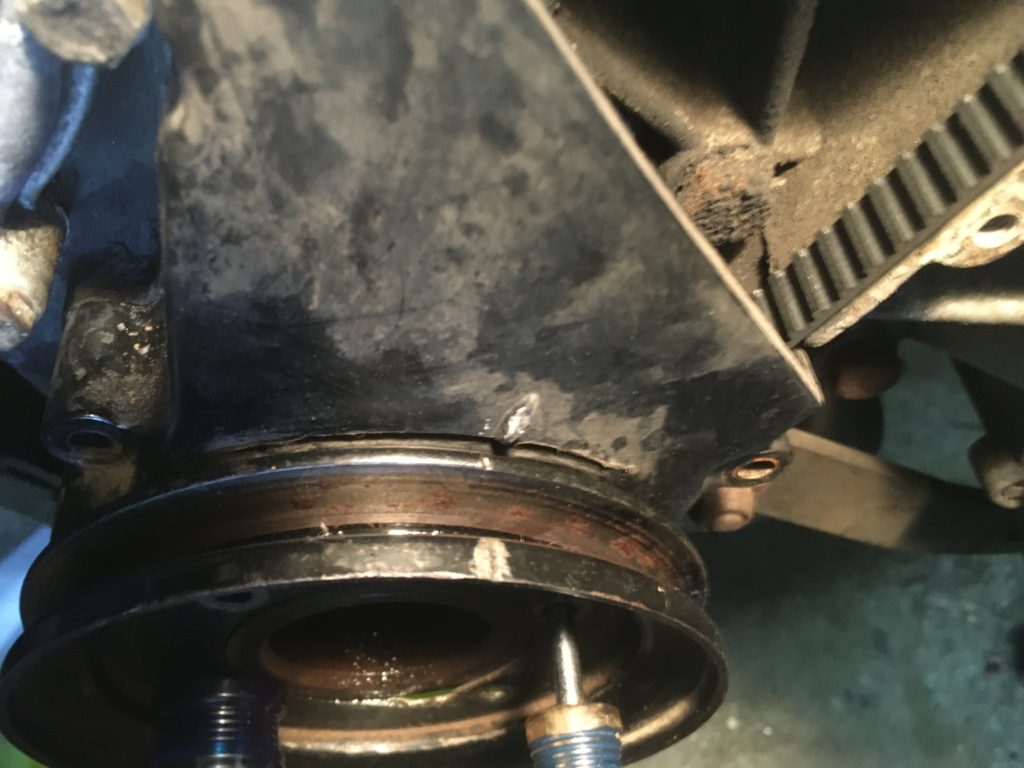
Like the upper injection-belt cover, the lower cover is also held on by four 10-mm bolts. But to get the lower cover off, you first need to remove the four 10-mm bolts that hold the pulley onto the front of the crankshaft hub. This is easier with the fan removed, which in turn requires the radiator to be removed, but there’s just enough room to reach in with a little 10-mm socket on a 1/4-inch drive ratchet and undo the bolts.
Then you need to carefully get the pulley off the hub that it’s likely been sitting on for decades. As with the 10-mm bolts, access to the pulley is better if the radiator is out, since then you can reach in through the nose if you need to, but a couple of light taps with a rubber mallet on a block of wood at 3:00 and 9:00 o’clock rocked the pulley off the hub.
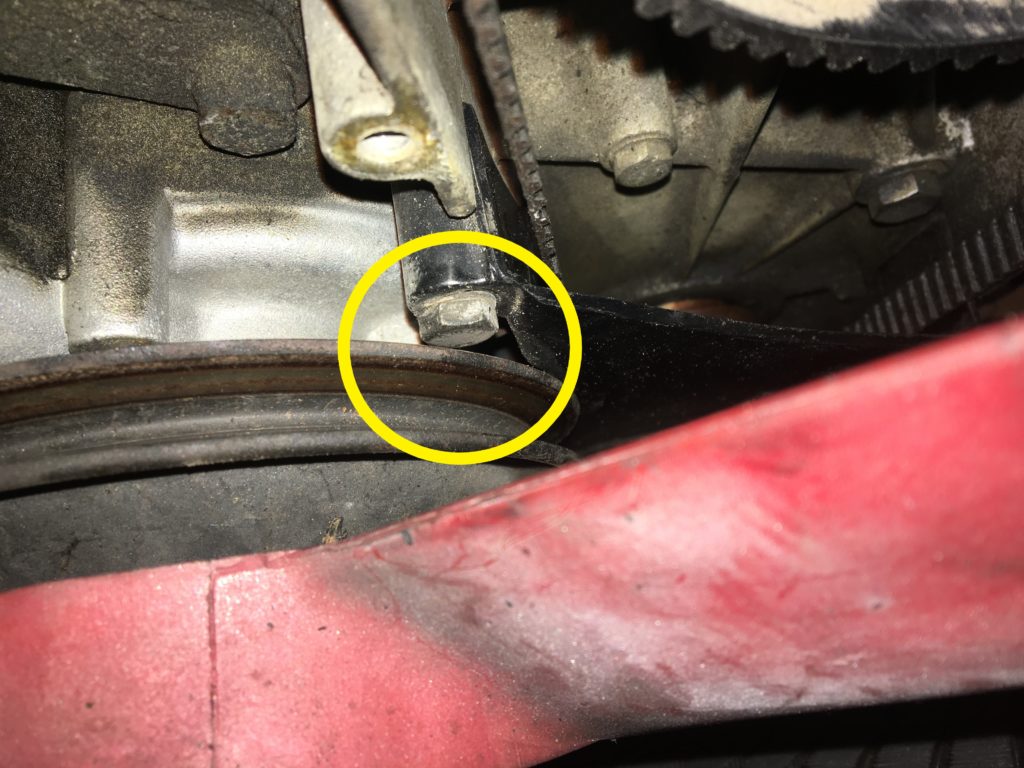
Note how the lower plastic injection belt cover is trapped by the crankshaft pulley.
With the crankshaft pulley off, I could easily undo the 10-mm bolts holding on the lower plastic cover from under the car. The cover loosened, but didn’t come off; I’d forgotten the fourth bolt that I couldn’t see. I looked down from the top and was not happy with the view: The fourth bolt, at the upper corner of the lower plastic cover, was blocked by the water-pump pulley. I could get the open end of a wrench on it to loosen it, but there was no way to remove it without pulling off the fan and the water-pump pulley, and to do that, the radiator needed to come out. I swear that I never had to do this before.
As Gandalf said, I have no memory of this place.
I thought about it and realized that the two most recent times I’d replaced the injection belt in a tii were in the context of a/c rejuvenation or installation, during which I was renewing nearly every a/c component, including the condenser which lives inside the nose and thus requires removal of the radiator and the grilles to get at. One of the quirks of air-conditioned tii’s is that the compressor belt sits behind the injection belt, so to install or replace the compressor belt, the injection belt has to come off. It makes sense that if there’s any wear on it at all, it’s a perfect opportunity to replace it. Thus, the other times I’d had at the injection belt, the radiator, fan, and water pump pulley were already out of the car.
Hmm.
Dumping the coolant, pulling the radiator, removing the fan and pulley, and putting it all back in is an easy job, but this was all in the context of the mitzvah (good deed) I was doing for the car’s owner. I’d agreed to work on the car, but even at a very reasonable hourly rate, and even charging maybe half of the number of hours I was actually working, it was adding up fast (I really don’t understand how anyone of modest means can afford a car unless they wrench on it themselves).
I looked at the belt and the lower cover again. I carefully slid the top end of the belt off the gear on the injection pump and found that with the lower plastic belt cover’s upper bolt loosened as far as it would go, there was enough play in the cover that I could swing it to the side and withdraw the old belt from underneath. With the belt in my hands, I could see that it was worse than I thought; in addition to being cracked, fraying, and missing teeth, it was actually split.
Yeesh!
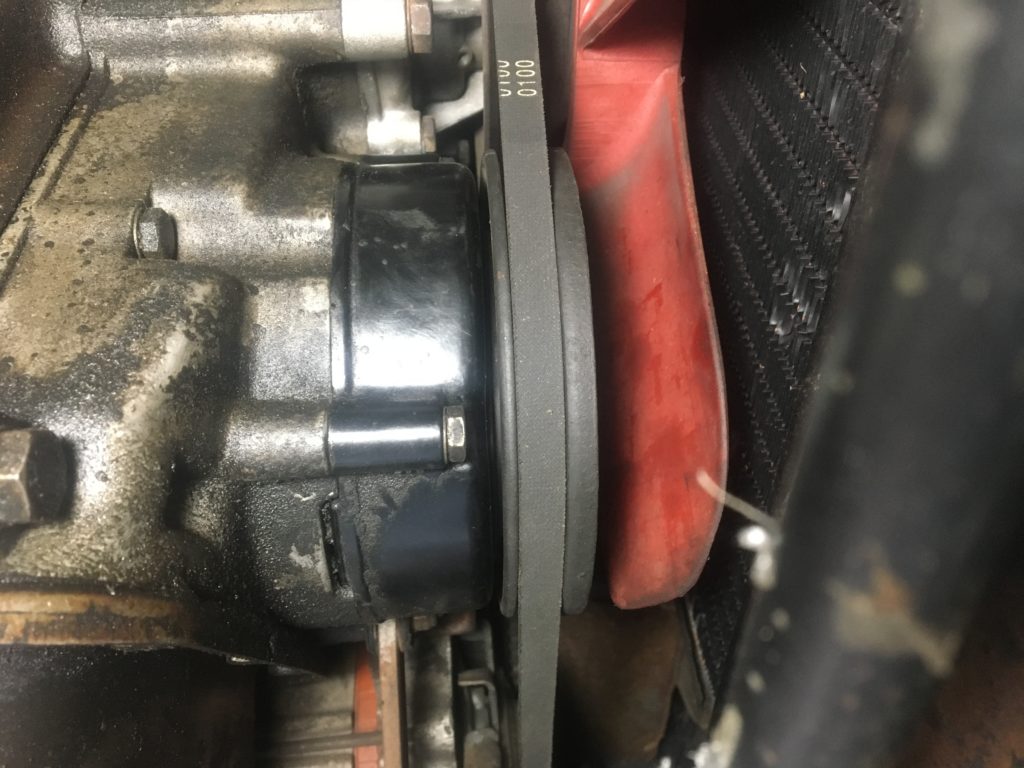
The replacement BMW belt is white (I’m suppressing another Gandalf reference here). It has a harder, more plastic-y feel than the old rubber-and-fabric belt. But it was the correct part, so in it went the way the old belt came out. The photo below isn’t great, but you can see that I took the belt, slid it under the tipped cover, and threaded it upward. I then carefully pulled it through from the top, fed the bottom loop through, made sure that it was seated properly on the toothed crank gear, and slid it carefully into position on the injection-pump gear.
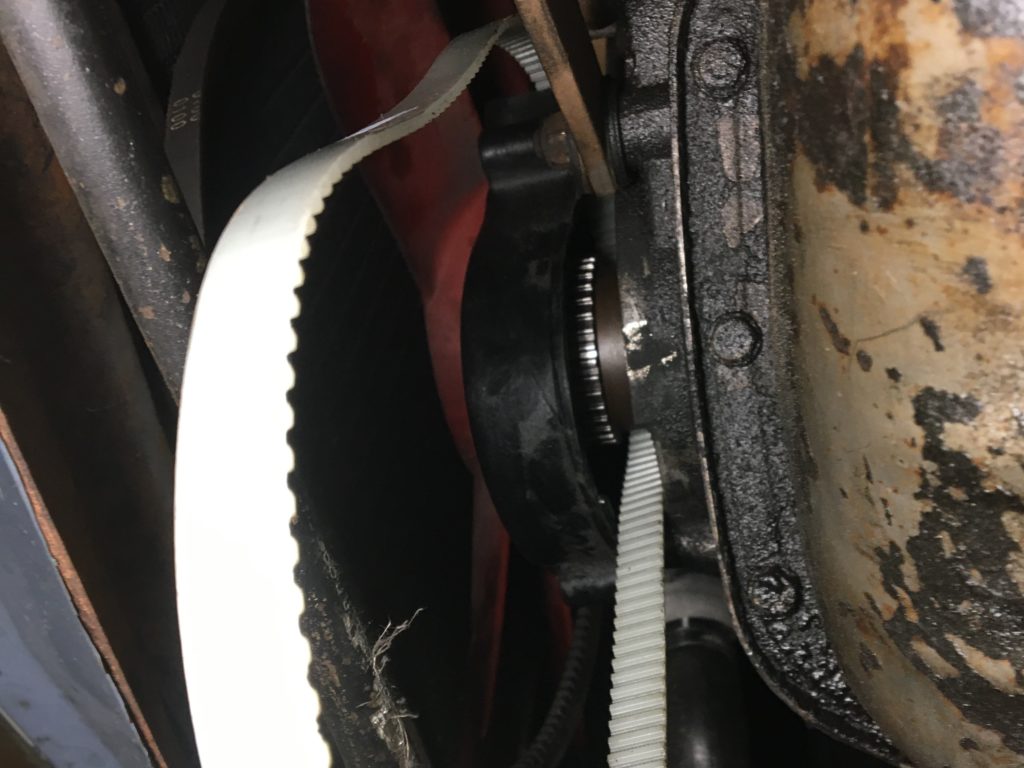
The new belt being threaded up from underneath.
I then reinstalled the rest of the 10-mm bolts for the lower cover, reinstalled the crank pulley, verified that the engine was still at TDC, and checked the markings on the injection-pump pulley. It took a few tries until I was convinced that I had done the best possible job of aligning the fiducial marks.
As rabbit holes go, it certainly could have been worse.
The other thing that happened in Mitzvah Land had to do with the rug. The car was missing the carpet piece in the driver’s footwell—the piece that covers the floor and the pedal bucket, and continues up the firewall. Instead, it had two pieces of black indoor-outdoor carpeting, a presence that disturbed the interior’s original unmolested vibe.
I ended last week’s column with a plea that if anyone had an original salt-and-pepper footwell piece from either parting out a car or replacing their rug, I’d buy it. By the end of the weekend, no one had responded. So on Monday morning, I blanketed social media with pleas, pleading shamelessly not only on my FB page, but the 2002 page, the Nor’East 02ers page, the BMW 2002 page, the Vintage page, and the pages for 2002 Classifieds and 2002 Buy Sell Trade.
It worked. First, Bo Black, organizer of Mid-America 02Fest, responded, saying that he was pretty sure he had a piece in storage somewhere. Then Ray King sent me a photo of a worn rug piece in his 2002 Alpina Touring, saying it was mine for the taking because he’d already bought a new rug kit, and this would be the impetus for him to get going on the job. Joshua Weinstein and Elbert Furay also said that they were almost certain they had pieces.
But then John Digrado posted this photo of an already-removed bird-in-the-hand. I jumped at it, saying I’d gladly pay for it,
Oh, baby. Come to papa.
John initially said that he only wanted the shipping cost reimbursed, but then asked if perhaps he could barter it for one of my books instead. I sent him three. The carpet piece should be here on Monday.
I’ve long said that the vintage BMW community is an exceptional one. This is just another in a long series of examples.
So I’m closing in on finishing the punch list. Once I get the rug piece installed, and have the new tires mounted on the original tii-specific 5×13″ steel wheels, I’ll be ready to re-photograph the car and submit it to Bring a Trailer. And then we’ll see whether all this effort was worth it.—Rob Siegel
Rob’s new book, The Best of The Hack Mechanic, is available here on Amazon, as are his seven other books. Signed copies can be ordered directly from Rob here.