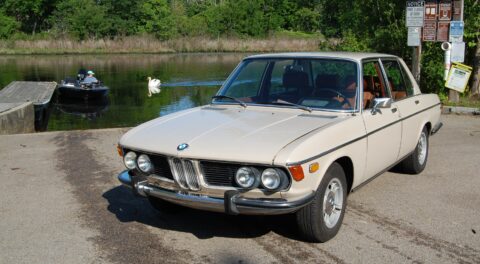
When last we saw Carter, my hastily-purchased bargain ’76 2002, I was in the “getting to know you ” phase of ownership. I’d eliminated the egregious suspension thunks and clunks by replacing the rear shock bushings and the front strut tower bushing. I also took a whack at the most alarming issue: the clatter from the engine compartment that I was afraid might be a rod knock. I wrote, “I found that a good portion of the noise was from the unused clamping bracket for the battery. I then poked around with a mechanic’s stethoscope and found that much of the remaining noise was due to a loose bolt attaching the unused smog pump to its bracket, and the exhaust heat shield not being fully secured due to a snapped-off bolt that once held it to the manifold. With the former tightened and the latter removed, only a small amount of clatter from the timing chain could be heard on the stethoscope. Another drive around the block verified that my feeling that the engine was going to fly apart was gone.”
I was dead wrong.
Once I drove Carter more, it was abundantly clear that the part-raspy-snarl, part-knocking sound was still very much present at a variety of low-to-mid-rpm load conditions. In the garage, however, it would rear its ugly snarly metallic head only when the engine was sharply revved up, and even with the mechanic’s stethoscope, it was maddeningly difficult to isolate. It seemed strongest at the front of the engine (upper and lower timing covers), but could also be heard pretty clearly from both the valve cover and the oil pan. This meant that it could be something in the valve train, something in the timing chain assembly, a slack oil pump chain, worn-out rod bearings, or some hellish combination of the four.
I’d adjusted the valves after I bought the car and hadn’t found anything amiss in the valve train, but I pulled the valve cover back off and inspected things again. I also examined the timing chain as best I could, checking the chain for slack at the top, pulling out the plunger and spring, reinstalling them and pouring fresh oil into their cavity and pumping the piston back up, even snaking an inspection camera down the front timing covers to see if the plastic rail was cracked or the tensioner arm had grooves worn in it.
All appeared okay—and that was good, because in order to directly inspect the guides or replace any components, the lower timing cover has to be removed, which is a bit of a pain because the crankshaft pulley has to come off.
Regarding the oil-pump chain and the rod bearings, about twelve years ago, I bought a ratty ’72 2002 that had been sitting for a few years. When I got it started, the engine sounded like a chainsaw. The noise was easily isolatable to the oil pan. I lowered the pan and found that the oil pump chain was so slack it was hitting the side of the pump. The oil pump is easy to remove so you can insert extra shims beneath to tighten up the chain. However, when I bounced this off our own Mike Miller, he said “Really, while you’re in there, you should check the rod bearings. It’ll never be easier to do than right now. If they’re worn, they could be contributing to what you’re hearing. Just drop the rod end cap to #3; that’s always the one that wears first.”
Sure enough, rod bearing #3 was worn into the copper. “Mike,” I emailed back, “I’m never going to doubt a word you say again.”
With that episode still in my mind, and with lowering the front of the oil pan easier than removing the lower timing cover, I chose my path.
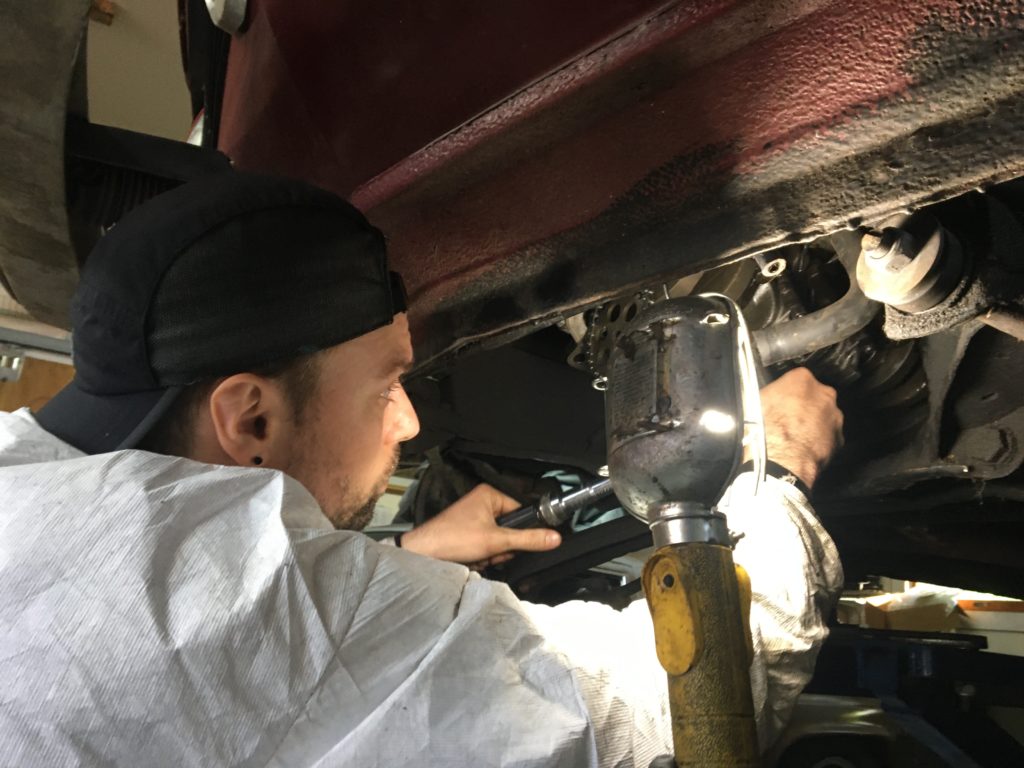
Somewhat surprisingly, my eldest son, Ethan, who is 33 and lives with us and who has never expressed much interest in wrenching, wanted in on the action. This slowed down the pace somewhat, but things like this are precious. Plus, I had a witness and a partner to the surprise that transpired.
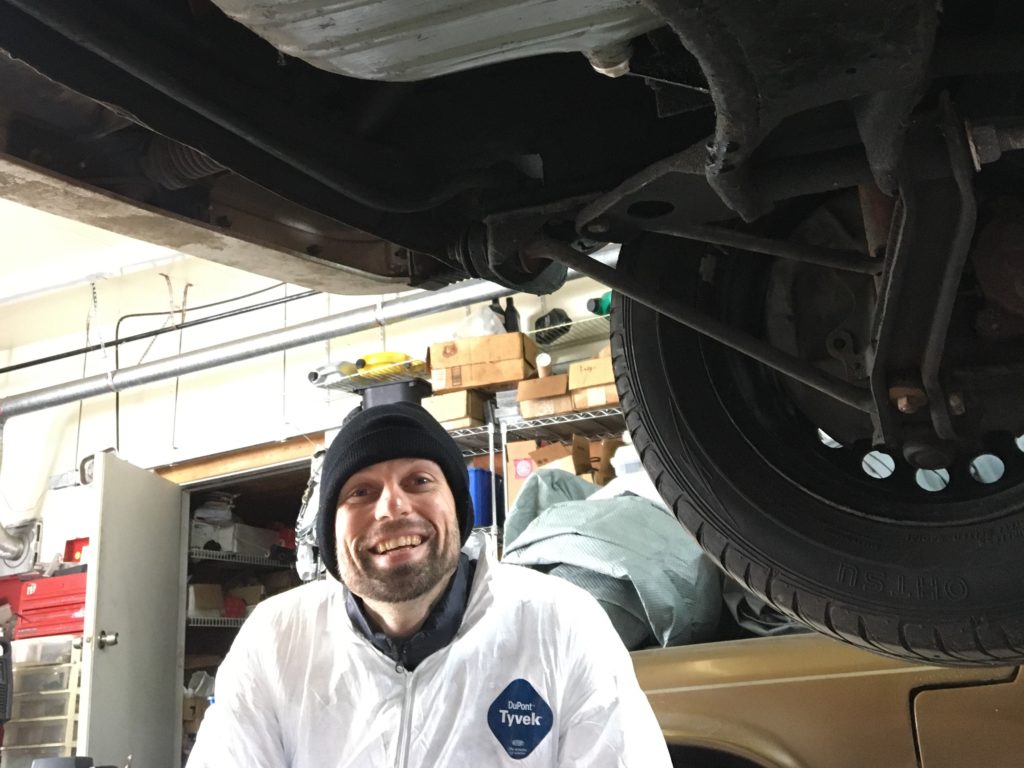
Ethan, clad in Tyvec just like dad, prepares to dive into Carter’s greasy realm.
The first surprise came when we drained the oil; I found that the drain plug was installed only finger-tight—yikes! And I drove this thing home this way, then put maybe another fifteen miles on it.
The second was that clearly someone had been inside the oil pan; the pan gasket was torn and cobbled into continence using a never-drying gooey adhesive, and some of the difficult-to-reach 10-mm oil-pan bolts had never been snugged down. Danger, Will Robinson!
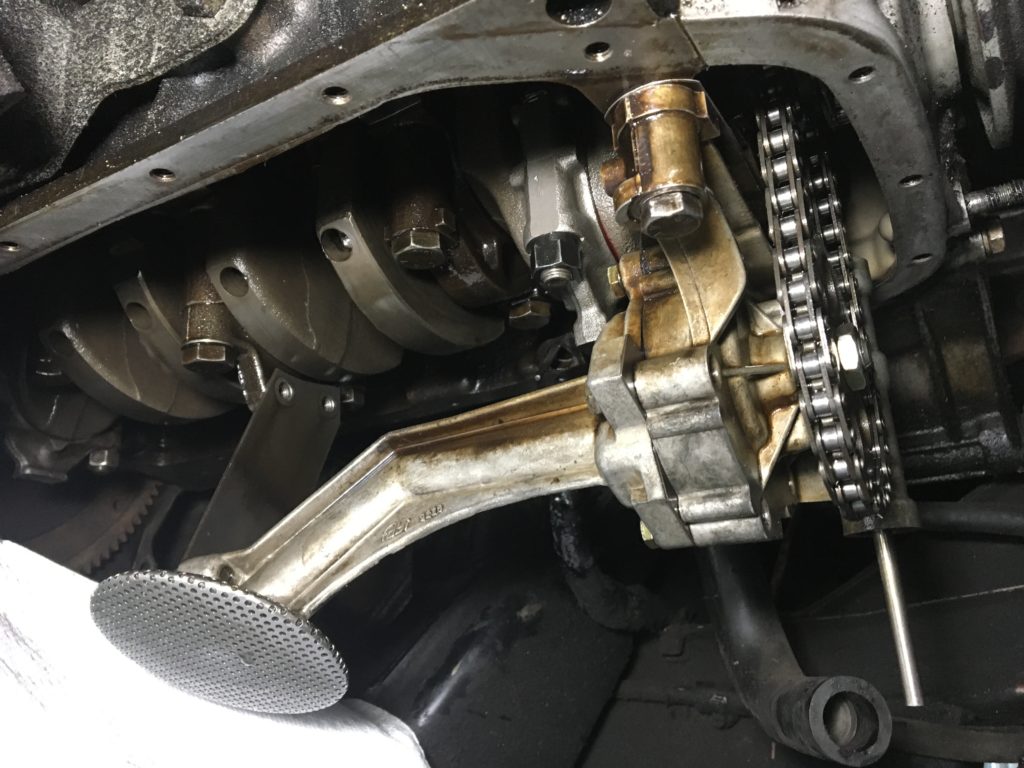
I’d forgotten the ins-and-outs of lowering versus dropping the oil pan, and refreshed my memory by reading up on bmw2002faq.com. Some posts say that to get the pan’s internal baffle to clear the pickup arm that hangs down from the oil pump, you need to raise the engine and either truss it in place with a chain or a ratchet strap suspended from a 2×4 across the tops of the shock towers, or insert blocks of wood at the engine mounts. Other posts say that you can just lower the front of the pan, reach in and undo the bolts holding the oil pump, remove it, and then slide the pan out. In my case, it was the latter, so I didn’t need to choose between a quick in-and-out to check and shim the pump chain versus having access to the rod bearings.
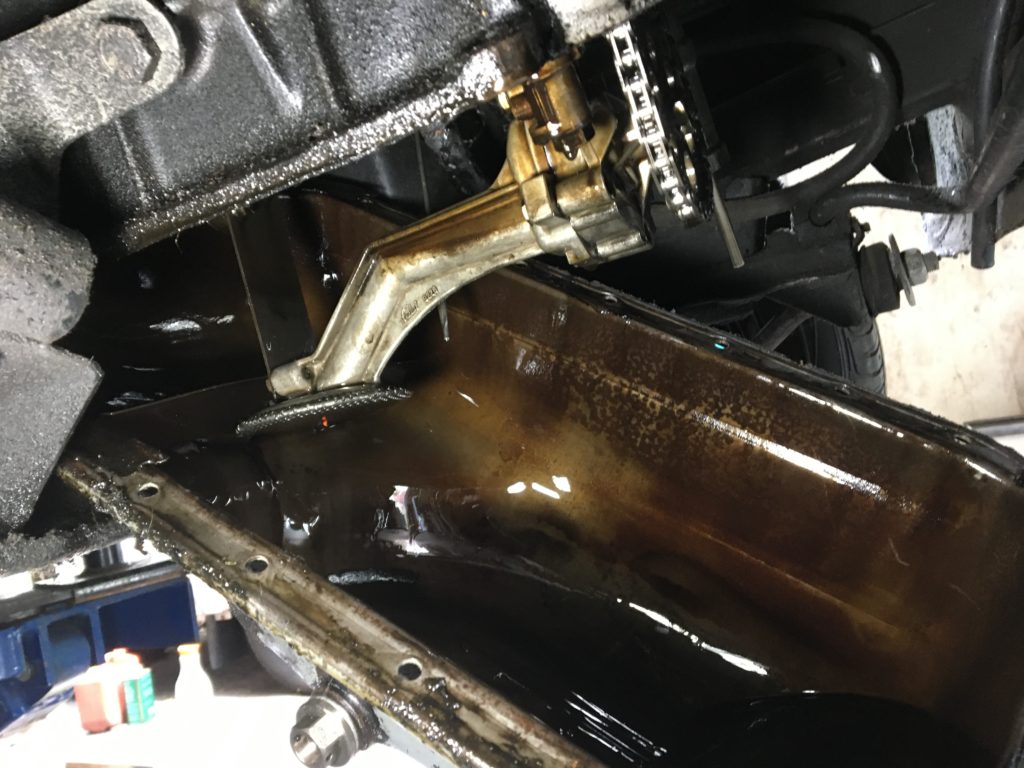
Success—and easier than expected.
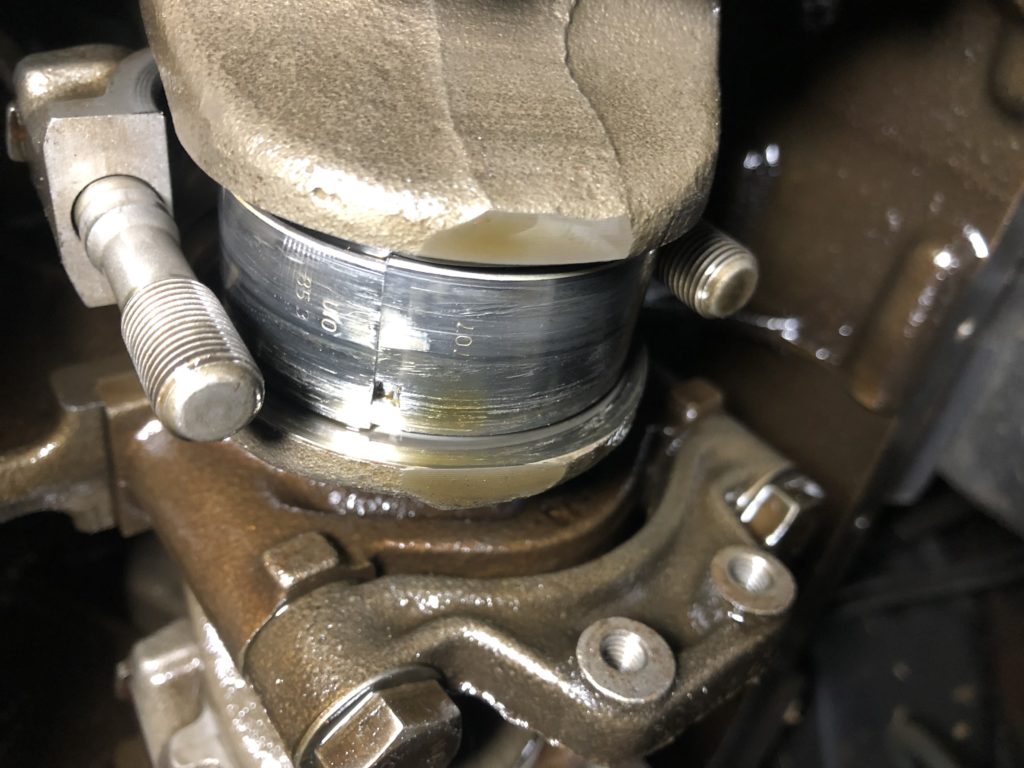
It was immediately obvious that the oil pump chain was very loose (see the video here), but I didn’t see any wear marks on the side of the pump. So, recalling Mike Miller’s advice, I rotated the engine so the #2 and #3 crank journals were at the bottom, and dropped #3 rod-bearing cap. The bearing had some obvious scratch marks in it, but it wasn’t worn down to the copper, as was the case twelve years ago. I reinstalled the cap and torqued it back down, and almost began buttoning things up, but like in Independence Day, I decided I wanted to fire a second missile at the alien ship. I dropped the #2 rod-end cap.
Bingo.
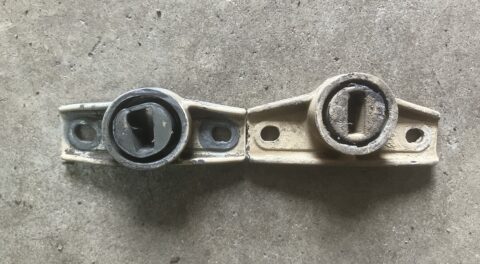
The first indication that something was wrong was that the bearing shell didn’t come out with the end cap; it was still on the crankshaft journal. When I looked up at it, I was horrified: I could see the seam between the two bearing shells. You should never see this because the upper shell should fit snugly in the rod end, the lower one in the cap. More than that, the little tabs that normally hold the bearing shells into the rod and cap were broken off. Together, these two things meant that the bearing had spun.
Yeesh!
Now, there’s a big difference between rod bearings simply being worn and having a spun bearing, where the two shells are actually turning inside the circular rod end and its cap. The former is an easy replacement, whereas the latter is somewhere on the spectrum of catastrophic engine failure.
A spun bearing is typically caused either by dirt or metal contamination finding its way into the thin oil film separating the bearing shells from the crank journal, or by overheating and/or high engine rpm. In either case, a spun bearing usually implies that the bearing has seized on the crank journal, forcing the rod end to spin around it.
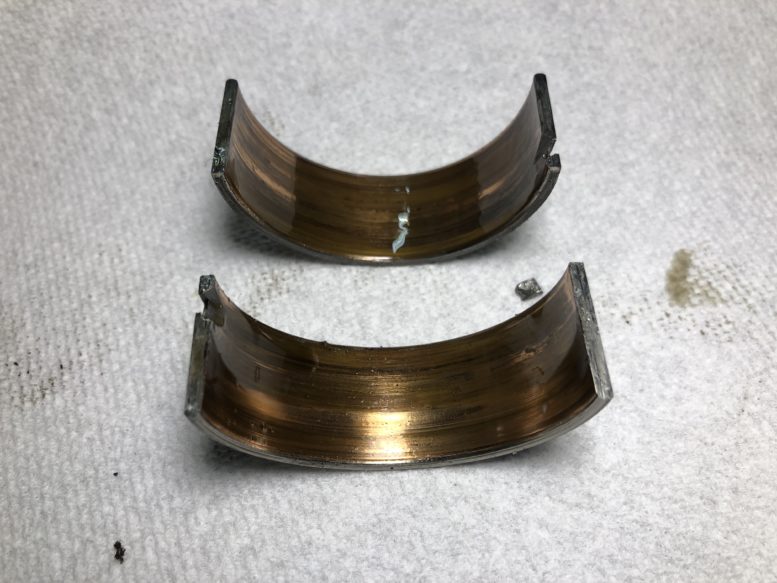
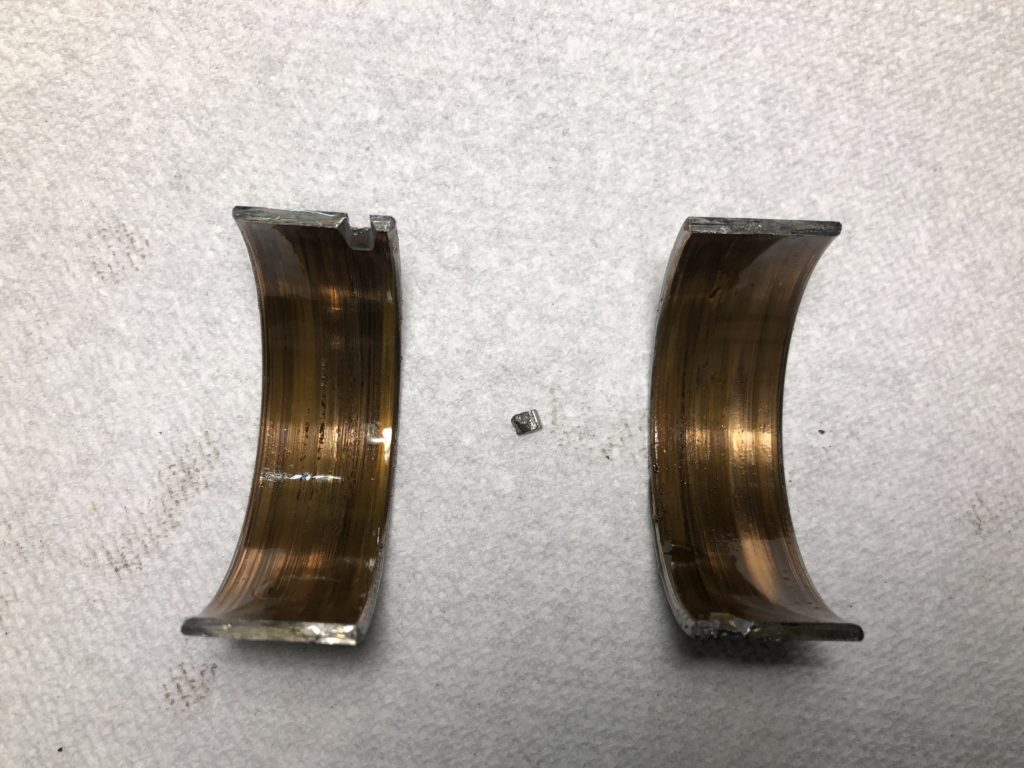
Fortunately, I was able to easily drop both bearing shells—they weren’t seized to the crank journal, as I’d feared; they were just held on with an oil film. With the shells removed, I saw that both were worn down to the copper and both of the little tabs had been broken off. I found the tabs embedded in the notches in the rod (better than loose in the engine!).
Yeesh a second time!
When I inspected the rod end and cap, I was thrilled that I didn’t see obvious spun-bearing damage—that is, there weren’t extensive scrape marks and heat discoloration that indicated the bearing had been spinning in place. There were also no seize marks on the crank journal, so it’s possible that this was a partially spun bearing, that the tabs broke and it moved, but then came to rest.
Ideally, you’d take the rod to a machine shop and have them measure it carefully and recondition it if necessary, but the rod is attached to the piston, and to pull the pair out, you need to approach it from the top, which means yanking the head off. And then, really, the crank should be measured and the journal surfaces polished, which requires removing it, which is possible with the block in the car if you pull the transmission and the front cover—but really, at that point you’re talking about rebuilding the engine.
Just to complete the bearing inspection, I looked at the remaining two bearings; #4 looked fine, but #1 was also worn into the copper.
Hey, at least the tabs weren’t broken like #3.
My original thought for Carter had been to do an M20 conversion, so dumping big time and money into this engine was not part of the plan. But if you know me, you know that I’m big on preserving options until I make a decision. What I wanted was for Carter to be running and rap-free, and off my lift and out of my garage until I made a firm decision on its future.
I nearly went over to the computer and put a set of rod bearings on order (they’re pretty inexpensive, about $40 a set), but then remembered that I had an incomplete set of bearing shells from when I’d rebuilt the engine in Kugel, my dear departed Chamonix ’72 tii. With that engine, I forgot to tighten one of the rod-bearing end caps, heard the rod knock, and had to go back in and replace the damaged bearing shell, leaving the rest of the set for—well, the next time I needed them. I figured that at a minimum, I could use the leftover bearing shells and some Plastigage to reassure myself that the rod end hadn’t been elongated or otherwise damaged.
I began to think hell, I could simply replace #1 and #2 with the leftover bearing shells, slap it back together, and be done with it. It’d have to be better than the way it was.
So Ethan and I swapped a pair of bearing shells into #2, laid a piece of Plastigage on the bottom one, tightened the end cap, and then pulled it back off, ready to compare the squished Plastigage to the marks on the wrapper to read the clearance.
Instead, I saw an unsquished piece of Plastigage.
This was after the bearing cap had been torqued down and removed.
What the—?!
My first thought was that the rod end had been damaged by the spun bearing. This was way not good. Even though I was thinking of doing an M20 conversion to Carter, that didn’t mean I was prepared to do it right now.
When in doubt, collect the data again, right? This time I pulled out the worn bearing shells from #1 rod, installed new ones, and checked the clearance with Plastigage. The result was the same: no squish. In addition, when I shoved the end cap up and down, I could feel massive amounts of play of the rod end on the crank journal.
Then the light bulb went on: Had this crank been reground? Was I replacing undersize bearings with standard ones? That would certainly explain the play and the lack of Plastigage squish.
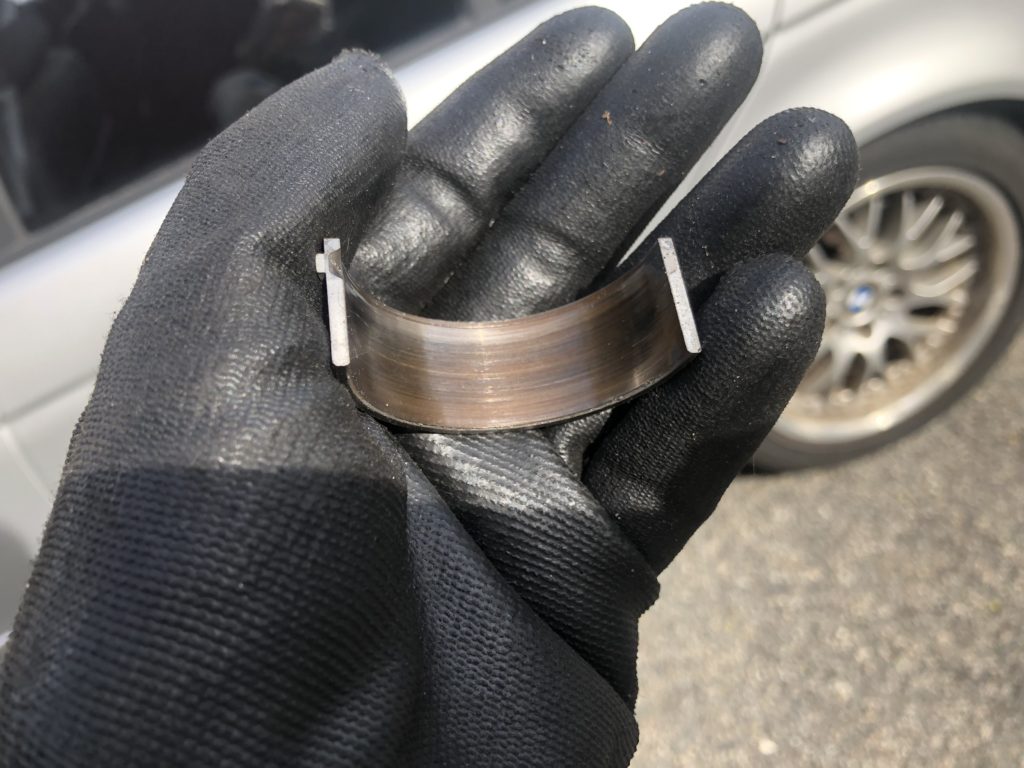
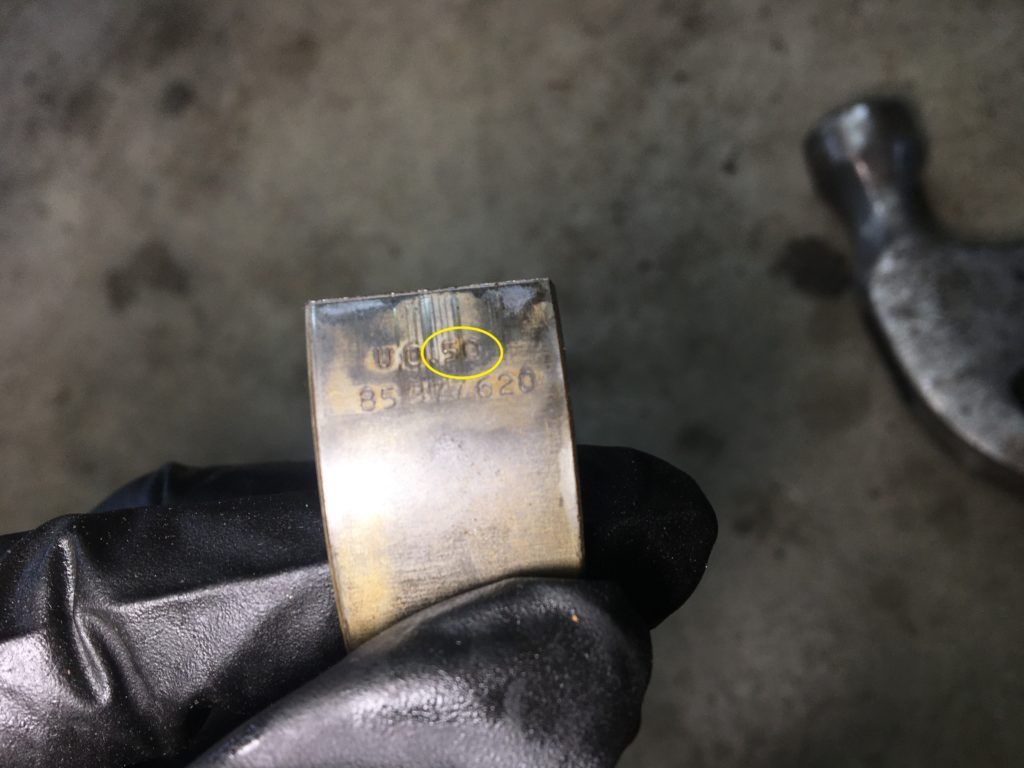
I examined the shells that I’d pulled out. Sure enough, I could see “0.50” stamped on the back. And when I ran the 8577620 number that was also stamped there, it came up as 0.5-mm undersize rod bearings (technically, they’re thicker oversize bearings for an undersize crank journal).
Aha!
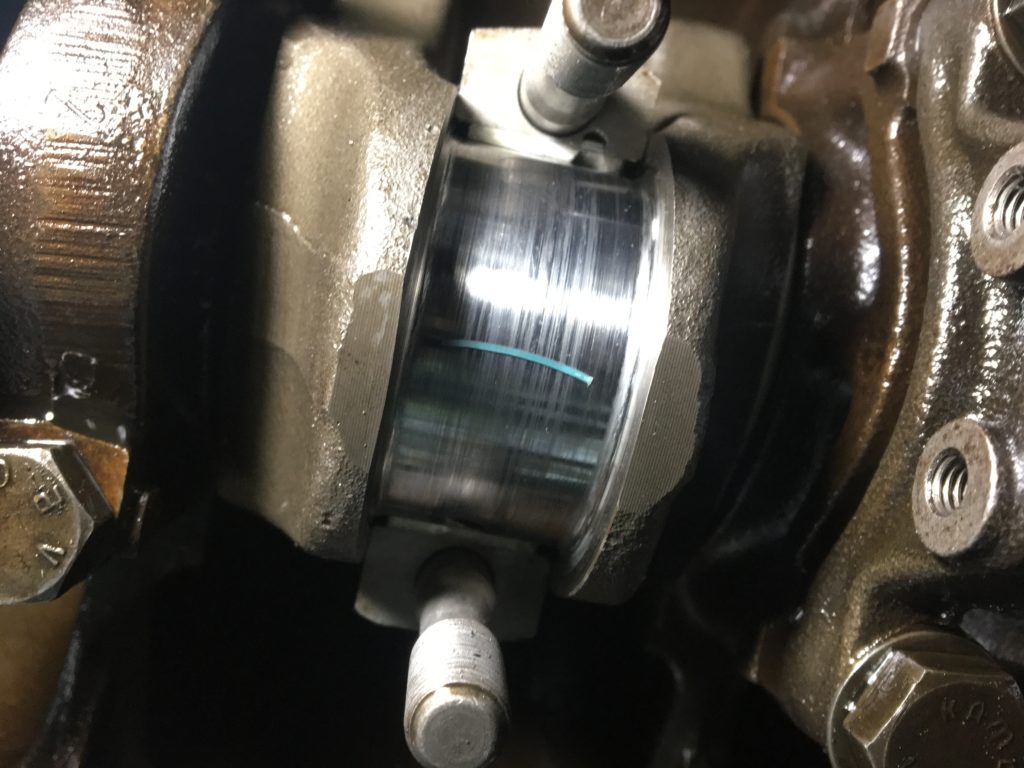
To complete the detective work, I measured two of the crank journals with calipers. Sure enough, they were about half a millimeter smaller than the stock size listed in the factory manual.
Okay, so with any luck, I simply needed 0.5-mm undersize rod bearings. The problem is that they’re virtually unavailable.
The factory manual lists three undersizes: -0.25 mm, -0.5 mm, and -0.75mm. But the only undersize bearings I found in a web search and a perusal of my usual vendors were 0.25-mm sets at FCP Euro. Then I checked eBay and found a vendor in Texas who was selling sets of Glygo new-old-stock 0.5-mm undersize M10 rod bearings for $20 shipped.
Click. Buy. Happy dance.
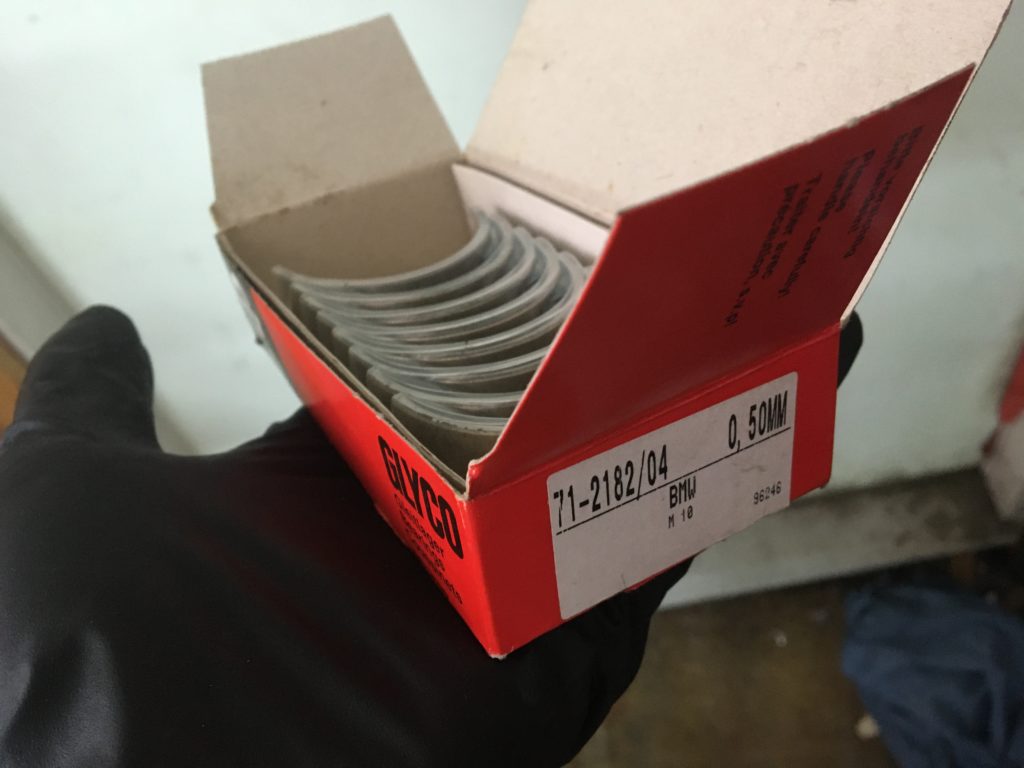
The rod bearings from heaven.
As soon as the bearings arrived, Ethan and I test-fit a pair into Rod #2. This time the Plastigage squished into the 0.001-to-0.0027-inch acceptance window. The other three pairs fit fine as well.
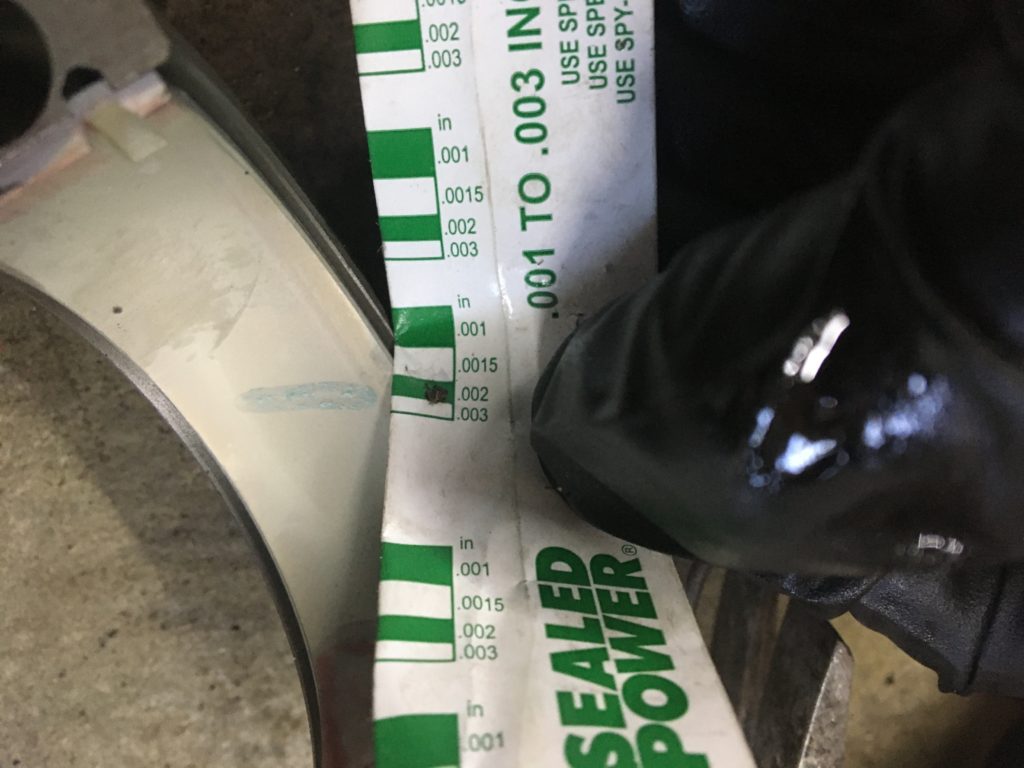
In the zone.
I know that using Plastigage isn’t as good as having a machinist directly measure your crank journals and rod ends, but I was simply trying to make sure that I had the correct-size rod bearings for a reground crank, and for that it worked perfectly. So, with that done, I lubricated the bearing shells with assembly paste and had my young padawan torque them all down to 41 foot-pounds.
Spring, and a young man’s fancy turns to… handling a torque wrench.
For the oil-pump shims, I clicked and dragged four of them into FCP Euro’s cart, prepared to pay the $10 each plus shipping. But I then wondered if I also had pump shims left over from both that chainsaw-sounding motor a dozen years ago, as well as from the more recent rebuild of Kugel’s engine. I searched around in the basement, and voilà! I was especially thrilled to find two of the thicker 0.3-mm shims (only the thin 0.1-mm shims appear to be currently available), and smiled that several were still in the original Bavarian Autosport wrapper.
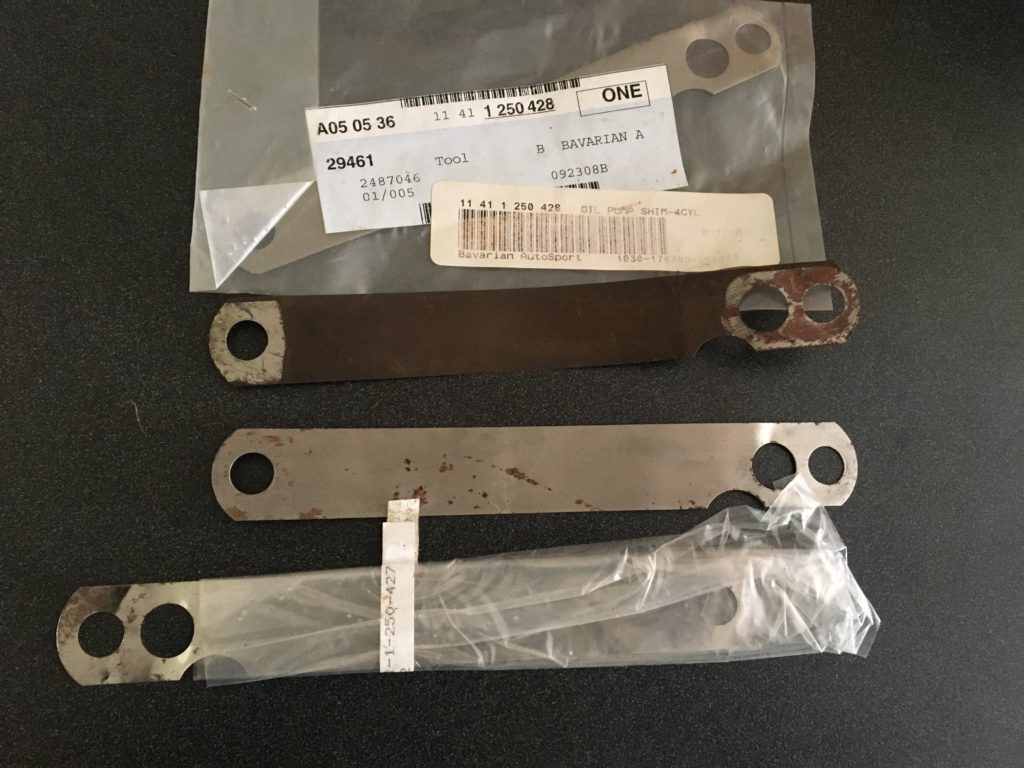
There’s no part that’s cheaper than one you’ve already bought.
After a quick inspection of the oil pump to make sure that the pressure-relief valve wasn’t sticking, I reinstalled it, properly shimmed with one thick and one thin shim.
Test-fitting the oil-pump shims.
With Ethan’s continued assistance, I slid the back of the oil pan and its new gasket in place, bolted the properly-shimmed oil pump back up, rotated the engine once by hand to make sure nothing was binding, installed the 21 10mm bolts holding the pan to the block, tightened everything down, added fresh oil, disconnected the ignition coil, cranked the engine until the oil pressure light went out, then started it. Folks who have never rebuilt an engine—or parts of one—will never know the mixture of anticipation and fear that comes from waiting to see if that first start brings a smooth idle or expensive noises. Fortunately, Carter’s re-bearing’d M10 sounded absolutely fine. I let it idle a bit, looped it around the block a few times, then gradually got on it, replicating the conditions under which it generated metallic smacking sounds.
Nothing.
The snarly rap was gone.

Yeah. We bad.
So, an unexpected problem, a really unexpected series of repair sessions with number one son, and a quieter healthier engine—all for an outlay of $20 for under-sized rod bearings, $5 for Plastigage, $25 for five quarts of Castrol, plus a filter, oil pan gasket, and oil pump shims that were kicking around my garage. It really doesn’t get much better than that.
If I had the stones I had five years ago, I’d put a few hundred local miles on Carter, then pack it with parts and tools and road-trip it down to the Vintage in Asheville this coming weekend. Right now, however, I’m still suffering fatigue and back pain from the 3,100-mile trip to MidAmerica 02Fest in Arkansas a few weeks ago. So a trip to the Vintage in any car is up in the air.
We shall see what happens.—Rob Siegel
Rob’s new book, The Best of The Hack Mechanic, is available here on Amazon, as are his seven other books. Signed copies can be ordered directly from Rob here.