About two months ago, I wrote about my 2003 E39 530i stick sport’s mysteriously and repeatedly losing power while taking me home from a doctor’s appointment. Because it was beastly hot and humid out, the tank was nearly empty, and the problem never recurred when the tank had more fuel in it, even in hot weather, it seemed likely that the root cause was vapor lock or cavitation.
This was great, because it meant that I didn’t really need to do anything. So I didn’t.
There was, however, the specter that I’d shortened the life of the likely-original fuel pump by overheating it, so I vowed that I’d replace it—as well as addressing some other deferred maintenance issues. But I felt like the kid in the old cartoon who doesn’t do his book report, prays that if he doesn’t get called on in class he’ll mend his ways, lucks out and slides under the radar, and immediately returns to his old homework-shirking ways.

My E39 sits forlornly in June before springing back to life, letting me drive it home, and acting as if the incident never happened.
There’s a dynamic I’ve referred to for decades as the Rhythm of Repair. It has to do with how you fit a repair into your life. Its parameters are time, money, space, and availability of parts. Make no mistake: Even if you take the car in to a dealer or other shop, you need to deal with the Rhythm, since you must schedule time to drop it off and pick it up, perhaps needing rides both ways. It’s often a minimum of two hours. I can get a lot fixed in two hours, so I generally opt to fix things myself and save on the money parameter. Ho0wever, in that case, the issue often becomes one of trying to determine in advance what parts you need, then ordering them so that you don’t lay up the car—and usurp precious garage space—for any longer than necessary. The parts choice is a balance between ordering only the part(s) you know you need versus ordering every possible while-you’re-in-the-neighborhood part; you certainly can do the latter, but it’s likely to explode the cost.
Just like Gödel’s Incompleteness Theorem, in which the Austrian logician Kurt Gödel proved that no mathematical system can be both complete and consistent, the Rhythm of Repair dictates that no set of parts you order in advance for a repair can be both complete and cost-efficient. (Yeah, sure, Rob. It’s just like that. You pick up many girls in college with that line?)
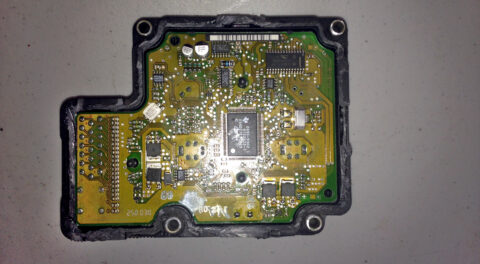
With the E39’s odometer about to roll over to 200,000 miles and the car having no repair records when I bought it five years ago, there were two bits of preventive maintenance I felt that it needed in order to restore my confidence in driving the car out of cheap AAA towing range. The first was the fuel-delivery system, the issue highlighted by the power-loss episode in June.
The second was refreshing the E39’s infamous plastic-laden cooling system.
Both of these are repairs where you can either be highly focused—replacing, for example, just the fuel pump and water pump—or you can go all the way down the rabbit hole and replace everything, or nearly everything, in both systems. I’ve done the latter in other cars I’ve relied on as daily drivers, but I now work from home. I have no commute. I’m not driving much, and I wanted to shift the balance away from completeness and toward cost-containment.
At the same time, I didn’t want to be stupid about it. Not being certain where to draw that line was the major reason why I kept putting off the two repairs.
In the end, I simply set a budget: How much fuel delivery and cooling system preventive maintenance am I willing to buy for a 2003 E39 530i stick sport that’s currently running fine but probably worth only $1,500 to $2,000 if I wanted to sell it? $500—I’m willing to spend $500… and two repair sessions in hot weather.
Numbers can sometimes be oddly comforting to the left brain. Right-brain-wise, I’d feel like an idiot if the fuel pump croaked or the expansion tank cracked and stranded me and the car—but if, say, one of the hard plastic coolant pipes breaks, c’est la vie.
First, the fuel system: My Facebook friend Stéphane Grabina, president of the independent repair shop Excluservice of Rockville, Maryland, had given me his recipe for a fuel-delivery system troubleshoot and refresh. He recommended replacing not only the fuel pump, but also the level sensor, the “sucking jet pump,” and the plastic flange that sits in the top of the tank. He gave me part numbers for everything. You can find it in the link to the original June article above. Grabina’s recipe was lucid, intelligent, and well thought out.
I didn’t follow it. (Yes, I’m echoing Fred Gwynne, playing the judge in My Cousin Vinny).
Instead, I hewed to my money-and-time budget and replaced only the “pump insert” (which most of us would call “the fuel pump” before that came to mean the entire gangly assembly that snaps into the bottom of the fuel tank). Right? Wrong? Frugal? Short-sighted? Who knows? It was a choice.
Budgets can be wonderful things. I found that an OE Pierburg pump could be had for about $125, so I ordered one and set aside an afternoon to install it with the E39 in my driveway, thereby not kicking the 2002tii, the E9, or the Bavaria out of the garage into this surprisingly rainy summer.
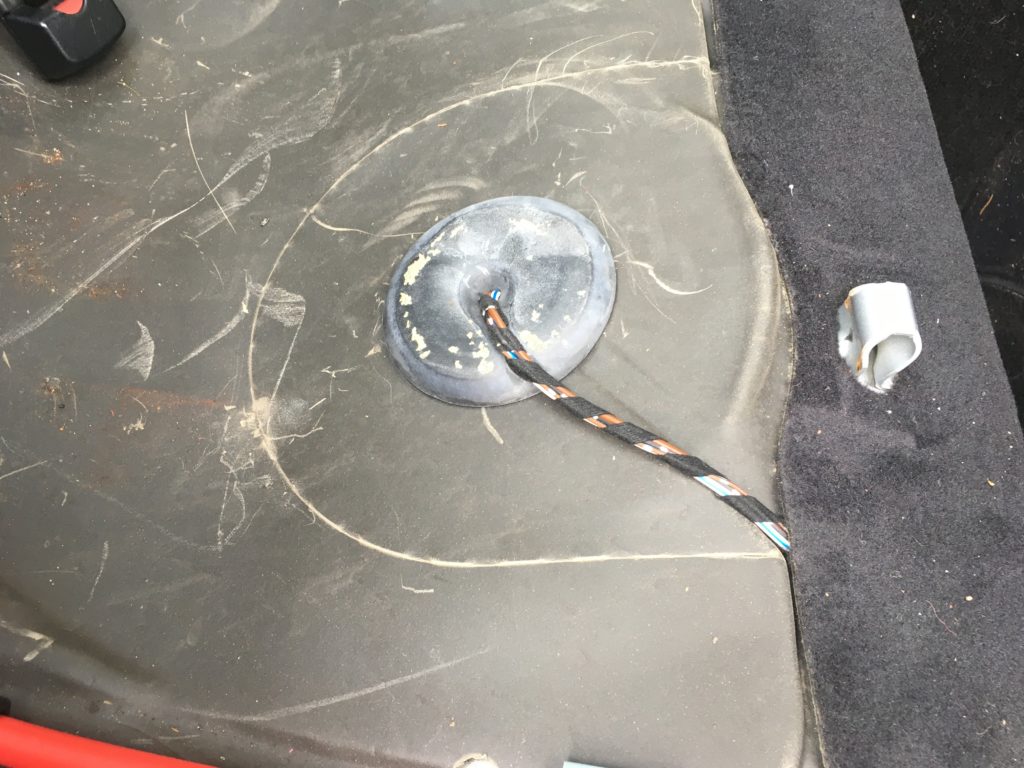
I don’t recall doing one of these jobs before, and the process was a bit Byzantine. On the one hand, in-tank fuel pumps are great: You pop up the rear seat, open the tank from the top, yank out the old pump, and install a new one without ever experiencing the glorious phenomenon of gas running down your arm into your armpit. But they do have their own set of challenges. With this one, when I removed the rear seat, I found that the round pre-perforated rubber-and-foam insulation had never been torn up, showing conclusively that the car was still running on its original fuel pump.
Like a virgin, touched for the very first time. Like a virgin, your fuel pump… is on my mind….
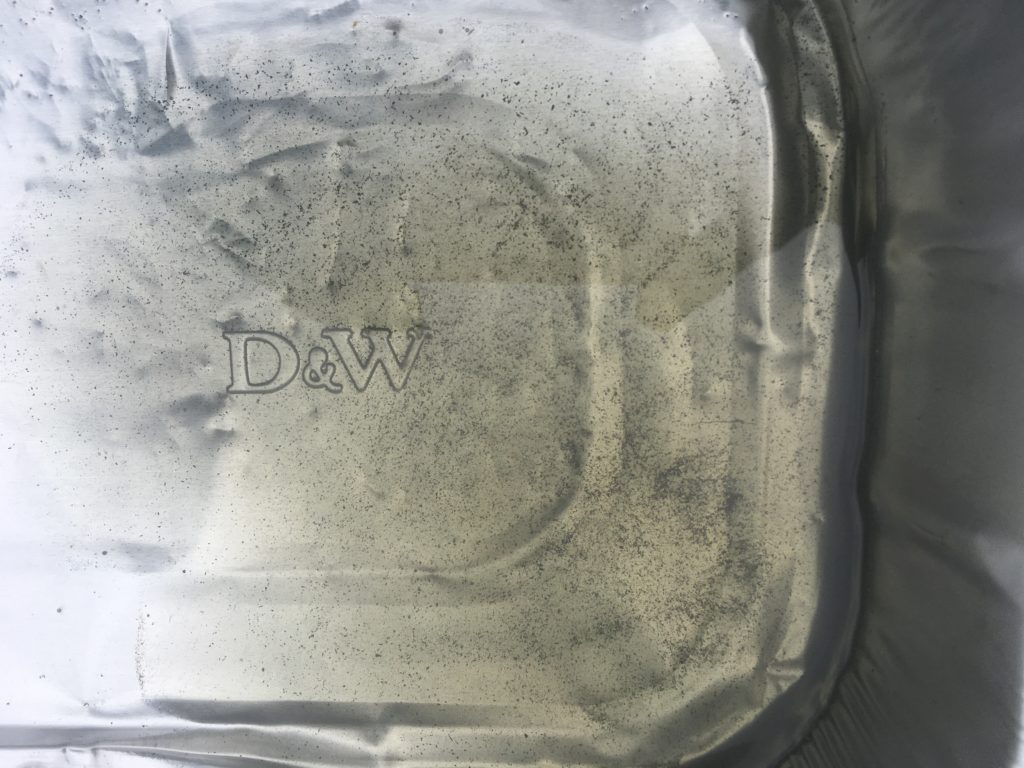
So imagine my surprise when I peeled up the rubber padding, unscrewed the access plate, and found some rodent’s seed hoard. I realized that if you’re a mouse and can crawl into small spaces, the top of the fuel tank is accessible from under the car. Fortunately, I found no other evidence of rodent incursion. It’s possible that this stash was very old, as the car had been sitting for two years when I purchased it in 2015.
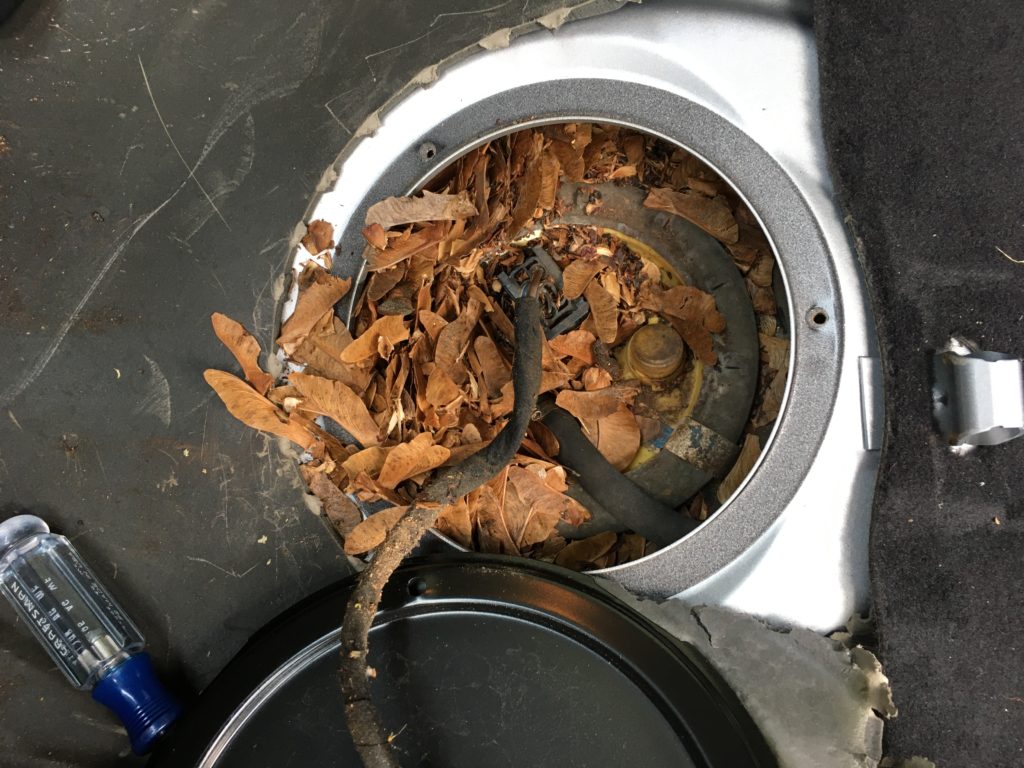
Seeds of doubt?
I vacuumed up the seeds, cleaned things up, and exposed the tank’s top flange.
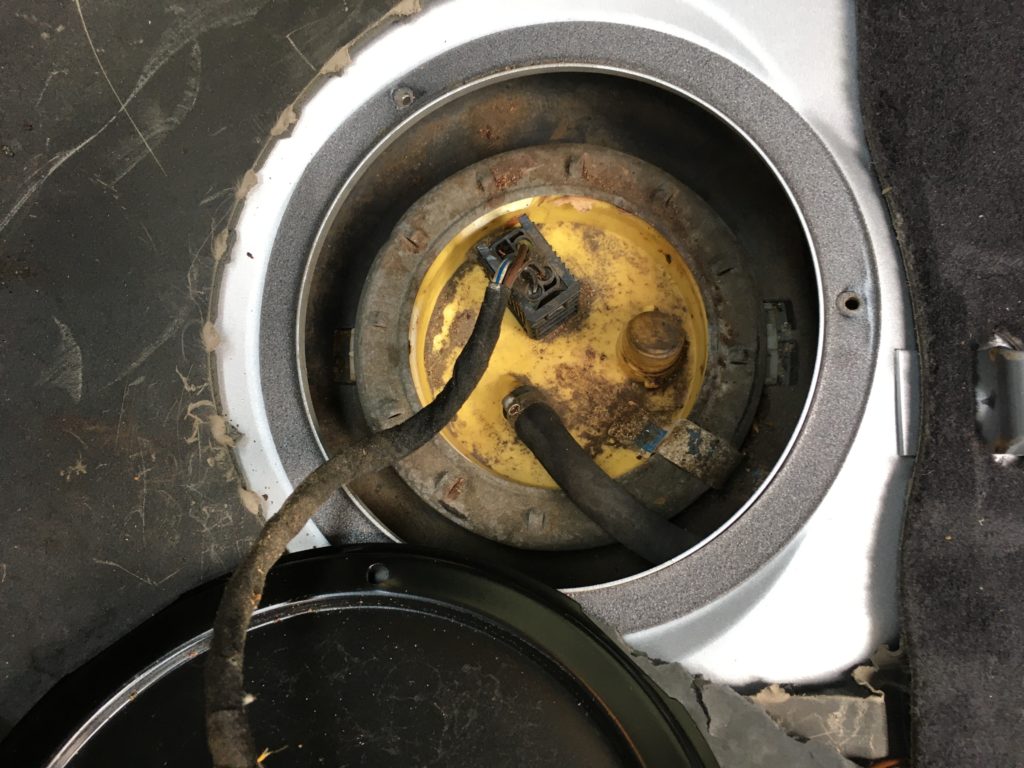
What lies beneath.
I then cut off the crimped-on clamp on the fuel line, pulled up the electrical connector, banged the lock ring loose with a screwdriver and a rubber mallet, saw the high fuel level in the tank, and realized that I was an idiot for not having waited until the tank was closer to empty. (Hey, it was running close to empty in hot weather that appeared to have caused the problem in the first place.) Oh, well; in for a penny and all that. But high fuel level notwithstanding, I couldn’t figure out how to remove the weird Rube Goldberg-like assemblage of plastic, hoses, and springs, and needed to consult a video. This one from FCP Euro was quite good as an overview, but it was this one from HakenE30 that provided the key piece of info that the float, on its thin metal arm, has to be lifted out first.
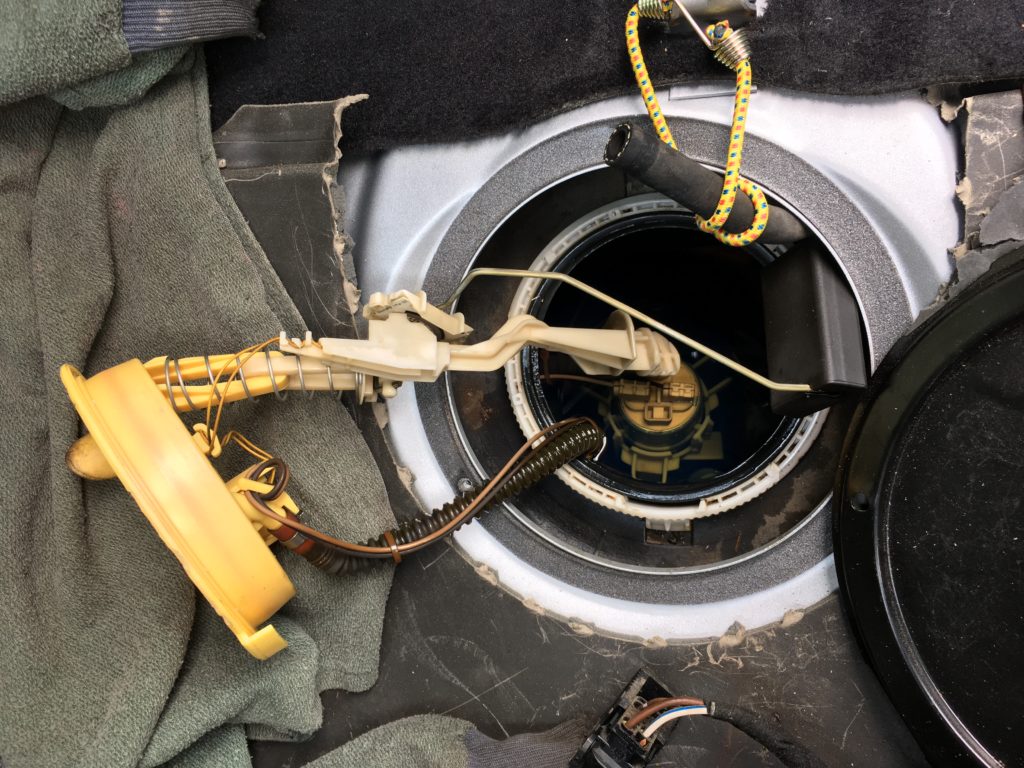
Bit of a puzzle, isn’t it? The black float on its thin metal arm is shown emerging on the right side of the hole.
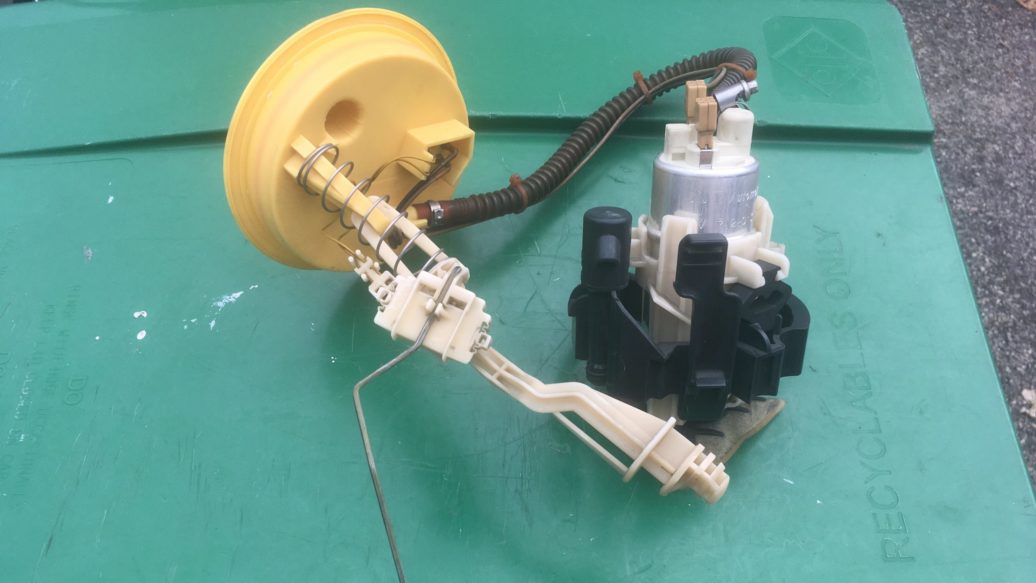
The high fuel level also interfered with reaching in and squeezing the two tabs at six and twelve o’clock that release the plastic cradle containing the pump, but what the hey, it’s only gasoline, I’ve been exposed to enough of it in my life (seriously, I did wear rubber gloves). But a few careful rotations here, a tug there, and I felt like I was a midwife for some alien mother at a junkyard.
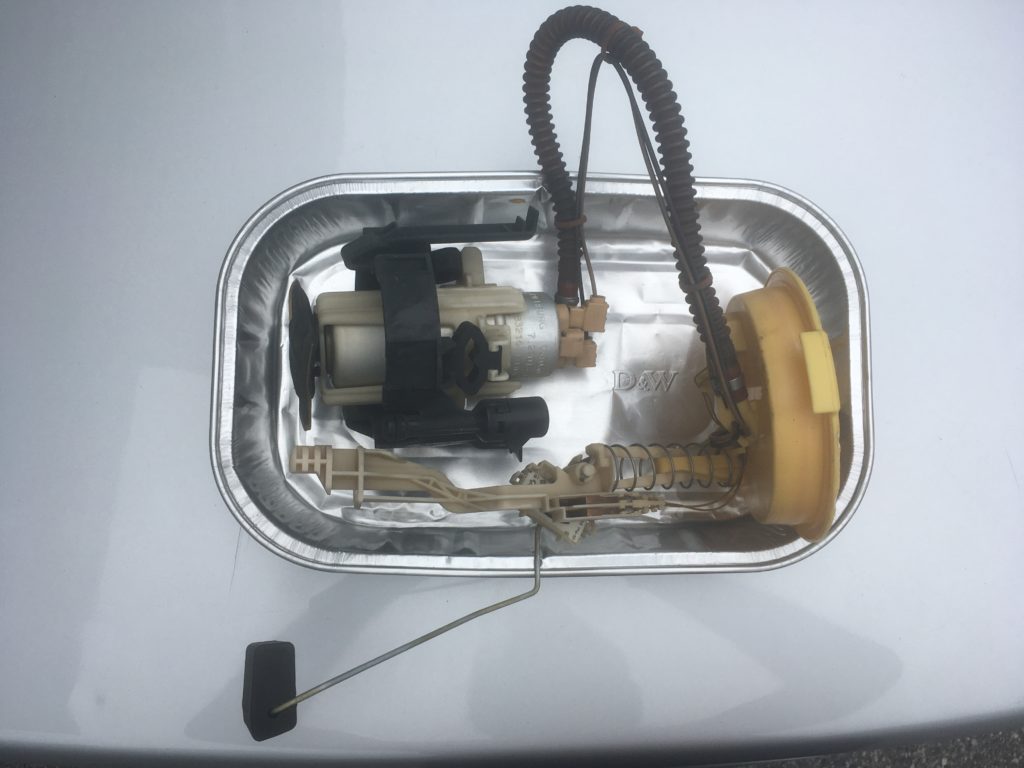
Congratulations: It’s a fuel pump assembly and the associated umbilical connecting it to the flange and the float assembly!
Swapping the fuel-pump insert into the plastic cradle is really only a matter of disconnecting the electrical terminals, cutting off the crimped-on hose clamp holding the hose to the flange, and pulling back three tabs on the cradle that snap over the ridge in the fuel pump, but this latter part was surprisingly challenging. The tabs were very stiff, there were three of them—making it more than a two-handed operation—and if I broke them, reuse of the cradle would be in jeopardy. Finally, careful positioning of three screwdrivers got them to release their grip.
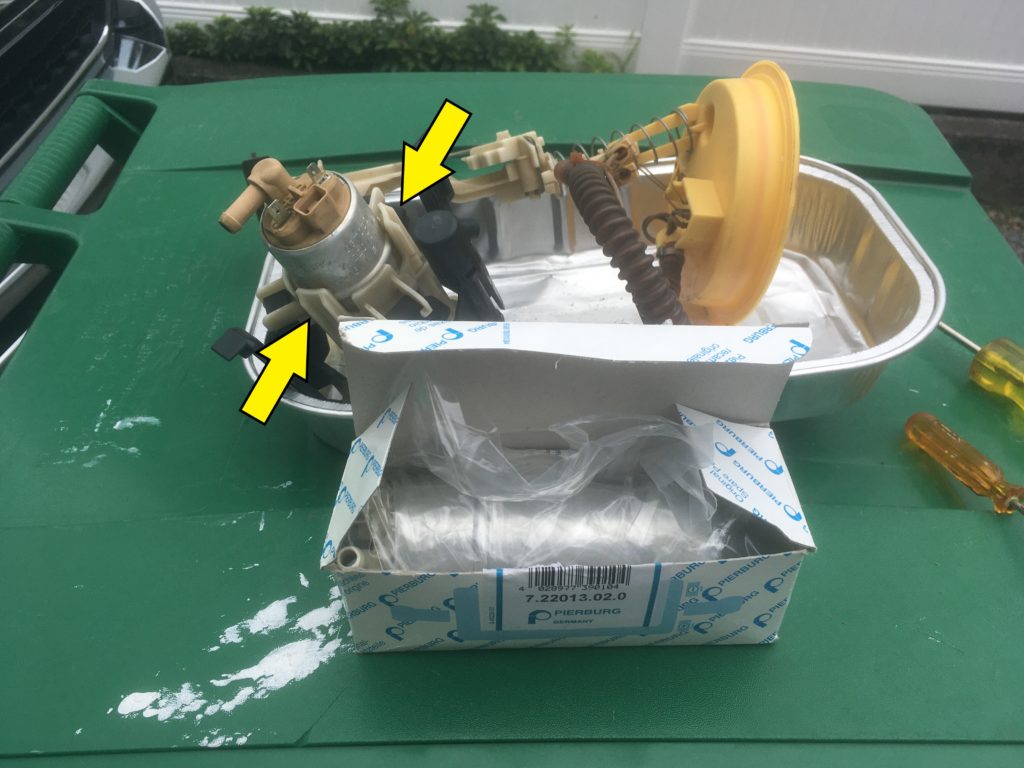
Two of the three of the plastic tabs in the cradle securing the pump.
At the bottom of the original pump was a flat detachable strainer. At first I thought the screen material was black, but I realized that what I was looking at was sediment. I then looked carefully in the bottom of the tank and found a small amount of sediment there as well. So at some point this car had been fed some gritty gas, although whether this had anything to do with its loss-of-power episode in June, I don’t know.
Although the new pump has a small integrated screen, I elected to clean the sediment out of the detachable strainer and use it, too, as part of a belts-and-suspenders approach. In addition, a few weeks ago I’d replaced the fuel filter, so maybe belts, suspenders, and duct tape.
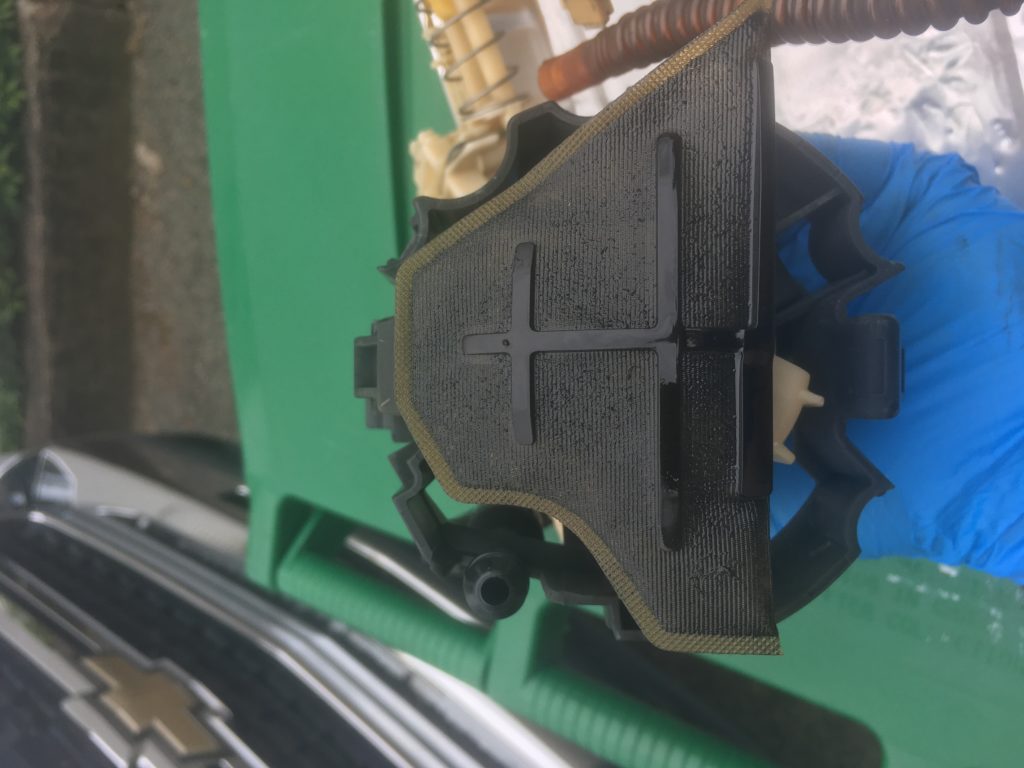
Black isn’t the color of the strainer screen. That’s sediment.
Sediment washed out of the strainer.
It took a little while for me to reverse the steps and get the baby put back in the, uh, gas tank, but when I did, I realized that I’d made a crucial Rhythm of Repair mistake: I’d forgotten to order a new rubber tank seal. D’oh—idiot! I called the local dealer, but none were in stock. “Well,” I thought, the denial so obvious I should’ve seen it in my own thought balloon, “maybe the original seal will be fine.” I tightened the lock ring down, drove the car, threw it side to side and mashed the gas and slammed on the brakes to see if the seal was tight… and it wasn’t.
I had no choice but to put a seal on order and wait for it to arrive. Fortunately, FCP Euro is near New Haven, Connecticut, and I’m near Boston, so if the item is in stock and I order in the morning, cheap shipping usually gets the part to me by evening the next day. Equally fortunate, the seal could be replaced by peeling the old one up and over the plastic flange, then sliding the new one on, without needing to remove and reinsert the entire baby. This time it passed the try-and-spill-gas test.
So, the fuel system is all buttoned up. No, I’m not going to run it empty and wait for the first scorching hot day to see what it does.
Next came the cooling system. This job I had done before, since I’d replaced essentially every cooling system part in my 1999 528iT sport wagon eight years ago, including every hose as well as those awful plastic coolant pipes under the intake manifold. This time, however, I was more cost-conscious, and bought a cooling-system overhaul kit (OE/OEM water pump, expansion tank, thermostat, radiator hoses, sensors, and BMW coolant) for $265. I added a new Nissens radiator and a new fan for the viscous clutch, since I have had those plastic fans crack and throw blades. I already had a new serpentine belt that I’d bought a few years back and kept in the trunk just in case. I elected not to order new tensioners or pulleys, since I had no evidence that any of them were bad (the pulleys usually give you ample warning from the bearings rattling or squealing).
But even though this wasn’t my first rodeo, I forgot that the radiator shroud, expansion tank, auxiliary electric water pump and its hoses, the little overflow hose that runs along the top of the radiator, and the viscous clutch and fan, all form one of those interlocked Chinese rope-and-ring puzzles. You need to (or at least I needed to) crawl under the car, undo the auxiliary water pump from its clip (remember to find the secret Torx screw holding it in place), lift it and the hoses it’s connected to out of their clips, leave everything hanging there, undo the viscous clutch and fan, undo the fan shroud, draw the shroud slightly upward to expose the little overflow hose connecting the top of the radiator to the expansion tank, undo one end of it, unclip the expansion tank from the shroud, and then draw the shroud and the fan/clutch upward together.
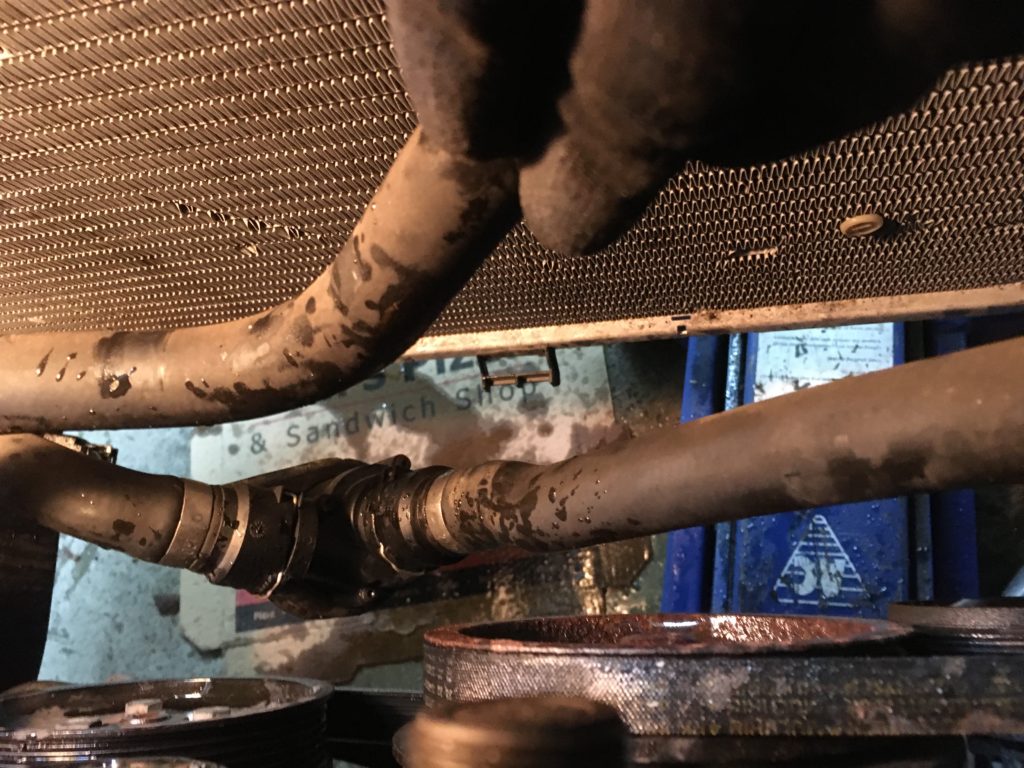
Leaving these hanging seems strange, but it works.
I already knew that the radiator and upper radiator hose were original (I could see their date codes), but when I had everything out and did the forensics, I found that every cooling-system part except the water pump was original to the car. The water pump appeared to be an unbranded part. The serpentine belt looked fine, so perhaps it was replaced when the water pump was changed. Roughly 200,000 miles on an original E39 plastic-tank radiator, plastic expansion tank, plastic thermostat, and plastic-ended radiator hoses? Sheesh. No wonder I felt skittish continuing to drive the car. I could hear little German cooling-related voices crying, “Change me! Change me!”
As much as I hate the amount of plastic in the cooling system of any post-E30 BMW, I have to say the fact that the water pump and thermostat both have O-ring seals makes short work of removal and installation; there’s no tedious scraping of old gasket and sealing material.

Yum, right?
Having the radiator out makes it easy to replace the serpentine belt. Of course, I had to figure out how to release the tensioners, and there have been a number of versions during the E39’s 1997–2003 tenure. I didn’t find any videos that told me that the a/c belt tensioner on the 530i has a Torx fitting, and the one for the main belt uses an Allen key, but I figured it out.
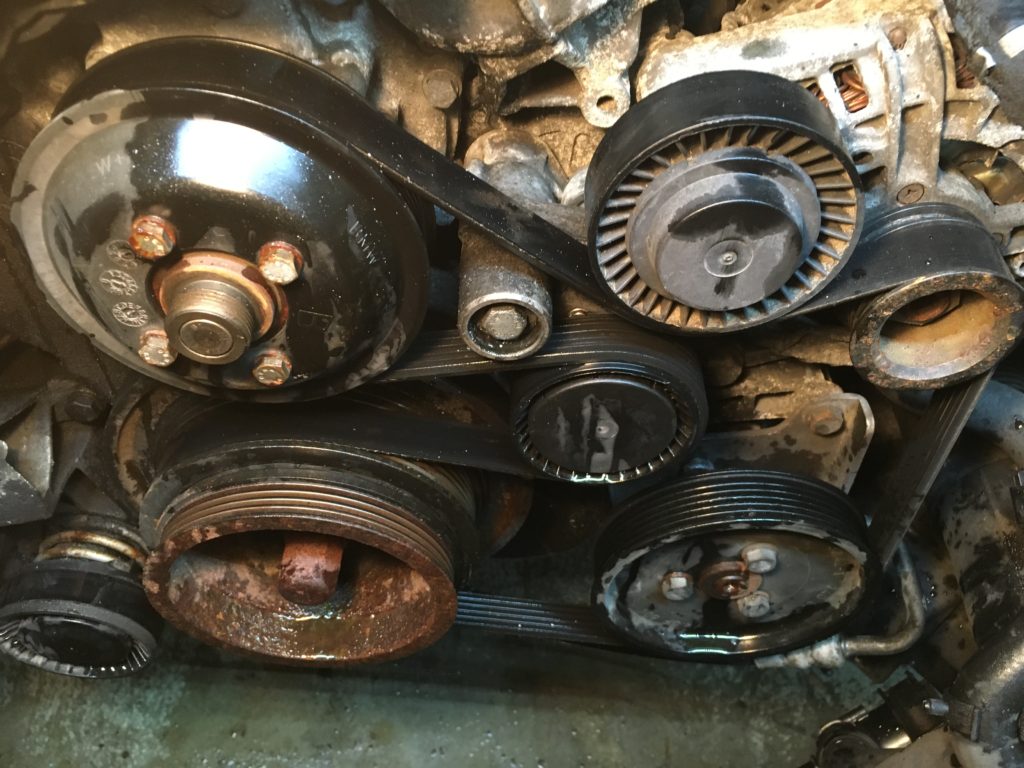
Oodles of access.
Although I hadn’t planned to replace the tensioners or the idler pulleys (none were making noise), obviously, with the belt off, I gave them all a spin and checked them all for play, and found a problem. The pulley on the main belt tensioner was not spinning smoothly; it gave a little howl if you spun it up quickly, and it had obvious lateral play. I was surprised that I hadn’t heard it with the engine running. This is classic Rhythm of Repair trouble: It was about 1:00 p.m. on Saturday. The OE German Ina pulley was only $14 on FCP, but if I ordered it now, I wouldn’t have it ’til Tuesday evening at the earliest, and the E39 was now occupying precious garage space, with my ’72 2002tii in the driveway and rain predicted for the following day. Low-price concerns evaporated, replaced by, “What do I need to do to lay my hands on this part now so that I can finish this repair?”
However, it’s not like I needed the car in the morning for a commute to work, so I could in fact afford to make some price trade-offs. The BMW dealer in Boston wanted nearly $70 for the idler pulley, and I just couldn’t bring myself to do it. Fortunately, I found that a nearby O’Reilly had a Gates pulley for about $40. That still felt stiff, but I regard Gates as a quality brand. I took a quick drive, and 40 minutes later the new pulley was installed.
But then there was one final problem.
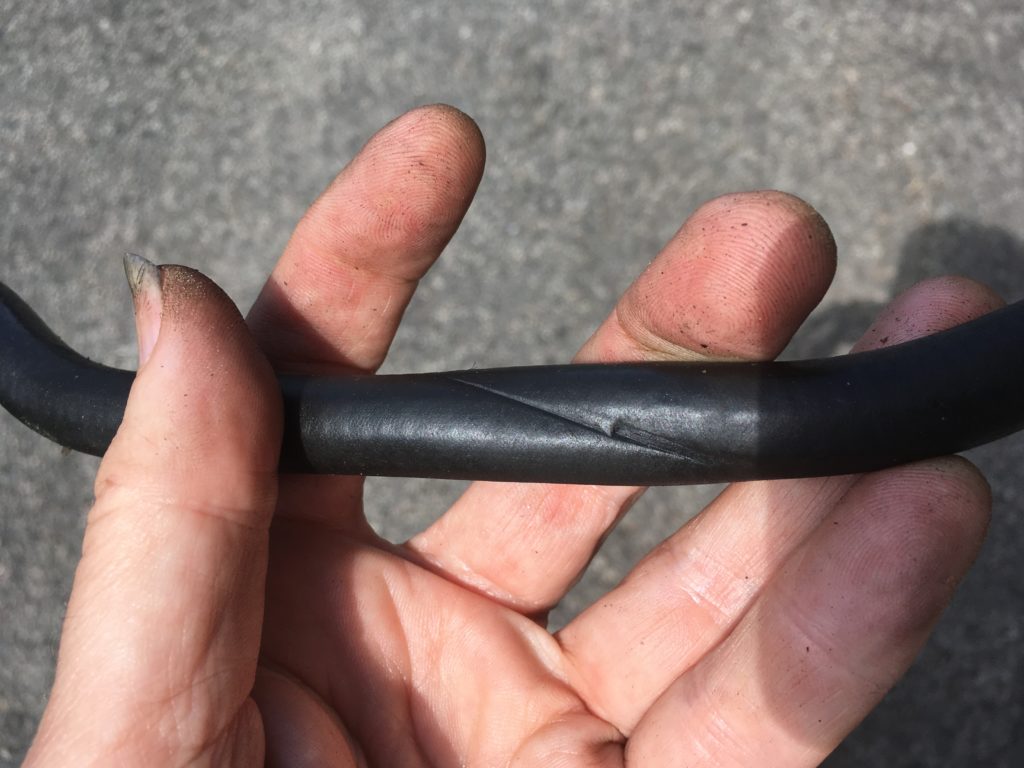
After I installed the radiator and was preparing to work the Chinese puzzle of the shroud, expansion tank, and fan in reverse, I discovered that the thin overflow hose connecting the top of the radiator to the expansion tank was damaged: It had a linear divot in it that was more than an indentation but less than a gash. When I squeezed the hose around the divot, it felt structural, like it was affecting more than just the outer layer.
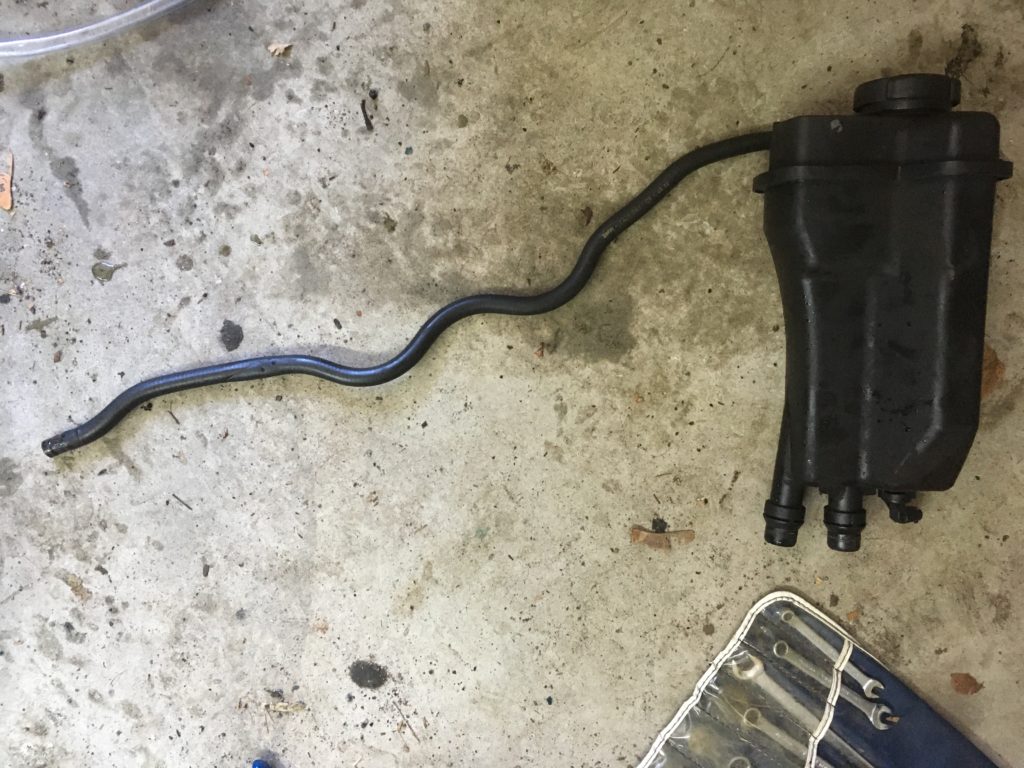
This weird bendy hose was the problem child.
Drat! Drat and fie!
At first I thought that I could simply replace it with a length of fuel hose. Unfortunately, I found that the 8×13-mm hose I had in the garage was too tight to easily fit on the plastic nipples of the radiator and the expansion tank.
I looked carefully at the radiator’s nipple, saw that pushing on it would create a shearing force at its plastic base, and decided that the last thing I wanted to do was risk my new radiator and expansion tank. As if to prove my point, I went to detach the thin overflow hose from the original expansion tank to which it was still connected, and accidentally snapped its nipple.
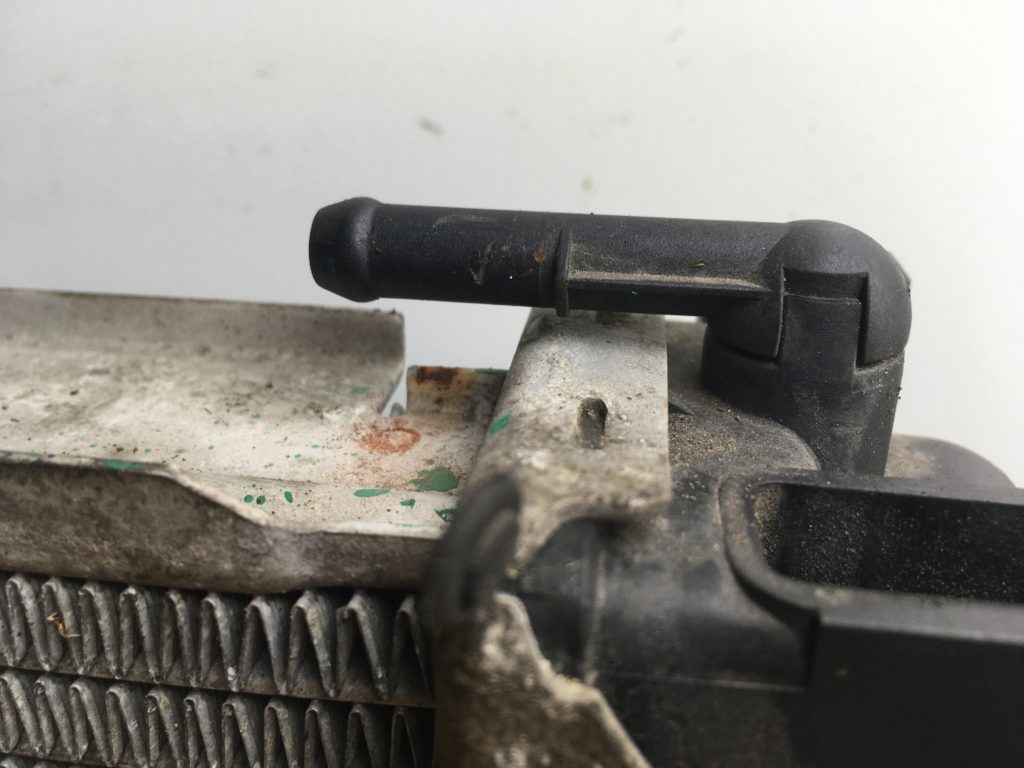
This is the plastic nipple on the original radiator, but the one on the new radiator was the same.
I looked at the clock. It was 4:30 p.m. on Saturday. I looked online. A new BMW overflow hose listed at about $60. There was a chance that I might be able to make it into Boston before the parts counter at the dealer closed at 5:00 p.m.—if they had one. I checked FCP’s price on the hose. It was less than $4 (about $10 with shipping).
I sighed, and thought about it carefully. Since this was an overflow hose at the highest point of the cooling system, even if it popped, it wouldn’t cause catastrophic loss of coolant. And that’s assuming that I needed to use the car, which I probably didn’t.
I put the $4 part on order, temporarily reinstalled the original overflow hose, filled the car with coolant, and pulled it out of the garage. I installed the new overflow hose when it arrived, undoing the puzzle just enough to access the hose clamps.
So the new fuel pump and freshened cooling system are done, nearly on time (two full repair sessions and two mop-ups), and not wildly over budget (about $600). My E39 now feels like its reliability-generating field is intact again. And I really like this car; I’m happy to have it back in a form in which I’m not afraid to drive it out of town. And if it breaks one of the hard plastic coolant pipes or something else, c’est la vie. At least it won’t be something stupid that I know I should’ve done but nickeled-and-dimed both the money and my own labor.—Rob Siegel
Rob’s new book, The Best of The Hack Mechanic, is available here on Amazon, as are his seven other books. Signed copies can be ordered directly from Rob here.