A few years ago, I was driving my 2003 E39 530i stick sport, ostensibly my daily driver (if I drove anywhere daily) on the highway when it developed a really bad front shimmy. I reduced speed and nursed the car home, put it up on the lift, and found that the ball joint on one of the lower control arms had developed an alarming amount of play. Ball joints sit at the bottom of the front strut assembly, the nexus of suspension and steering, and take all the pavement pounding; if they fail, you can lose control of the car. They’re not something to ignore.
On a primitive car like a 2002, there’s a single ball joint on each side, but on the E39’s sophisticated front suspension, there are two or three, depending on how you count. The lower and upper control arms both have ball joints, as does the end of the tie rod. For this reason, the “do it once, do it right” approach is to refresh the entire front end if one component wears out and an inspection shows all components to be original. That’s not an unreasonable approach, but it’s not inexpensive, either—the eight-piece front-end refresh kit costs about $580 from several Roundel vendors.
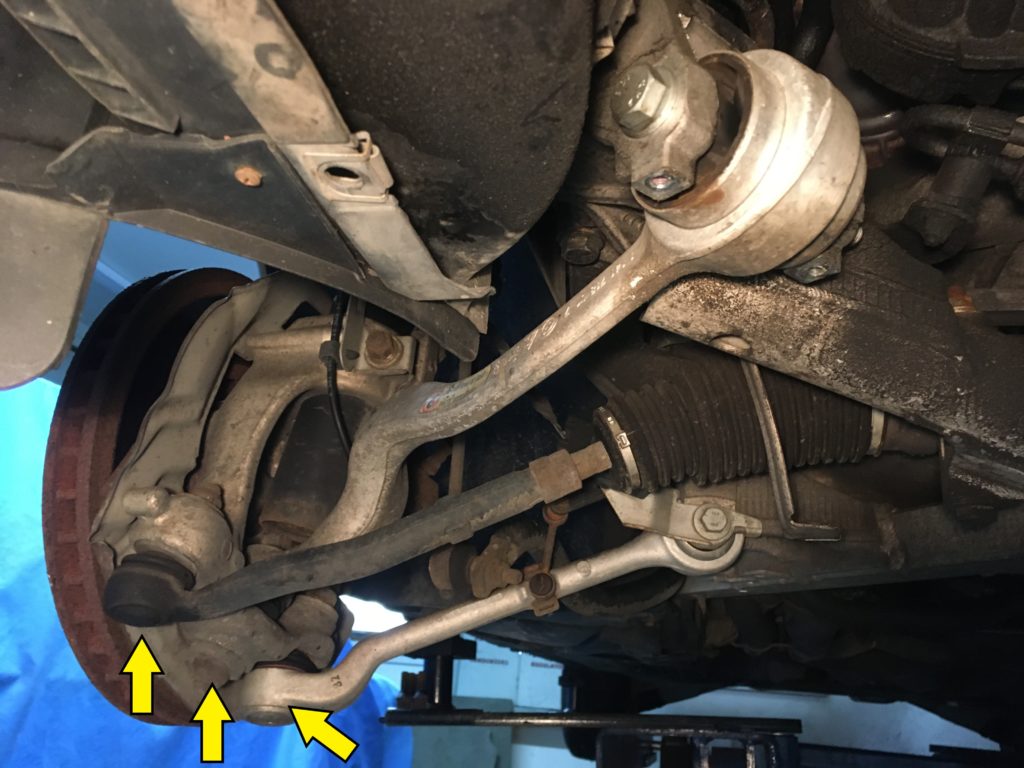
The three ball joints (left to right: tie rod, upper control arm, lower control arm) on each side of an E39’s front end.
You can see how there’s nothing in the way of dropping the lower control arm. Even before the pandemic, I wasn’t driving much. And my E39 isn’t worth much, so I’ve adopted a fix-only-what’s-broken approach to its maintenance. At the time, I checked the other ball joints and didn’t feel any play in them, so I replaced just that one bad lower control arm. Even for penny-pinching Hack Mechanic me, that felt wrong, so I did soon do the other side, and did use OEM Lemforder parts.
I wrote about replacing the E39’s lower control arms for Hagerty in this piece (I must’ve had something very weird and BMW-specific to serve up for y’all that week). It was a delightfully simple repair, as nothing else is in the way and nothing else needs to be removed: Just use a ball-joint separator on the tapered rod, undo the big bolt through the bushing on the other end, put the new part in, and torque the bushing bolt down with the car on the ground at ride height.
However, when I drove the car after the repair, although the alarming shimmy from the loose ball joint was gone, I noticed that there was still a light steering-wheel shimmy while braking at highway speeds. At first I thought that this was due to microdeposits on the rotors (what’s often mistakenly called “warped rotors”), but when that’s the cause, you should be able to feel pulsations in the brake pedal, and I didn’t. The longer I drove the car, the worse the shimmy got, and it eventually began appearing when braking at any speed. Some reading revealed that it was likely due to the wear in the bushings on the upper control arms, which are also referred to as thrust arms. Since it appeared to be bushing wear and not ball-joint wear, and only occurred on braking, I put off dealing with it. Then, when the pandemic hit and my use of the car fell nearly to zero, there was even less incentive to repair it. Add in it being winter and my garage being full and, well, you understand.
However, as I’ve written, the 530i stick sport is the best daily-driver BMW I’ve ever owned. Its sport seats are wonderfully comfortable, it eats up interstate, it has exactly the right amount of power and handles well, has a great-sounding stereo, and has not been anywhere near as needy as its E46 325XiT and 528iT wagon predecessors. This is, however, also the car that I essentially abandoned in my driveway for seven months when I did my little experiment last year with the X5 triple unicorn, so occasionally I guilt-buy it little presents to make up for my indiscretion.
And thus, with the a/c rejuvenation on Zelda the Z3 at a good winter stopping point, and no used Boston Green front bumper cover to be found to replace that car’s shattered one, I decided to give my E39 a little love and R&R in a coveted winter garage space.

The E39 is rarely in the pampered spot on the lift, whereas the Lotus and the Z3 have spent months there.
On both the lower and upper control arms, if the ball-joint end is fine and it’s just the bushing that’s worn, not only can you save money by replacing just the bushing, you can even do it without removing the control arm from the car, provided that you have the right bushing-removal tools; there are several good videos and DIY articles, including this one. However, most folks prefer to simply buy a new control arm with the bushing already pressed in, as I did.
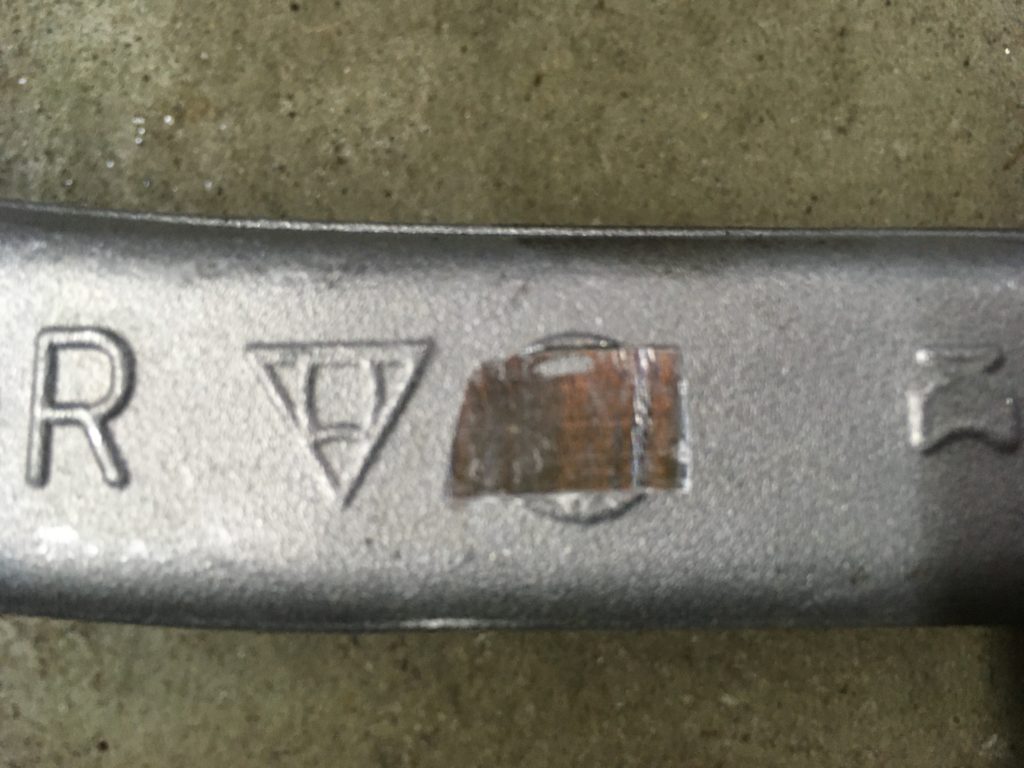
There’s little question that’s the real deal, even with the “BMW” ground off.
Front-end parts are one area where I will almost always buy OEM (original equipment manufacturer). The E39’s OEM front-end parts are made by Lemforder. I believe that if you buy the part from a dealer, curiously it comes without the bushing, but if you buy the Lemforder part from an aftermarket supplier, it comes with the bushing pressed in (and the BMW logo scratched off). The upper control arms are about $100 per side from most reputable vendors. So I guilt-bought my neglected E39 the pair of upper control arms, paid my $215 with tax, and waited for the parts to arrive.
Replacing the upper control arms is a little more involved than replacing the lowers because the ball joint end of the thrust rod can’t be withdrawn without first loosening the clamp that holds the steering knuckle in place and sliding it further down the strut. In theory, that’s not terribly difficult, but I recalled trying to undo the pinch bolt on my E46 wagon about five years ago, snapping the bolt, and putting myself in a world of hurt. The E39’s right side pinch bolt cleanly withdrew, but on the left side, I found that the threaded end of the bolt was corroded in place. Successive application of heat from a MAPP-gas torch, beeswax, and back-and-forth on the bolt head with an impact wrench adjusted to a moderate setting worked it free.
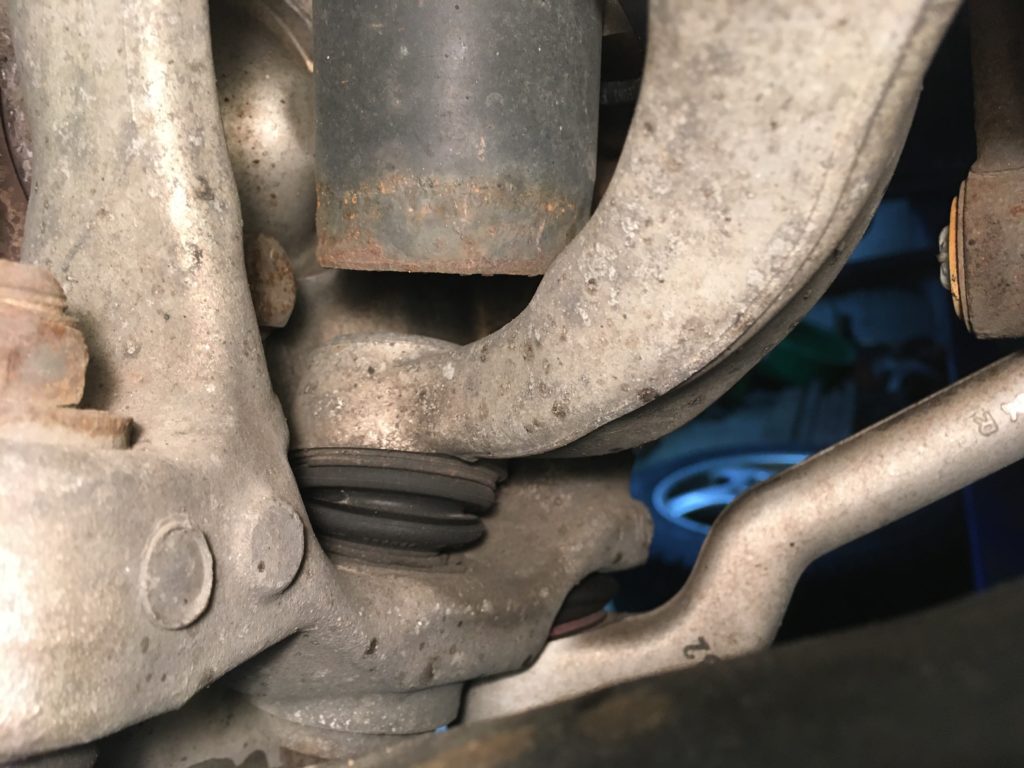
The upper control arm’s ball joint must be withdrawn from the top of the steering knuckle, and you can’t do that until you slide the knuckle down on the strut to create clearance.
The bolt on the pinch collar loosened.
Some of the DIYs say to first mark the strut with a Sharpie or a scratch awl before you slide the knuckle down so that you can slide the collar back into the same position. It really doesn’t matter since there’s a stop on the strut housing; when you lower the car, the weight on the suspension will make the strut slide down into the collar until it hits the stop.
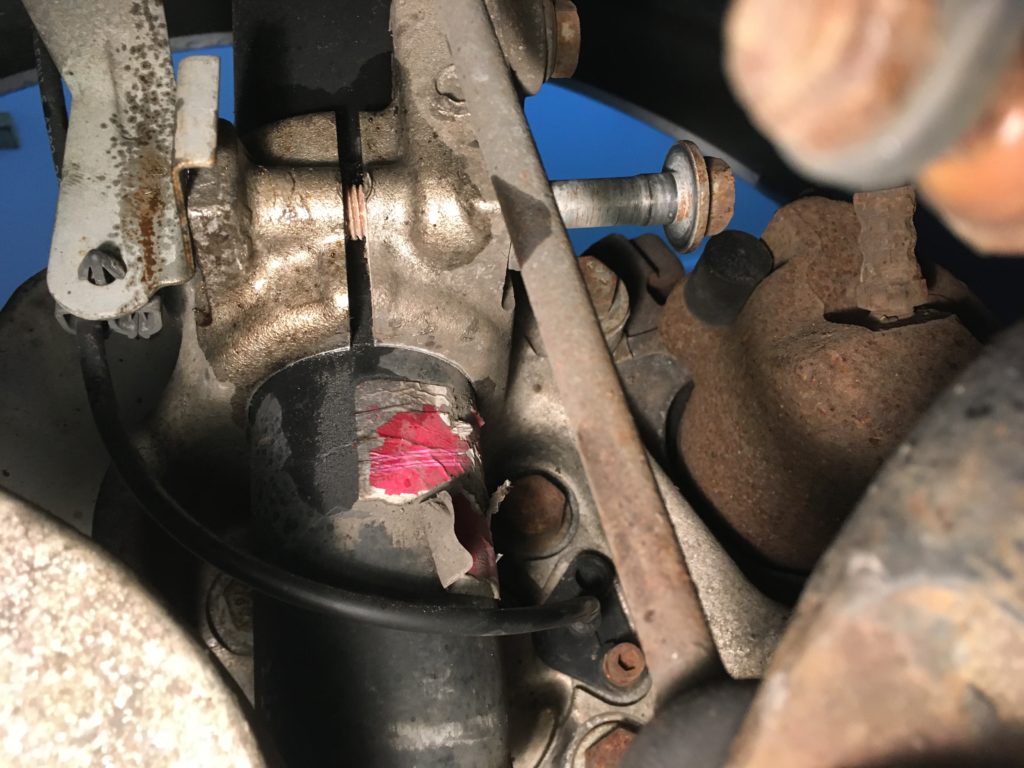
The stop on the back side of the strut for the clamp on the steering knuckle. As pictured, the knuckle isn’t quite slid all the way up against it.
For removal, once you slide the knuckle down the strut, you can use your favorite ball-joint separator to pop the tapered ball joint out of its hole in the knuckle, then withdraw it upward.
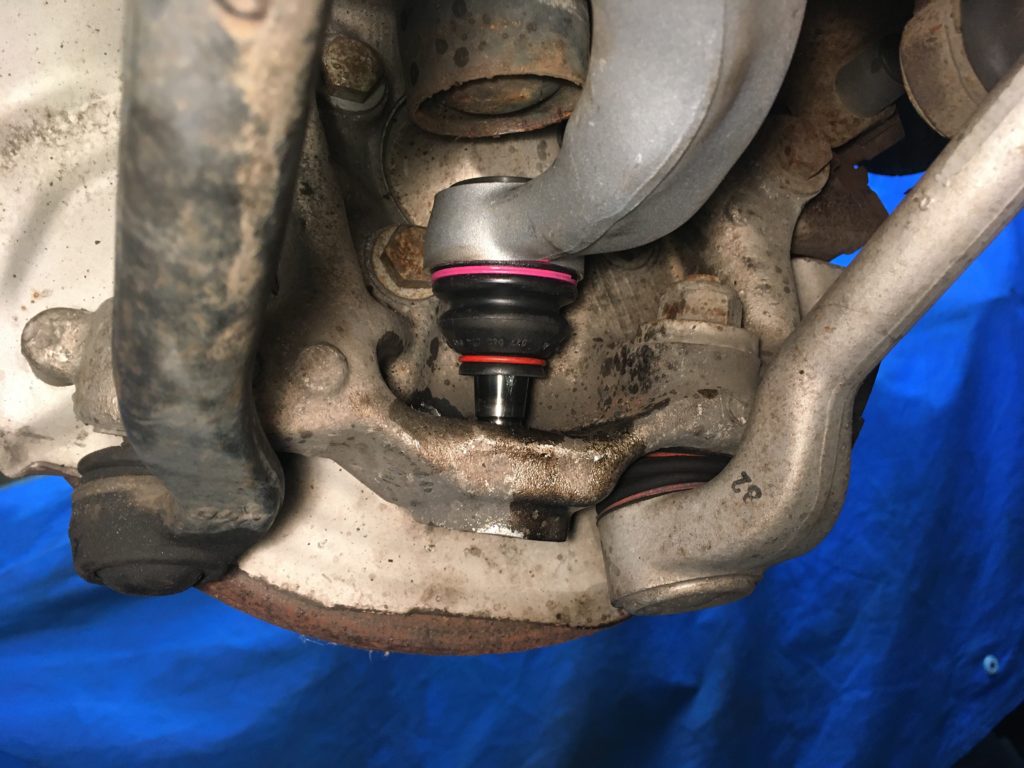
Voilà! (Alert readers will notice that this is actually the new upper control arm being put in, but imagine it with dirt on it and it’s the old one being taken out.)
One surprise was that, in addition to needing to unbolt the little plastic covers from the bushing end of the thrust arms, you need to move the brake ducts out of the way in order to get clearance to withdraw the bolts from the bushings. I figured out that I could remove two of the three eight-millimeter fasteners holding the duct in place, then pivot it on the remaining front fastener to get clearance for the bolt.
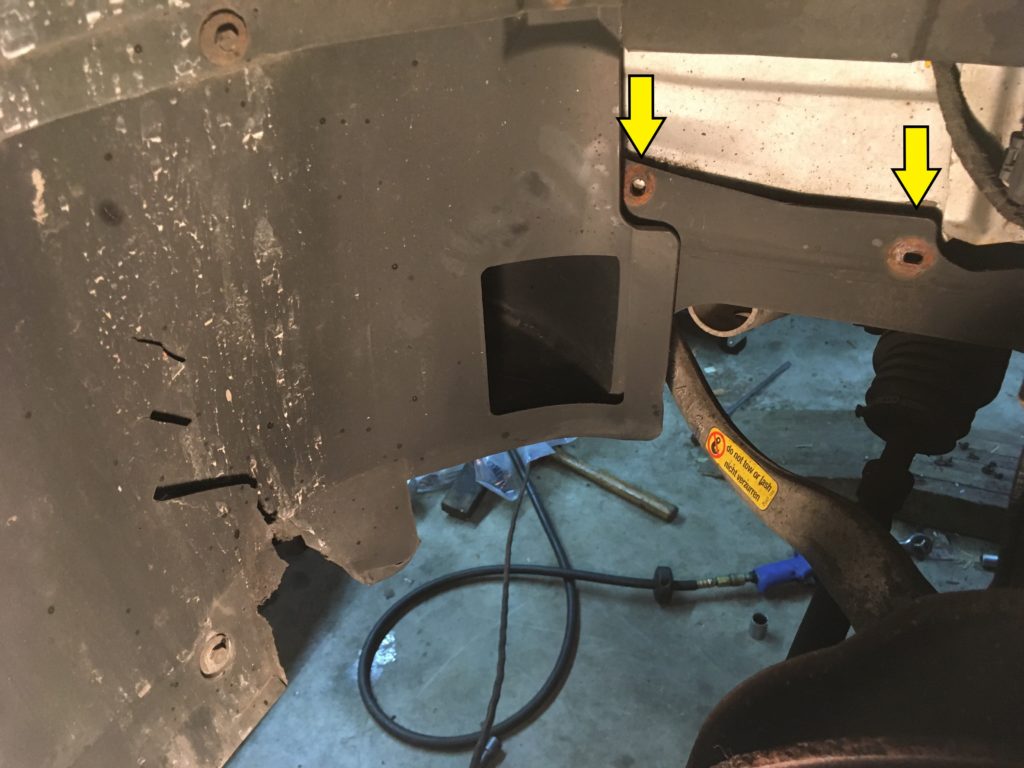
Removal of two of the three 8-mm bolts holding the brake duct in place.
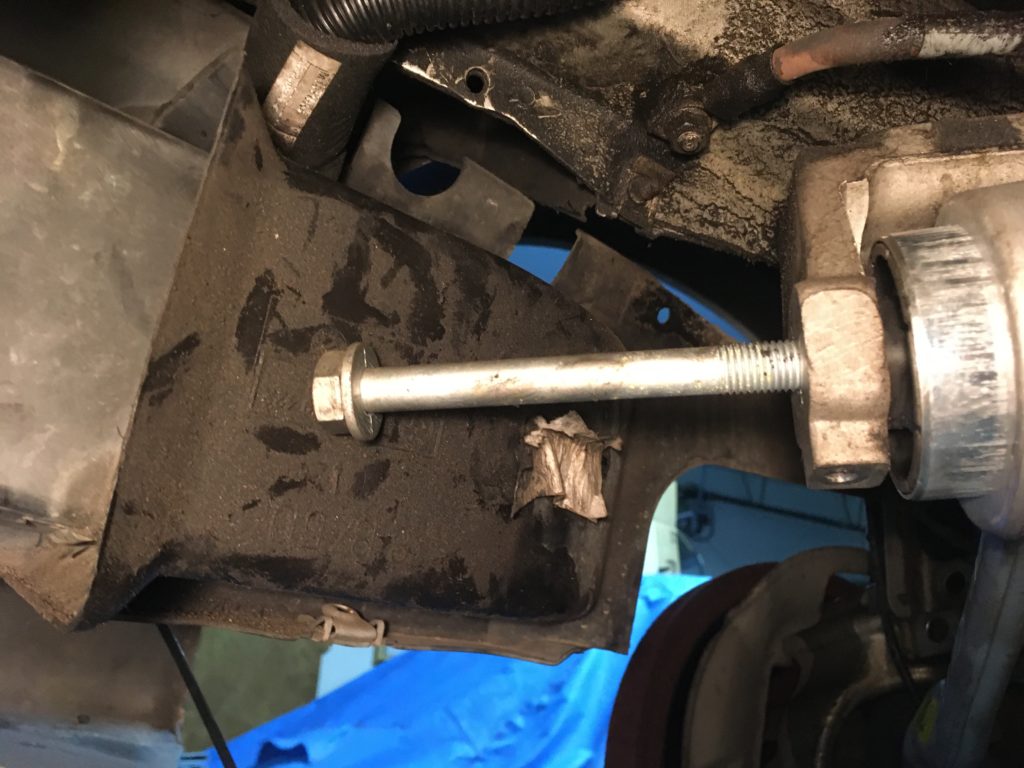
Moving the brake duct to withdraw the bushing bolt.
With that, it’s out with the old, in with the new, and torqueing things down.
The bushing bolts are supposed to be torqued with the car at ride height and with 150 pounds in each seat, but there are challenges to all three parts of that sentence, at least there were for me.
The ride-height part is challenging, as it’s tough to get under the car and access the bushing bolts. When I recently did this on my Lotus Europa, I lowered the car onto four milk crates, but the Lotus only weights 1,600 pounds, probably a third what the E39 weights. Fortunately my mid-rise lift has short-height ramps on both sides to allow the undersides of cars to clear the lift, and those gave me just enough clearance to skooch under it and reach the bushing bolts.
The clearance on the nut and bolt heads is so tight that there’s no way to get a socket and a torque wrench on them (well, you could get it on the bolt head if you left the brake duct swung out of the way, but I was always taught to torque nuts, not bolts). A crow’s-foot wrench would fit , but it’s a 16-mm nut and my crow-foot set only includes 17 and 19-mm. The torque spec is 81 foot-pounds, not far from the 89 foot-pounds for the wheel bolts, and I’d just put the wheels back on so I knew what that felt like, so, now, I put a short pipe on the end of a box-end wrench and did it by feel.
The weight part of it could’ve been handled by corralling my wife and son to sit in the car, but this work, as most of my work, was being done either early morning or after hours, and for now I just punted the weight issue. When I order a sixteen-millimeter crow foot wrench and the weather warms up, I may give it another shot.

Not bad for a few hours work.
For now, it’s done. A test-drive revealed that the shimmy on braking is nearly gone (if I want to chase the last remaining little bit, I can guilt-buy the car a pair of front rotors), and the E39’s mantle as the best, most reliable, most comfortable daily-driver BMW I’ve ever owned remains intact.
Here’s hoping that I soon have somewhere to drive it.—Rob Siegel
Rob’s latest book, The Lotus Chronicles: One man’s sordid tale of passion and madness resurrecting a 40-year-dead Lotus Europa Twin Cam Special, is now available here on Amazon. Signed copies of this and his other books can be ordered directly from Rob here.