Last week, I bought back Zelda, my old 1999 Z3 2.3i, after my friend Kim’s son had crashed it into a median strip. I had already replaced both lower control arms, the four bent wheels, and the airbag for Kim, making the car drivable again, but it needed further sorting out from the curb strike. In addition, it needed a clutch, since the release bearing alternated between sounding like a chainsaw and nails on a chalkboard. I’d spent $440 on parts, plus $500 more to buy back the car, which meant that I had a little under a thousand dollars in it. On paper, this sounds like a smoking good deal for a running and driving six-cylinder Z3, but my buy-back offer was calibrated to the facts that repairing the rest of under-nose crash damage will add up, other potentially needed clutch-related components such as the dual-mass flywheel would likely drive up the cost, and—most important—replacing a clutch in a Z3 is a colossal pain in the butt.
It is this last point into which we’ll delve today.
Ten years ago I replaced the clutch in my Z3 M coupe. I recalled this as a challenging and lengthy job, not as easy as the clutch on a vintage BMW. I vividly remembered snapping off four of the six Inconel (special steel alloy) studs holding the downpipes to the exhaust manifolds, but the rest of the details of why it was such a hassle were murky. As I said last week, I put Zelda up on my mid-rise lift, and this time, using a MAPP gas torch and beeswax, I was able to get the nuts off the exhaust studs without snapping anything.
As soon as I got into the rest of the job, though, the other reasons why it’s such a pain all came roaring back.
First, there are the mechanics of pulling a transmission. If you’re a pro with a shop, you have a post lift that picks the car up over your head, and a transmission jack on a rolling stand. These are a wet dream for do-it-yourselfers; like many folks, I used to do transmission jobs with the car on jack stands and just muscle the gearbox out and in without a floor jack. Jim Rowe from the Metric Mechanic once flawlessly described “The Position”: You put the gearbox on your chest, roll under the car on a creeper, then balance the bell housing on your toes while lifting the back of the box with your hands, thus using all four of your appendages to create a biological multiple-articulated transmission jack. That was fairly easy with the little four-speed box in a 2002, but the gearbox in the Z3 weighs about 80 pounds. Plus, at age 62, not only do I lack the strength, but my tolerance for spending hours on my back under a jack-stand-supported car is pretty low. And these days, I get the heebie-jeebies shoving a transmission around while under a car supported only by stands and a redundant floor jack.
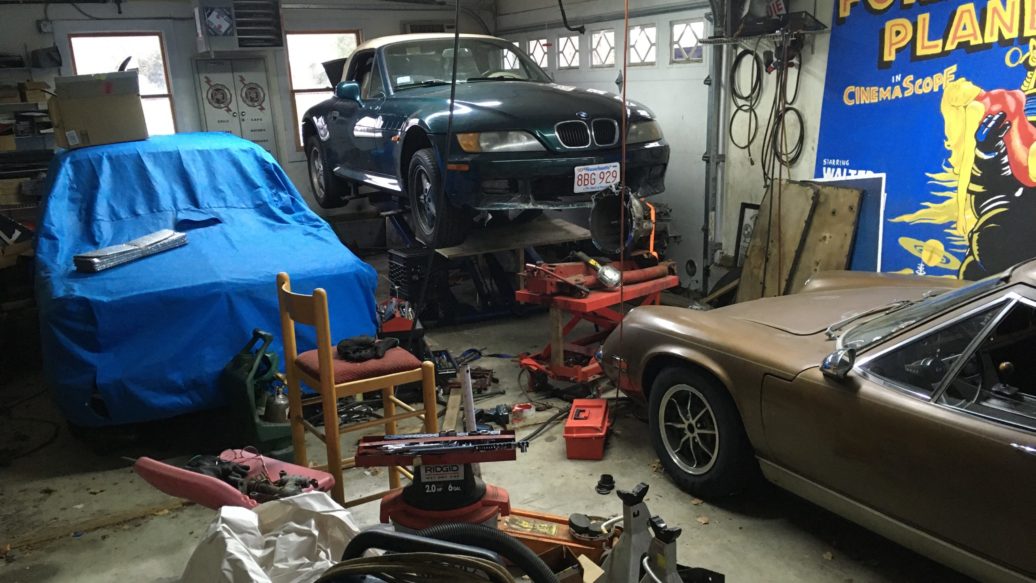
However, I am blessed to have a BendPak MDX6P mid-rise scissors lift in my garage. If you want more information on the pros and cons of a mid-rise lift, see this piece I wrote for Hagerty a few years back—but long story short, if you have the height and side-to-side clearance to have a post lift in your garage, it’s better than a mid-rise in every way, but a mid-rise lift is waaaaaaay better than nothing. I use mine constantly. Project cars live on it for weeks, sometimes months.
But pulling a transmission from a car on a mid-rise lift is problematic because the body of the lift itself is in the way. You can still reach the driveshaft, giubo, shift lever, and transmission with your hands, but what you can’t do is roll a jack under the transmission, and that’s a problem. In the past, I experimented with a few methods for getting a transmission jack to work in this obstructed environment, but if I recall correctly, when I replaced the clutch in the M coupe, I put the car on the mid-rise lift, used its access to disconnect everything except one bellhousing bolt, then rolled the car off the lift and onto the garage floor, jacked it up, put it on stands, and from there, dropped the transmission using a jack.
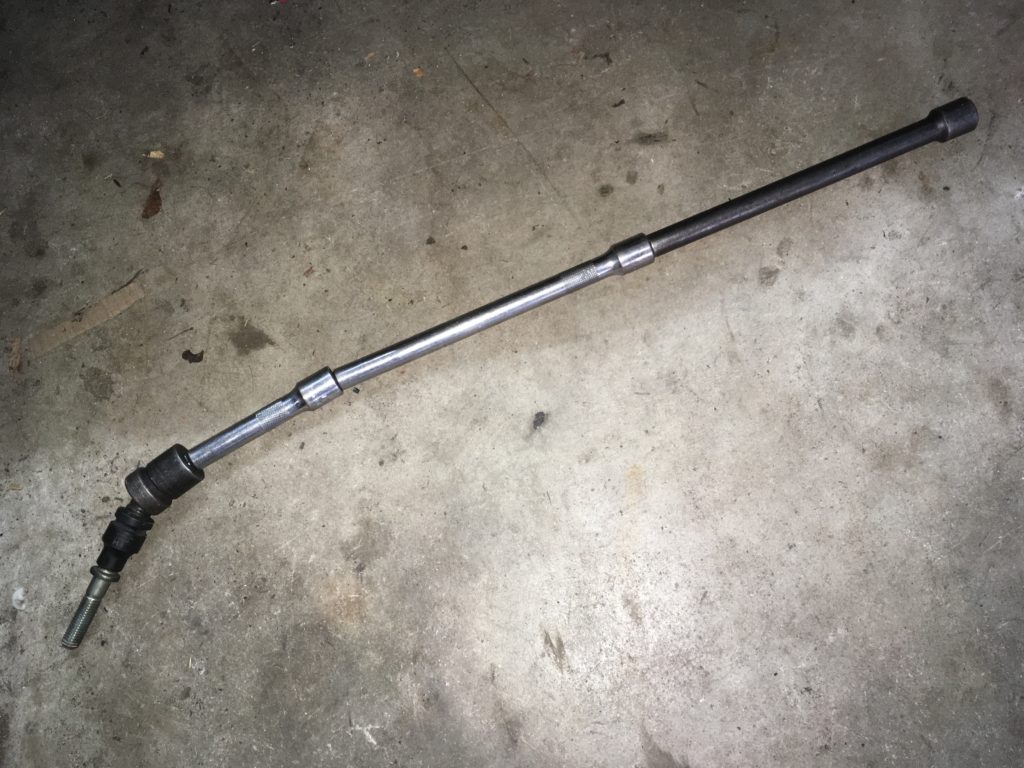
Since I had a fair amount of work to go through first, however, I decided to table the issue of how I’d go the final mile. I followed this excellent forum post which lists, in exquisite detail and with ample photos, the steps needed to remove a Z3 transmission. I’d completely forgotten about the “bitch clip” holding the shift-support rod to the back of the transmission, and it gave me a lot of trouble. Facebook friend Jeffrey Miner advised buying this U-shaped pick tool on Amazon to pop the clip. Unfortunately, it wasn’t in stock, so I used a small screwdriver and pried the back of it upward with an L-shaped pick tool.
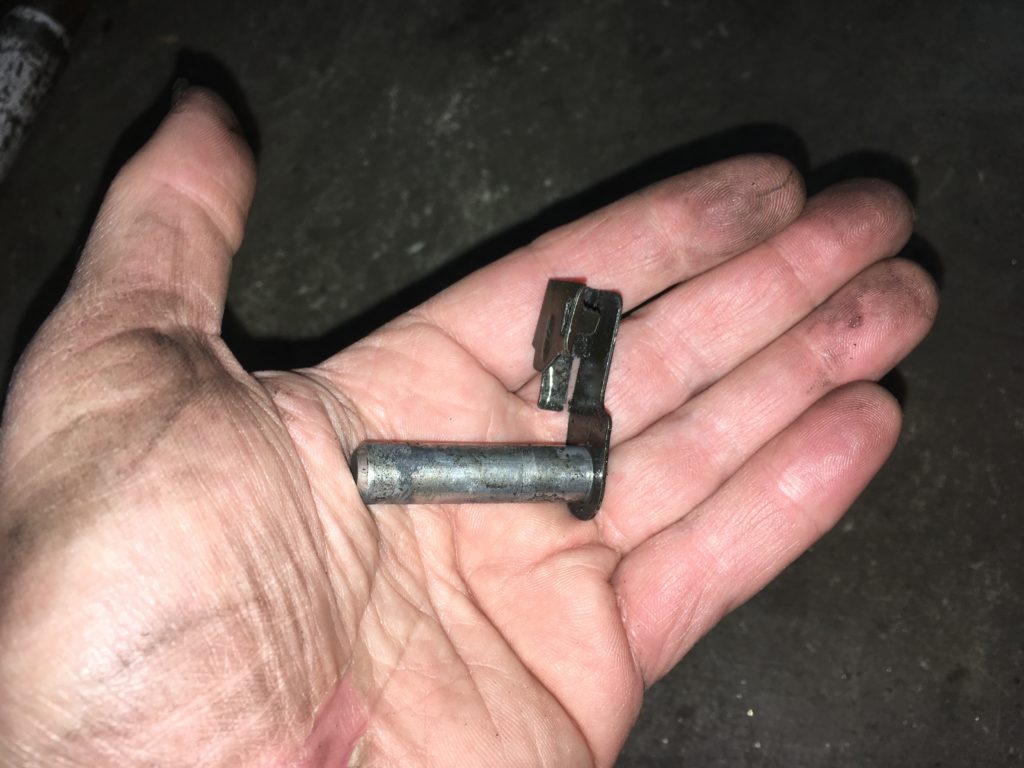
The notorious “bitch clip” lives the back of the transmission.
Then there were the ten bell-housing bolts. Nine of these are Torx-head fasteners. The Torx head itself is actually a plus, since I have the sockets from the last time I did this job, and the head gives a lot for the socket to bite onto, unlike hex-head bolts, where the socket can slip if it isn’t aligned perfectly square. But the difficulty in removing these comes from several issues:
- The Z3 has a large transmission in a small car. This means that from the get-go, there’s just not a lot of space between the hump and the transmission.
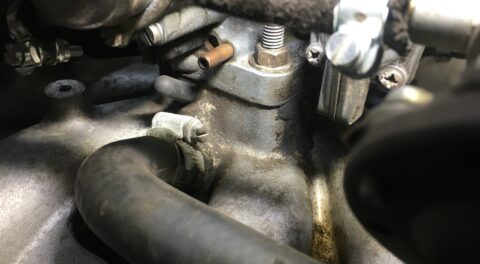
- Even when you remove the support bracket from the back of the transmission, the engine and transmission don’t tip as far down as you’d think because the intake manifold hits the heater valve, so the bolts at the top of the transmission are still difficult to reach.
- There’s no way around needing a long extension (or multiple extensions) with the Torx socket at the end, using one hand to thread the socket and extension(s) in from the back, and jamming your other hand up high to feel the Torx head of the bolt and guide the socket into position.
- While the mid-rise lift gives better access for this process than having the car on the floor on jack stands, the ergonomics of getting sockets into position from the back of the transmission are still poor; it requires lying at a 45-degree angle with the lift’s hydraulic cylinders jamming into your back. I eventually put a layer of bubble wrap over them for cushioning.
- I didn’t have a 24-inch-long half-inch-drive extension with a pin at the end as friends on Facebook were recommending, so I had to piece it together using two twelve-inch extensions, a four-inch wobble extension, and an impact-wrench-surviving half-inch swivel joint (one of only two Snap-On tools I own). The problem with this lash-up is that the flop from the swivel and the multiple extensions eats up torque, and coupled with the corrosion on the threads from this being a New England car with 150,000 miles on it, my impact wrench wouldn’t spin the Torx bolts off.
 My multiple extensions plus a swivel joint were necessary but problematic.
That leaves the option of using a pipe on the end of a breaker bar, and that’s dangerous. Leverage is a wonderful thing, except that, as the old adage says, when an immovable object meets an irresistible force, something’s gotta give. What you hope happens is that you hear the characteristic CRACK! of a fastener breaking free, followed by the screeeeeeee of the first few full turns of the threads. If instead the breaker bar starts to move with no accompanying sound, you get a sick feeling in your stomach, because you know you’ve just snapped the head off the bolt.
My experience has shown me that for nuts or bolts where, if they snap, you’re in a world of hurt, it’s best to pre-emptively attack them with heat and beeswax—as I did with the exhaust studs and nuts—but there’s no easy way to get a torch on the upper transmission bell-housing bolts. I have a long, thin red tube that I put on the can of Silikroil penetrating oil to reach into difficult-to-access places; I sprayed as best as I could, prayed to the Hack Mechanic Powers That Be, and went for it. Fortunately, all of the bolts came free.
The Z3 has a one-piece exhaust that runs from the back of the catalytic converters to the tailpipe. While that made it comparatively easy to disconnect and drop it, it came to rest in the center of the mid-rise lift, exactly where I’d normally be poking my head up to access the back of the transmission, and it pretty much had to stay there for the duration of the work. Because I couldn’t get my head up the middle, I had to again lean my upper body against the hydraulic cylinders, but this time slide my head way up a place it would never normally go, and at a very uncomfortable angle—sort of like the two prisoners in the Will Smith movie Hancock.
For all of these reasons, by the time I’d extracted the last Torx bolt, I felt like I’d been run over by the car.
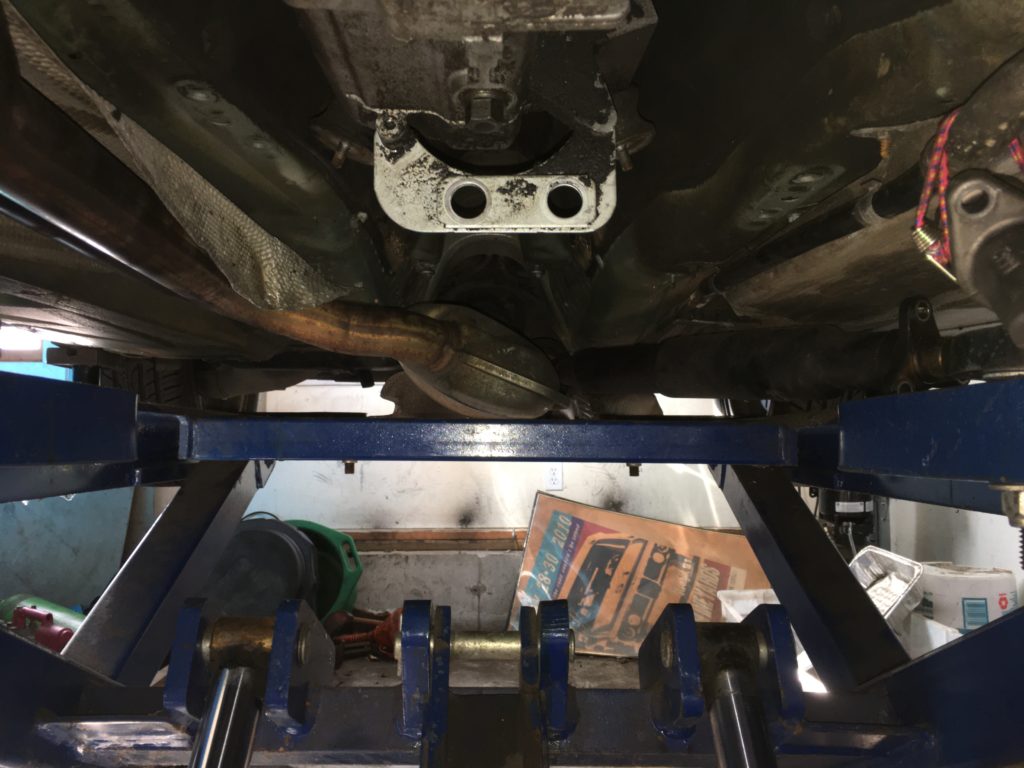
When I dropped the exhaust onto the mid-rise lift, it was right where I’d normally poke up my head to access the back of the transmission.
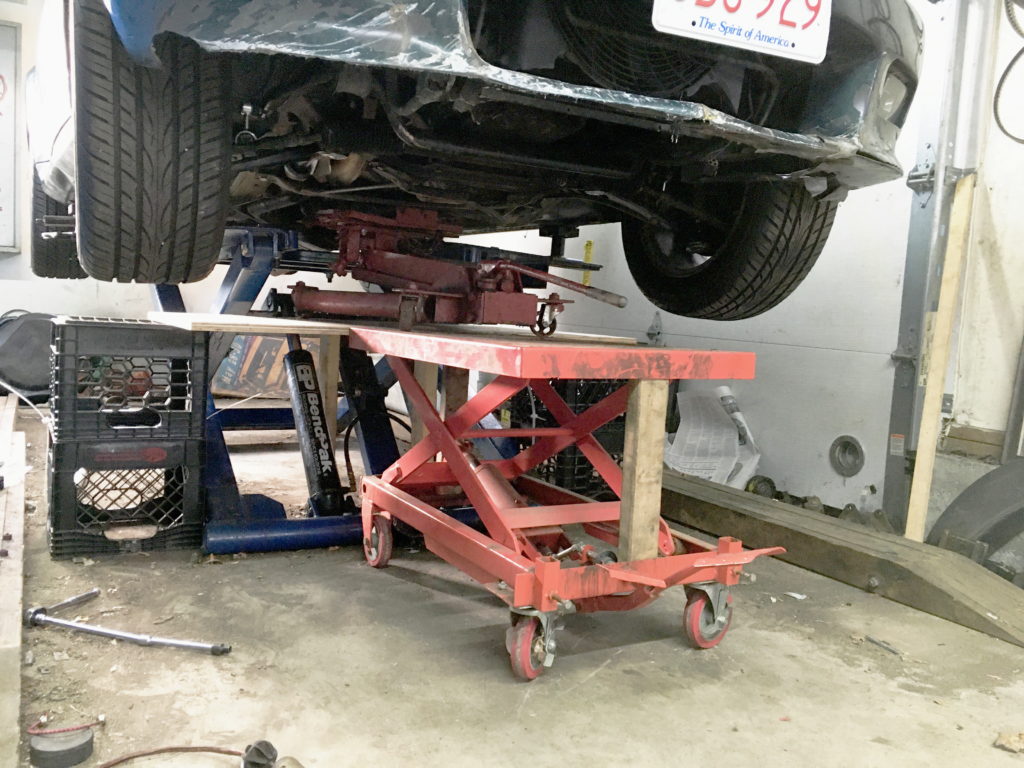
With the bell-housing bolts out (I left one lightly tightened to be certain that the transmission wasn’t hanging on its input shaft), I looked at the transmission removal itself. I didn’t recall the exact mechanism I’d last used to remove a transmission on the mid-rise. Thinking that I must not be the only person to confront this problem, I googled “remove transmission on mid-rise lift,” and laughed when I saw that the top hit was an article I posted on my own blog seven years ago. In it, I detailed my three attempts to do this, the final one involving a Rube Goldberg-like combination of putting the transmission jack on an inexpensive scissors-lift table, then constructing a wooden shelf out of milk crates and plywood, effectively providing a raised floor that allowed me to roll the jack under the transmission.
I dug the lift table and the transmission jack out from under the back porch where they’d been sitting for years. In the blog post, I said that while I’d used a two-by-four-foot piece of wood for the raised shelf, a five-foot-long piece would be better, as it would sit completely on top of the milk crates. I ran to Home Depot, but I currently have no way to transport a four-by-eight piece of plywood to bring it home and cut it myself, and some customers were reporting that they’d waited an hour to get someone to custom-cut a piece of wood for them, so instead I just bought a pre-cut piece of three-quarter-inch-thick two-by-four-foot piece of plywood.
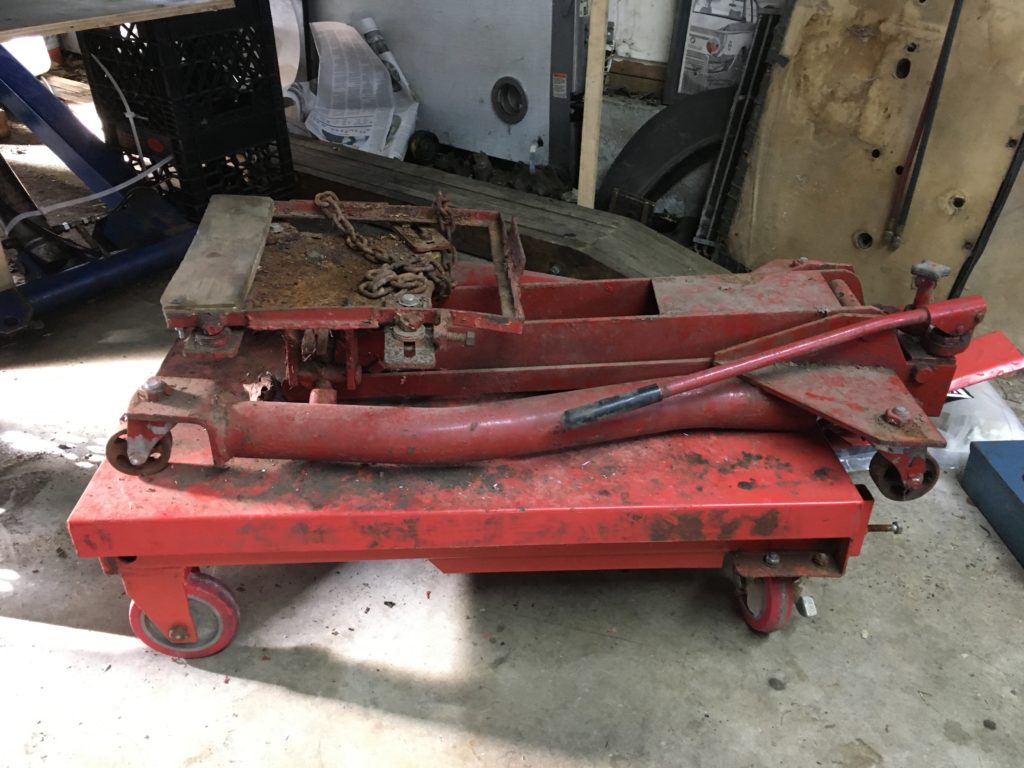
My venerable indestructible 1962 Hein-Werner transmission jack sits on top of my piece-of-crap Tractor Supply lift table.
I then set up the milk crates and the plywood, cut a few pieces of two-by-four, and screwed them into the plywood to stabilize it and prevent it from tipping, put the transmission jack on the lift table, test-rolled the table under Zelda’s nose, pumped it up so it was level with the shelf, and rolled the transmission jack into position. This had worked before, and it was going to work now.
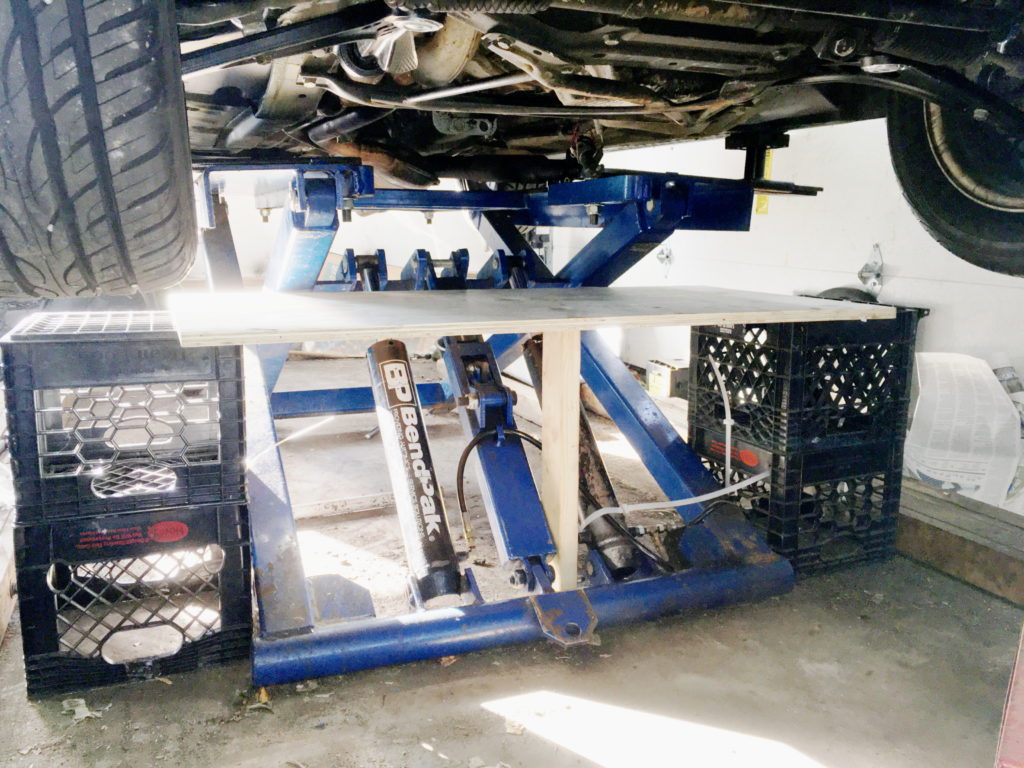
The two-by-four-foot shelf, milk crates, and braces provide the raised floor on which to slide the transmission jack.
And then I saw two problems: The first was that the cradle on the ancient transmission jack was too wide for the narrow transmission tunnel. I’d need to take it off to get more clearance.
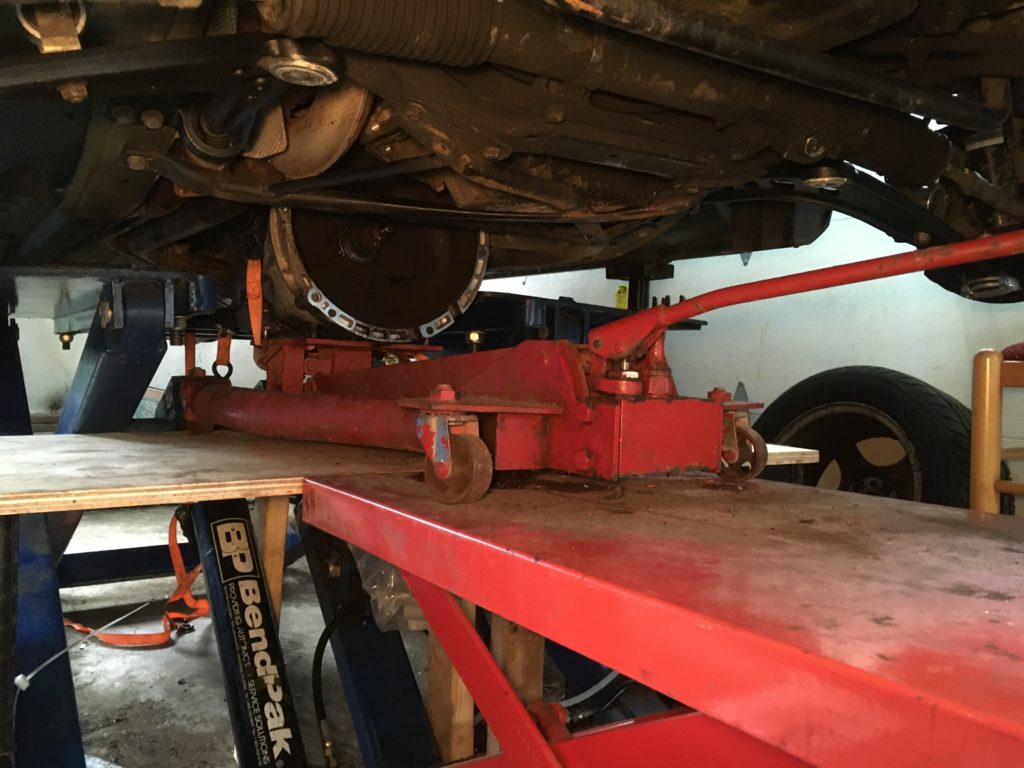
The second problem was that the lift table was sinking.
I remembered that when I last used it to install the engine in the Lotus, I found that the hydraulic cylinder was leaking. I pumped it back up to the height of the shelf, slid the transmission jack back onto it, and pulled it out. I briefly considered rebuilding or replacing the hydraulic cylinder, then realized that for now I could simply cut some additional two-by-fours and slide them in to prevent the table from sinking below the height of the shelf.
Test-fitting the lift table that was now braced to keep it at the same height as the shelf.
I then ratchet-strapped the transmission to the jack’s small cradle-less platform, removed the last Torx bolt I’d left installed on the bell housing, and used a long screwdriver to lever the bell housing away from the engine block. All seemed well, until the transmission would separate no further.
I couldn’t see where it was hung up.
I did some reading in forums, and several posts mentioned the transmission being hung up on the starter. I was certain that I’d removed the two Torx bolts holding the starter in place, but then I read that the starter has a dowel pin that goes into the transmission’s bell housing, requiring the starter to be levered off; this was the one thing missing from the otherwise excellent forum post I linked to above.
Careful placement of a long screwdriver from the top and a few blows with a mallet pried the starter off. The lift table, transmission jack, and shelf then worked flawlessly, allowing me to move the transmission backward until the input shaft cleared the clutch, and then drop it down—except for one problem I didn’t anticipate: With the transmission jack all the way down, I couldn’t pull it onto the lift table to lower it because the top of the bell housing wasn’t clearing the components on the underside of the car.
Oops: I did not anticipate this clearance problem.
Well, no problem, right? I mean, the car is on a mid-rise lift that’s not yet at its highest setting; just raise the lift until the car clears the transmission, right? Right, yes—except that I found that when I raised the lift, the angle of the hydraulic cylinders became more vertical, and pushed directly against the wooden shelf and began to tip it alarmingly.
What I should have done was stopped and used my Sawzall to notch the shelf around the hydraulic cylinders, but I didn’t want to put my upper body under the lift when the lift wasn’t securely sitting on a stop. So instead I carefully monitored the degree of tipping and moved the milk crates to compensate. As soon as I had sufficient under-engine clearance, I pulled the transmission jack backward onto the lift table and got the unit out. Whew! Before I reinstall the transmission, I will cut those notches in the shelf.
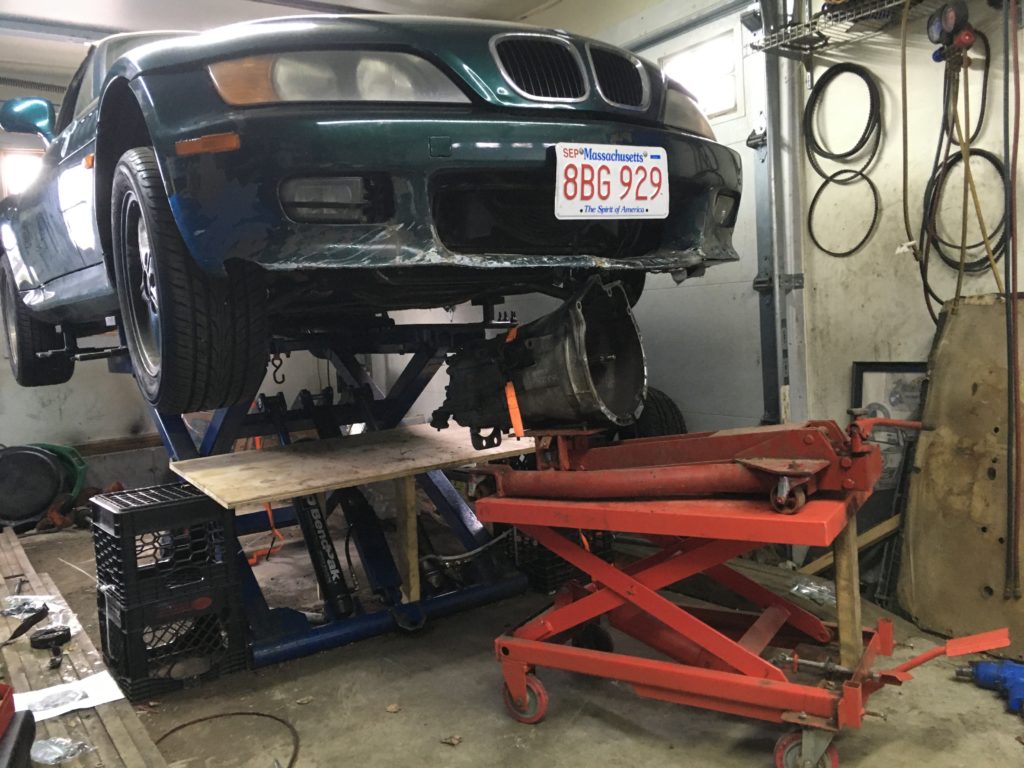
Success! You can see the plywood board tipping forward, no longer level with the milk crates.
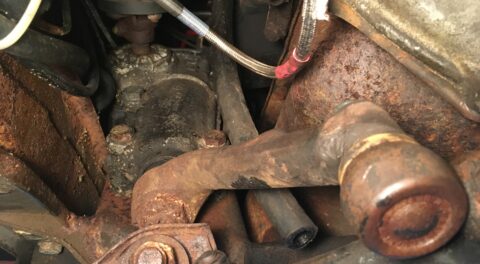
With the transmission out, I looked inside the bell housing, and laughed out loud as I saw the comically destroyed clutch-release bearing: The bearing cover was completely separated and sitting loose on the shaft, the unit was missing about half its ball bearings, and a chunk of the assembly was sitting inside the bell housing. At least there was no question that I’d diagnosed it correctly.
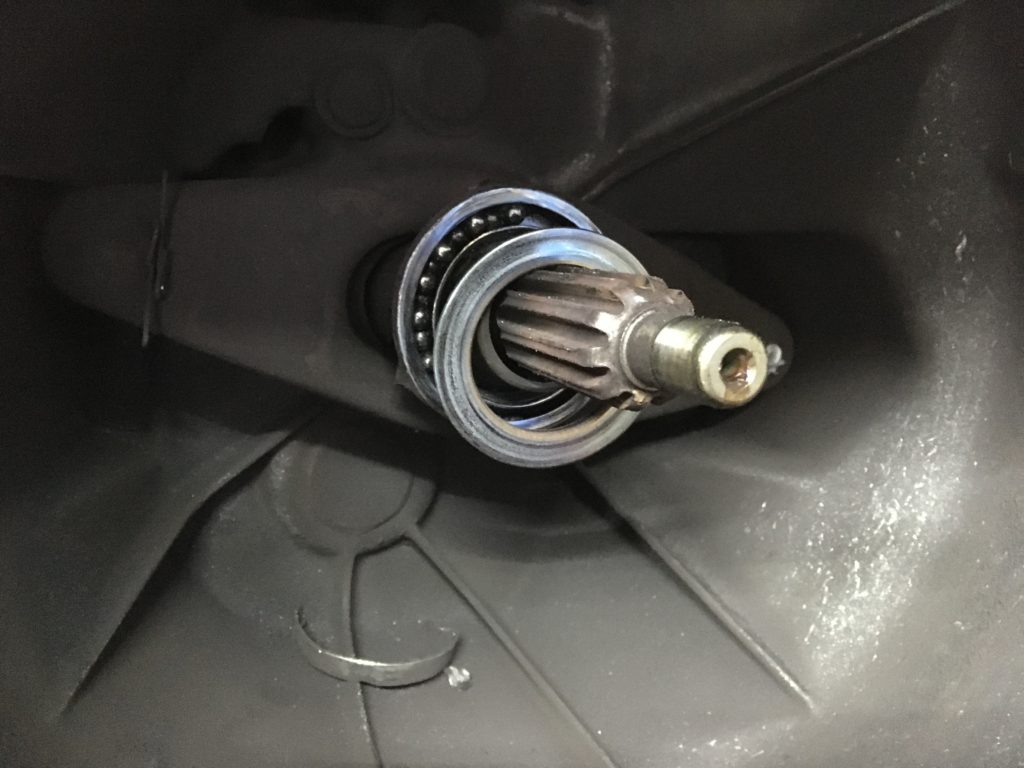
Just re-pack it with grease and it’ll be good to go, right?
Last week I talked about my method of doing one thing each night in order to move a project along. What I explained here took the better part of a week. It was one evening to remove the giubo and swing the driveshaft out of the way, another to remove the linkage, “bitch clip,” clutch slave, and rear bracket. The Torx-head bellhousing bolts took three evenings, with the really difficult-to-reach eighth bolt requiring a session (and Advil) all its own. There was one evening to run to Home Depot and build the shelf, and another to actually drop the transmission.
But that’s the point of the one-thing-a-night method: A headache-inducing job is broken down into small pieces.
Next week: Parts.—Rob Siegel
Rob’s latest book, The Lotus Chronicles: One man’s sordid tale of passion and madness resurrecting a 40-year-dead Lotus Europa Twin Cam Special, is now available here on Amazon. Signed copies of this and his other books can be ordered directly from Rob here, and they’re on sale for the holidays!