Two weeks ago I found that Bertha’s fuel-pressure regulator—the aftermarket device taking the feed from the trunk-mounted electric fuel pump, reducing the pressure, tee-ing into two, and sending gas to both of the Weber 40DCOEs—was leaking. Actually, it wasn’t my discovery; it was discovered by the mechanic when I took the car to get it inspected. However, the inspection station didn’t fail it for the fuel leak—something I have mixed feelings about.
I drove the car the mile back to my rented garage in Fitchburg with a fire extinguisher on the passenger seat, but I certainly wasn’t going to drive it the 50 miles back to my house in Newton that way.
When I got home, I ordered another regulator. It arrived a few days later. While I usually don’t work on cars in Fitchburg due to a lack of tools, jack, stands, and electricity, this barely qualified as a repair; detaching the hose clamps on each of the three fuel lines and one screw holding the regulator to a bracket required bringing only a screwdriver. However, I’ve gotten into the habit of taking a three-quarter-size red plastic tool chest with me whenever I go out to Fitchburg to swap cars, or whenever I take one of the vintage cars on a drive longer than a few miles. While nothing beats being in your own garage with every tool and spare part you own at your disposal, the red toolbox has been a fun and useful iterative exercise in putting together a right-sized kit. I recently added a three-in-one crimper/stripper/cutter, a length of wire, and an assortment of connectors.
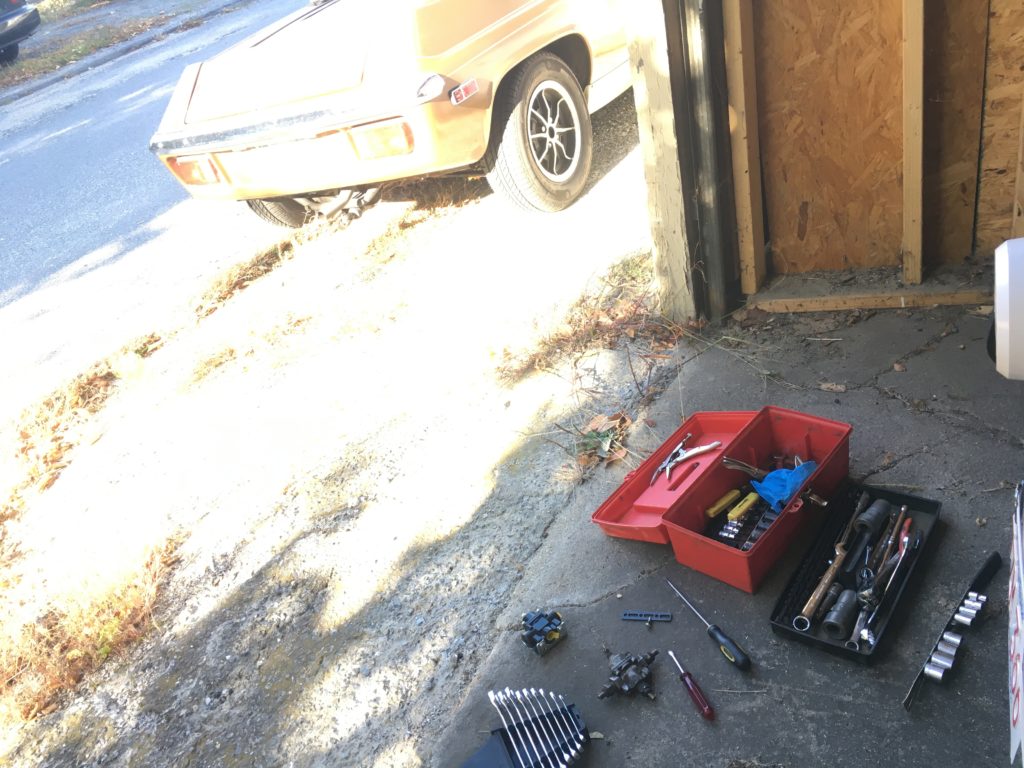
The red road toolbox has proved very useful.
So early one morning this week, I drove my ’74 Lotus Europa out to Fitchburg with the tool box and Bertha’s new regulator in the trunk. After I arrived, I had the old regulator off Bertha in about 30 seconds, and began transferring the fittings from it onto the new regulator, carefully cleaning the 35-year-old Teflon tape out of the threads, wrapping new tape, pulling the rubber plugs out of the new regulator’s ports, and installing the fittings that would be connected to the fuel lines.
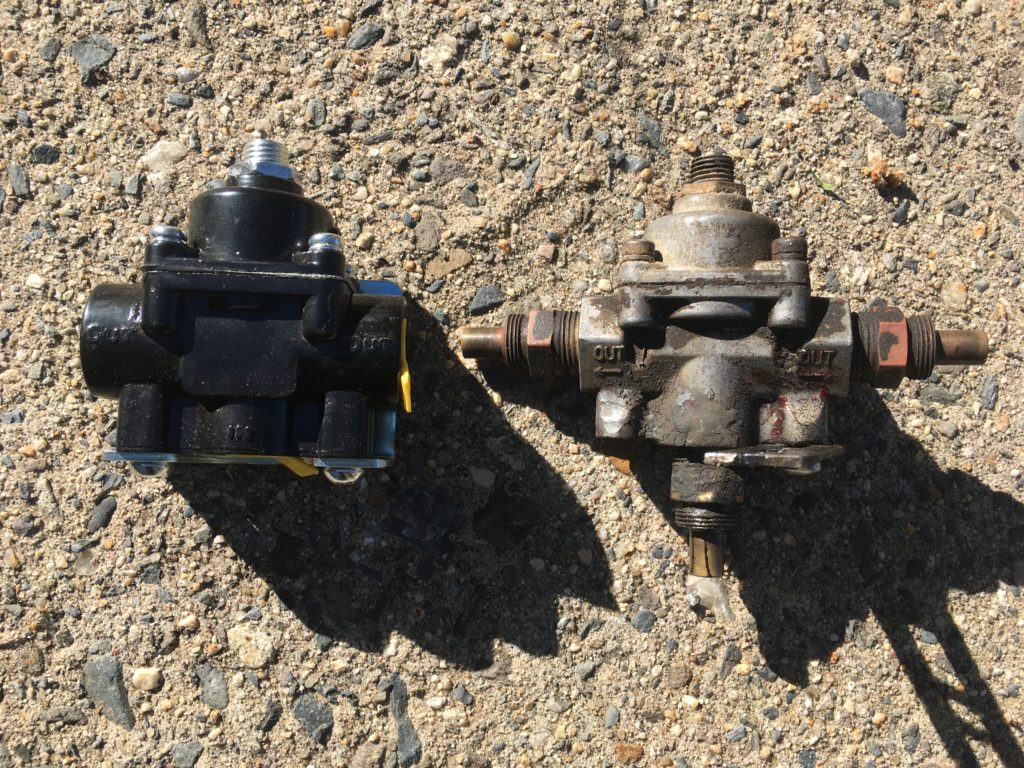
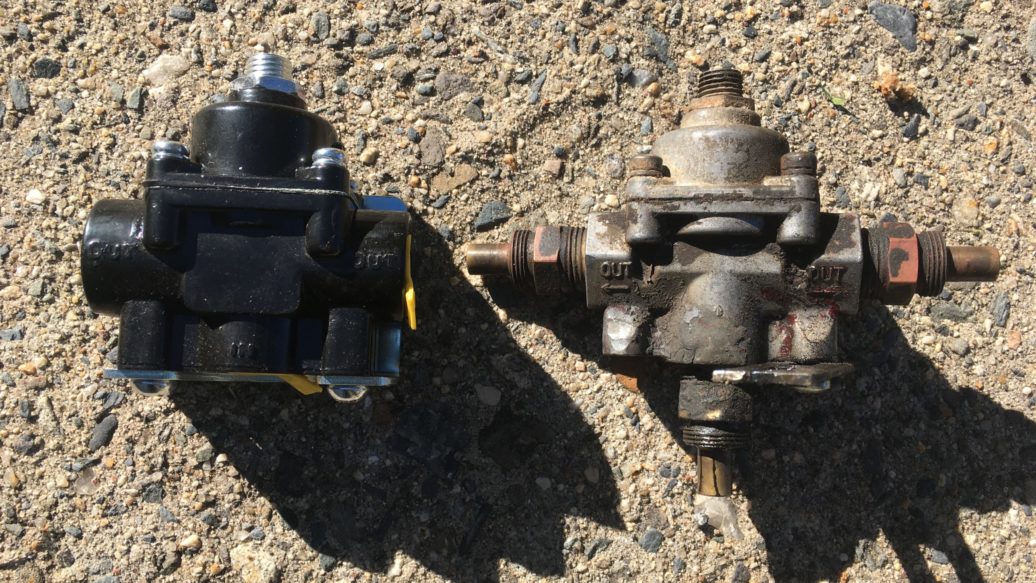
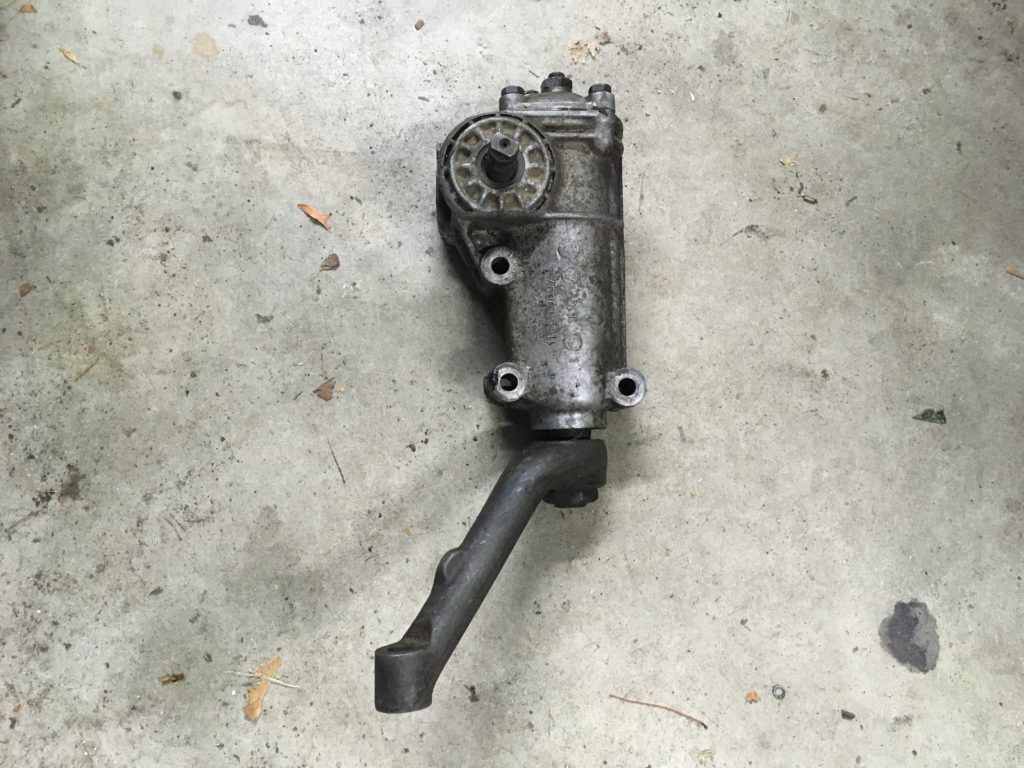
The old (right) and new fuel-pressure regulators.
Then I saw something that was problematic: One of the output ports didn’t have a rubber plug in it; instead, it had a threaded metal block-off plug with an Allen-key slot in it that allowed the regulator to be used with a single carburetor. D’oh! If I were home in my garage, I’d have Allen keys. I began searching on my phone to find the nearest auto parts or hardware store.
But then an old neuron fired; I remembered something like this happening a few years ago, and buying a second set of Allen sockets to have in the road box. I looked in the bottom of the red toolbox, and sure enough, there they were! I was able to remove the Allen plug and complete the repair.
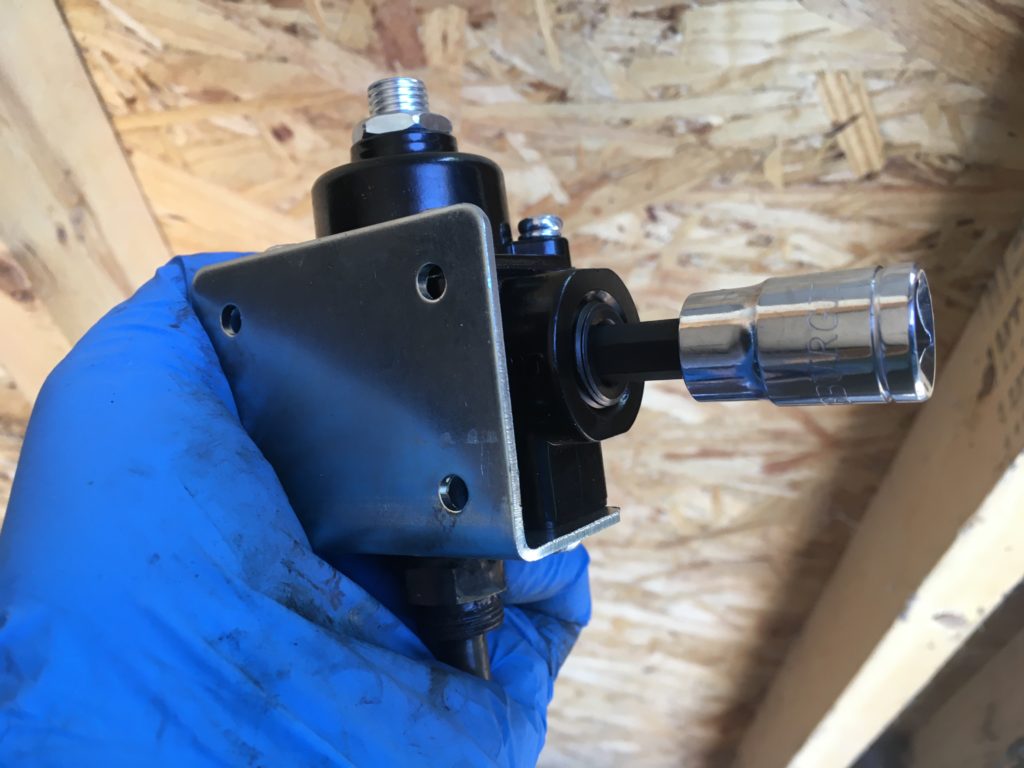
Allen sockets? Yes!
I mounted the new regulator, and then realized that I had forgotten to bring a fuel-pressure gauge with me to set the regulator to the 2.5-ish PSI that the Webers like to see (again, the issue of outlying storage spaces not being as good as your own well-stocked garage). The inexpensive Facet-style solid-state fuel pump that Bertha is running, and other similar products, are typically advertised as “2.5 to four PSI.” Usually, if a fuel pump puts out the low end of 2.5 PSI, it’s probably fine using it to directly feed the carb(s) without any regulator at all, but if the pressure is closer to four PSI, it can overwhelm the needle valves in the floats and cause the carburetor to flood the engine—which is why you need the regulator. But if the regulator is set too low and restricts the pressure to more like 1.5 psi, the pressure may not be high enough to keep up with demand, and the float bowls may run dry. Adjustable regulators usually come set somewhere in the middle, but an actual measurement with a fuel-pressure gauge really is the best way to make sure.
Having no pressure gauge, I started the car and let it idle for a few minutes with a fire extinguisher at the ready, watching the carburetor carefully for flooding. I saw no problems. I then took the car for a few runs around the block, and it behaved well. I wanted to test it under increased fuel demand, so I took it up on the highway, nailing it through the gears. I felt no evidence of fuel starvation.
I then made the snap decision to leave the Lotus in Fitchburg and drive Bertha back home to Newton. I’ve been pretty addicted to the Lotus all fall—after all, there’s nothing like scattering leaves in a car whose roofline is only 42 inches off the ground. But I did have a present waiting for Bertha back in Newton.
Several months back, I wrote about Bertha having a notch in the steering, almost a detent that made itself known on tight left turns, whose cause I’d isolated to the steering box. My friend Grice Mulligan recently liquidated his 2002 parts hoard in preparation for a cross-country move, allowing me to pick up a presumed-good used steering box for a good price. It had been sitting in the garage in Newton waiting for Bertha to come back. I thought that this would be a satisfying repair I could easily tick off.
Bertha’s present was waiting.
When I got home, I immediately put Bertha up on the lift, thinking that I’d have the box swapped by mid-afternoon; after all, it’s only attached to the front subframe with a few bolts, can be detached from the steering column by removing the four nuts and bolts on the rubber flex disc, and has one nut and tapered rod holding it to the center track rod (also called the drag link).
It was the center track rod that stymied me.
I’d forgotten what a pain these are. Unlike tie rods, which use a rubber boot that compresses and allows a puller or separator to be slid into place for non-destructive removal, the center track rod has a tightly-fitting plastic cap to protect the ball-in-socket beneath it, and it slowly came back to me that the only way I’ve ever had success separating one from the steering arm (and the idler arm that mirrors it on the right side of the subframe) is to pry the plastic cap off in order to create a gap for the puller. This is usually fine, as generally the reason you’re replacing the center track rod is because there’s play in it, so if you have to destroy it to get it out, who cares? However, in this case, the track rod wasn’t the bad part; it was the steering box that I wanted to replace.
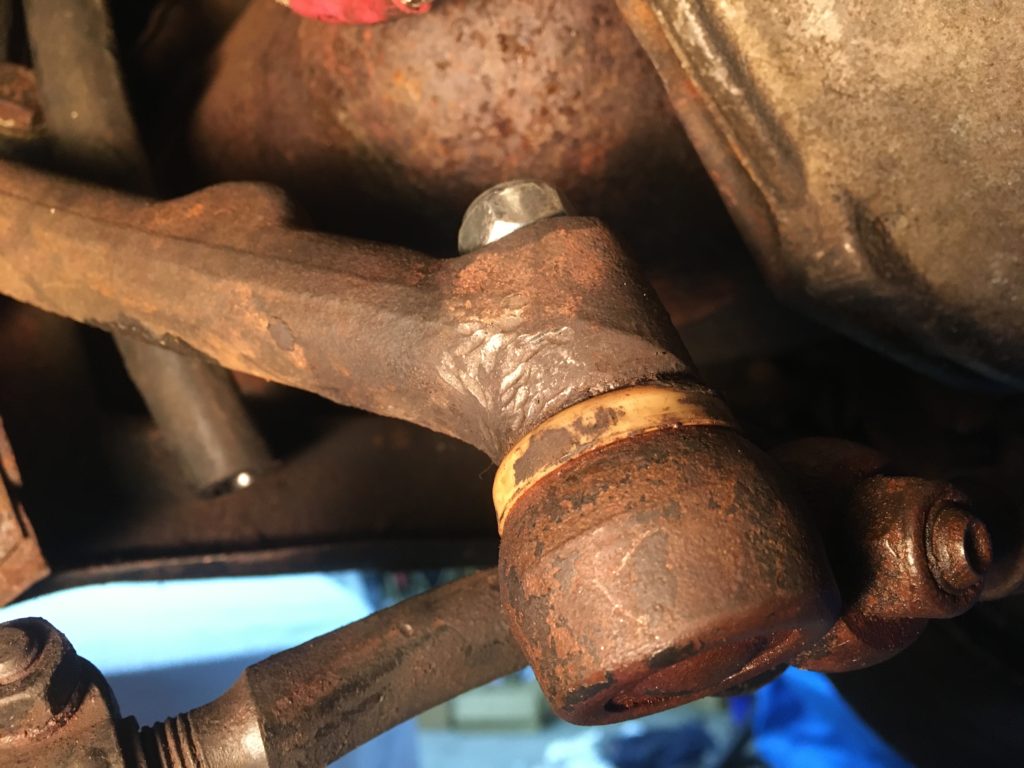
The plastic cap between the center track rod and the steering arm makes it nearly impossible to slip in a puller to separate the two components without ruining the track rod.
I tried using a torch to heat the part of the steering arm that the drag link’s tapered rod goes through (being careful not to melt either the plastic cap or the rubber boot on the tie rod), and then rapping sharply on the side of the arm with a hammer to dislodge it. (Not only was I unsuccessful, but I was also alarmed to find afterward that the steering was bound up; it turned out that the heat from the torch had expanded the track rod’s ball-in-socket to the point where it wouldn’t move. As it cooled, it moved with a screeeeeee. Time and a shot of Silikroil quieted it down. But clearly, I thought, I shouldn’t do anything else unless I was prepared to replace the center track rod.)
I was about to order one (it’s about a $90 part) when I began wondering if I should slide down the slippery slope and think about addressing anything and everything in Bertha’s front end that requires attention. After all, I didn’t really renew anything in the front end when I revived the car in 2019 other than install over-boots on top of the cracked boots on the tie rods to buy some time.
I did a quick inspection. Although there was no play, I saw that the bushings in the lower control arms were old and cracked, and that the ball joints were held in by rivets, which showed that they’d never been replaced. I decided that I wasn’t prepared to rebuild Bertha’s entire front end at this time just to try to eliminate a little left-of-center notch in the steering, that this is best left as a winter project when nothing else is competing for time on the mid-rise lift, and just left everything alone. (In my first book, I refer to this with the parable, “If you’re not going to kill the beast, back slowly out of the cave.”)
So Bertha didn’t get her present. But she did get a damn fine hundred miles in running from Fitchburg to Newton and back. She may not have the Lotus’ slot-car cachet, but she can scatter leaves with the best of them. I’ll just try to only hang the tail out on entrance ramps that curve to the right.—Rob Siegel
Rob’s latest book, The Lotus Chronicles: One man’s sordid tale of passion and madness resurrecting a 40-year-dead Lotus Europa Twin Cam Special, is now available here on Amazon. Signed copies of this and his other books can be ordered directly from Rob here.