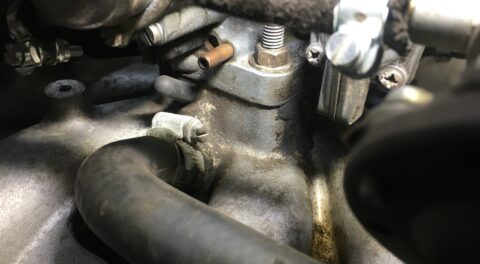
I’d been pressing forward at a slow but steady pace on the sort-out of Hampton, the 48,000-mile ’73 2002 that I bought last September. Shortly after the purchase, I’d gotten it running and driving well enough to make the 50-mile trek back and forth to my rented storage in Fitchburg, but the car’s been in my garage here at the house since Thanksgiving. Over the winter, I did the mammoth round of removal of the black Ziebart rustproofing from under the hood, and addressed a hard-starting problem that was caused by a mislocated fuel filter and a partially plugged passage to the accelerator-pump nozzle. But for the past few months the car has literally been on a pedestal, sitting on the mid-rise lift while I take advantage of that elevated position and address anything I can think of that’s either under the car or that requires having the wheels in the air.
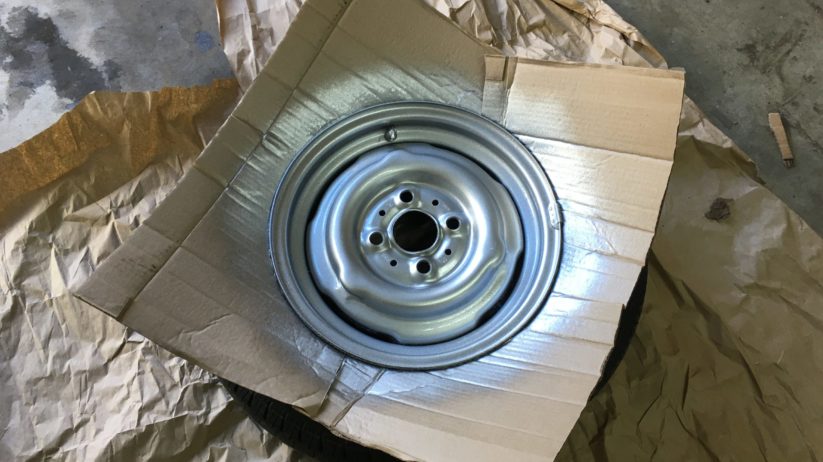
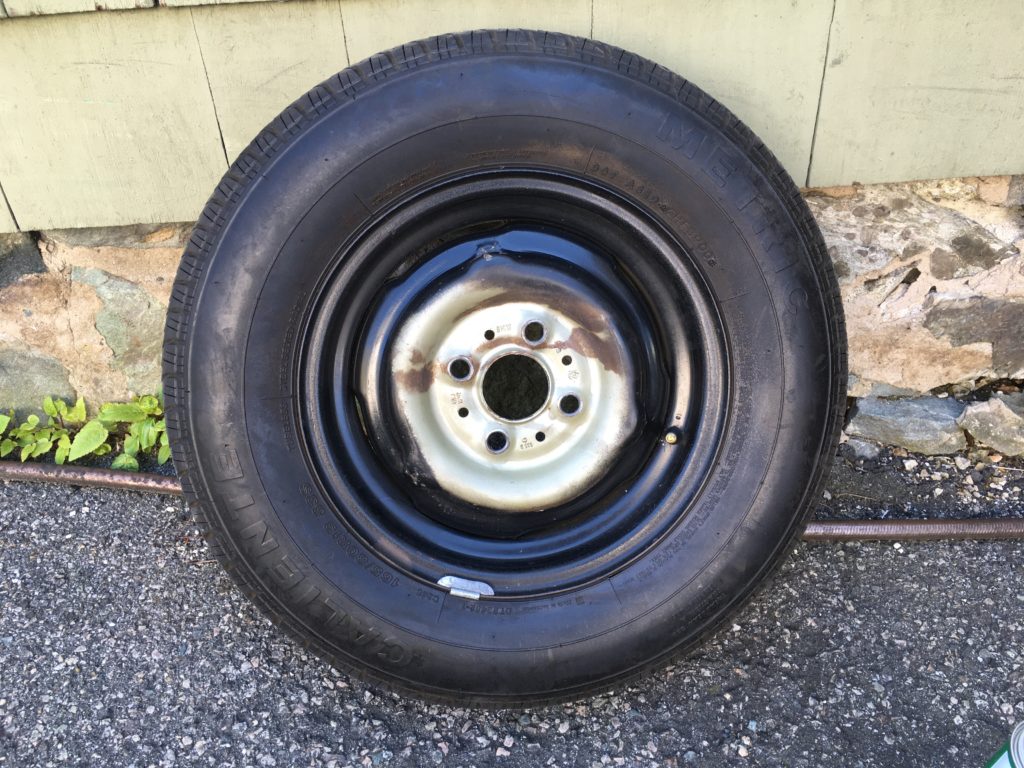
On that latter point, there was a vexing bit of cosmetics I wanted to address. For such an original car, it was surprising that at some point Hampton’s wheels had been painted black—while still wearing their original slotted hubcaps, making it look like the car had the tallest tires ever seen on a 2002.
Weird, right?
Even stranger was the fact that when I pulled the hubcaps off, I found that only the portions of the wheels that were outside the hubcaps had been painted black; the wheel centers had been left unpainted.
It gets weirder.
I figured that while the car was in the air, it’d never be easier to drop all four wheels and shoot ’em silver. So I ordered a can of steel-colored Rust-Oleum High Performance Wheel Spray Paint, pulled the wheels off, and began reading up on painting wheels.
Of course, the correct thing to do is to have the tires and balancing weights removed, sandblast the wheels, paint them, then have the tires mounted and re-balanced. And that made a certain amount of sense, since the car was still running around on the tires on which it had been sitting in storage. However, there was nothing obviously wrong with the skinny 165/80-13 off-brand Caliente tires; it looked like they had very little mileage put on them before the car was put into storage a decade ago, there was absolutely no visible sidewall cracking, and I didn’t recall feeling obvious flat spots when I drove the car last year. I took the decision path that I’ve used for many of the actions on the car, which is to do what’s necessary to represent it as a lightly-sorted survivor, leaving as flexible a canvas as possible for the next owner when the time comes to sell it.
So, yeah, I cheaped out and sprayed the wheels with the tires on. I know you’re shocked.
There are dozens of videos on YouTube about how to do this. There are issues. Obviously, you need to mask the tires, and that turned out to be a little more challenging than I’d thought; I’d planned to just use newspaper and snug it up to the wheel lip with tape, but even after trying several kinds of tape and cleaning the tire sidewalls first, I found that nothing would stick to the sidewalls. A few videos showed people cleverly taking a deck of playing cards and jamming them between the tire bead and the wheel lip. Some folks recommended coating the sidewall and the tire stem with Vaseline that could then simply be hosed off.
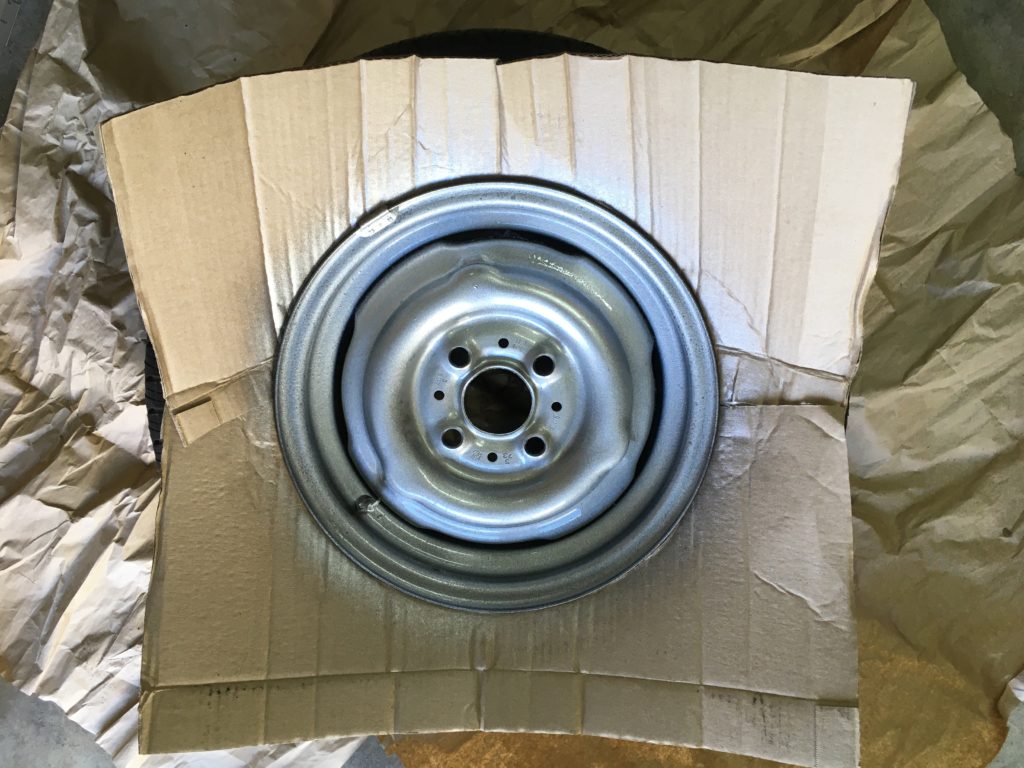
I decided to try something of my own design: I made a tire-masking template out of two pieces of cardboard. I placed the first piece halfway on the wheel and used a rubber mallet to tap along the lip. This clearly marked where I’d need to cut the cardboard. Once I trimmed it to make it fit, I used that piece to mark the second piece of cardboard. This worked well, as it produced a pair of templates that I could then reuse for all four wheels.
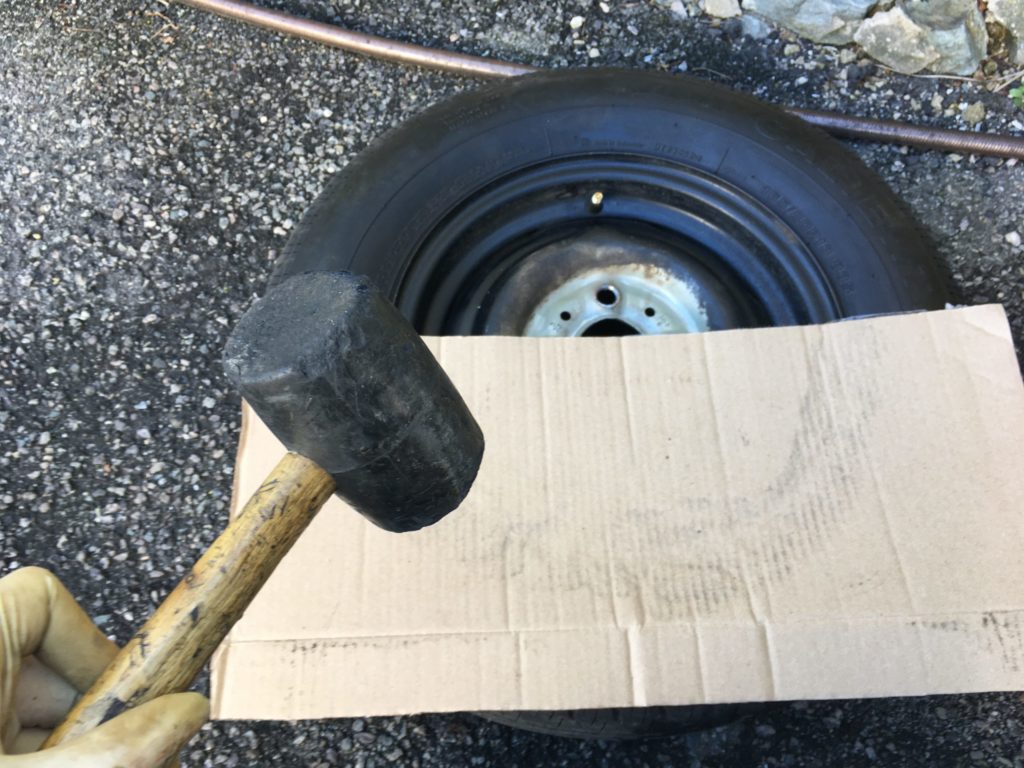
Using the wheel lip and a rubber mallet to mark the first piece of the masking template.
The completed two-piece mask.
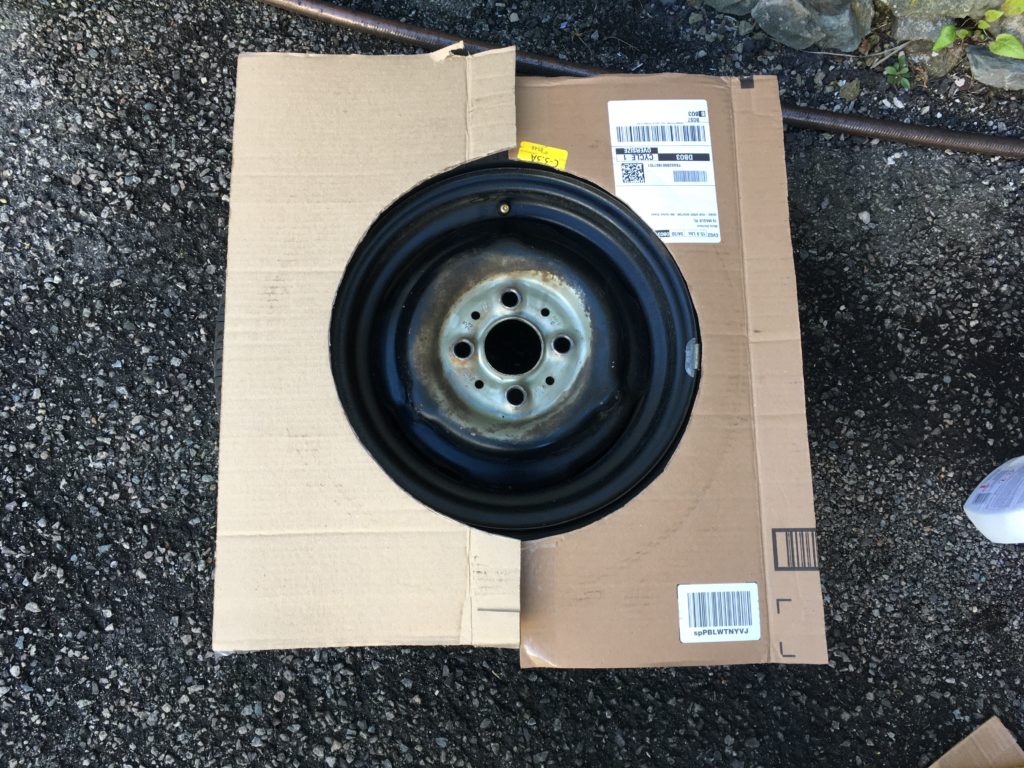
I then fully deflated each tire by removing the valve cores. This made it easier to jam the cardboard between the tire bead and the wheel lip to avoid overspray onto the rubber. I put some paper on the garage floor to keep errant paint of it, wrapped the stems in tape, and had at it.
The cardboard pieces have been jammed in and overlapped.
Because the cardboard hadto be left in place for two coats, I did one wheel at a time, pausing to let the first coat dry. Despite that, the work went quickly. One can of spray paint was exactly the right amount to give each wheel two coats.
And… sprayed. Yes, I left the balancing weights on. Don’t judge me.
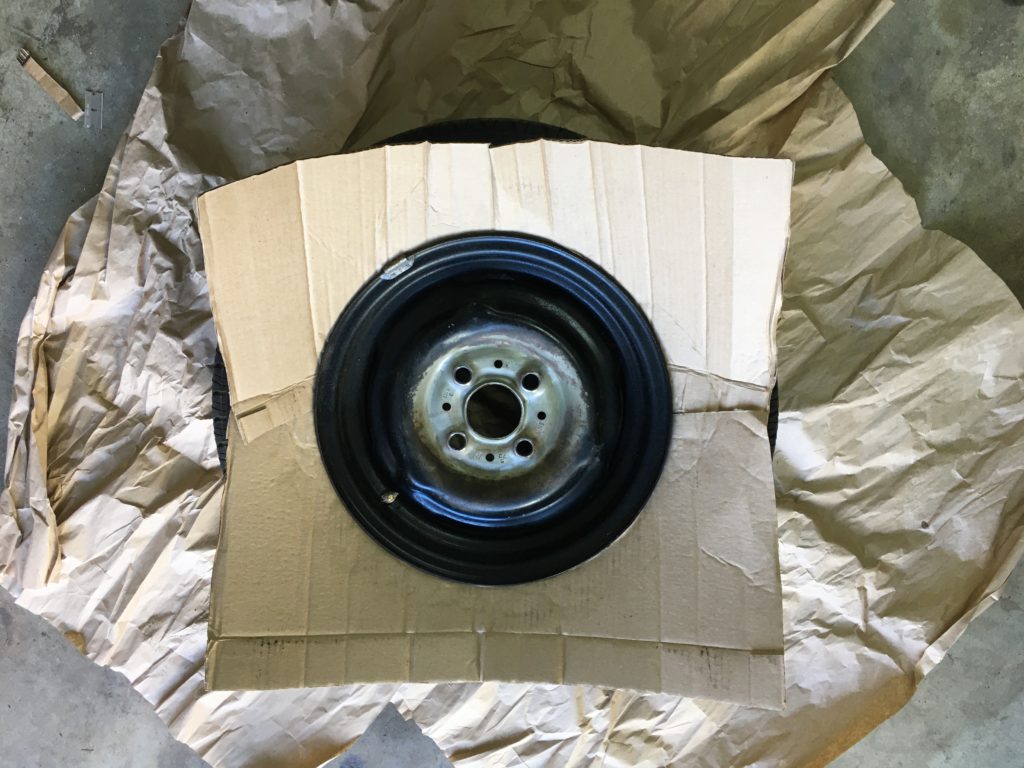
The end result was pretty good—not as flawless as a tires-off sandblast-it-first job would be, but the wheels looked way better than they did before.

Presenting the silver.
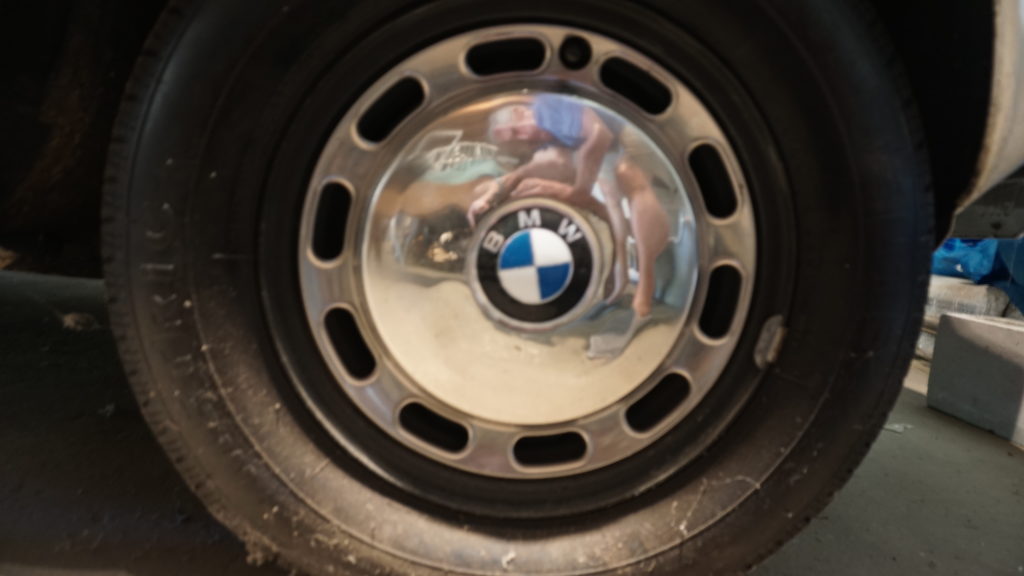
And most important, with the hubcaps installed, the tires no longer look like they have the aspect ratio of those on a monster truck.
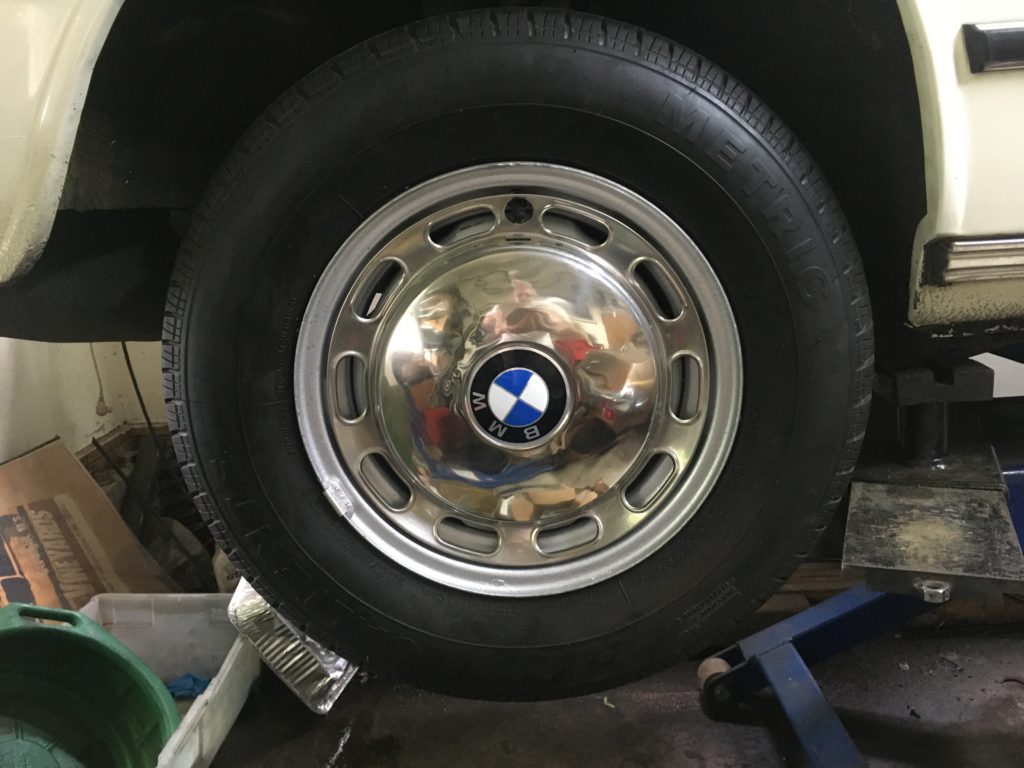
Oh, that’s so much better.
The car is still on the mid-rise lift, sinceI’m replacing the clutch hydraulics, which I’ll detail next week. But while it’s still up there, it occurred to me to spin all four wheels and do the standard exercise of selecting the straightest wheels for the front. The wheels are all fine, but I was astonished to see that all four tires still have plainly visible flat spots. I’m surprised that I haven’t felt them, but both the height of the tire sidewall and the soft original shocks may be damping out the vibration. If either I or the next owner plan to drive the car any distance to events, clearly they should be changed—but for now, they’re part of the, uh, vibe.—Rob Siegel
________________
Rob’s most recent book, Resurrecting Bertha: Buying Back Our Wedding Car After 26 Years In Storage, is available on Amazon here. His other books, including Just Needs a Recharge: The Hack MechanicTM Guide to Vintage Air Conditioning, are available here on Amazon. Or you can order personally-inscribed copies of all of his books through Rob’s website: www.robsiegel.com. His new book, The Lotus Chronicles, will be available in the fall.