I write this from BMW CCA Oktoberfest in Greenville, South Carolina. I came down in my ’72 2002tii, Kugel, which I drove because I sold it and am delivering it here to the new owners. For years I’ve routinely described Kugel as my most well-sorted vintage car, the one I can hop in and pound out a thousand miles in without any additional prep in advance or drama along the way.
Normally, at this point, you as the reader would think “Rob, why are you so blatantly taunting The Automotive Powers That Be?” And I as the writer would go “So, well… funny story.”
But not this time. Kugel knocked off the thousand miles from Newton Massachusetts down to Greenville without so much as a hiccup. Which is great, but that makes for a lousy article. So, faced with the choice of writing about why I thought a porn film was being shot in the hotel room directly above me at the Motel 6 at which I stayed in Roanoke, or circling back to document a small sort-out issue on Hampton (the 48,000-mile ’73 2002 I just bought), since this is a family publication, I think we’ll do the latter.
As I said last week, Hampton is a remarkably original car, and I feel honor-bound to preserve things I’d normally rip out, like the intact EGR plumbing and the still-working door and ignition buzzers. However, there was one thing that had to go: The headlight spacers.
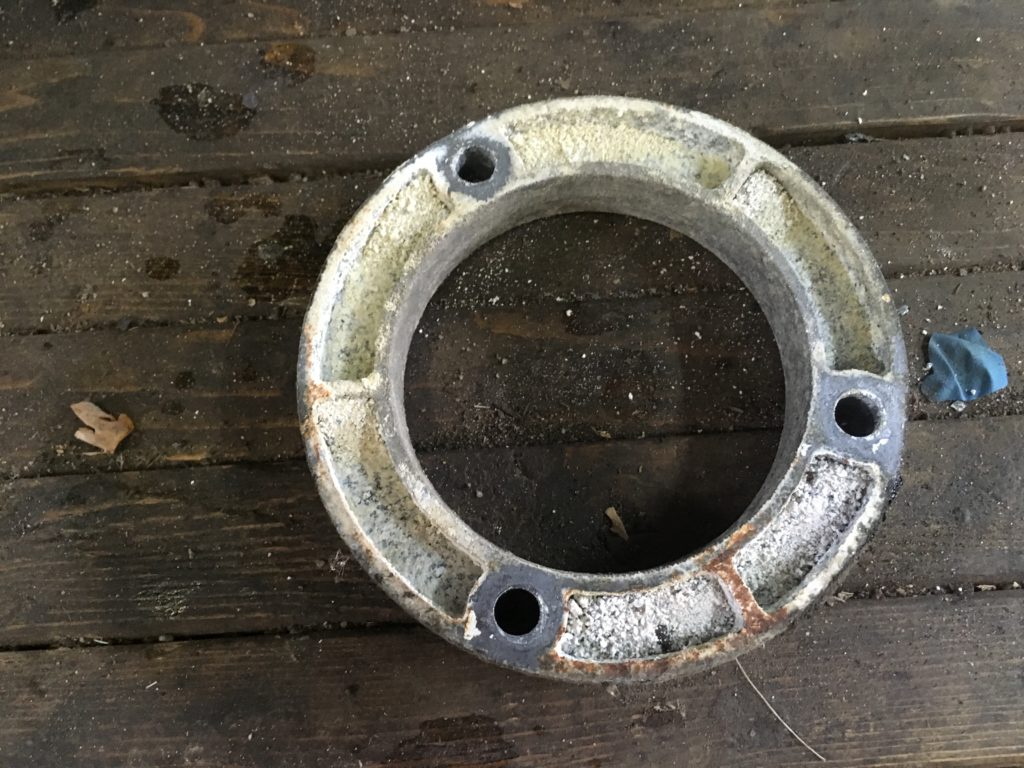
In order to meet federal headlight height requirements, 2002s sold in this country were equipped with circular aluminum spacers about an inch thick between the tops of the front strut bushings and the undersides of the front strut towers. The spacers put the nose of the car inappropriately high, making it show too much wheel well space above the front tires. Cars that still have the spacers look like a boat on plane.
I like originality, but damn Sam, you could stuff a turkey under that wheel well.
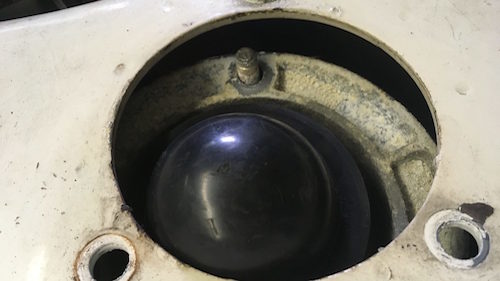
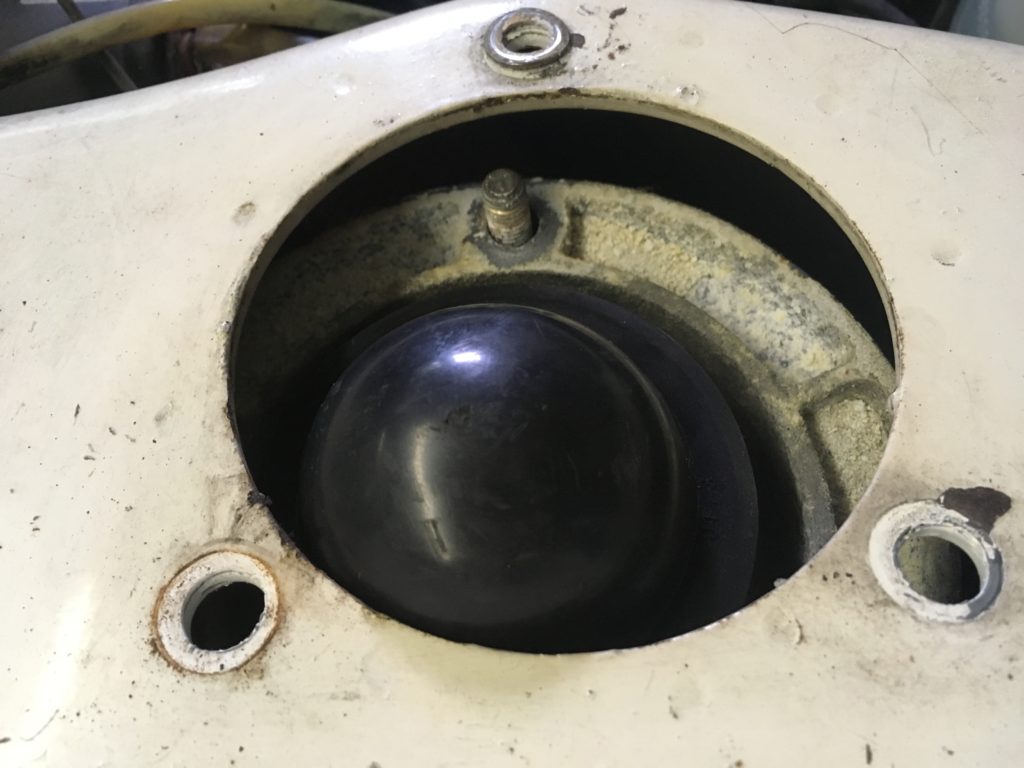
It’s rare to find a 2002 that still has its headlight spacers in it, as they were usually removed and thrown in the garbage when the front strut assemblies were unbolted and removed in order to replace the front strut cartridges. If the nose height or wheel well gap makes you suspect that the spacers are still there, it’s easy to verify by simply looking where the three strut tower bushing studs protrude through the towers. If the bushing is recessed in the tower and there’s not much length of the studs protruding through the nuts securing them, then the spacers are still present. You can see them below the sheet metal if you look carefully.
A front strut tower bushing with the spacer still present.
Normally, in order to service anything in the front strut assembly (replacing the bushing, changing the springs, or renewing the strut cartridge), the entire strut assembly has to come out of the car, which is a little bit of a pain since you need to cut the safety wire going through the three 14mm bolts at the bottom holding the assembly to the steering knuckle and pull off the brake caliper. However, many years back, I discovered that it is possible to remove the spacers with the strut assemblies still in the car.
Before we jump into this, I should say that you should first bounce the left and right sides of the nose of the car up and down, and verify that the front struts are neither seized (the car barely will budge when you try to bounce it) or blown (the car continues to bounce up and down after you release it), as to repair either of those conditions, the front strut assemblies have to be removed anyway, at which point you can just pull the spacers off. But if the front struts are intact, here’s what you do:
1) Jack the car up and set the front end on jack stands.
2) Disconnect the links connecting both ends of the front sway bar by undoing the two 13mm nuts at the bottom of each link. This will allow the lower control arms to move down.
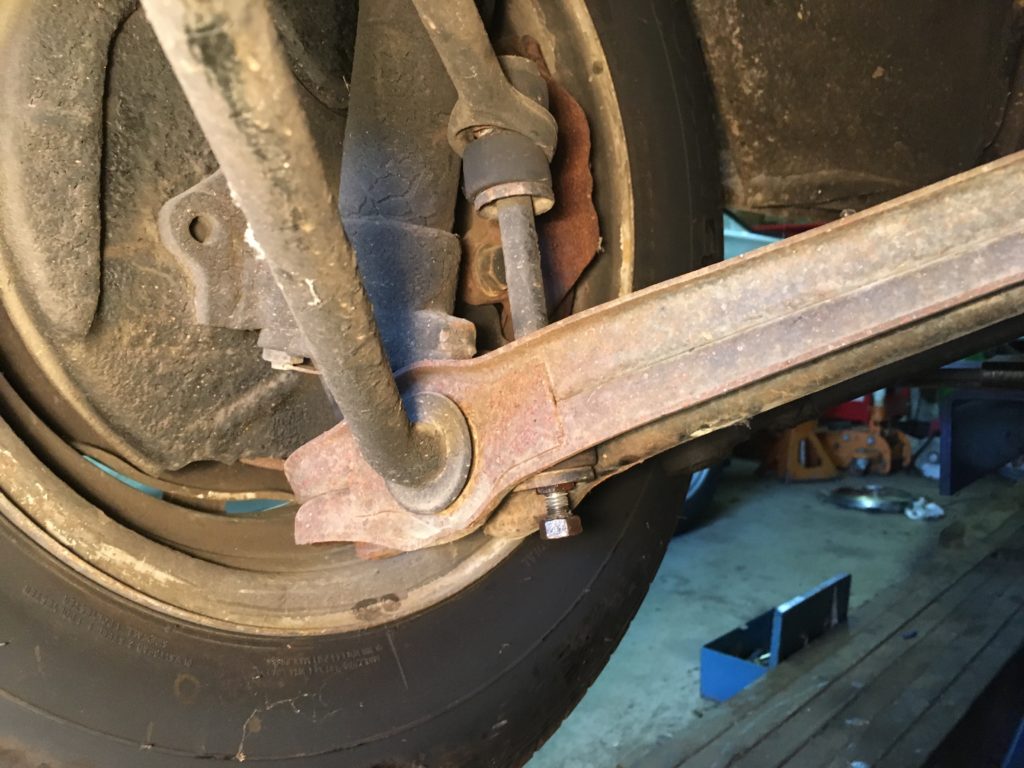
Disconnecting the front sway bar end links.
3) Remove both front wheels.
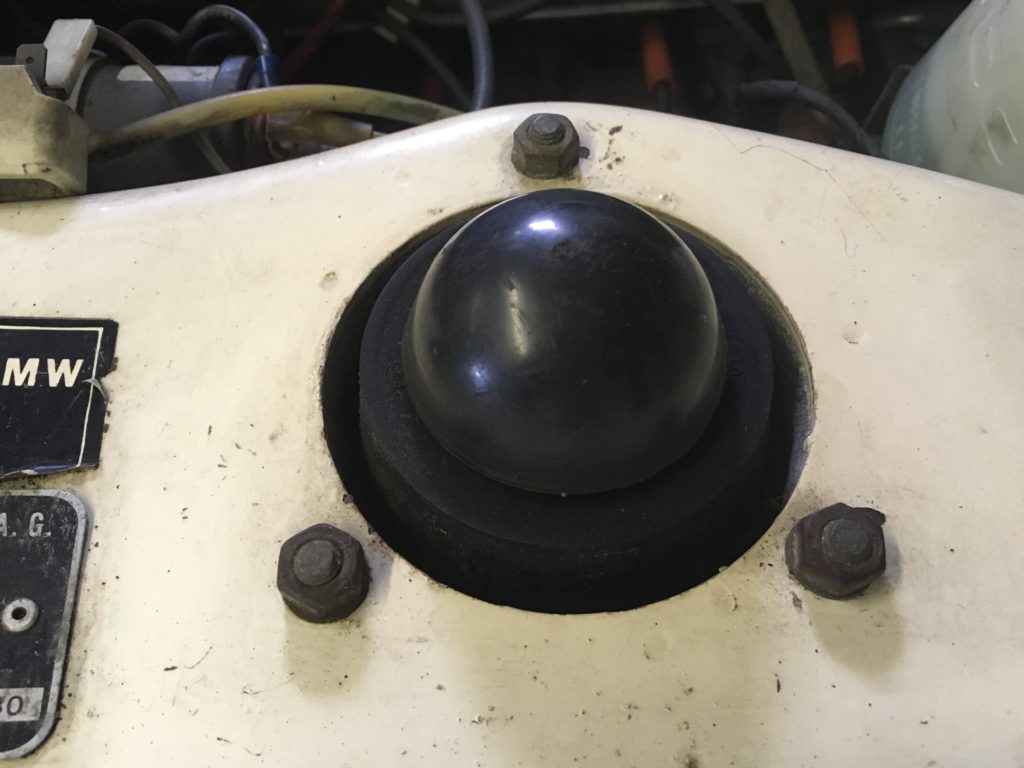
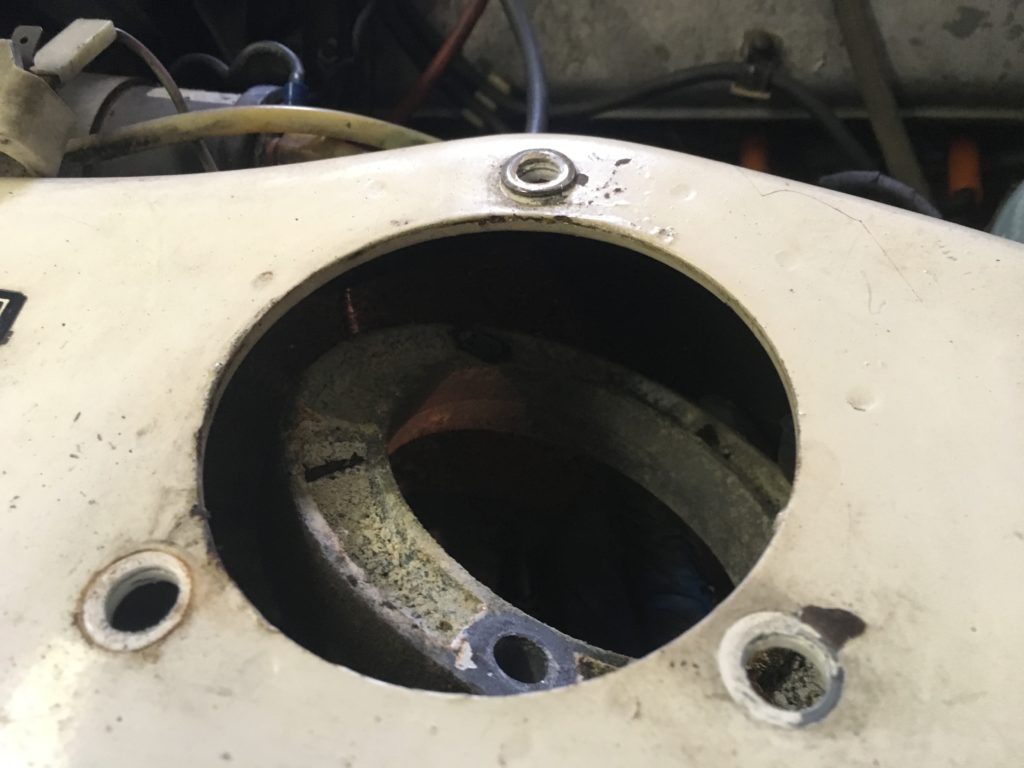
4) One side of the car at a time, undo the three nuts holding the strut tower bushing in place. The whole strut assembly will start to sag down, but it won’t go far.

With the nuts undone and the strut assembly dropping down, the spacer becomes visible.
5) Position your foot on the steering knuckle and push down on it. This will force the strut assembly to drop further.

Using your foot as leverage on the steering knuckle.
6) With the additional room created under the strut tower, reach underneath and lift the spacer up and over the studs. You’ll swear that there’s not enough room to do it, and I’ll admit that it’s tight, but by careful maneuvering, you should be able to get it off. There’s a bit of an odd dance you need to do with pushing down with your foot, positioning the spring with one hand so it doesn’t slide off too far to the side, and lifting the spacer off with your other hand.
Making space for the spacer.
Off you come, you nasty old federally-compliant corroded thing.
Success!
7) Before you button things up, this is a good time to make sure that the bearings in the bushings aren’t binding. Reach up and rotate the bushing. If it’s difficult to turn, or you hear crunching noises, or if it turns so freely that there’s obvious play in it, then this don’t-need-to-drop-the-strut-assembly exercise was for naught and you should remove the whole assembly, compress the spring, and replace the bushing. But if everything feels okay…
8) With one hand, lift the spring up, position the studs so they pass through the holes (the spacing isn’t symmetrical, so you’ll need to rotate the bushing to get things to line up), thread the washers and nuts back on, tighten them, reconnect the sway bar end links, and you’re done.
The result with Hampton was very satisfying. The car is by no means slammed; it simply no longer looks comically wrong.

Much better.
Other original quirky bits will stay—even annoying ones like the door and ignition buzzers—but this was a very satisfying little repair.—Rob Siegel
Rob’s new book, Resurrecting Bertha: Buying Back Our Wedding Car After 26 Years In Storage, was just released and is available on Amazon here. His other books, including his recent Just Needs a Recharge: The Hack MechanicTM Guide to Vintage Air Conditioning, are available here on Amazon. Or you can order personally-inscribed copies of all of his books through Rob’s website: www.robsiegel.com.