With the faux tii off to a new home, I’ve had the chance to turn my sights to other projects.
For a number of years, I’ve neglected Kugel, my Chamonix white ’72 2002tii. Kugel did have a big trip to MidAmerica 02Fest in Eureka Springs Arkansas in 2014, and to the Vintage in 2016, and to Oktoberfest in Pittsburgh last year, but with the steady stream of needy orphaned cars showing up at my door, the car has been like the never-in-trouble good child that gets little attention. I resolved to give the car a little love.
I, who jokes that “cleaning” is spitting on the bird poop and rubbing it off with my sleeve, set out to clean Kugel.
Joking aside, the poor thing really was a mess. The once pretty shiny car had become dull, the nose splattered with bugs and tar, the entire rear clip coated in carbon from an injection system that, before I installed the air-fuel gauge and tweaked the mixture, was running too rich. I washed it with car detergent and the wash mitt, and it barely made a dent in the crud on the tail. I then tried some household spray cleaner (Costco Kirtland brand, sort of like Formula 409), and that began to break through the dingy coating. It emerged singing and dancing like Maria in West Side Story.

Kugel suddenly looked pretty, oh so pretty…
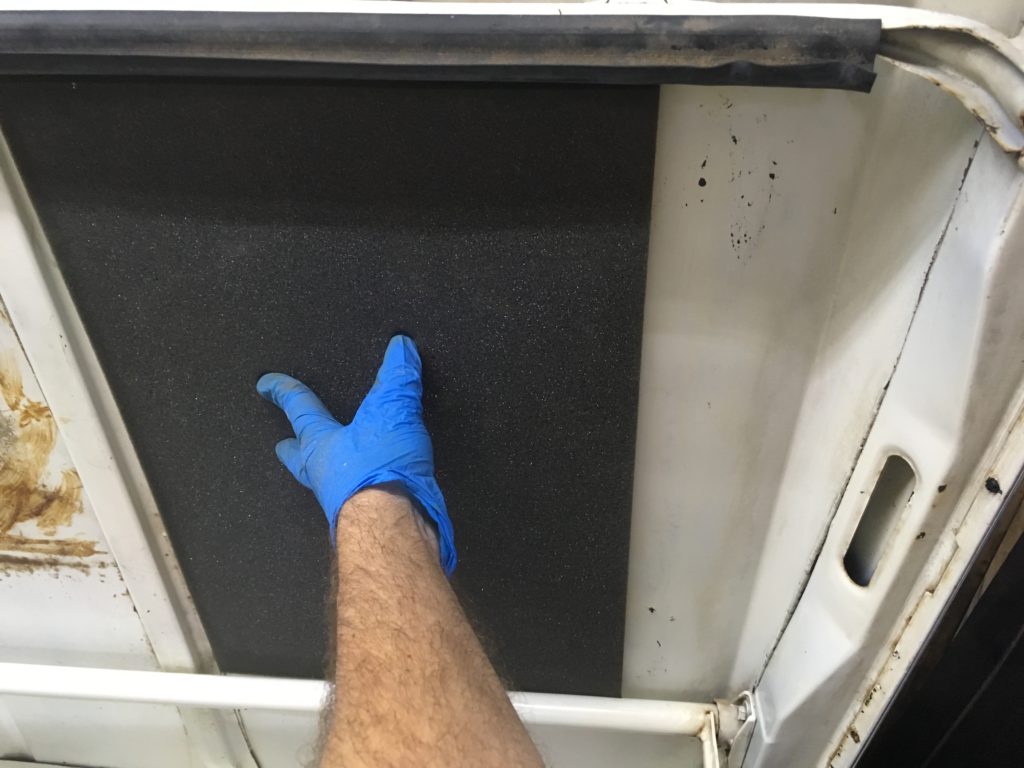
Next were the bottoms of the rear quarter panels, the small sections below the bumper. Both sides were coated with a soft black rubbery goo as if a tire had immolated and thrown off spaghetti-like rubbery trails that then stuck there. The spray cleaner didn’t make a dent in them. I thought I had adhesive remover around, but couldn’t find it. I found, however, that a little acetone took them off nicely (yes I wore gloves, had all doors of the garage open, and washed the area off with water immediately afterward).
And then I did something absolutely shocking, at least for me: Seeing how much better the exterior looked, I began to clean the trunk. I removed the covers over the spare and the tire gas tank and cleaned them with the same spray cleaner and elbow grease. I located the trunk’s missing side panels on an upper shelf in the garage. I have no memory as to why I’d removed them; maybe I was trying to de-rattle the car and thought them suspect. I cleaned out the spare tire well. Suddenly, meh turned into meow!
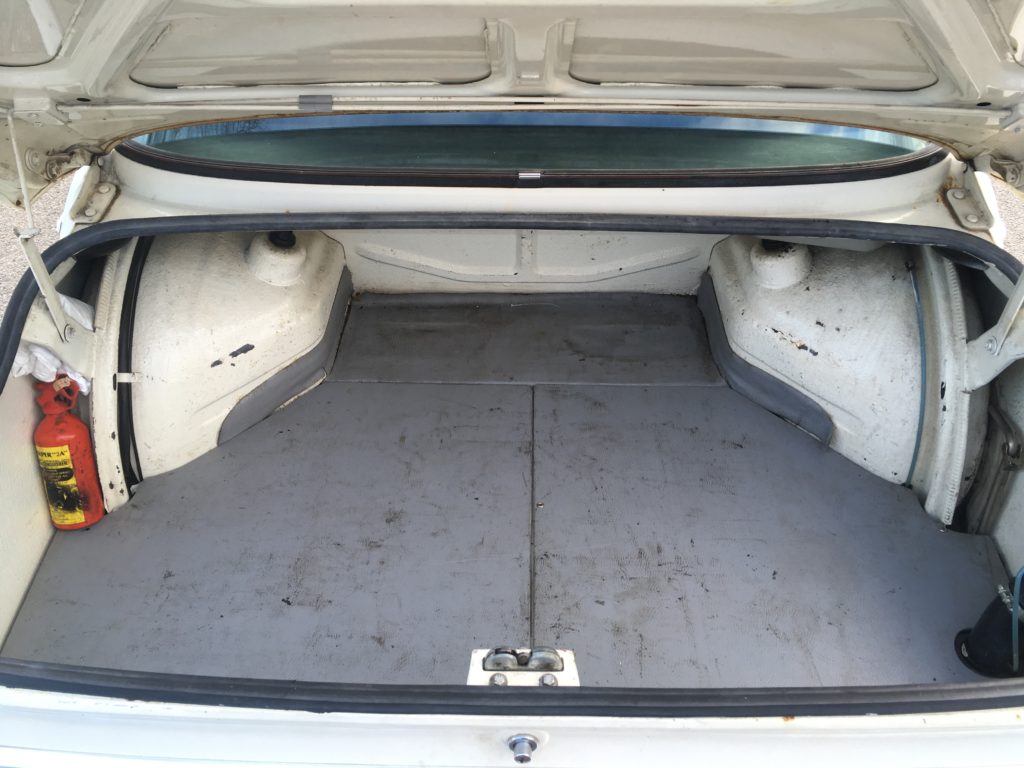
Trunk panels before…

…and after.
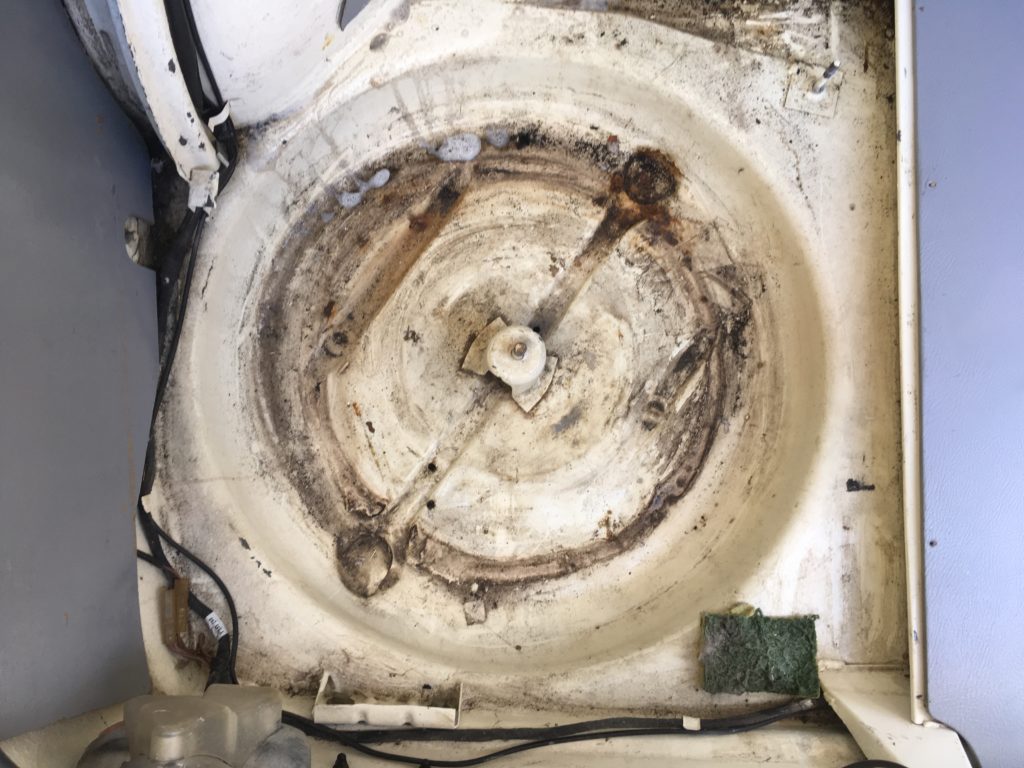
Spare tire well before…
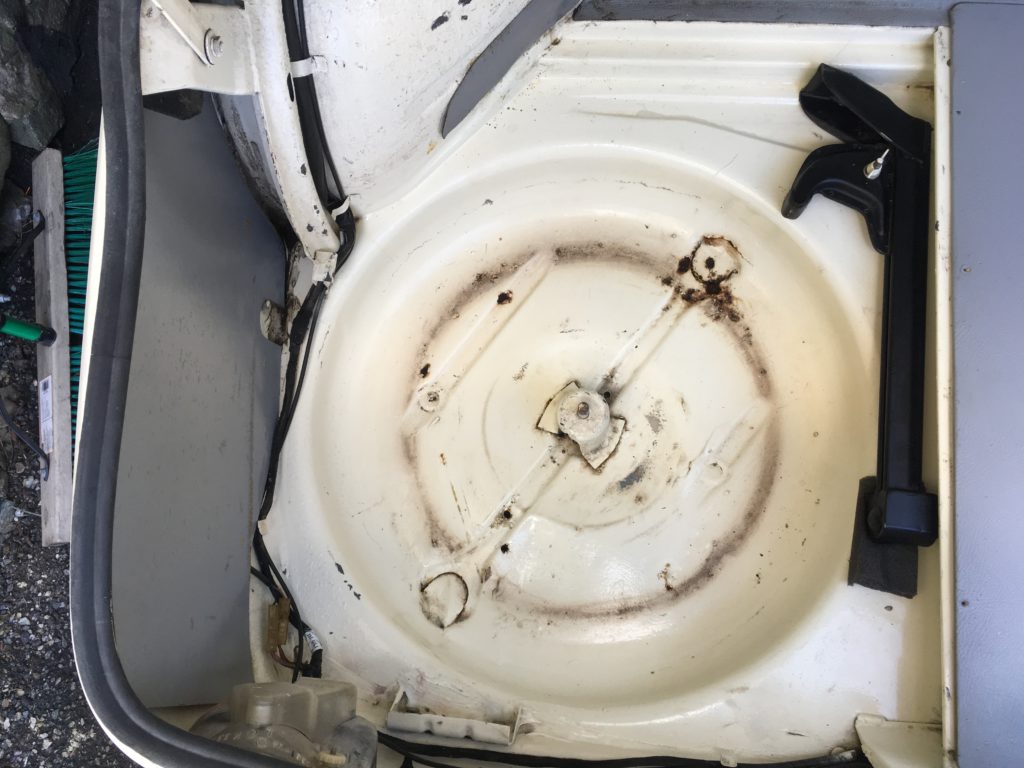
…and after.
With the momentum that quick positive results can produce, I then proceeded to the engine compartment. I grabbed a can of Gunk engine de-greaser I’ve had on the shelf for years, soaked the engine and the inner fender walls, and hosed it down. The engine looked cleaner, but the Gunk didn’t put much of a dent in the grime on the paint. I then, as I did with the trunk, scrubbed with household spray cleaner and a sponge, and the grime began to come off. After about an hour, while there was no confusing it with a detailed engine compartment, the difference was dramatic. While I’m not going to join the Q-tip brigade anytime soon, I suddenly had a window into what a little time spent cleaning can do, and the enjoyment that it can produce.
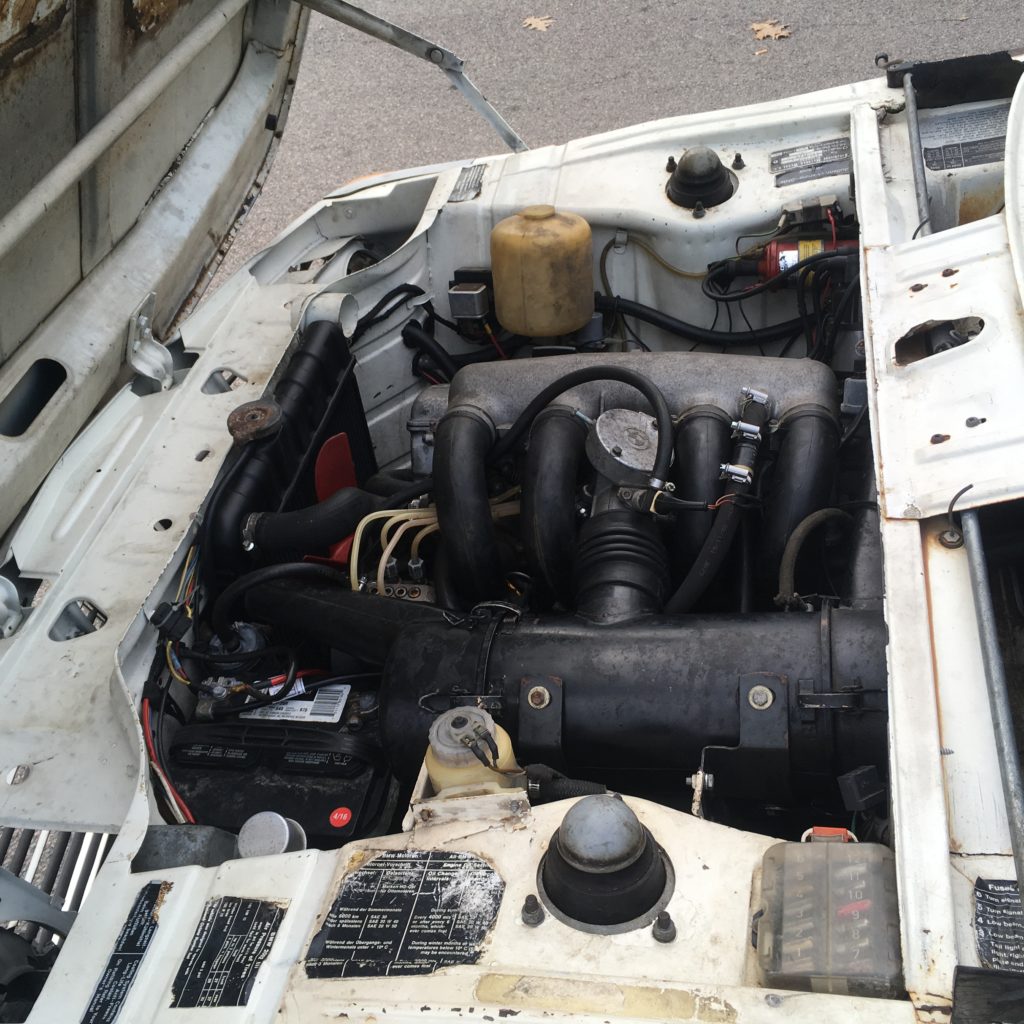
Engine compartment before…
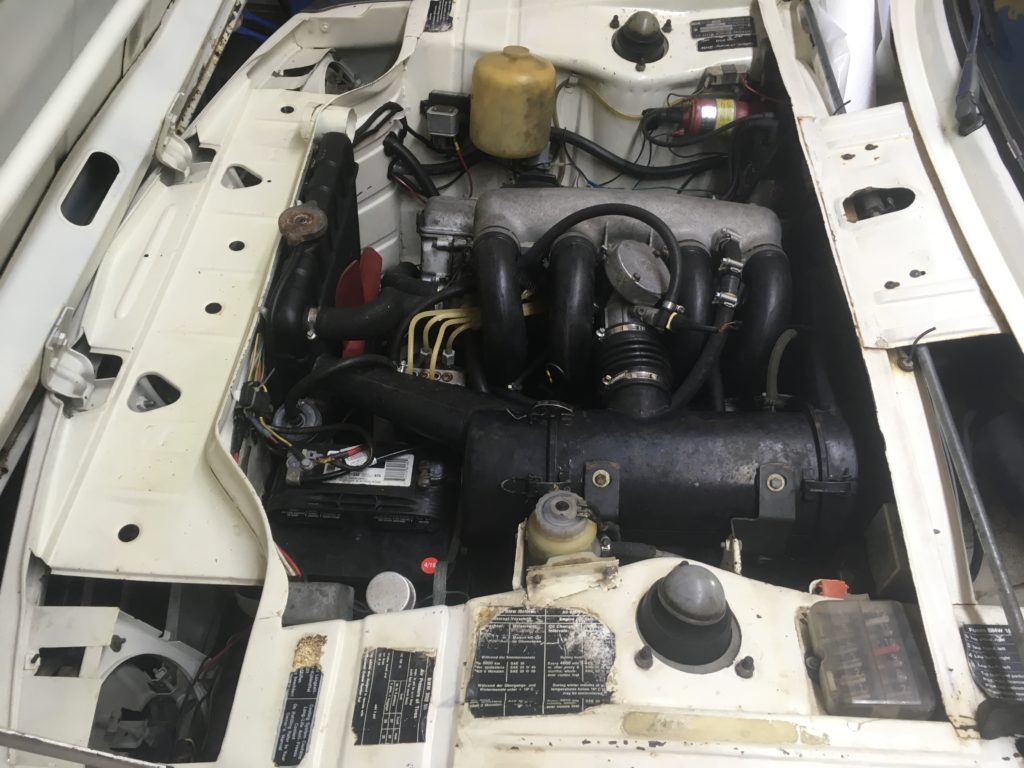
…and after.
And then, as often happens, I ran into molasses.
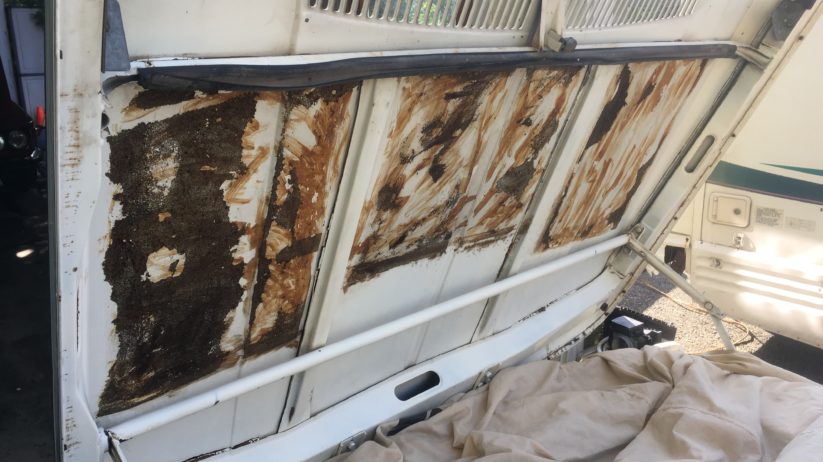
Kugel has been missing its foam under-hood insulation ever since I bought it; all that was under the hood was some shreds of old tattered foam and a lot of unsightly ancient adhesive. Fortunately, when I bought the car eight years ago, it came with a bunch of parts, and among them were three new pieces of foam with peel-back adhesive. They’d been sitting on a shelf in the garage. I found them, dug them out, smiled, and resolved that they would be the cherry on my newly-cleaned engine compartment sundae.
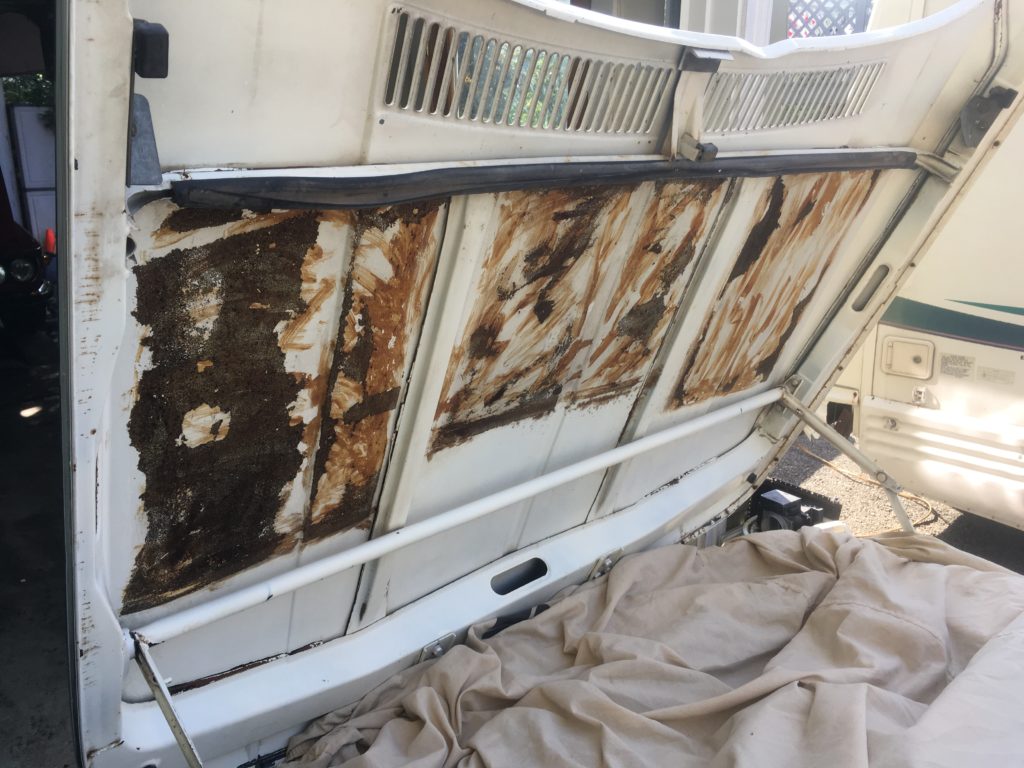
Kugel’s un-appetizing under-hood.
I did a quick size check on the new foam pieces. There were two narrow ones and one wider one. Clearly the two narrow pieces were for the symmetrical left and right sides of the hood, and the wider piece went in the center. I held the wide piece up over the center patch of adhesive and it matched perfectly. I did the same with one of the smaller pieces, holding it over the tattered foam on the left-hand side of the hood; it too was a perfect fit.
All I needed to do was clean off the old adhesive. Well, probably not all the adhesive; really, I just needed to get the remnants of the old foam off so the new adhesive would stick. As you can see in the photo, most of that old foam was on the left, but there were remnants in the middle and right areas. But I couldn’t use a wheel on a drill like a Scotch-Brite or a wire wheel, as that would rip up the paint under the hood.
I did a little research, and found a product called an “adhesive eraser.” It’s a big, thick rubber disc that looks a little like a land mine. It mounts onto a drill, just like a Scotch-Brite or wire wheel, but like an eraser, it’s made of sacrificial rubber. They’re intended for removing adhesive-attached items like pin striping and bumper stickers, without damaging paint. Amazon has several different brands costing about $12. I read the reviews. The main downside appeared to be that, due to the self-shredding nature of the “eraser,” they leave a mess, so buyers are warned to close car windows and throw a sheet over things they didn’t want inundated with particulate matter. And one brand reportedly left brown-ish stains on white paint. I ordered one that didn’t have that complaint.
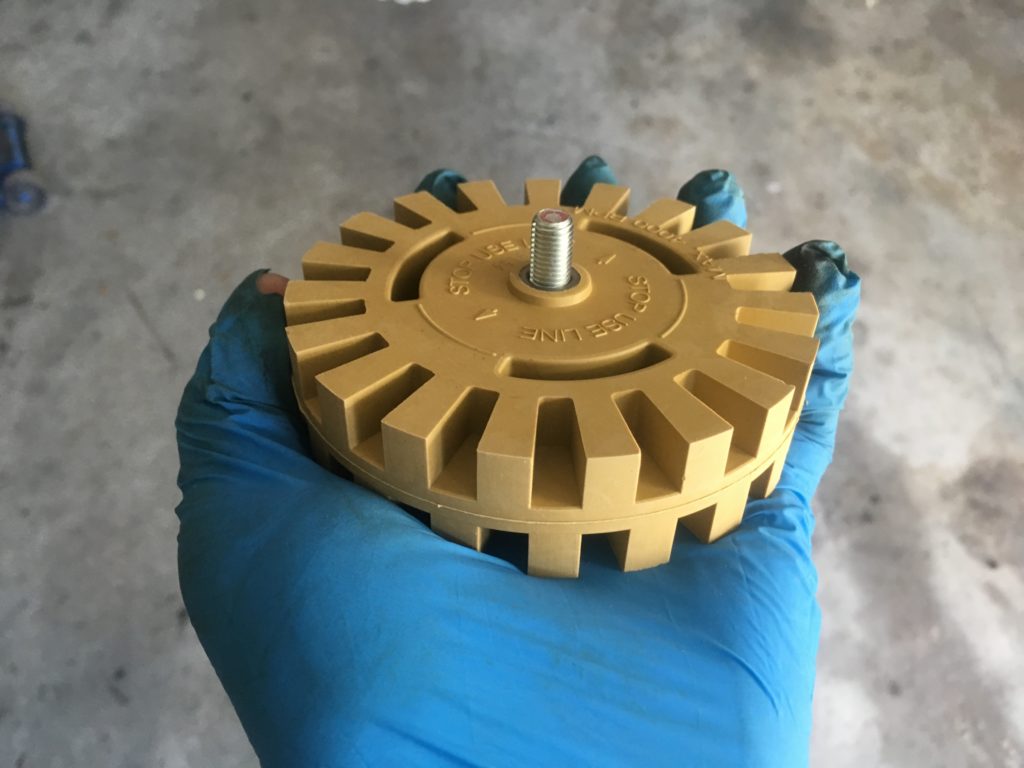
The adhesive eraser.
When the eraser arrived, I pulled Kugel’s car cover down so it covered the engine compartment, then attacked the underside of the hood. The eraser quickly tore off the degraded foam that still hung over the left side and the small amount remaining center and right. With that gone, I could see that what was left was perhaps 30% still-pliable gray-colored adhesive, and perhaps 70% old rock-hard brown glue. I soon found that, using the eraser, I could work off the gray stuff, but the brown stuff was not easily “erased.”
I took a break, hosed everything down, and dried the underside with paper towels. I then did a few passes on the big obvious lumpy gray adhesive areas with a single-edged razor blade. Good enough. I wasn’t restoring the engine compartment. I had new foam ready to stick on. Clearly things were now smooth and clean enough for new foam to adhere.
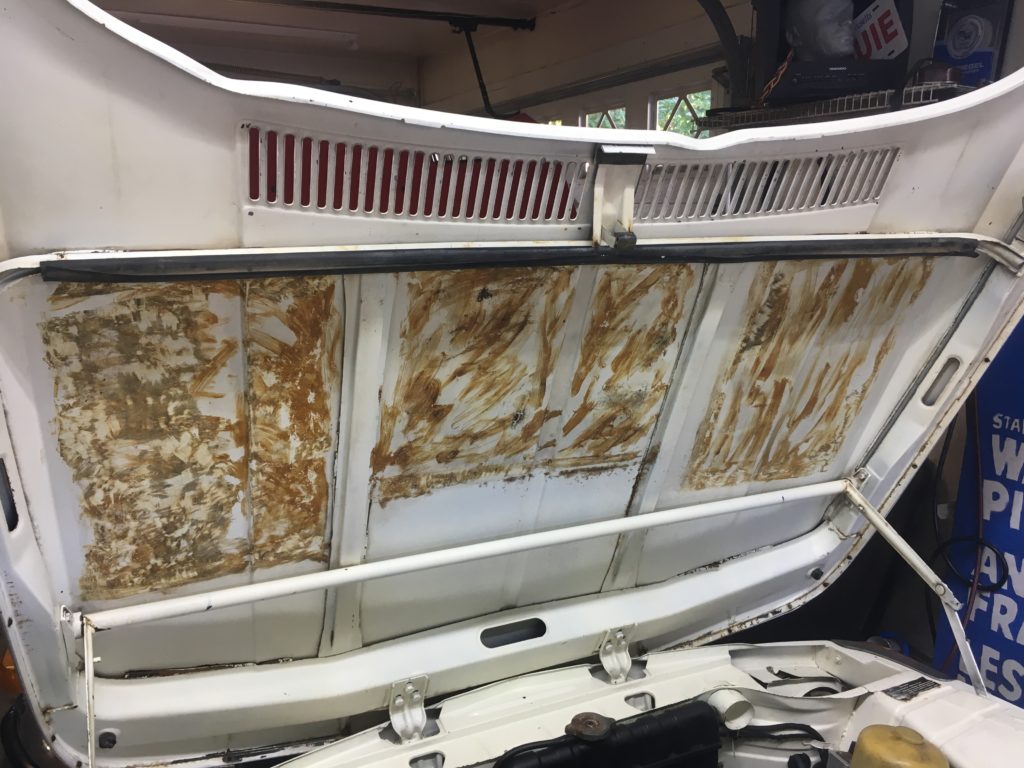
After “erasing.”
I took one of the two smaller pieces, peeled the back off to expose the adhesive, and carefully positioned it in the left-hand space. It immediately stuck to it like the creature to John Hurt’s face in Alien. One down, two to go.
I don’t know why, but before peeling the backing off the adhesive on the remaining two pieces, I test-positioned them. It seemed curiously cautious of me. After all, I’d already verified that the big one went in the center, and clearly the left and right sides had to be symmetrical.
And I found a problem. Two problems, actually. No, three. Make that four.
First, if you look in the photo above, at the bottom of the vertical ribs that under-gird the hood, and see where they are relative to the hinges, you’ll see that the ribs are not, in fact, symmetrically located. The right-hand area is wider than the left. When I took the smaller of the two remaining foam pieces and positioned it on the right, it was about three inches too narrow. And yet, the fatter piece clearly went in the middle. I was convinced that the under-hood foam kit I’d been hoarding for eight years was simply incorrect for the car.
So I did some reading, and of course found the correct answer on bmw2002faq, the world’s 2002-related brain trust. The wider of the three pieces is actually supposed to be turned sideways and go on the right side to cover its larger area, leaving the two small pieces to go on the left and, surprisingly, in the center. Measuring the glue areas on my car revealed that it once had one narrow and two wide pieces, the reverse of what it should’ve had. And that leads us to the second, third, and fourth problems.
Second, if I used the big piece on the right, I wouldn’t have a big piece to cover up the ugly remaining adhesive in the middle. All the ugly old glue in the middle was already the size of the bigger piece.
Third, reading on bmw2002faq, I learned that, although there are aftermarket kits that cover the entire underside of the hood with foam, the original factory placement of the center piece isn’t at the top of the hood, as it was on Kugel; it’s supposed to be at the bottom so the center foam is over the radiator. Thus, even if I had another correctly-sized big piece, I’d either need to put it back in the wrong place at the top, or put it in the right place at the bottom and then have to clean off all of the ancient hardened brown adhesive that was in the wrong place.
I tried the eraser again in the center area, and it basically sneered at the ancient hardened brown glue. I read online about folks using kerosene, WD-4o, Goo Gone, 3M adhesive remover, and other things. I had a small bottle of Goo Gone in the house and tried it, letting it soak in for ten minutes. It did absolutely nothing. I went for the acetone. It was pretty effective pretty quickly, but as I removed it—and this brings us to the fourth problem—I found that it uncovered an area where, under the old glue, there appeared to be a minor paint issue. Perhaps the center piece had intentionally been put in the wrong place and this was why.
This was stupid. I had three new pieces of foam insulation. The underside of the hood was now clean enough to install them. One was already placed. All I needed to do was stick the other two on and be done with it. I could put the wide piece in the middle and exactly cover up the old glue. The remaining narrow piece would probably look fine on the right… except that old glue would be visible around it. I used the acetone to clean a three-inch strip off the right-most edge of the right side, then test-fit the narrow piece there. It obviously looked wrong. Off-center. Too narrow. My eye would be drawn to it every time I opened up the hood.
No.
Don’t you just hate it when you try to do something simple and get tripped up by stuff like this?
I stopped. I sighed. I thought.
As they often say in government and business, perfect is the enemy of good. Kugel is not a concours-quality car. I didn’t set out on this little cleaning exercise to try to turn it into one. I was not going to get sucked down the rabbit hole of repainting part of the damned underside of the hood over the placement of a bloody piece hood foam, something I’d previously never paid a millisecond of attention to. All that I needed was a second piece of correctly-sized foam—the same size as the larger of the two pieces I already had— to cover up the rock-hard brown glue in the center. Then I could put the other large piece on the right side where it belonged and be done with it.
McMaster-Carr is usually a great source for any kind of foam you’d ever want, but I didn’t see anything inexpensive that looked like the pieces I already had. I looked online and found that the correct foam kit, part number 51 48 1 805 775, is available from BMW, and is sold online for as low as $56 shipped (FCPEuro). I thought about it, and clicked buy. It was expensive for a single piece of foam, but it should solve the problem in minutes, and will also enable me to use one of the other two spare pieces to cover the entire center panel, top and bottom, if that’s what I choose to do.
So, it’s on order, and this silly problem should be resolved next week.—Rob Siegel
Rob’s next book, Resurrecting Bertha: Buying Back Our Wedding Car After 26 Years In Storage, will be released on September 15th and can be pre-ordered here. His other books, including his most recent, Just Needs a Recharge: The Hack MechanicTM Guide to Vintage Air Conditioning, are available here on Amazon. Or you can order personally inscribed copies of all of his books through Rob’s website: www.robsiegel.com.