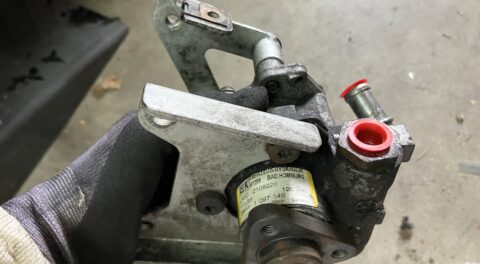
Last week, I resolved to get the free faux tii running so I could evaluate the condition of its transplanted injected engine to help sell it as a parts car. I found its gas tank full of varnish-y goo, cleaned it out well enough that I felt it wouldn’t pose a hazard to the rest of the fuel system, blew out the metal and plastic fuel lines, replaced nearly all of the rubber ones, and discovered, to no surprise, that the fuel pump was seized. I pulled an old spare pump I had out of a box on the shelf in the garage, tested it by wiring it to a battery, verified that it ran, and prepared to swap it in.
I forgot to mention last week that, when I have a gas tank in less-than-perfect condition in a tii, I’ll put a fuel filter between the pick-up tube and the fuel pump to catch stray rust and sediment before it gets pulled into the pump. Because the tii has a fat fuel suction hose, you need a filter with a fat neck. Years back, I found, by opening up boxes at my local Autozone, that the Fram G11278 has a 1/2″ inlet and outlet tube that’s big enough that the tii’s fat rubber fuel line will seal against it when you tighten the hose clamps down. The Fram G11278 appears to now be difficult to find, but any metal-cased mesh filter with 1/2″ ports should work.
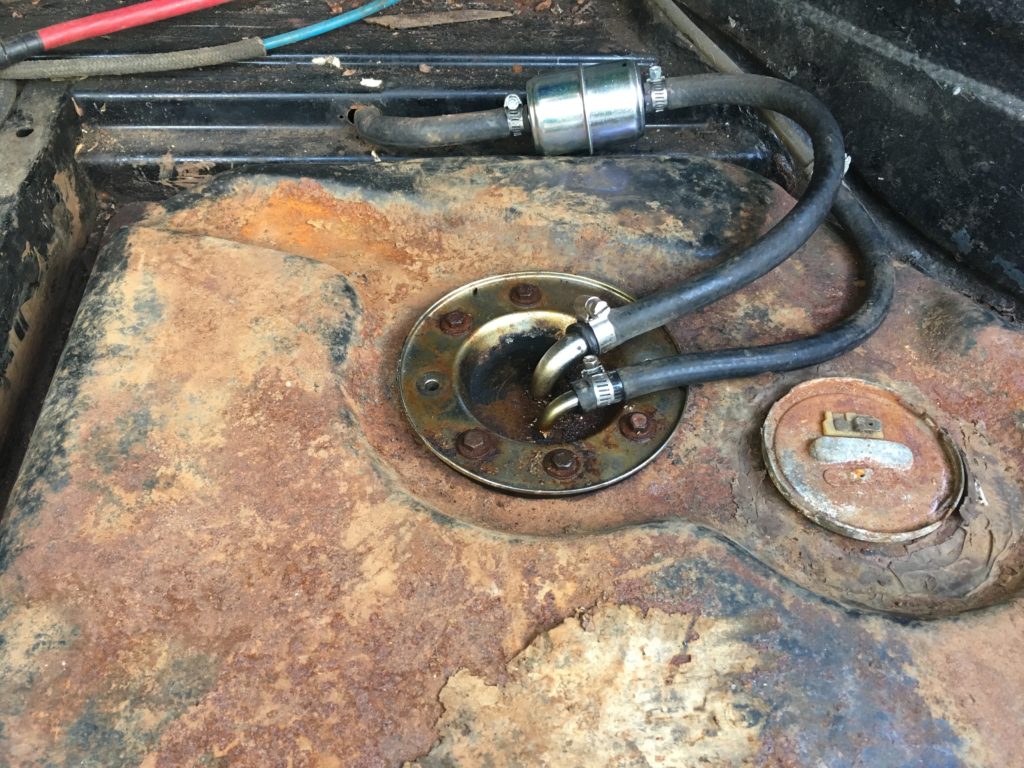
It’s smart to put a filter between a not-spotless gas tank and the fuel pump.
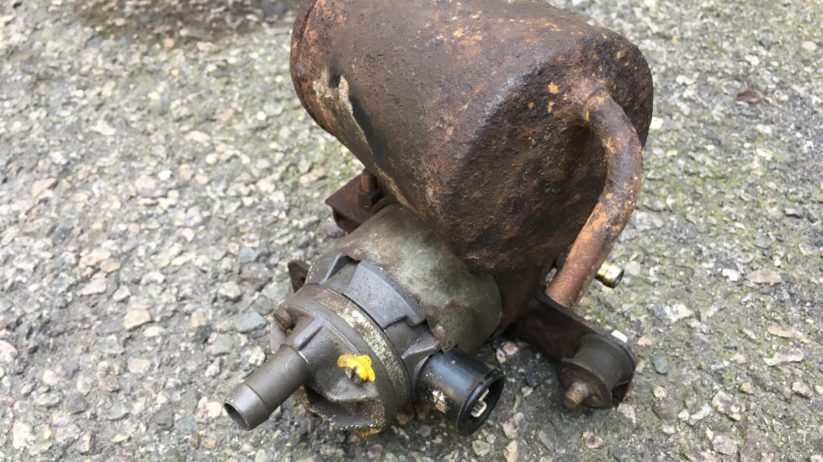
As I described last week, the tii’s fuel pump is mounted in a bracket along with an expansion canister. That bracket hangs upside down from a stationary bracket that’s mounted to the underside of the car. I removed the old pump from the bracket and swapped in the spare.
The two brackets are attached with rubber vibration isolation bushings that have little threaded posts protruding from each end. After 45 years, it’s common for the rubber bushings to break (which is why the fuel pump and bracket were dangling beneath the faux tii like a trout on the end of a fishing line) and leave just the threaded posts and the 10mm nuts in their holes. The problem is that when you try to loosen the nuts, the snapped-off part of the rubber bushing twists on the back of the bracket, and there’s nothing solid to get a hold of with a Vise Grip to keep it stationary while you loosen the nut. There’s really very little choice but to cut the nuts and studs off.
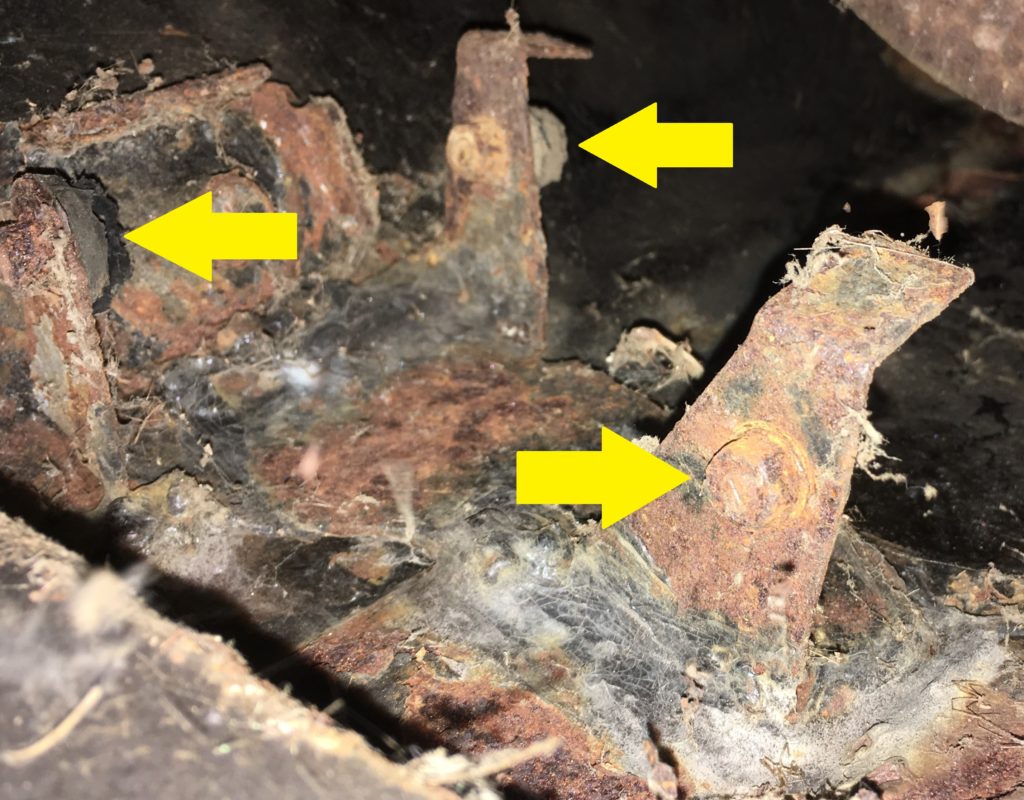
Snapped rubber bushings, rusty nuts and studs.
Due to the occluded access near the stationary bracket, it took me nearly an hour to cut through the nuts and studs using a combination of the Dremel tool, the Sawzall, and a small air hacksaw I’ve owned for 35 years but only used a handful of times. But pressing all of them into service, and contorting myself into odd and uncomfortable positions under the car, I was able to remove the remnants of the deteriorated bushings.
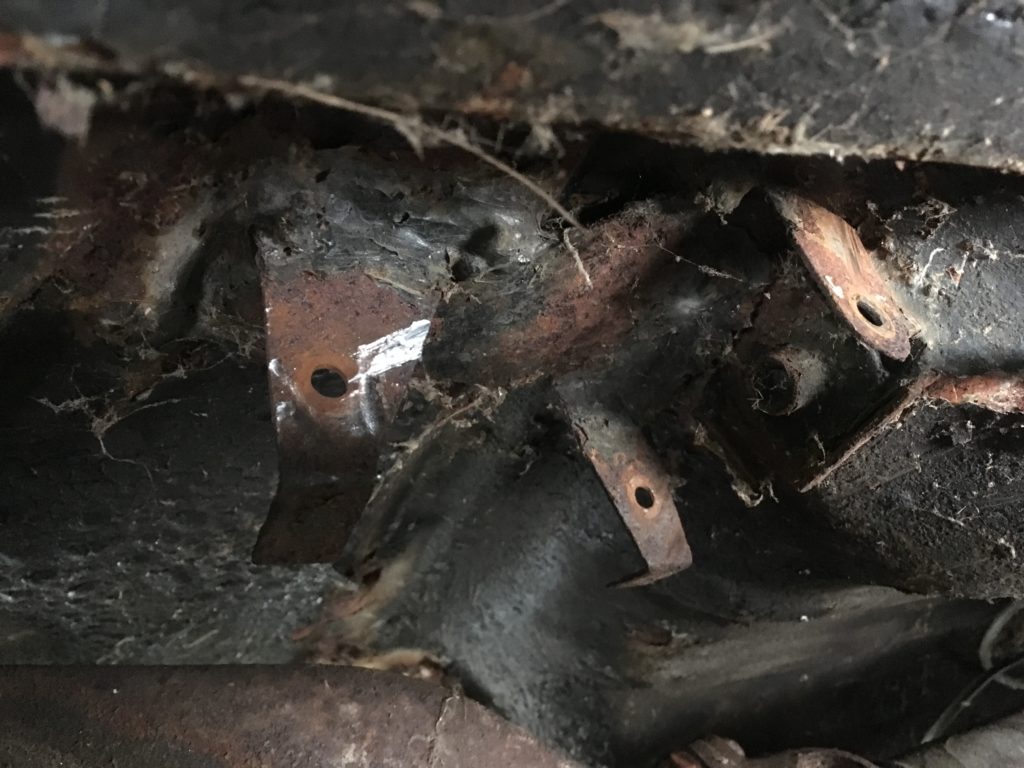
Bushings gone!
Finally, with the holes exposed, I could insert replacement isolation bushings and mount the bracket into which I’d swapped the spare fuel pump. It’s a bit of a pain doing this on your back and trying to reach up with a 10mm wrench to tighten the nuts, but I got it in. I connected the fuel lines, dumped a few gallons of fresh gas into the mostly-cleaned tank, and powered the pump directly off a battery.
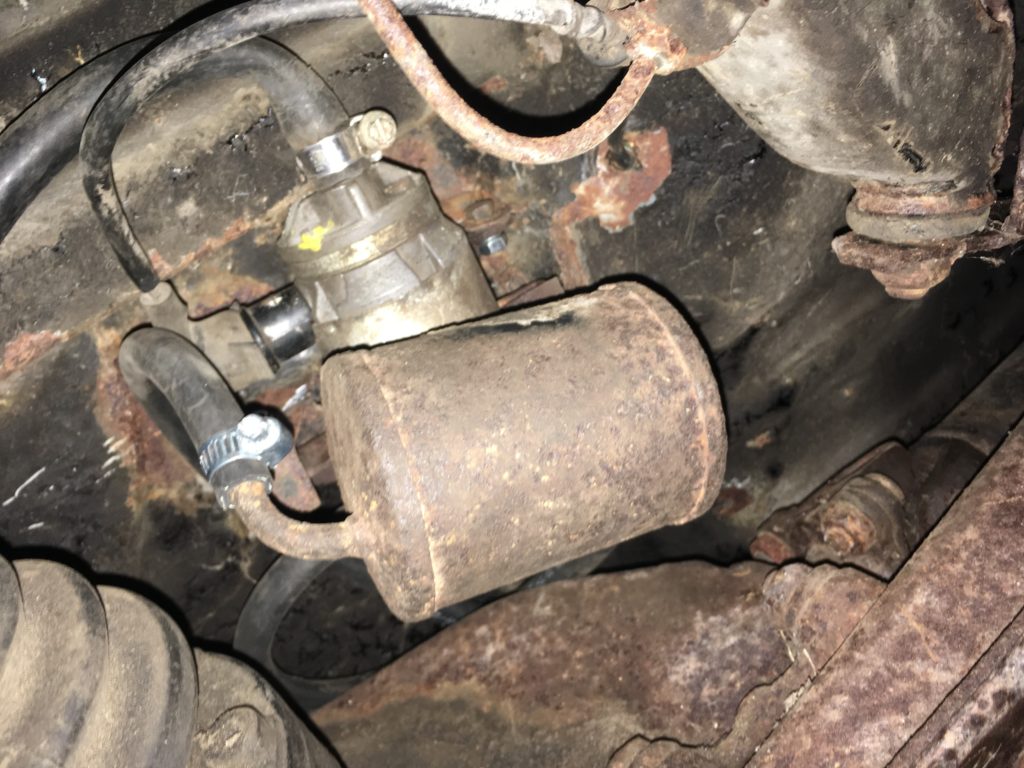
The installed pump, canister, and bracket.
The swapped-in fuel pump ran for a few seconds, then stopped. Drat.
Sometimes these old pumps stick. I rapped it with a ratchet handle and tried again. Nope.
I reversed the polarity of the pump’s leads and ran it. That freed it up. I then corrected the leads, and let the pump run while I checked for fuel leaks. I expected to see gas leaking out the odd union connecting the halves of the makeshift metal fuel send line, but instead I immediately saw gas streaming out of the pump itself.
This wasn’t going well. Remember, I wasn’t trying to put this car back on the road; I was simply trying to start it so I could show interested parties that it was a parts car with a running tii engine. As was the case with scraping the goo out of the gas tank myself rather than paying to have it properly boiled out, I didn’t want to pay a hundred bucks to purchase and retrofit a new Bosch E28 fuel pump just to try to start the damned car.
I took off the hoses, disconnected the pump bracket, undid the 10mm nuts I’d just dutifully tightened, pulled the assembly out, and tested the pump with inlet and outlet fuel hoses stuck into a gas can. I could plainly see that the gas leak was coming from the seam where the cover attaches to the nose of the pump.
When I saw this, I recalled that I’ve pulled these pumps apart before due to leakage from this spot, and remembered being stymied by the fact that I couldn’t find a source, or even a reference, for the exact size for the two rubber o-rings in the nose. But more than that, as I looked at the pump, I had this memory flash across my brain: I realized that the reason I recalled this bit about the o-rings was that, years ago, I took this very pump out of a tii because it was leaking, tried to fix it, and couldn’t.
In the movie Cloud Atlas, a character makes the observation that we go through life crisscrossing over our old paths. This was not a “Hello old friend” moment; this was more like “Why didn’t I throw this in the trash 15 years ago instead of leaving it lying around here like a land mine waiting to be stepped on so it could waste more of my time?”
I rooted around in the garage to find other spare tii fuel pumps. I swore I had two more, but I only found one. I realized that the other one (probably the one that really was “known good”) was still in the trunk of Louie, my Agave ’72tii that is still rubbing elbows with the glitterati at Lance White’s place. I took the only other pump I found and wired it to a battery. It, like the one I’d pulled out of the faux tii, was seized. Sigh.
Okay, I thought, how hard can it be to replace a couple of o-rings?
I undid the four screws holding on the nose of the pump. What you see when you pull it off is the rotary vane and the five little cylindrical bearings that together move the fuel. There’s an o-ring on the inside of the removed cover. If you lift up the metal spacer that surrounds the vane and bearings, you see that there’s a second o-ring underneath it that surrounds the fuel passageways. But because both o-rings are stretched into a teardrop shape, you can’t easily measure them in order to find a replacement.
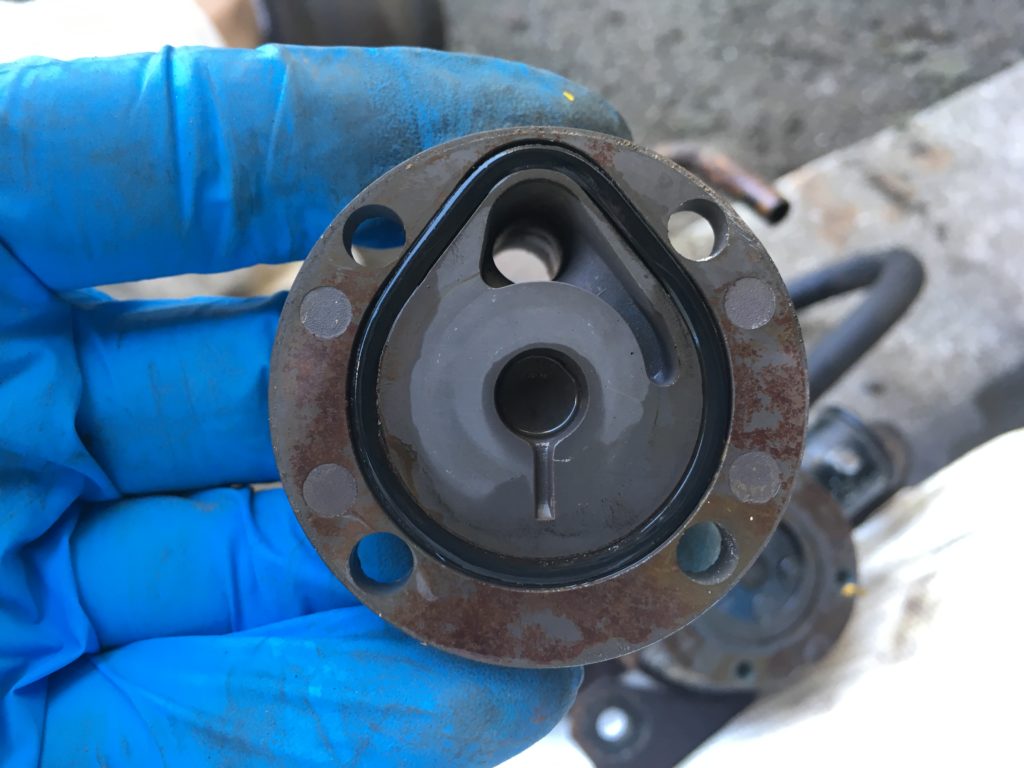
The o-ring inside the pump’s nose.
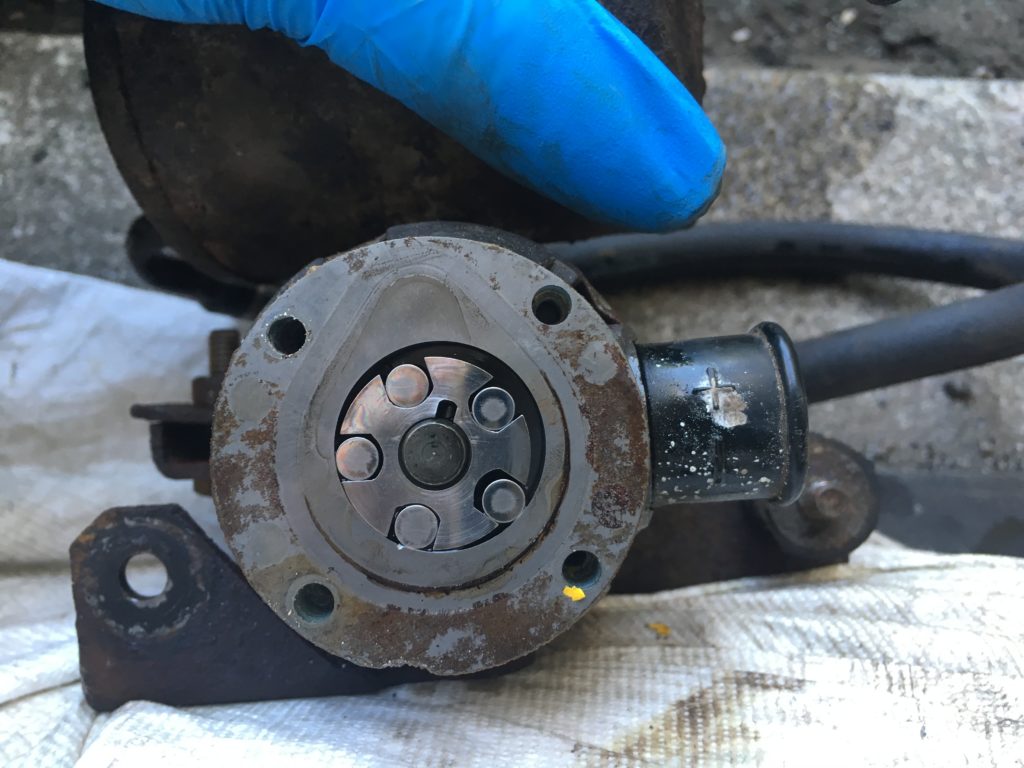
The first o-ring sits against a flat spacer.
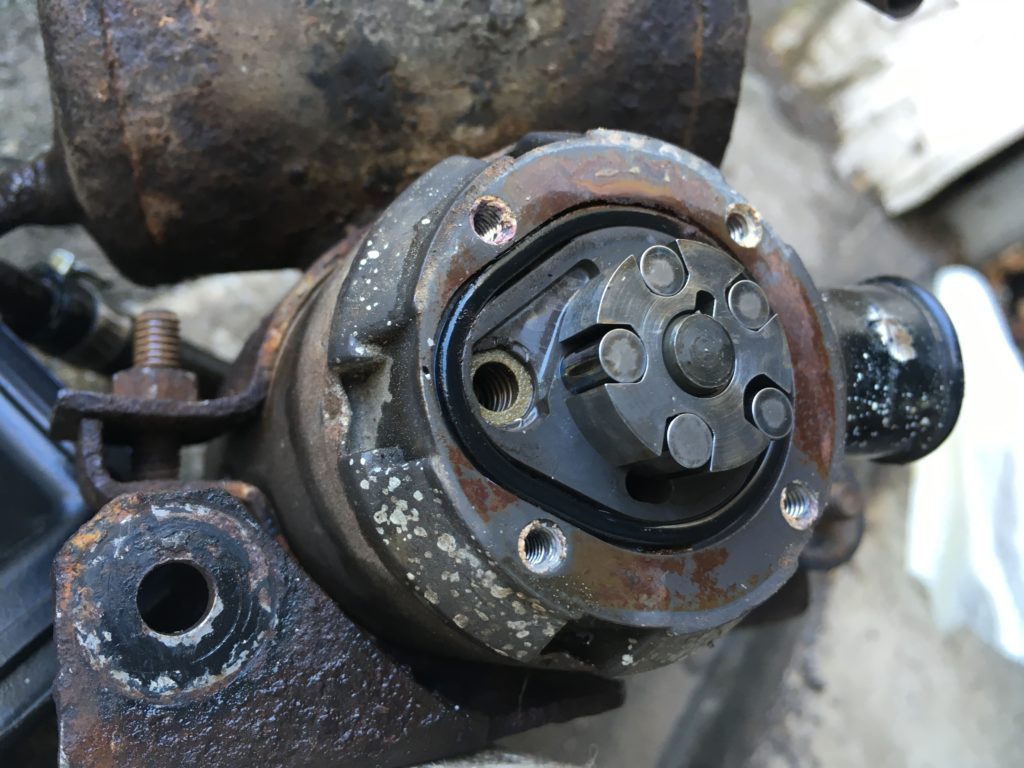
The second o-ring is between the spacer and the body of the pump. This one had some divots in it which were probably responsible for the leakage.
I again looked online, as I had years back, to find a spec and a source for the o-rings, and again was unsuccessful. So I took the pump’s nose down to my local hardware store, and by trial and error, found that a 1 5/16″ ID x 1 1/2″ OD x 3/32″ W o-ring fit the teardrop slot very well. I bought two, took them home, cleaned the rust you see in the photos above off the flat surfaces using 800-grit sandpaper, stuck the o-rings in the pump, put the spacer and the nose back on, and snugged the screws. I noticed that, even with the screws tightened all the way down, there was a gap remaining between the pump and spacer and between the spacer and nose, but I figured it didn’t matter as long as the o-ring sealed and the rotor and bearings spun. I tested it with the battery, hoses, and gas can, verified that it spun and didn’t leak, and skooched back under the car and mated the brackets and hoses back together.
I again powered the fuel system and checked for leaks. This time, I found none. I mentally patted myself on the back for my o-ring-related ingenuity and general New England flintiness.
The next thing to verify was that fuel was returning to the tank. There’s a little check valve on the back of the Kugelfischer injection pump that acts like a pressure regulator. If it’s clogged up with rust, sediment, or goo, it won’t let fuel pass and the fuel pressure will be too high. I felt the rubber fuel line coming out of the check valve, and didn’t feel any vibration. I went to the tank, undid the rubber fuel return line from the pick-up tube, and saw no fuel.
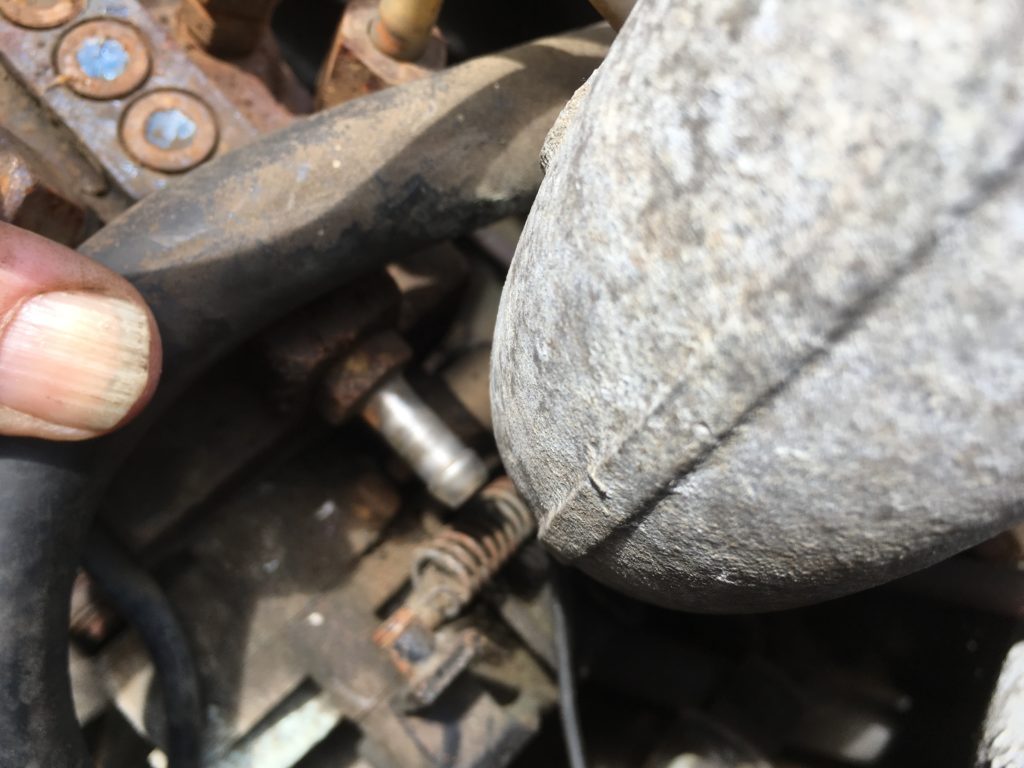
The Kugelfischer pump’s check valve, effectively a pressure regulator.
I was about to undo the check valve and inspect it when I thought to verify that fuel was going into the Kugelfischer pump. I laid my hand on the input hose and, like the output hose, I felt no fuel pulsation. I went to the back of the car and couldn’t feel any pulsation in the output line on the tank. It was as if the pump wasn’t running, but I could hear it running. And I had tested it with a gas can. What was going on?
Then I realized that when I tested the pump with the gas can, I only tested that it a) spun and b) wasn’t leaking. I didn’t actually verify that it moved fuel. I crawled back under the car, undid the hoses and the 10mm nuts again, dropped the pump and bracket, and tested the pump with the gas can. I found that it did not move a drop of fuel.
Crikey.
It seemed clear that my idea that the flanges didn’t need to be flush with each other as long as the o-rings were sealing wasn’t correct. I’d gotten the o-ring size about right, but I needed one that was thinner. I looked on McMaster-Carr. I couldn’t find an SAE-measured o-ring of that size, but when I switched to metric, I found a 32mm ID x 36.8mm OD x 2.4mm W o-ring was very close in size but a bit thinner. When they arrived, I installed two of them and screwed the nose of the pump back down. Unlike the previous 3/32″ o-ring, these appeared to allow the nose and spacer to seal flush. However, mindful of my having done all that work to install the pump last time only to not have it move any fuel, this time I tested it first using the gas can.
And the same thing happened: The fuel pump spun but didn’t actually pump anything.
I was flummoxed. Not being sure how to proceed, I took the nose off the other pump that had been knocking around the garage to see if perhaps I could revive it. I grabbed the impeller and was able to un-seize it, but there was still too much resistance to consider using it.
Next I disassembled the pump that had originally been in the faux tii. Since the gas tank had been filled with varnish-y goo, I wasn’t in the least surprised to find that the pump was in a similar state; it was packed solid with brown snot that had the consistency of partially-cured Permatex Aviation Form-A-Gasket. The rotor, though, did free up and spin without much resistance, so I put this one aside in case I needed to try to clean and revive it.
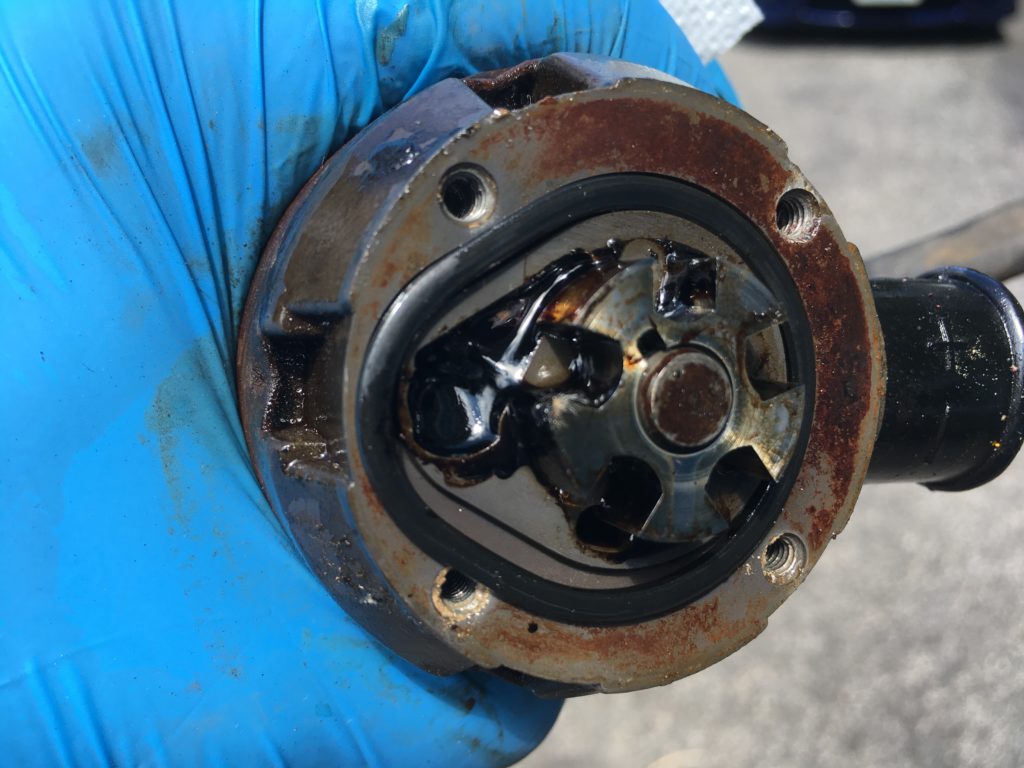
Ick.
Then I looked at the rubber o-rings in the goo’d-up pump, and saw that they looked better (more plump and free of divots) than the ones in the pump I was trying to press into service, so I swapped them in. I tested the pump—reassembled for the third time—and was delighted to find that it spun freely, moved gas, and no longer leaked. So, for now, why the pump wouldn’t move gas when it had anything other than the original o-rings, including the McMaster-sourced o-rings that appeared to fit fine, is still a mystery.
I reinstalled the pump and bracket yet again, and tested things more carefully. I disconnected the fuel input from the KFish pump, put the end of the hose in a bottle, powered the pump, and verified the presence of fuel. I did the same with the return line. I then powered the closed system. I found a small leak at the input of the cold start injector. This was the one small-diameter rubber hose I hadn’t replaced, as I was out of fresh hose. I cut the end off and re-clamped it and that sealed it up.
So, no small amount of work later, I now have a working, acceptably clean, and apparently tight fuel system. Next week I’ll change the oil, do a leak-down and a compression test, then check for spark. From there, it should be an easy step to an attempted start.
Right…just as easy as getting a clean, tight fuel system.—Rob Siegel
Rob’s new book, Just Needs a Recharge: The Hack MechanicTM Guide to Vintage Air Conditioning, is available here on Amazon. His previous book Ran When Parked is available here. Or you can order personally inscribed copies of all of his books through Rob’s website: www.robsiegel.com. His next book, Resurrecting Bertha: Buying Back Our Wedding Car After 26 Years In Storage, will be released in the fall.

