When we last saw my E9’s air conditioning, I had removed the evaporator assembly from under the dash to deal with what I suspected was a clogged expansion valve. I took the assembly apart, replaced the expansion valve, and pressure-tested the valve and evaporator core, only to find that it wouldn’t hold pressure. To isolate the source of the leak, I threw every trick in the book at it (note that there is an actual book), including pressurizing it with nitrogen and spraying every connection with Big Blu soap solution. In case the leak was coming from one of the tubes inside the evaporator core itself, I submerged the entire core in a bucket of water. But I didn’t see any bubbles, and thus could not find the leak.
Stumped, I thought that perhaps the leak was some odd artifact of the test setup itself where I’d plugged up the inlet and outlet ports of the evaporator with home-made adapters that allowed me to connect the gauge set and nitrogen bottle. I instead put the bare evaporator core and expansion valve on the transmission hump, and temporarily connected it to the metal hoses that plumb the car through the firewall. I installed a new receiver-drier, replaced the o-rings on it as well as the ones at the compressor, and pressure-tested the entire a/c system with nitrogen, only to find it still leaking, dropping from 120 psi down to 110 overnight. Again I sprayed every connection with soap solution, but still couldn’t find the leak.
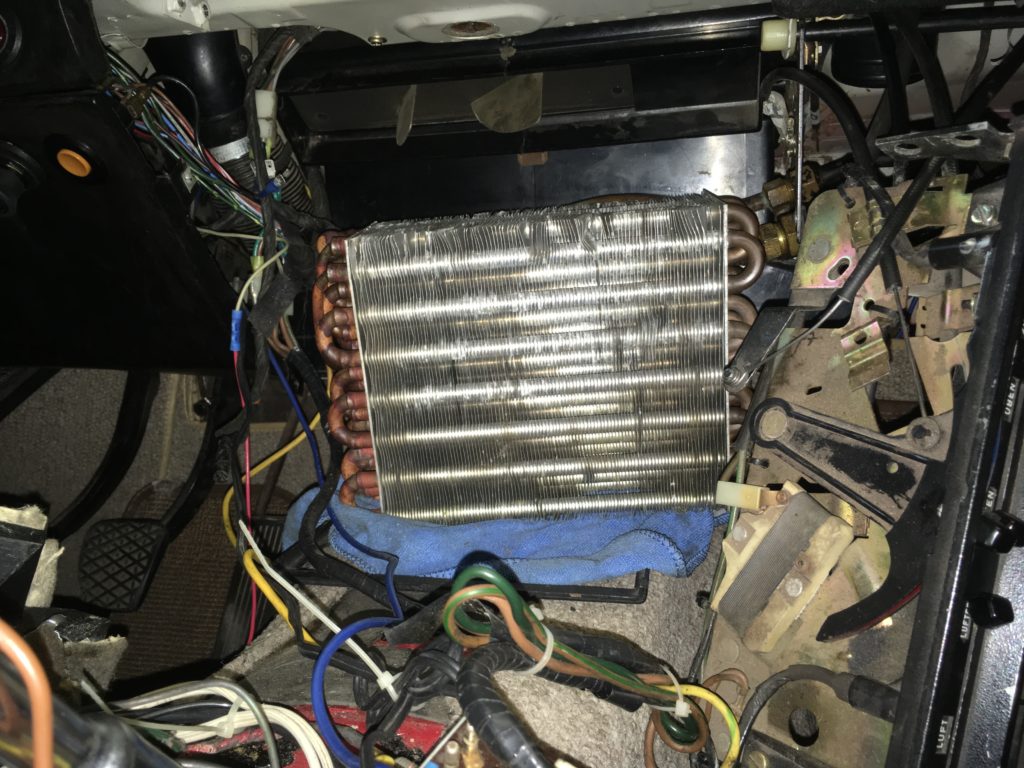
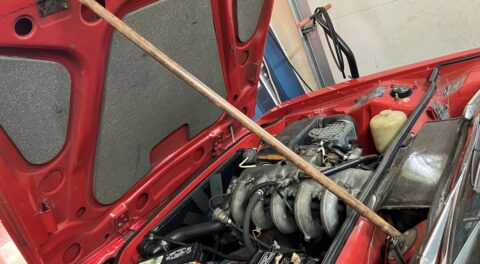
The unenclosed evaporator core sitting on the transmission hump for testing purposes.
I appeared to have little choice but to charge the system with refrigerant—in this case, R134a—and use my leak detector to sniff out the leak. I cringe every time this issue comes up because it raises the specter of intentionally venting refrigerant, and that’s a no-no. To be clear, R134a is not an ozone-destroying agent like R12 is, but it is a greenhouse gas, and according to EPA guidelines, intentionally discharging any refrigerant is illegal. If you have a car that’s charged with R134a or other refrigerant, and the system has a small leak, it’s not illegal to top it off (if it was, everyone buying cans of R134a at Autozone could be thrown in jail), and it’s not illegal to hunt for the leak with a sniffer, but once you find the leak, you likely need to take the system apart to replace the leaking component, and at that point, it is illegal to vent the rest of the refrigerant that’s in the system. Very few do-it-yourselfers have refrigerant recovery equipment (e.g., an evacuation machine), so what you’re supposed to do is take the car to a shop that has it and have them pump the refrigerant out. I’ve certainly done this in the past (like when my Suburban with rear air was filled with 84 ounces of Freon seized its compressor) but I’ve mostly avoided the issue by being assiduously careful about pressure-testing with nitrogen first to get the system leak-free before introducing refrigerant. Yet here I was with the nitrogen testing not having worked.
There are a few ways around this. One is to pressure-test with a gas that will set off the detector. Welding shops will sell or rent you a bottle of nitrogen with small amounts of helium in it. The next time I need to have my nitrogen bottle filled, I’ll probably get it filled with that mix. But pending that, one thing I’ve done is evacuate the system, then shoot some keyboard duster into it. The active ingredient in keyboard duster is difluorethane, which is also used as a refrigerant (R152a), and will set off the detector. I’m not a lawyer, but I believe that, as long as you’re not using duster as a refrigerant, it’s legal to let it escape into the atmosphere, which is, after all, what you’re doing when you use for its intended purpose as keyboard duster.
So that’s what I did. With the naked evaporator core and expansion valve on the transmission tunnel, I hooked up my vacuum pump, drew a vacuum for about 30 minutes, let the keyboard duster get drawn into the vacuum until it stabilized at about 70 psi, then broke out my trusty old Yokogawa H-10G leak detector and passed its probe over not only the threaded connections, but every portion of the a/c system, including every hose and all of the tubing in the evaporator and the condenser.
Nothing.
Crap.
What the hell was going on?
I thought that maybe the sensor in the probe of the venerable Yokogawa had given up the ghost. I took the can of keyboard duster, shot a tiny blast of it at the garage floor, and passed the probe over it. The detector immediately swung into “Danger Will Robinson” alert mode. I entertained the idea that maybe a newer detector might be more sensitive, but after some searching online, I found that the Yokogawa is still revered for its sensitivity, and that used ones still sell on eBay for $100 to $400.
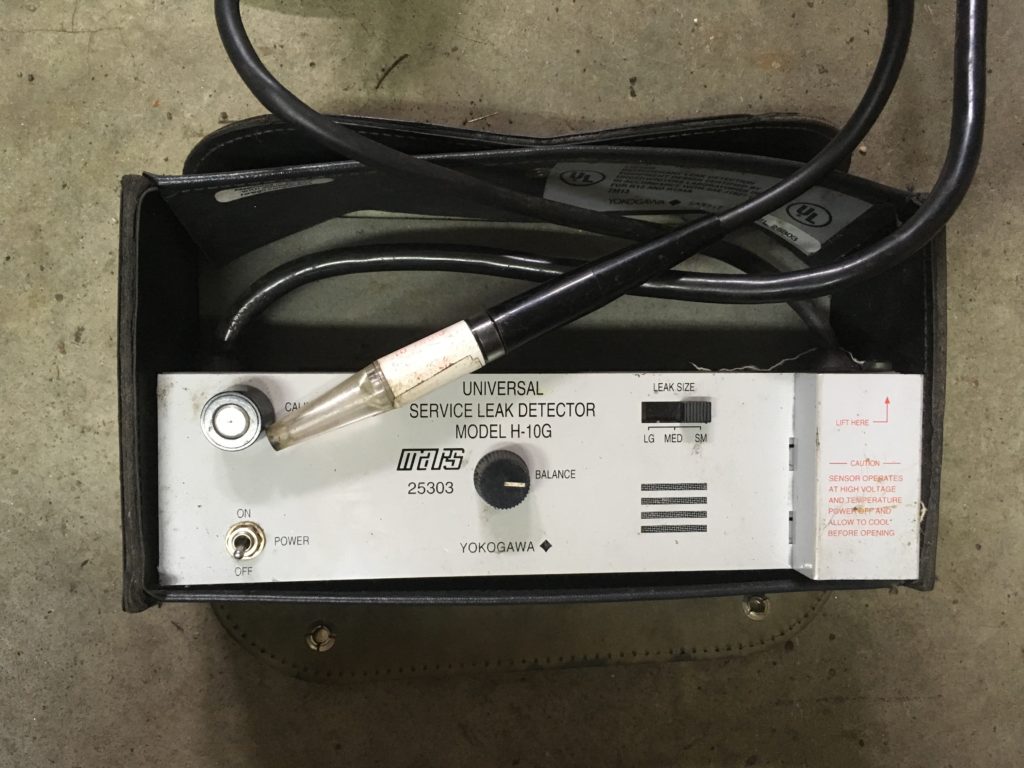
My Yokogawa H-10G—still a mighty weapon in the leak-detection war.
I checked again, this time also running the probe over all the hoses and connections in the manifold gauge set. Still nothing.
Then I thought, “Sheesh, the only things I haven’t checked for leaks are the manifold gauges themselves. But it can’t be those.”
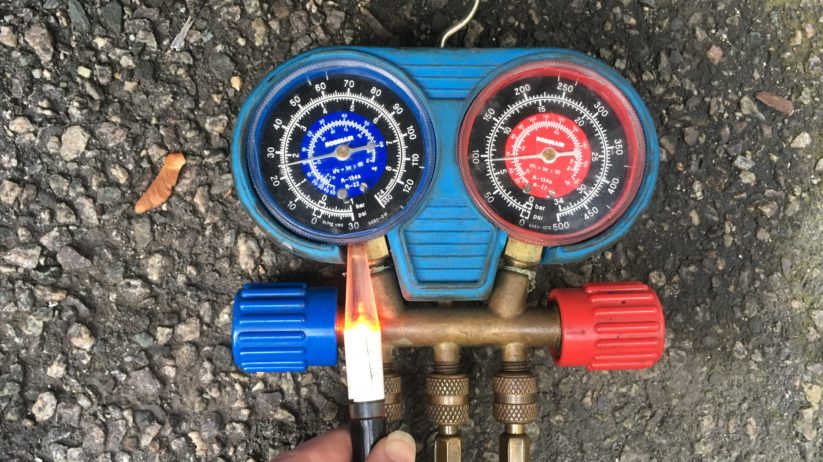
One of the most valuable diagnostic lessons I’ve learned is that whenever I catch myself saying “it can’t be X,” I should admit that I have a big blind spot right in front of X. I put the detector’s probe at the joint where the low-pressure gauge threads into the manifold. The detector began to chirp. I moved the probe up into the gauge itself, and it went nuts. The video can be seen here.
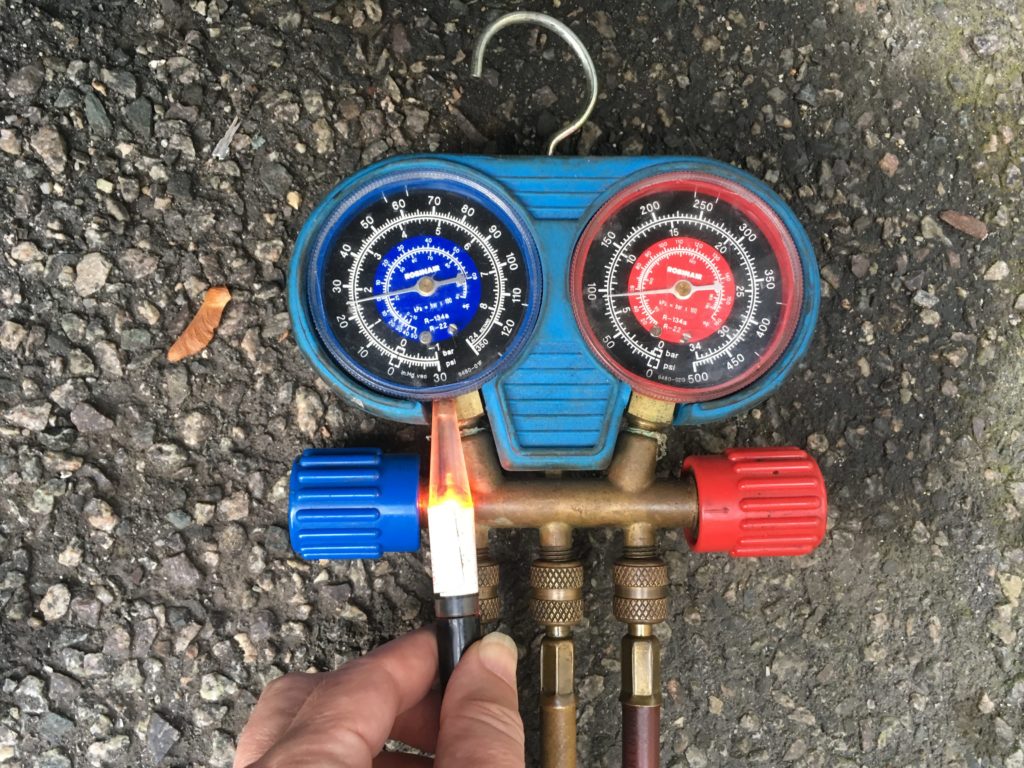
The leak detector lighting up as it finds the leak in the gauge itself.
I ordered a new Robinair low-pressure gauge from Amazon for $24, but then I remembered that I have two sets of Robinair manifold gauges and hoses. One is for R134a, the other for R12. The manifolds and gauges are identical; it’s just the hoses that are different. I swapped hoses with the other manifold/gauge setup, retested, and verified that the leak was gone. I let the pressure sit overnight in the system, and in the morning, it was within 1 psi of where I’d left it.
Whew!
I was all set to begin buttoning things up when I remembered that one of the outstanding issues with the E9’s a/c was that the blower fan seemed anemic, at least as compared with my Bavaria, which uses the same fan motor. With the evaporator assembly still apart, now was the time to do any testing, diagnosis, and repair.
I tested the fan motor by wiring it straight to the battery. It seemed to spin okay. I had another E9 evaporator assembly from a 2800CS I’d parted out over 30 years ago. I tested its motor, and it also seemed to spin okay, at about the same speed as the first, but I had no metric for what “okay” actually was. The next day, I was about to reassemble things, but I tested the original fan motor again, and inexplicably, it was dead. I don’t know if I somehow fried it or if it coincidentally gave up the ghost.
Fortunately, the bare motor was used in not only the E3/E9, but also the E21, E12, E24, and E28. It cross-references to Bosch part number 0130063013 which is readily available (without the dual squirrel cages) from reputable eBay vendor “Partscontainer” for $67. Hoping that this is the last time I remove and crack open theE9’s evap assembly, rather than install the spare used one that’d been sitting for over 30 years, I ponied up the $67 for the new motor.
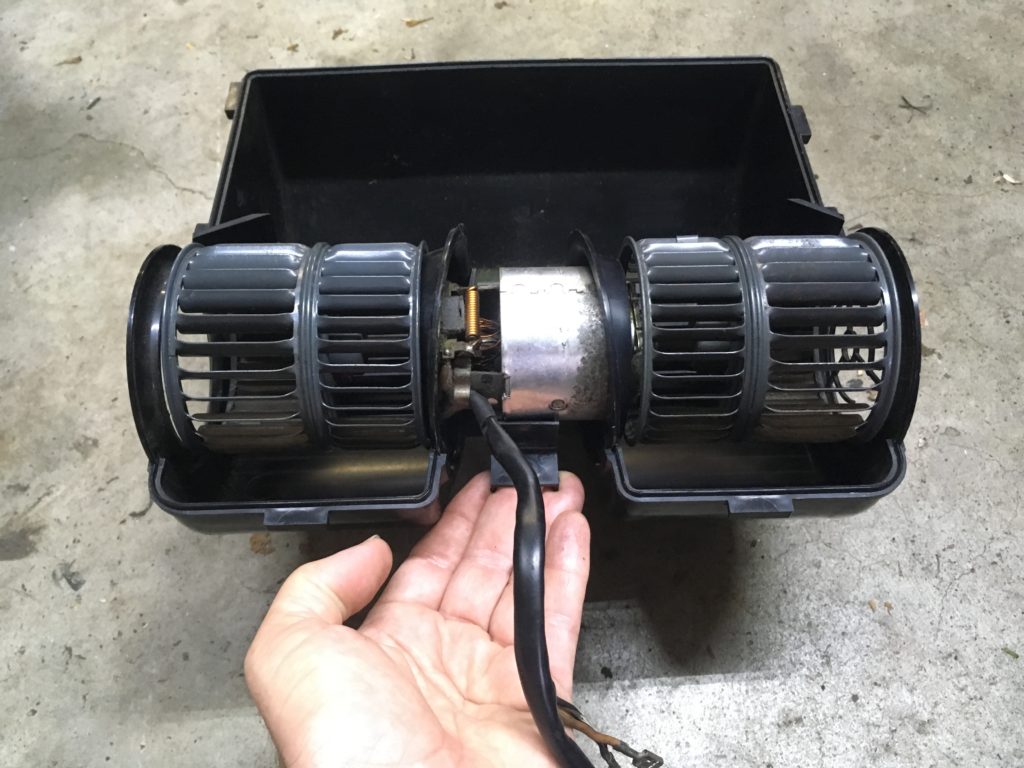
The original squirrel-cage motor is being replaced.
However, when the new blower motor arrived and I began the cage swap, there were a few surprises. I think I’ll leave those for next week.
—Rob Siegel
Rob’s new book, Just Needs a Recharge: The Hack MechanicTM Guide to Vintage Air Conditioning, is available here on Amazon. His previous book Ran When Parked is available here. Or you can order personally inscribed copies of all of his books through Rob’s website: www.robsiegel.com. His new book, Resurrecting Bertha: Buying Back the Car My Wife and I Drove Off From Our Wedding, will be released in the fall.