The piece I wrote last week in which I compared and contrasted the tii, the Bavaria, and the 3.0CSi was a natural outgrowth of circumstance; I’d just successfully returned home from 2,000-mile trip to the Vintage with Bertha, my heavily patinaed 2002, taken it to the storage space I rent in Fitchburg, and swapped it for the Bavaria. While I was there, I ran the other cars around the block, including the ’72 tii. Then, with summer at the threshold, I took an Uber to the other storage area, where I keep the 3.0CSi, and brought it home, almost giddy in the knowledge that I’d have that E9 coupe, the Bavaria, and the nascent Lotus to play with all at the same time.
But while I was driving the 3.0CSi home, the bubble burst a bit. It was hot enough out that I switched on the a/c, and to my disappointment, it blew warm.
When I got the car home, I hooked up the manifold gauges and found that the a/c had static pressure of about 40 psi, indicating that it had refrigerant in it, but not enough; a rule of thumb is that static pressure should be about equal to the ambient temperature in Fahrenheit. I turned on the a/c and the gauges moved as they should—the high-side gauge went higher and the low-side gauge went lower—indicating that the compressor was functioning. However, I noticed that the low-side gauge went very low, nearly into vacuum, which is an indication of a possible clogged expansion valve. I shot a can of R134a into it, saw the pressures rise, and felt the inlet pipe cool somewhat, but the vent temp gauge wouldn’t go any lower than 60ºF.
Then, when I shut off the a/c, I noticed something. Normally, when you shut off the compressor, the high- and low-side gauges equalize within a few seconds to the same static reading—but instead, the gauge readings moved very slowly, indicating a possible restriction in the system, most likely in the expansion valve.
At this point I realized that this all felt familiar, and remembered that the system showed this same behavior at the end of last summer.
It’s been twenty years since I retrofitted the a/c system into this car; it was the first a/c project on this scale that I’d ever done, and I did it because even though Massachusetts ain’t Florida, the comfort of an air-conditioned car dramatically increases my enjoyment of the car, which in turn increases my use of the car during the short summer driving season.
The retrofitted system consisted of a used original evaporator assembly and console from a rotted-out car, a new Seltec rotary-style compressor (similar to the better-known Sanden), a large condenser and fan mounted in front of the radiator, and all-new hoses and fittings.
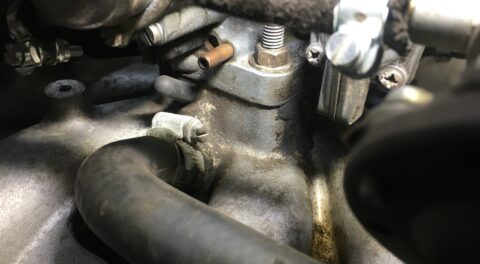
The E9’s a/c system is very similar to the Behr system in a 2002; the evaporator assembly is a plastic tub that houses the evaporator core, expansion valve, and blower motor, and has temperature and fan controls that are separate from those of the heater box (that is, it’s not a climate-control system). There is, however, one crucial difference: In the 2002, the cold air blows directly out the front of the evaporator at you, whereas in the E9, the opening of the evaporator assembly is at the top, not the front, and there’s a piece of ductwork that connects this opening to the same front-mounted dash vent from which fresh air emerges. This duct piece, labeled “intermediate piece” in Realoem, is made out of plastic that’s now 46 years old, and it cracks if you look at it crooked.
In addition, it’s very difficult to remove the evaporator assembly and the intermediate piece without moving the slider and vent panel out of the way, and that requires undoing the Bowden cables that connect the dash sliders to the heater box. Pile onto this the fact that disturbing the center console risks tearing the brittle old vinyl covering of the old particle-board side pieces, add a sprinkle of “The E9 is the nicest car I own,” and you can appreciate that pulling the evaporator assembly out of this particular car to replace the expansion valve is my least-favorite BMW repair, bar none. I know—because I had to do it shortly after I’d first installed it, because I’d overtightened the expansion valve and cracked the copper flare on the evaporator tubing.
Honestly, I’d rather replace a clutch.

I really, REALLY hate to crack this beauty open.
When I installed the system twenty years ago, I charged it with R134a because the accepted wisdom at the time was that Freon (R12) was both illegal and unavailable. The a/c functioned well enough to be useful, as long as it wasn’t beastly hot and humid out. I found that every year when I drove the car to the Vintage, I’d hit a stretch in Pennsylvania where it would be in the mid-90s and drippingly humid, and the a/c would struggle.
I did other things to keep the cabin cool, including tinting the widows and installing a coolant-bypass valve so that the heater core wouldn’t stay hot. These helped enough that I left the E9’s a/c system alone—until two years ago.
When I began writing my a/c book, I included a lot of detail about how when you convert a vintage car from R12 to R134a, you should replace the old serpentine-flow condenser with a modern parallel-flow condenser that’s much better at dumping heat to the outside. This made me realize that the E9 did not, in fact, have a parallel-flow condenser in it; those were not yet really a thing when I installed the system. So about two years ago I took the plunge and installed a parallel-flow condenser. Part of the reason for this was that a clevis pin had flown off a truck in 2013; the pin crashed through the front grille, and embedded itself between two of the serpentine tubes in the condenser. It didn’t puncture them, but it made me feel that perhaps the condenser was not long for this world (you can read about it here).
The parallel-flow condenser did seem to improve a/c performance, though not dramatically. In fairness, the blower motor in the evap assembly is a bit anemic—it just doesn’t move that much air—but that’s a separate issue from the refrigerant used.
So here it was, the beginning of June: The E9 was finally back at my house where I could hop in it, drive it, and enjoy it, but the a/c wasn’t working. I had some indication that the problem was a clogged expansion valve, but that diagnosis wasn’t a slam dunk. Should I leave the a/c alone, use the car while it was here, and leave this awful repair for the winter, or should I dive in and get a cold car before the bulk of the summer heat hits?
In I went—but all the time I was thinking, “If I don’t find that expansion valve plugged with crud, I’m going to be pissed.”
I got the evaporator assembly out in one evening session. It actually wasn’t that bad; the first step is pulling out the power-window switches, reaching in with a screwdriver, and unscrewing the two little Phillips screws holding down the shift surround.
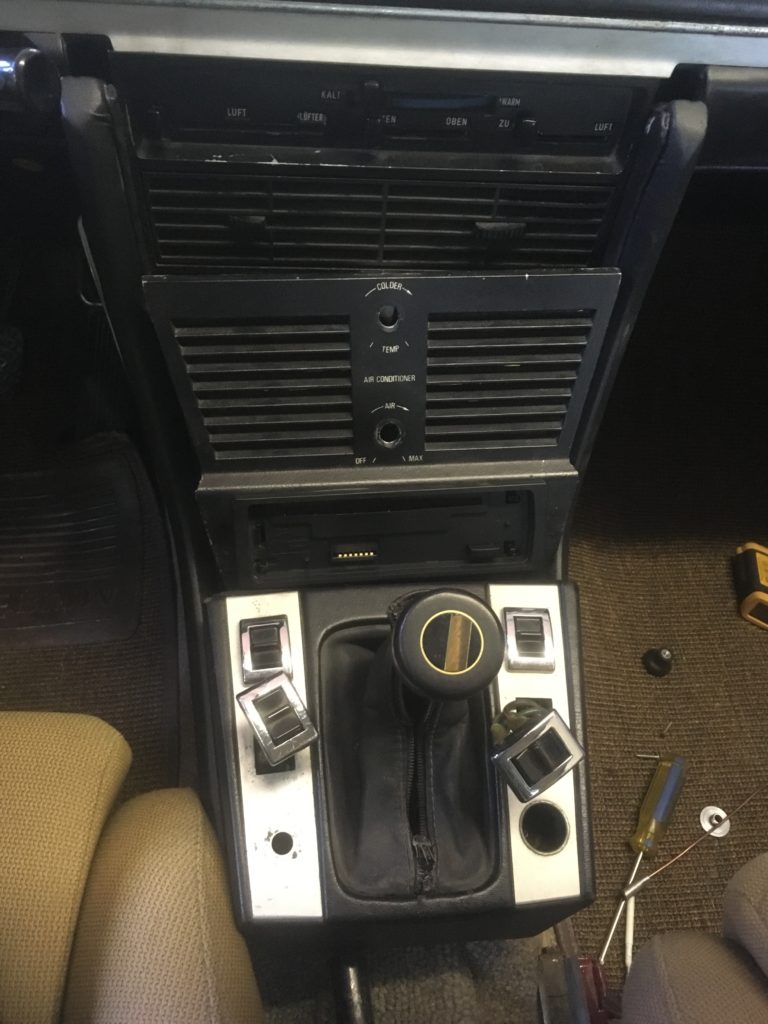
Step one: The Phillips screws holding the shift surround down are underneath those two rear switches.
Then the window switches can be disconnected, the wires fed through, the surround lifted up, and, the switches reconnected so that you don’t lose them or forget how they go. The faceplate and radio can then be pulled out.
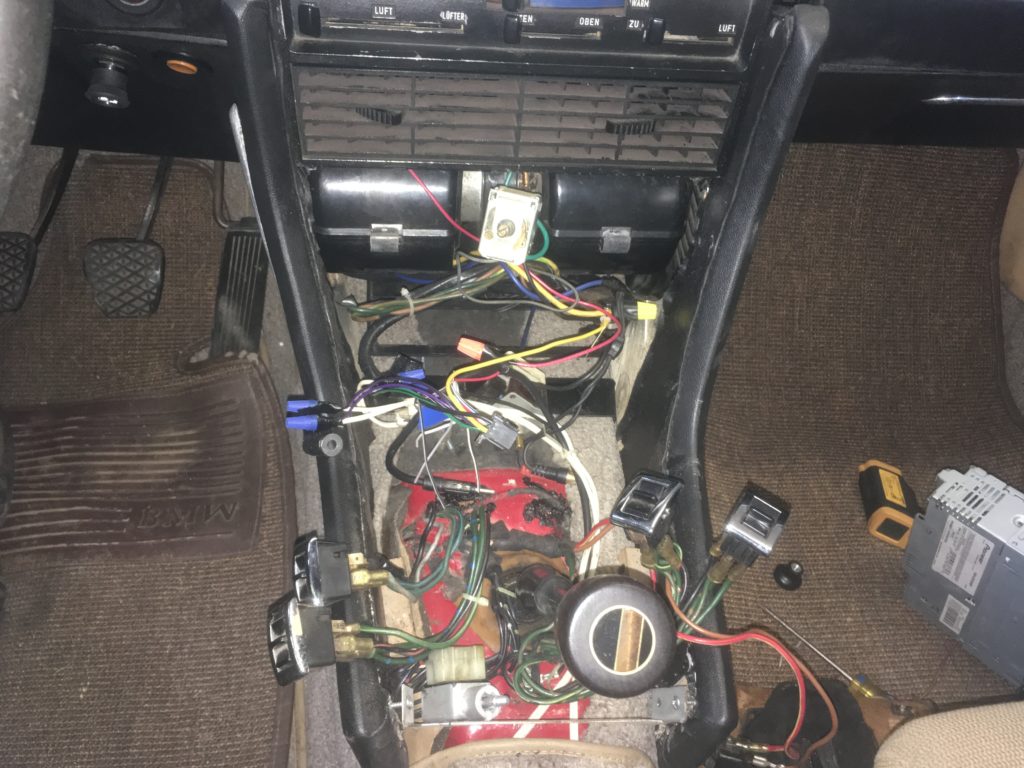
Step Two exposes the rat’s nest of wires.
Next, the entire console can be pulled forward and out—at least it could in my car. Of course, it’s quite possible that I never screwed it down twenty years ago.
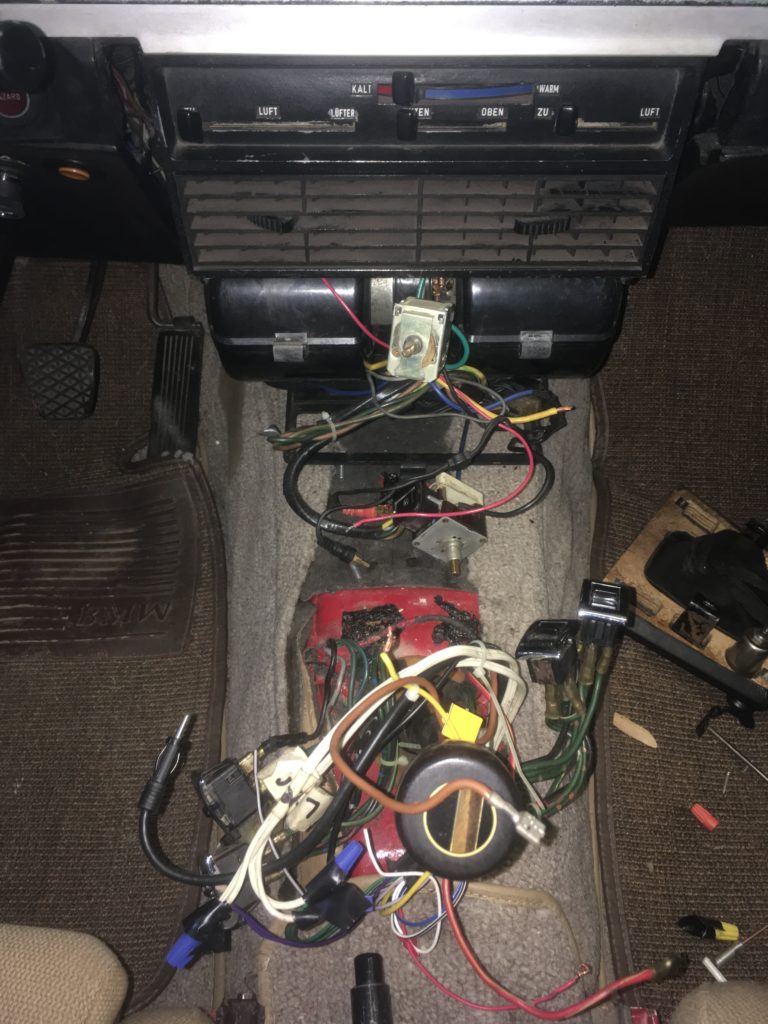
Step 3: Console begone!
Next, the panel with the vent and the levers controlling the Bowden cables has to be moved out of the way. It’s held in place with two 10-mm bolts on each side; once those are removed, the panel can be swung to the right. I had a hazy recollection that, when I last did this twenty years ago, that was enough to let you draw out the evap assembly and duct piece, but this time I couldn’t get the vent panel far enough to the right with the cables connected, and the corner of the panel began rubbing a mark in the near-mint side-piece of the dash.
I searched on E9coupe.com, and found a post that confirmed that you do need to do what I dreaded: unfasten the four Bowden cables and remove the clips that hold the cable housings in place.

You can see several of the Bowden cables, their little clips, and their attachment nuts.
Finally, with the vent and sliders swung out of the way, the intermediate piece and evaporator assembly were exposed and could be withdrawn. I thought that the assembly was bolted down securely onto the black plate in the foreground, but apparently I’d installed it all loosely enough that both could slide forward without self-destructing.
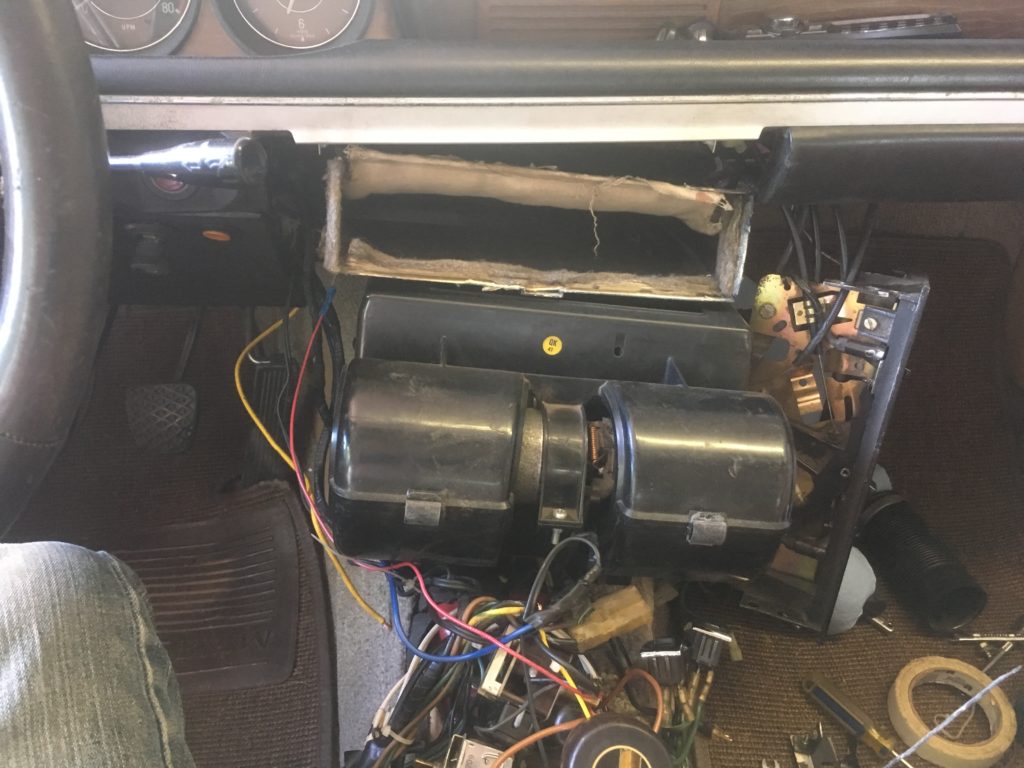
Light at the end of the tunnel: The evaporator assembly and “intermediate piece” are ready to come out.
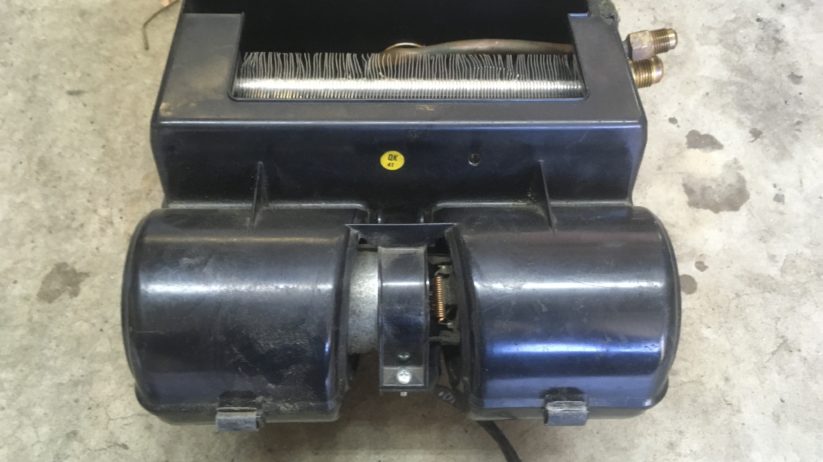
The evaporator assembly could then be set down and disassembled.

Haven’t seen YOU in a while. And I now remember that I never liked you.
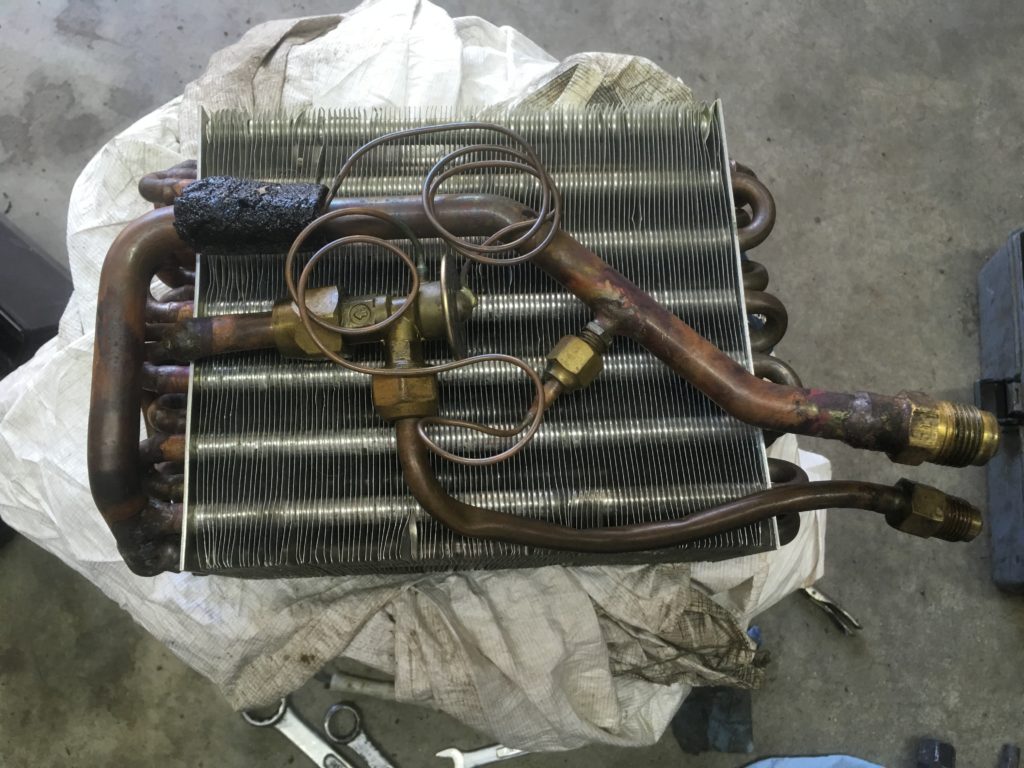
The evaporator core and expansion valve are ready for surgery.
I removed the expansion valve and inspected it, and found a small amount of black particulate contamination, but it certainly wasn’t a wholesale smoking gun.
Hmmm.
That’s where we are. I’ve ordered a new expansion valve. And because there’s some visible contamination, I’ll flush the entire system out before reassembly. But boy, I hope this is all worth it.—Rob Siegel
Rob’s new book, Just Needs a Recharge: The Hack MechanicTM Guide to Vintage Air Conditioning, is available here on Amazon. His previous book Ran When Parked is available here. Or you can order personally inscribed copies of all of his books through Rob’s website: www.robsiegel.com.