For most of the first four months of 2019, my head was living in Lotusland as I worked like a fiend to resurrect the 40-year-dead 1974 Lotus Europa Twin-Cam Special that’s been occupying precious garage space since I bought it in a weak moment back in 2013 as a present to myself when my first book was published. But as the big season clock swung around to spring, my focus began turning to Bertha, my reclaimed 2002. My plan was to consummate her revival by driving the car to both MidAmerica 02Fest in April and the Vintage in May.
Even though a number of events in my personal life put the kibosh on MidAmerica, it still seemed like there was plenty of time to prepare Bertha for the Vintage—but time did what time does, and I suddenly found myself ten days before the departure date with a car I’d done virtually nothing to since the Lama, my sight-unseen-bought 5 Series flipping project, invaded the premises in September.
I began the work by examining my own list of the “Big Seven” things most likely to strand a vintage car:
Ignition: Bertha was still running around on the points and condenser that were in her when I woke her from a 26-year snooze last summer. These days, much is written about the declining quality of new-car parts, including points that have the nylon separation block snap off and condensers that fail within five miles, so using old but proven ignition parts actually makes more sense than you’d think. But this didn’t mean that I wanted to leave it that way for a nearly 2,000-mile round-trip drive.
I’m a big proponent of replacing points and condensers with an electronic triggering module. For a 2002, the most commonly used one is from Pertronix. I’ve had them in many cars, and the only failures I’ve experienced occurred when I wired them wrong. They cost about $85. However, I found a vendor on eBay selling a similar module from Hotspark for $40. I searched on bmw2002faq.com for reviews, and was delighted that the gestalt seemed to be, “Basically the same as a Pertronix, basically as reliable.” I installed and tested it. The rubber grommet that goes out the condenser hole was easier to install than the one for the Pertronix. So far so good.
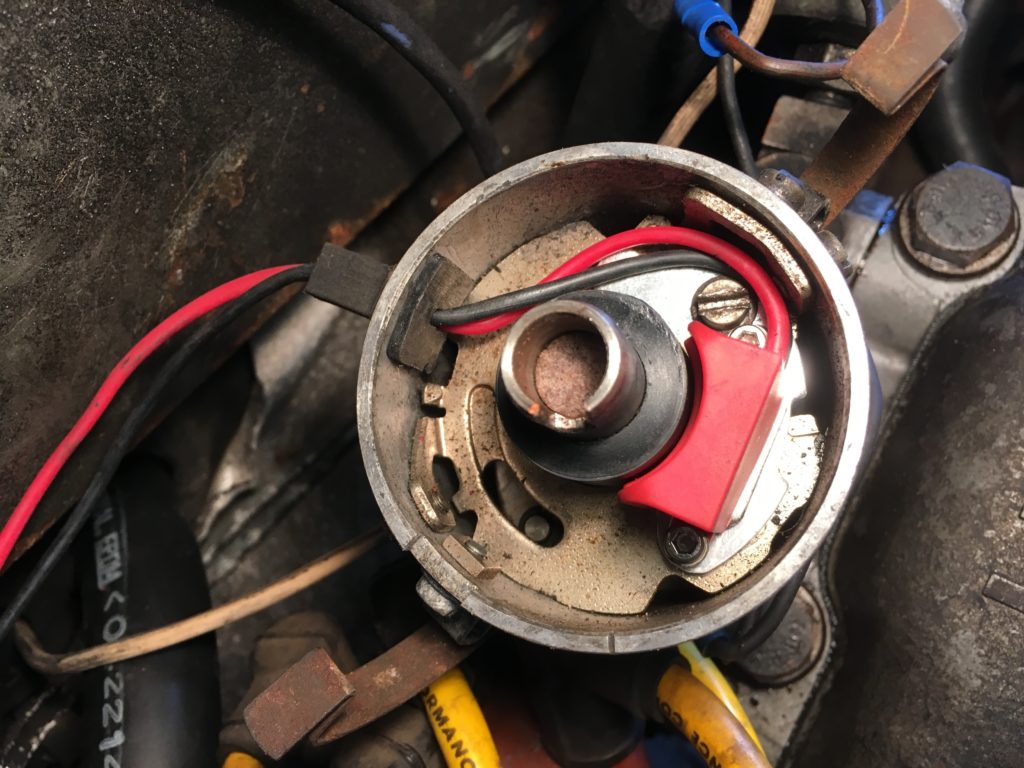
I installed the Hotspark triggering module in Bertha’s distributor. Yes, I added some slack to that black wire.
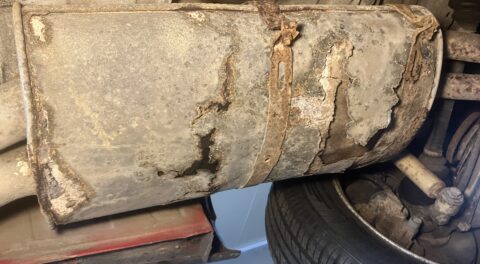
Fuel delivery: Bertha has a highly non-stock fuel-delivery system consisting of a pair of Weber 40DCOE sidedraft carbs fed by a trunk-mounted electric fuel pump—all installed 34 years ago. Last summer, I found that the metal fuel line running under the car had rusted and was leaking near the front. At the time, I simply cut off the rusted section and ran a longer length of rubber fuel hose to it. So fuel-prep-wise, the first thing I needed to do was inspect the rest of the metal line.
To my dismay, I discovered that other sections of the metal line had the unmistakable “coffee cake” look of non-trivial corrosion you often seen on brake lines before they pop. In addition, I found that, contrary to my memory, I had not replaced all of the rubber fuel hose under the car; the long section that leads from the tank to the back end of the metal line was clearly decades old. And the fact that the electric fuel pump itself was installed partway through Reagan’s second term gave me pause.
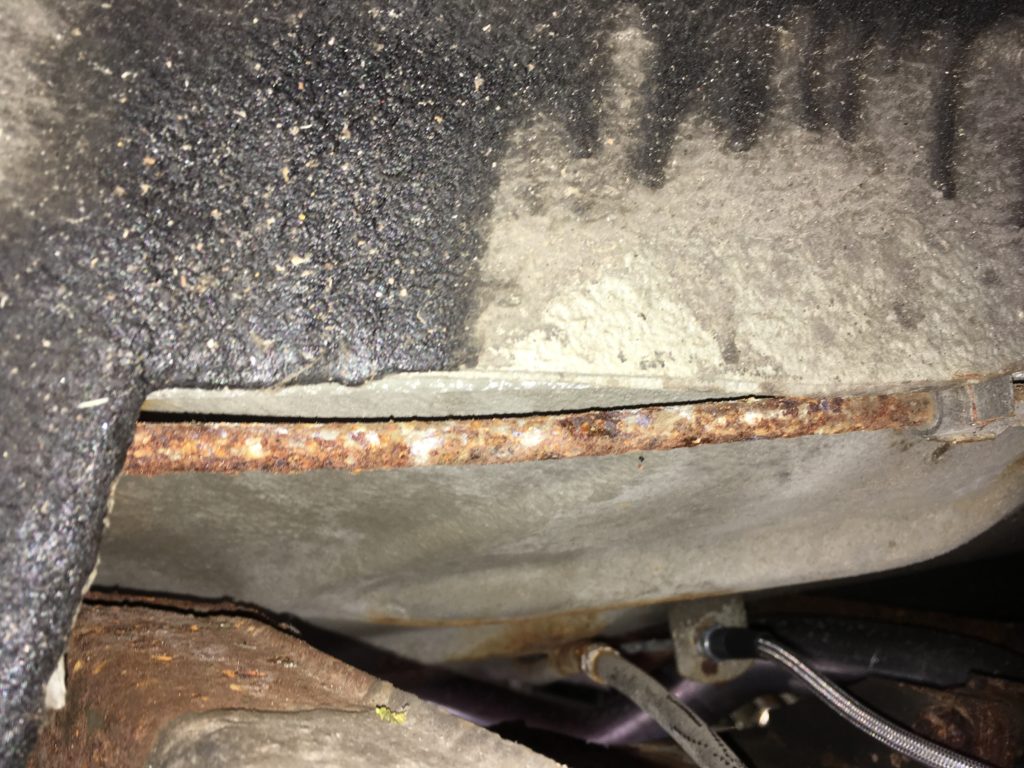
A worrisome section of rusty “coffee cake” fuel line. What is seen can’t be unseen.
So I addressed all three issues. On a stock 2002, the metal line is actually the fuel-return line; it’s the white plastic line that runs inside the car that’s the fuel-delivery line. When I built Bertha, I originally planned it to be a fuel-injected tii-tribute car, in which the metal line is the delivery line, so I plumbed it that way, but then wound up using the Webers instead. Now I blew out the long-unused white plastic line with compressed air and plumbed the fuel system using that line instead of the metal line.
I’d bought an EMPI electric fuel pump for the Lotus, but wound up repairing the car’s mechanical fuel pump, which left the electric pump up for grabs. I used it to replace Bertha’s 34-year-old pump, mounting it lower in Bertha’s trunk and with a less circuitous route than the previous pump. I then connected everything using new fuel hose and band clamps. Done!
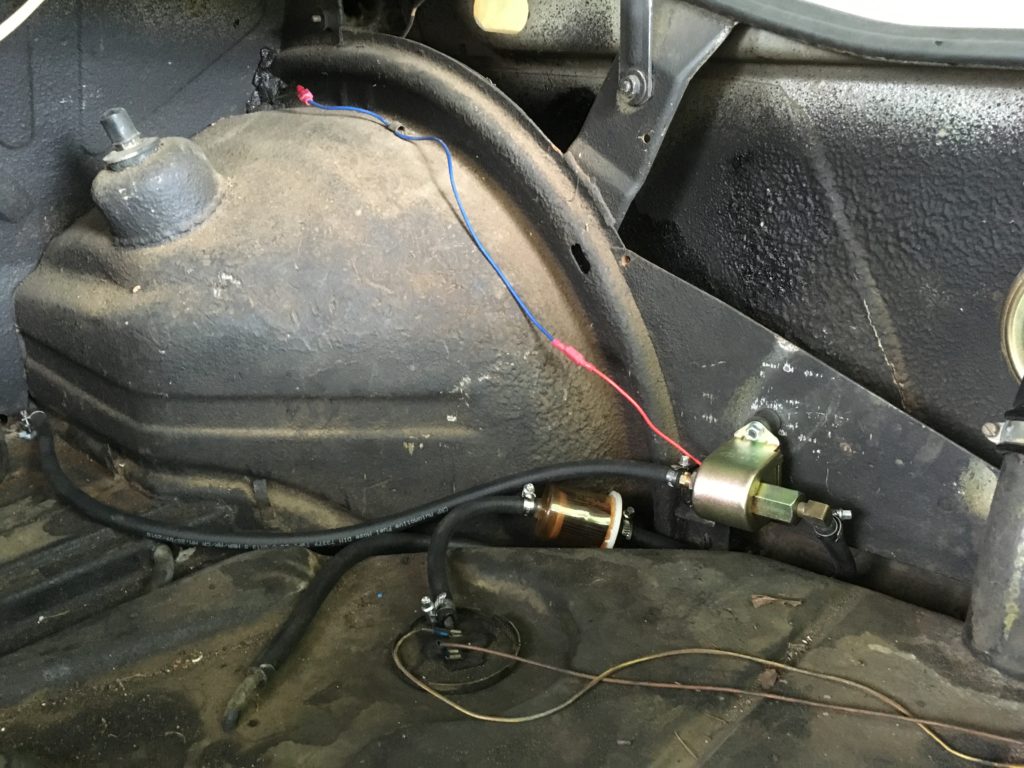
The new fuel pump was relocated and plumbed in a less circuitous manner.
Shortly after this, my friend Lindsey Brown mentioned to me that he’d prophylactically replaced the aging electric fuel pump in his 2002, only to have the new one fail, requiring him to reinstall the original one on the side of the road. I take omens like this seriously. I’m thinking of swapping them back.
Cooling system: This one was a tough choice. I’d installed a factory tropical radiator in Bertha in the 1980s, so at least the radiator was 34 years old, and not 44. When I resurrected the car last summer, I drained the cooling system, wasn’t horrified at what came out, rocked the fins on the water pump fan fore-and-aft to check for play in the pump bearing, thought it was fine, scraped the corrosion off the aluminum coolant necks, and replaced any hoses that were either pillowy soft or rock-hard. On the one hand, I’ve made a career out of preaching prophylactic maintenance of the cooling system, but I’d driven the car last summer during hot weather, and cooling-wise, things seemed absolutely fine; I think I’ll leave it alone and just travel with a spare water pump. I also have an unused Spectra metal 320i radiator I may throw in the trunk. (Of course, when you don’t trust your cooling system enough to be traveling with a water pump and a spare radiator, you need to ask yourself if you’re making the right decision.)
Charging system: Last summer I installed a new internally-regulated alternator and an extra grounding strap to the engine. Check.
Belts: On a 2002, there is only one belt. It was replaced last summer, although I always carry a spare anyway. And the new alternator has new bushings, so there’s no issue of worn alternator bushings causing the belt to loosen. Check.
Clutch hydraulics: I replaced the master and slave last summer. Check.
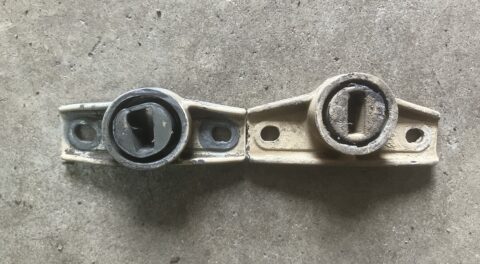
Ball joints: These seem like an artificial addition to my list of seven, but ball joints sit at the nexus of the steering and the suspension; they take all the pounding from bumps and potholes, and if they fail catastrophically, you lose control of the car. The ball joints in 2002s are originally riveted to the lower control arms, so if you find ones with the rivets still there, they’re 45 years old. 02 ball joints are usually quite sturdy, but if the rubber boots tear, moisture and dirt can get it in and ruin them.
Bertha is running on her original ball joints, but the boots are fine, and they pass the “squeeze ’em with a big pair of Channel Lock pliers to look for play” test. Check.
Bertha’s still wearing her original riveted ball joints.
While I was checking out the front end, though, I did notice that the left front wheel bearing was a little loose. I removed the cotter pin, tightened the castellated nut by one notch, verified that, as per the manual, I could still move the big washer with a screwdriver, and re-pinned it.
With “The Big Seven” addressed (or, in the case of the cooling system, ignored at my own peril), I then addressed the Bertha-specific issues:
Valve adjustment and oil change: Like, duh. Bertha’s head had been rebuilt last summer. Both of these steps were overdue.
Driveshaft alignment: These days it is well known in 2002 circles that driveshaft alignment is critical to a successful 5fivespeed conversion. Ironically, the giubo, or flex disc, doesn’t really like to flex; it’s not a universal joint, and improper alignment can dramatically shorten giubo life. The driveshaft length, and the angle that the driveshaft attaches to the giubo, should both be such that the giubo is flat and unstressed. After the driveshaft is shortened to accommodate the longer five-speed, its length is certainly fixed, but the differential can be moved back and forth slightly, the center support bearing can be shimmed down, and the transmission can be shimmed up or down. However, when Bertha’s five-speed was installed 34 years ago, this kind of attention was rarely paid to driveshaft alignment.
Bertha’s giubo was clearly distorted.
After I replaced the cracked giubo during the car’s resurrection last summer, I found that the new one was obviously distorted. There appeared to be two reasons. First, the driveshaft simply seemed too short, even after using up all the play in the differential mount. Second, with the giubo bolts partially loosened, I could see that the gap between the giubo and the flange yawned open at the bottom, indicating that the center support bearing needed to be lowered. Last summer I used washers to lower it by an almost comical amount, which made things slight better, but clearly something was still amiss.
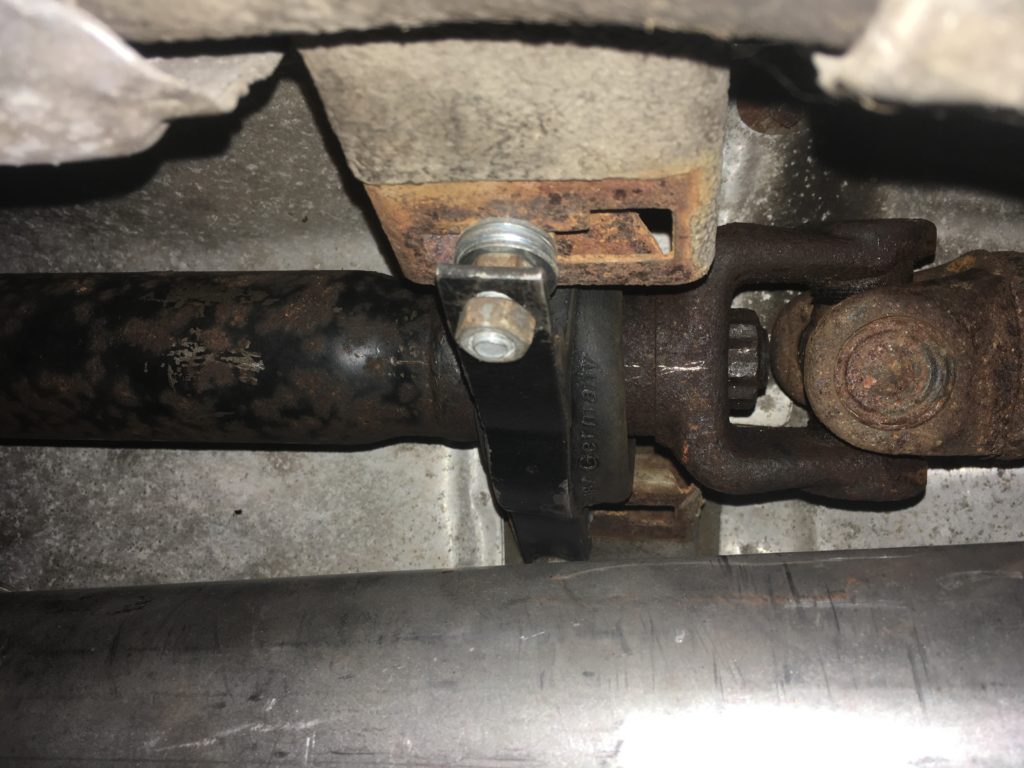
Even shimming the center support bearing down by a massive amount didn’t fully correct the problem.
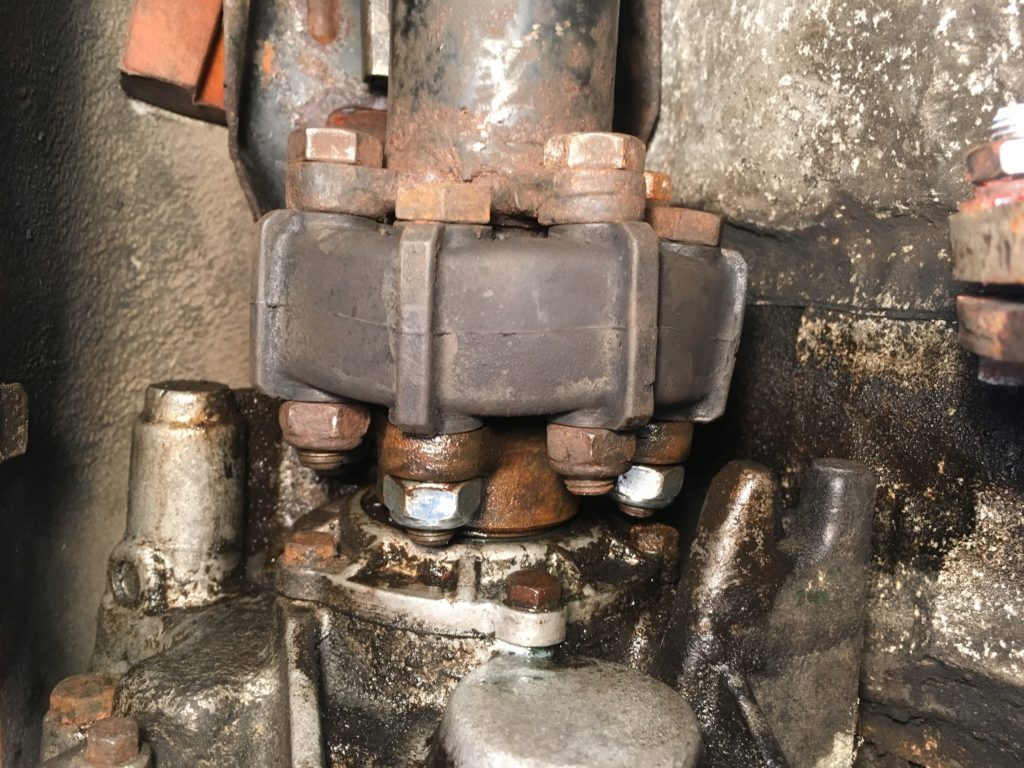
If you’re using a U-shaped transmission-support bracket, as many five-speed installations do, you can monkey with the alignment by shimming the transmission up (putting washers under the support bushing) or down (washers under the bracket), but Bertha has an ultra-rare Metric Mechanic transmission-support bracket that doesn’t allow for any upward adjustment. Further, the yawning rust hole behind Bertha’s pedal bucket comes jarringly close to the left-hand transmission-mounting tab. Both the pedal bucket and the transmission will probably need to come out in order to fix the rust, and that’s certainly not going to happen before the Vintage, if ever.
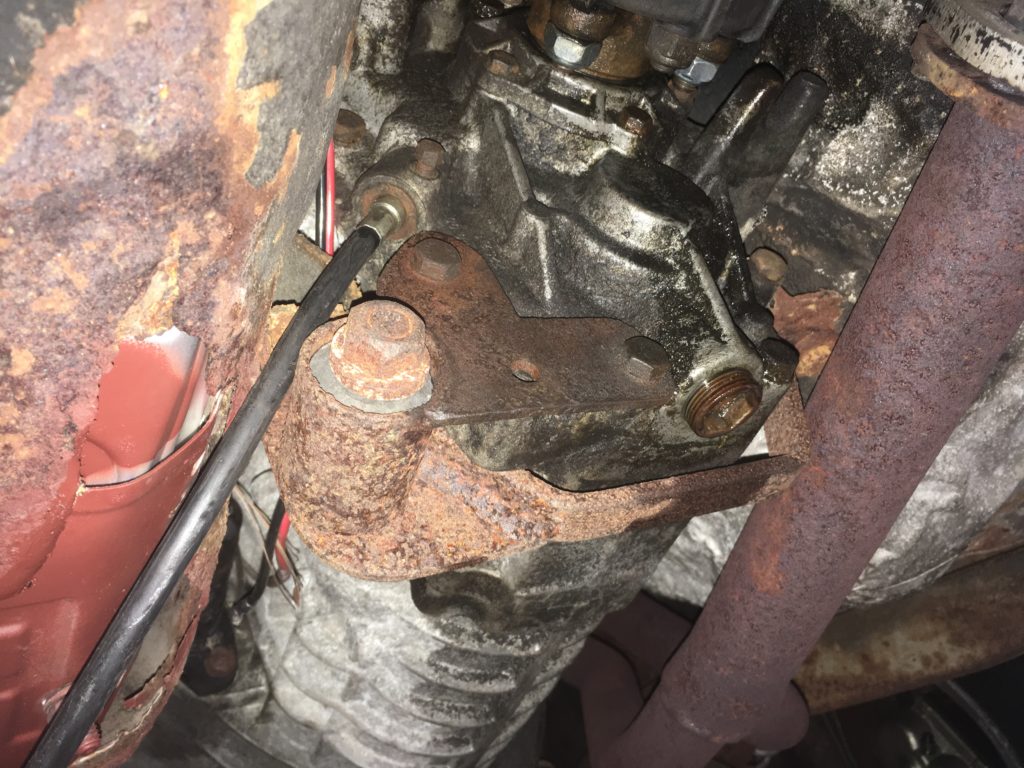
This shows Bertha’s unusual Metric Mechanic transmission mount, and the alarming proximity of the left transmission mounting tab to the rust hole behind the pedal bucket.
I thought that I had a traditional U-shaped transmission support bracket that I could try, but I tore apart the garage and could not find it. In the end, I loosened the giubo, removed the washers, re-did the “gap test,” determined that I’d gotten the shimming correct (or as correct as it could be) last summer, and simply put everything back together the way it was—and made a note to bring a spare giubo for the trip in case this one self-destructed.
Door locks: Neither of Bertha’s doors would lock. The ignition key wouldn’t turn in either door handle, and neither bush button would go down, so I couldn’t even do the reach-over thing. That’s not the end of the world, but it does mean that on a road trip, you have to pull your valuables out when you run into Sheetz to use the restroom. I pulled off both door cards, lubricated the locking plates, and got the push buttons to work. Next I pulled off the door handles and lubricated the tumblers—but the problem seemed to be that the key didn’t match. Bertha had twice been stolen while Alex had her, and while neither Alex nor I recalled re-keying the ignition, anything was possible.
Then I remembered: I have a free faux tii sitting ten feet away in my driveway with “parts car” written all over it!
I pulled the key from its ignition, tried it in both of its door locks, and marveled at my good fortune that both worked. So I pulled the door handles from the faux tii, swapped them with Bertha’s handles, and put the faux tii’s key on Bertha’s ring.
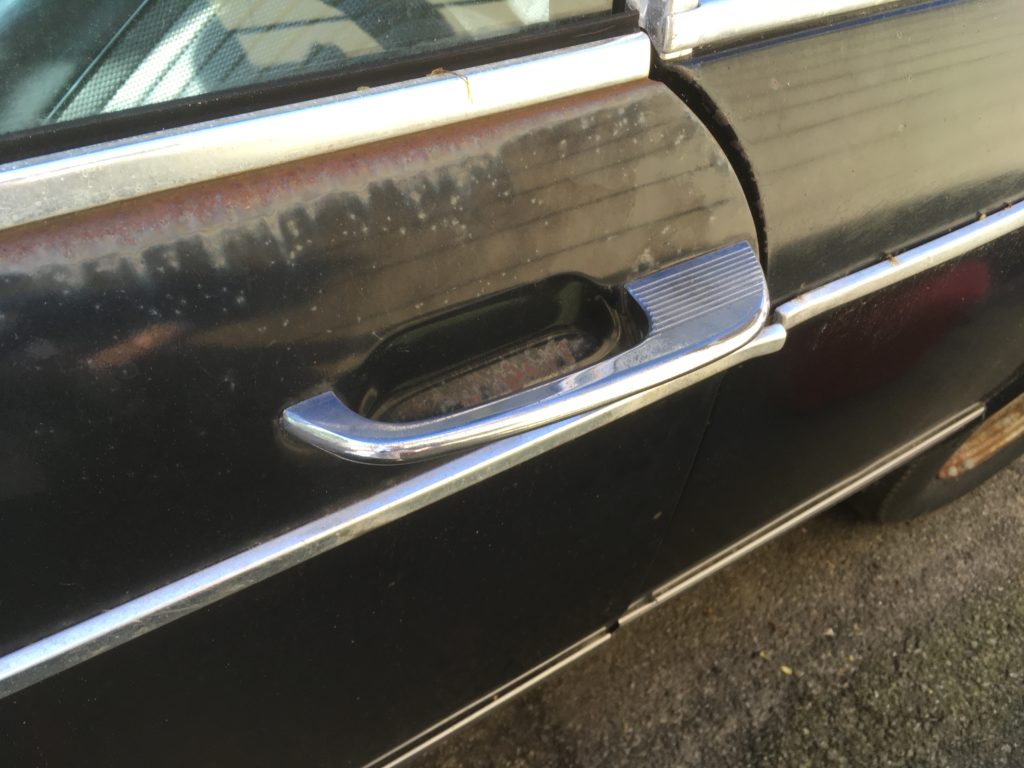
Nothing like having a parts car in your driveway with working keyed door locks just when you need them.
Before I buttoned up the door cards, I re-grommeted the lock rods in the driver’s door. I’d done this in the passenger door last summer when I replaced the smashed window, but the grommets were all missing in the driver’s door, which caused it to rattle like a bunch of coat hangers on rusty bedsprings in a motel on the seedy side of town.
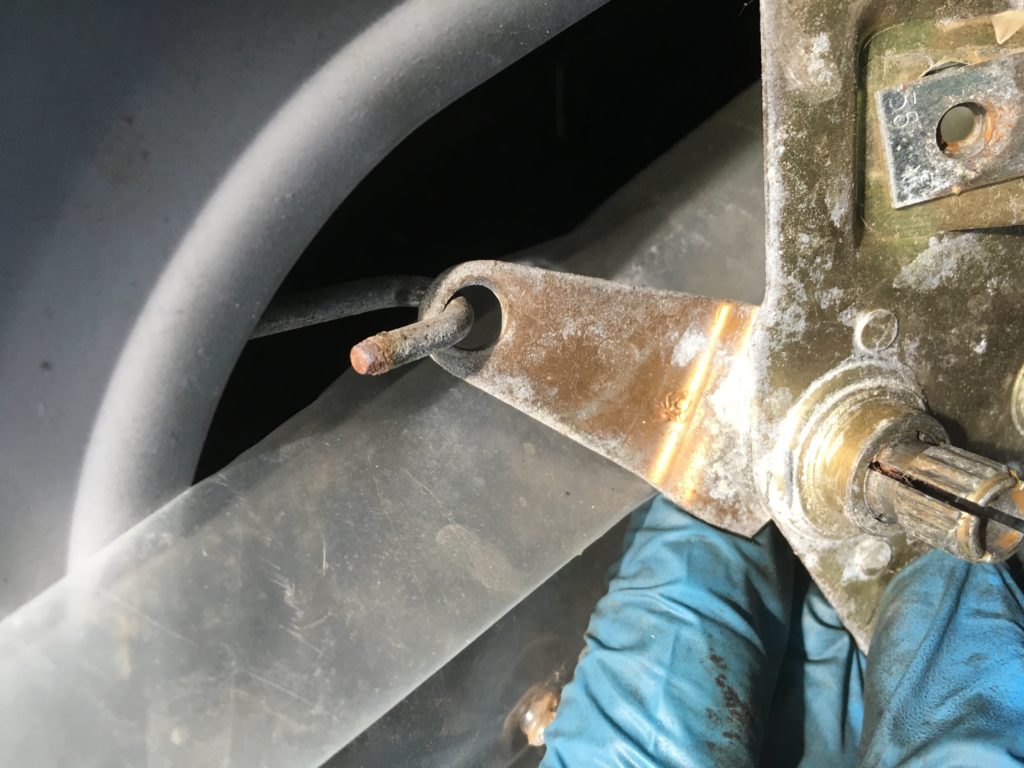
Missing grommets in the locking mechanism create door rattles that can drive you nuts.
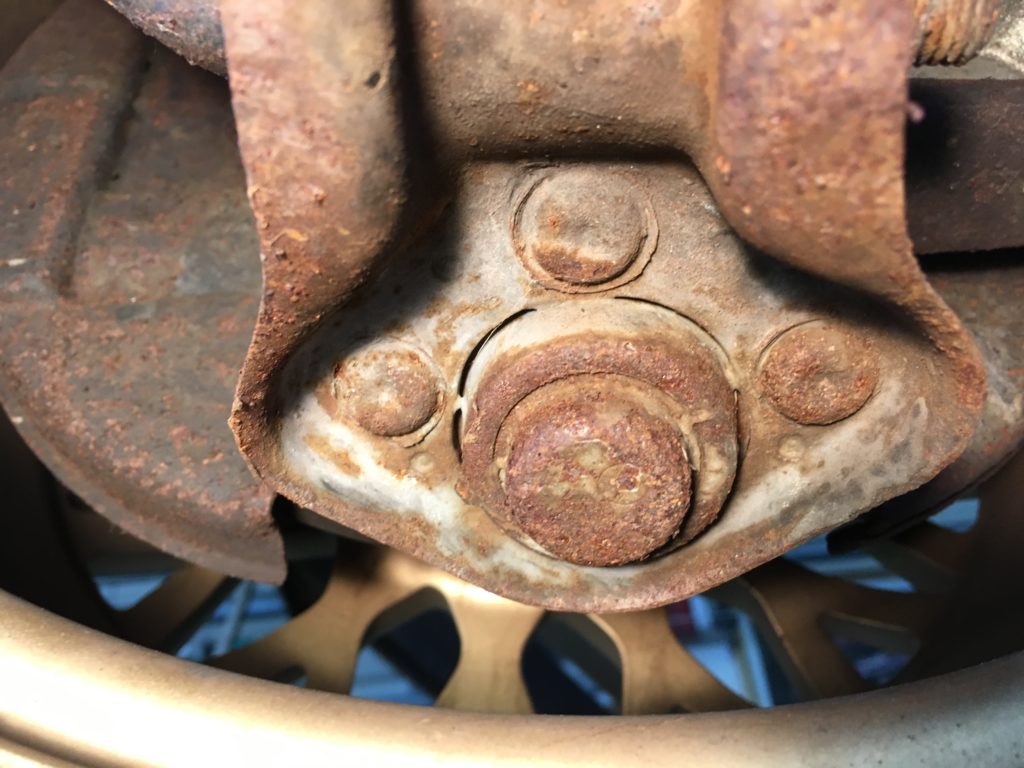
Snapped rear wheel stud: When I first pulled the wheels off Bertha last summer to un-seize the drums, one of the studs on the left rear wheel snapped. I’d been comfortable driving around locally on three lug nuts, but 2000 miles at highway speeds was another matter. Experience has shown me that you only have a few seconds from “What’s that metallic rumble, could the lug nuts be loose?” to the wheel flying off at speed.
I read up on replacing a broken stud. While there is enough room to drive it out with the hub still on the spindle, it’s not really advised, as you can bend the hub or spindle, or damage the bearing. I tried heating up the stud with the oxy-acetylene torch and giving it a love tap, but it didn’t budge. So I tried to pull the hub. I got the big castellated nut off, but could not pull the hub off the spindle despite using heat. So I went back to Plan A: I cut the broken stud off flush with the flange, heated it up cherry red with the torch, and using a hammer and a punch, popped it out with minimal effort. Should’ve done that the first time. I hope I didn’t damage anything trying to heat and pull the hub.
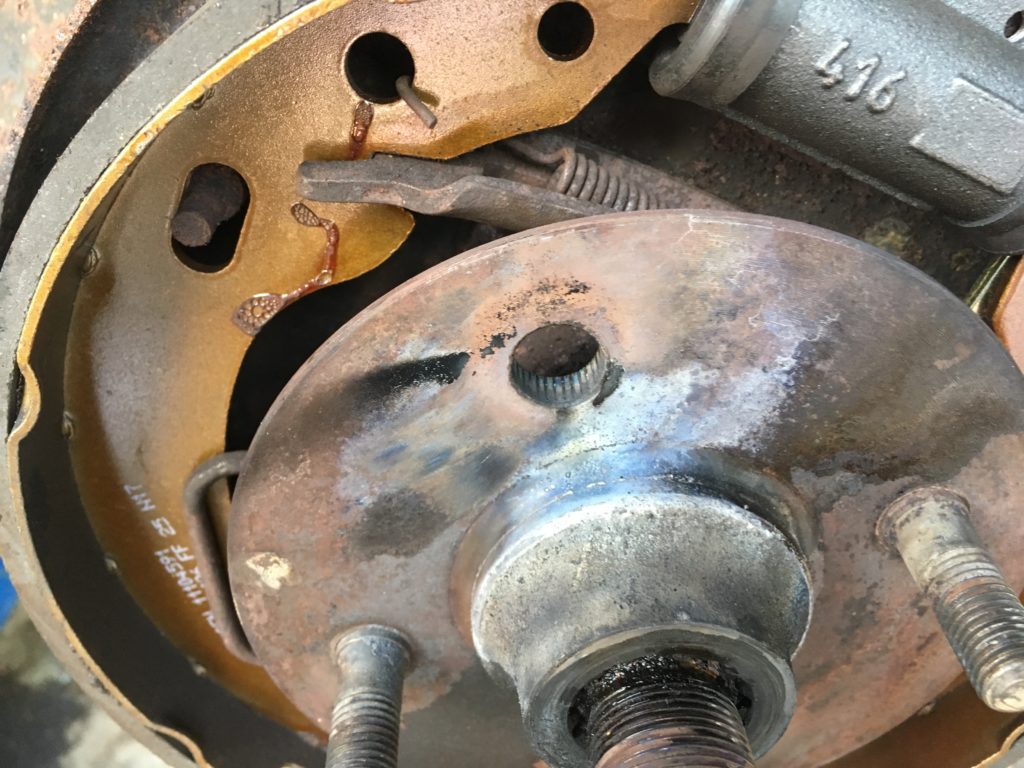
The old “heat and beat” worked perfectly removing the snapped stud.
Install Cibié Oscars
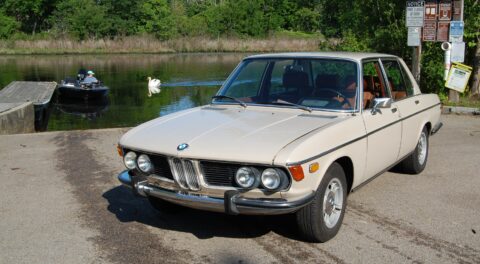
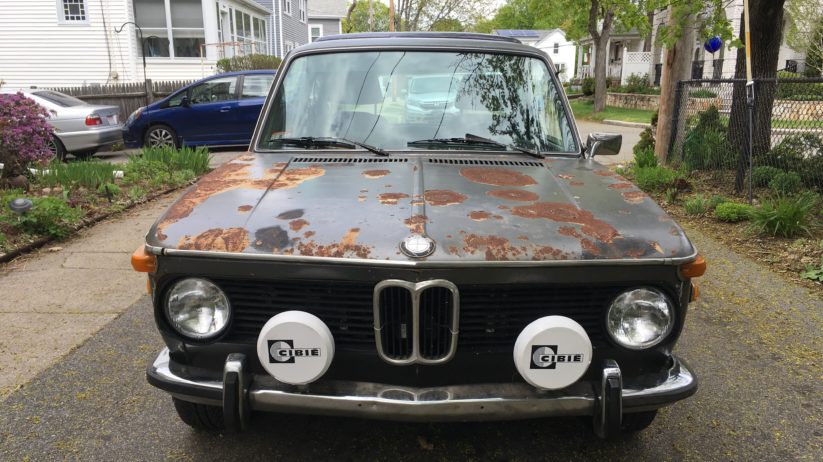
During my original ownership of Bertha, she proudly wore a set of Cibié Oscar driving lights on her massive bridge abutment of a front bumper. When I rescued her from the garage where she’d been sitting for 26 years, only the Cibiés’ housings were present. I later found the lenses under the seats, but the lighting elements were trashed. I put the non-functional lenses back in to retain the look. But then, when I did the bumper conversion, the Cibiés were lost, and with them, part of Bertha’s swagger. Although I like the small bumpers, I always felt like I’d taken part of Bertha’s personality away, like a facelift she didn’t want.
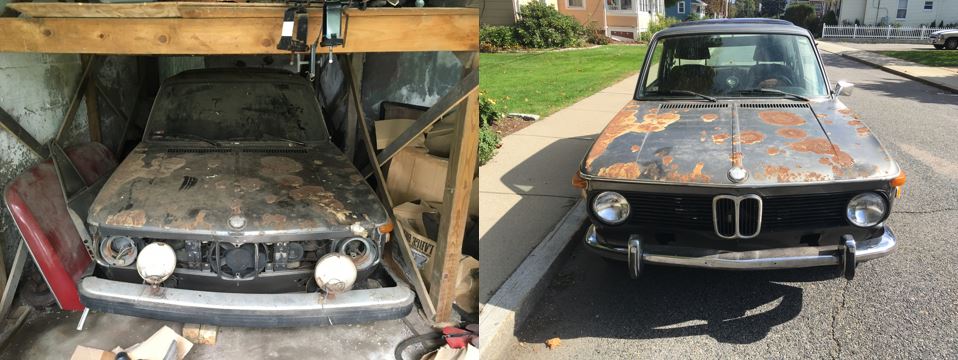
Bertha last summer, before and after the facelift.
Some of you may recall that last summer my friend Alan Hunter Johansson conspired with my wife to send her a mint set of Cibiés he’d had on his Volvo 122. His instructions to her were to give them to me when I was at low point with Bertha. I promised to install them when the dust had settled on the car’s resurrection. Then the bumper swap happened, and I’d need to drill holes to install them, yadda yadda. They’d been sitting on a shelf in the garage since then.
As I was clocking through the punch list to get down to the Vintage, I came to the line that said “Cibiés .” My left brain thought, “No, they’re not important.” My right brain said, “Yes, they are.”
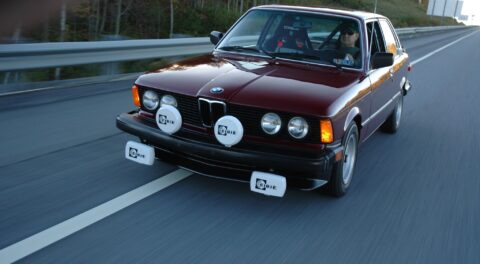
Initially I thought I’d just mount them for show, but Bertha has the factory fog light switch to the left of the instrument cluster, and it beckoned to be hooked up. Not to mention, having written an electrical book, I now know how to wire them properly, with the fog-light switch tripping a relay, and the Cibiés connected to it with beefy 12-gauge wire. (The old ones were literally spliced into the high beam wires on the back of the headlights with wire nuts and thin speaker wire. It’s a wonder I didn’t burn the car down.)
I hope that I don’t have much, if any, night driving on this trip, but I’m prepared to stun deer at the length of a football field if I do. And, more important, Bertha’s got that “Hello, boys” face again. Thanks, Alan!
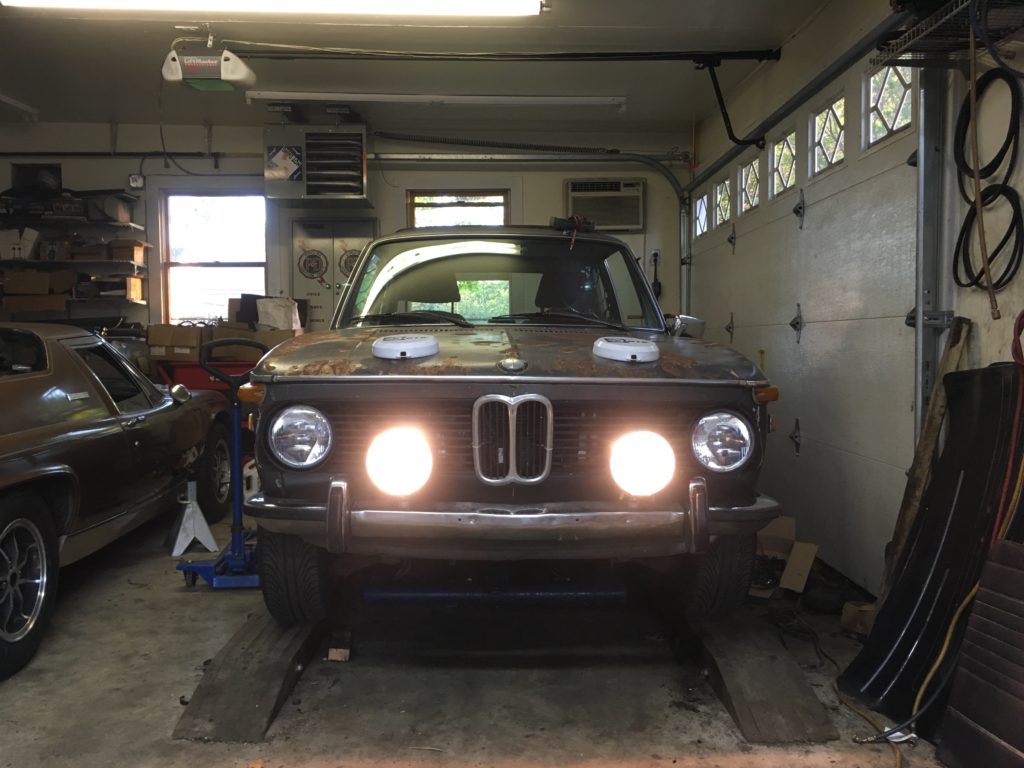
The Cibiés are back!
So, all in all, Bertha’s vintage prep was going swimmingly—right up until I saw the cracked subframe.—Rob Siegel
Rob’s new book, Just Needs a Recharge: The Hack MechanicTM Guide to Vintage Air Conditioning, is available here on Amazon. His previous book Ran When Parked is available here. Or you can order personally inscribed copies of all of his books through Rob’s website: www.robsiegel.com.