For the 28 years that my friend Alex owned Bertha, the 1975 2002 that I sold him in 1990 and bought back in June 2018, he talked about doing a bumper conversion—replacing her U.S.-spec bridge-abutment bumpers with the small, thin chrome bumpers it would’ve had if it were a Euro car. I didn’t really understand the appeal; if you want small bumpers, I thought, buy a round-taillight 2002. Don’t go to extraordinary lengths to create this odd American-European hybrid (if you merely swap the bumpers, you’re still stuck with the U.S.-spec side-marker lights).
As it turned out, Alex was ahead of his time. So-called “small-bumper squaries” became a big thing. Initially, each of them was home-rolled, with the conversion requiring a bit of fabrication. At some point, though, an enterprising guy named Eric Anton began selling bumper-bracket kits on bmw2002faq.com. Recently, Roundel advertiser BluntTech began selling a similar kit. So these days you can buy a bracket kit, procure front and rear bumpers, drill a few holes for the “ears” on the curved corner pieces, tighten a few bolts, and you’re done.
At least in theory.
But even with kits available, I had zero interest in doing the bumper conversion on Bertha. After all, the car needed mountains of work in order to get it running, then drivable, then sorted; a bumper swap seemed utterly frivolous. Small bumpers weren’t something I lusted after for the car anyway; they were Alex’s dream, not mine. Plus, so much of Bertha’s history and image were embodied in those big bumpers: As I’ve said, I bought Bertha in Austin in 1984 when Maire Anne and I knew that we’d be returning to Boston, so I actually–I know this is shocking—wanted a big-bumper 02 that could stand up to Boston traffic and parking. Her very name, Bertha, originated from the fact that with those battering-ram bumpers, she was anything but dainty. And although in her present resurrected incarnation, I’ll be unlikely to rely on the big bumpers to, say, parallel park her regularly on the streets of Cambridge, those bumpers—especially the front one supporting the two giant Cibié Oscar driving lights—were an inextricable part of her vibe.
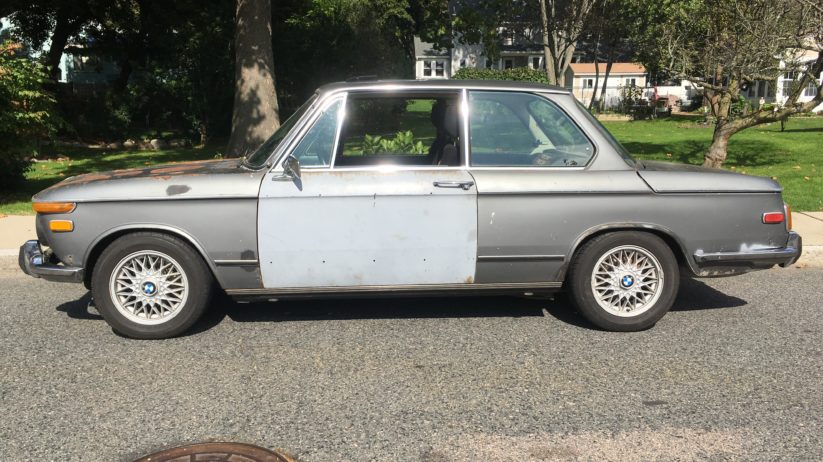
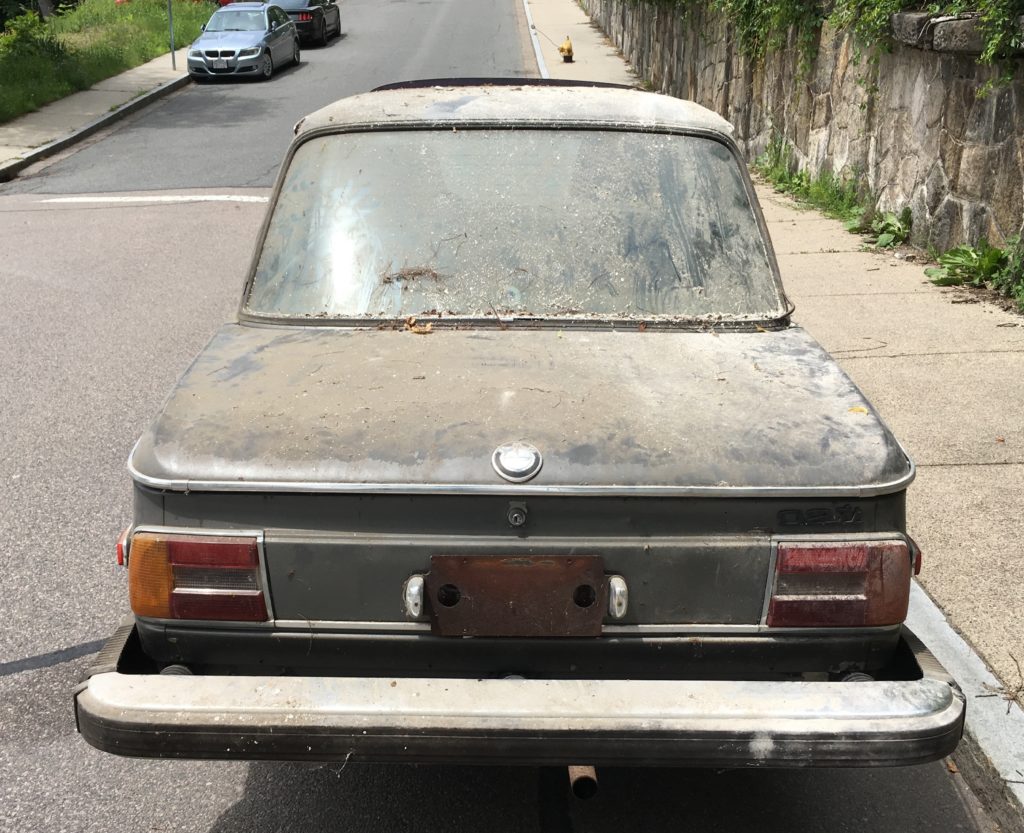
That giant battering ram of a bumper and those big lights certainly gave Bertha’s face a certain, uh, presence. You can see in this photo how the bumper was pushed in on the right side, a fact that became significant during its replacement.
But then a few things happened. First, understand that Alex and I both think of Bertha as “our car.” After all, we first met 34 years ago because I drove Bertha, with her driver’s door missing, into his shop, and asked if I could borrow a door (he didn’t have one, but to this day, the door I installed is still in primer). Alex took a longer road trip in Bertha than I ever did; I loaned Bertha to him and his first wife so that they could take a six-week “Grand Circle” swing through national parks for their honeymoon. Technically, he owned the car for longer than I did, although for most of his ownership, the car was dead and off the road because it got stolen, vandalized, hit lightly, and appeared to have its engine damaged.
I noticed that in my continued conversations with Alex, the issue of the bumper conversion kept coming up. I initially brushed this off as just the “stick the landing” part of Alex’s pie-in-the-sky vision for a ground-up restoration that was never likely to happen. However, in resurrecting Bertha, I was trying to be true to her heritage, to how I’d built her in the mid-’80s with parts ordered from Roundel advertisers, plus adding a few new mods that I never got to do back in the day, such as 14″ silver E30 steel wheels, which I’m still looking for. It began to feel right to extend that heritage to include the bumper conversion that Alex had always wanted to do. More than that, the bumper conversion was the intersection of Alex’s visionary tendencies and my incremental practical ones. I didn’t have the money or the time to restore the car (which made no sense anyway), but I could do this.
For a time, the backyard was Bumper Central.
Second, a few years back, I’d bought a bunch of parts from a closed restoration shop, including a dozen 2002, E3, and E9 bumpers. The best ones were sold immediately; the remaining ones weren’t in great shape, and they lingered, unloved and unwanted, in the backyard for months. Maire Anne, who asks very little of me, gently requested that I remove them. I stashed them in the back of the storage spaces I have in Fitchburg.
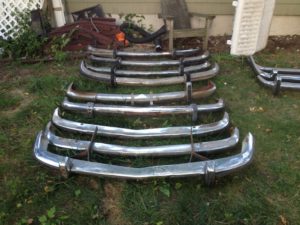
A few months ago, I literally tripped on them while moving my cars around. I saw that I had still had three 2002 front bumpers, and among the three there were all necessary un-dented sections—the long center piece, the two curved end pieces with the ears for the fender bolts, and the two bumperettes (overriders)—with relatively intact chrome. The best bumperettes were missing the thick rubber pads, but the pads on the worst bumperettes, the ones that were too bent and rusty to consider for use even on Bertha, were good; it seemed that if I mixed and matched, I could make one pretty good front bumper, although I still needed to procure a rear one (I kicked myself for having sold three good ones).
Finally, the proceeds from the books that I’ve self-published go into a PayPal account. It’s essentially mad money. Although I will frequently go to ridiculous, often pound-foolish, lengths to save the last dollar on parts purchases, every once in a while I’ll use this account to buy something frivolous.
So one night in mid-September, I saw that Bertha’s punch list of mechanical issues had become quite short, and felt that the bumper conversion would be a nice cherry on the sundae of the whole resurrection project. I looked for information on Eric Anton’s bumper brackets on bmw2002faq.com (they’re often referred to as “the Anton brackets”). People liked them. The results looked good. I found his contact information (antontr6@gmail.com) and asked him about cost and delivery. Yes, he said, he still sold them. Yes, the price was still $260 shipped. No, they weren’t “in stock,” as each set was fabricated when ordered; it would take about a week.
I dipped into the mad money and ordered the brackets from Eric. Bertha was about to get a facelift and butt-tuck.
Some folks have asked me why I ordered the Anton brackets instead of the kit from BluntTech. To be absolutely clear about this, at the time, I didn’t know that BluntTech had a kit; they just recently began selling it. So don’t read anything at all into my choice. From what I can tell, the two kits appear to be quite similar: They both have brackets that slide into the holes vacated by the old bumpers’ hydraulic cylinders, and bolt to the back sides of the smaller chrome bumpers. They both provide “pre-2-1/2 mph” bumper spacing, where the rear bumper is flush against the body and the front bumper is slightly forward of the tip of the hood. They both work with all three front bumper configurations (upright bumperettes like a ’72 or earlier, pointy bumperettes like a ’73, or no bumperettes like a Euro) and the two different rear bumpers (long-eared and “shorty,” each with and without bumperettes). They both cover up the extra space where the brackets go through the nose with a clear piece of Plexiglass that you’re supposed to paint the body color and affix to the nose with adhesive.
The major difference is that each Blunt’s front bracket is a single piece, whereas Anton’s are two-piece, using an intermediate piece that bolts onto the bumper and then onto the bracket. Other differences are that BluntTech’s pieces are powder-coated rather than painted, BluntTech claims that their metal is heavier gauge (I have not verified this), and, shipped, the BluntTech kit costs $321, about $60 more than the Anton kit.
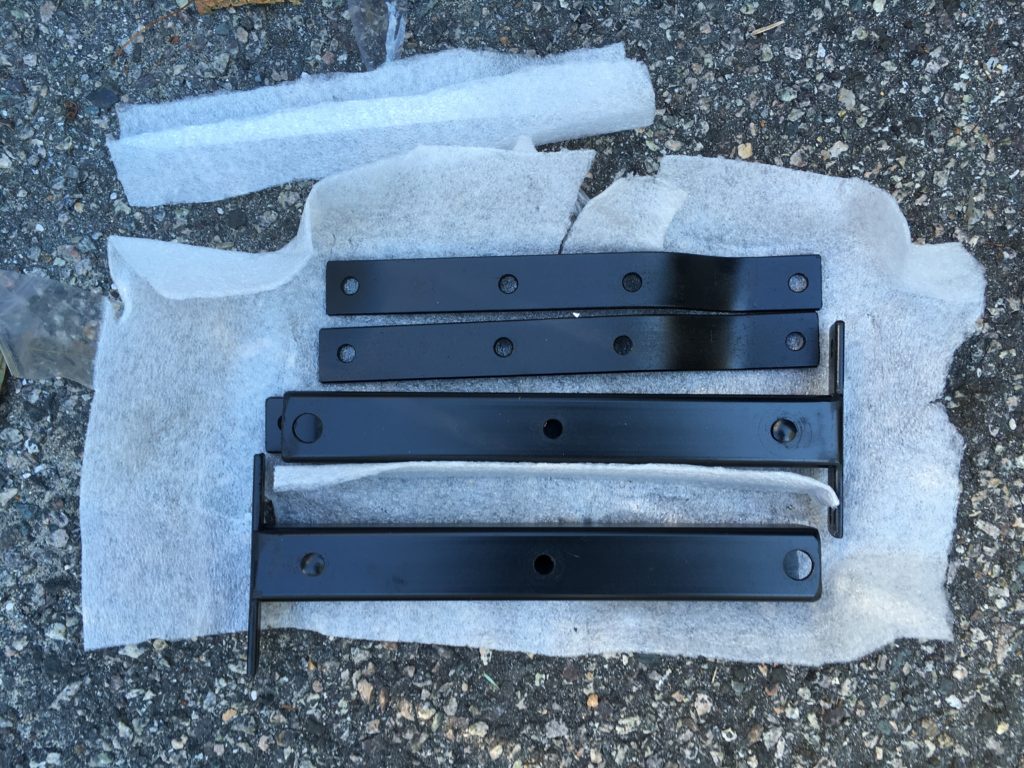
The front bumper pieces of the Anton bracket kit. Fasteners and Plexiglass covers not shown.
While I waited for the kit to arrive, I procured a rear bumper. You can read about that story and the rather moving provenance of the bumper in the December Roundel.
The basic steps for both the front and rear bumper conversion are:
- Remove the big bumpers and their hydraulic cylinders. (Step one in the Anton kit’s instructions literally says “REMOVE THOSE BIG-ASS UGLY STOCK BUMPERS.” I liked it immediately.)
- If you’re installing a long rear bumper, remove the trim pieces behind the rear wheels, as they’re in the way.
- Test-fit the bumper brackets in the car.
- Measure the distance between them accurately.
- Take the brackets out, mount them on the back of the small bumper, and adjust things so that the spacing between the brackets is the same as when they were installed in the car.
- Use the supplied paper templates to mark where the new holes to attach the bumper ears should go.
- Drill those holes.
- If you like, fill the old holes where the accordion corner pieces of the big bumpers went.
- Mount, adjust, tighten.
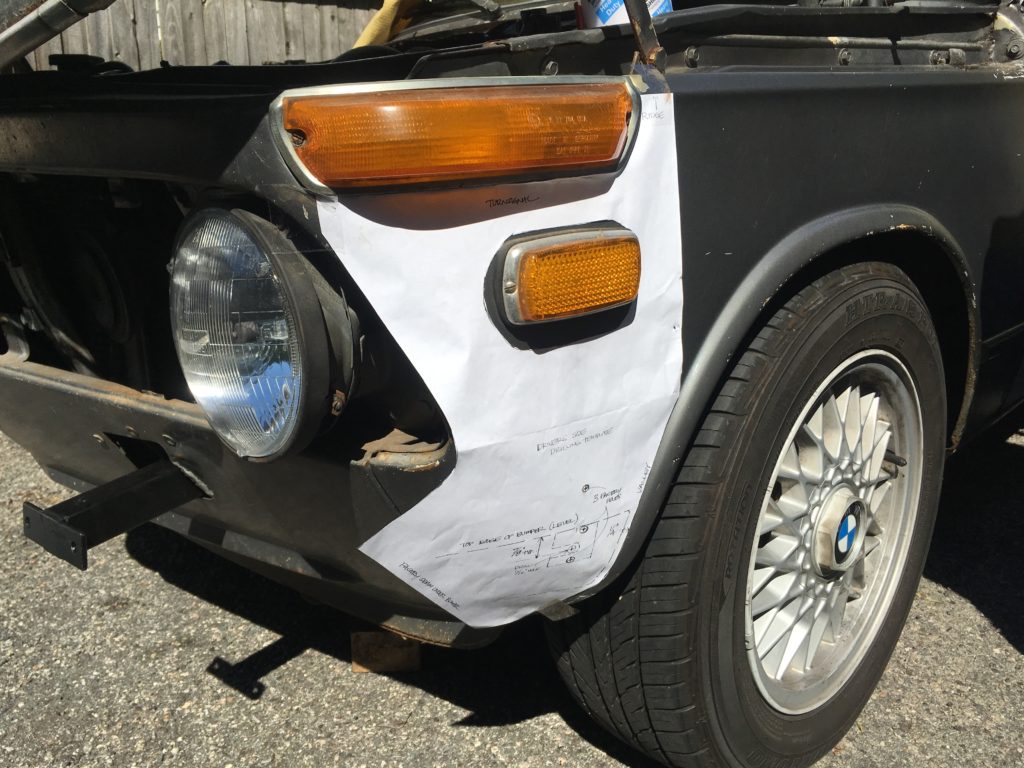
I’m using the paper template that came with the Anton kit to mark the hole for the front bumper ear.
You’re never going to be able to loosen the frozen 10mm nuts holding the rubber pads to the bumperettes.
On Bertha, one of the most time-consuming parts of the project was the fact that I was mixing and matching to assemble good bumpers. Swapping rubber pads on the bumperettes was very problematic. You can buy these new for as low as about $32 before shipping, and that’s what I should’ve done, but nooo, I tried to hold costs down and re-use them from other bumpers. The problem is that they’re held on to the bumperette by two 10-mm nuts threaded onto M6 studs that are sunk into the rubber; after 45 years, the nuts are seized on the studs, and when you try to undo them, the studs just spin in the rubber, and there’s basically no way to grab them and hold them still. If you’re very careful, you can use a Dremel tool and a cutting wheel to cut off the seized nuts above the washers separating them from the back of the bumperette, leaving just enough thread to put a new nut on.
I did the rear bumper first, inserting the brackets and test-fitting the bumper with no problems. I then drilled the holes for the ears, but noticed that there was some rust bubbling not only around the old holes for the accordion pieces, but also in other places that the big bumper had been hiding. Bertha is obviously a body-challenged car on which my sanding or not sanding these bubbles wasn’t going to make a great deal of difference, but I hastily wire-wheeled the rust, sprayed on some rust-inhibiting primer, sealed the old holes with POR-15 Patch, called it good enough, and completed the installation.
I instantly loved the way the new rear bumper looked. I no longer have a ready-made shelf for my beer when standing around the back of the car, but I can live with that.
Bertha’s rear bumper changed from this…
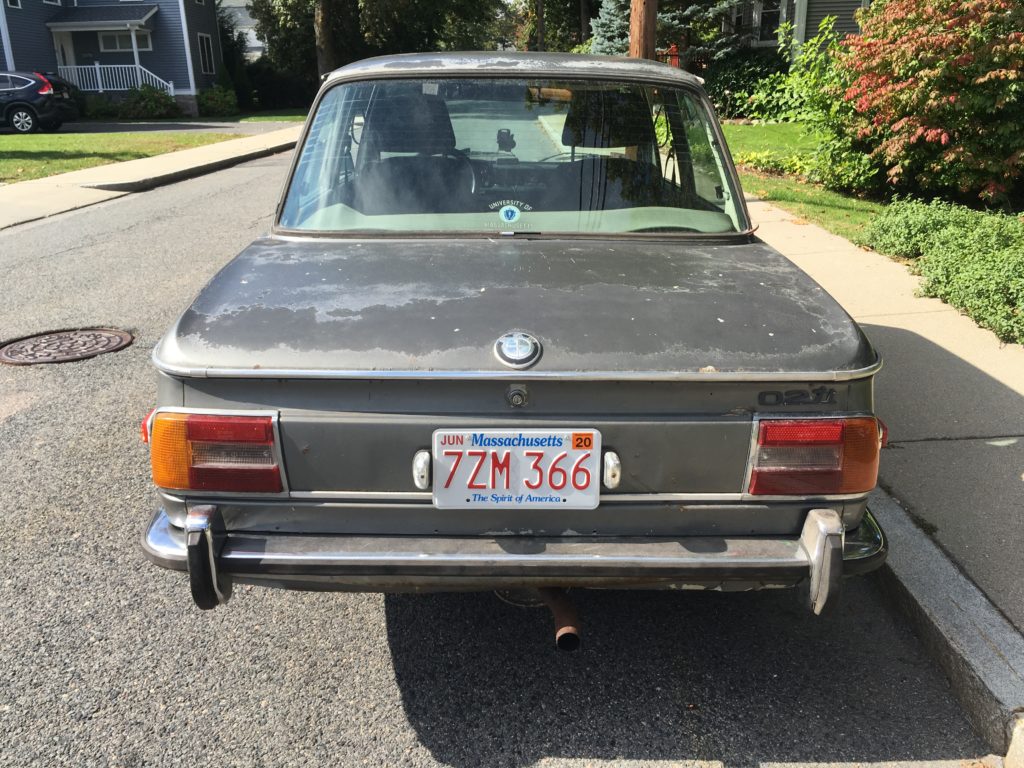
…to this. Schwing!
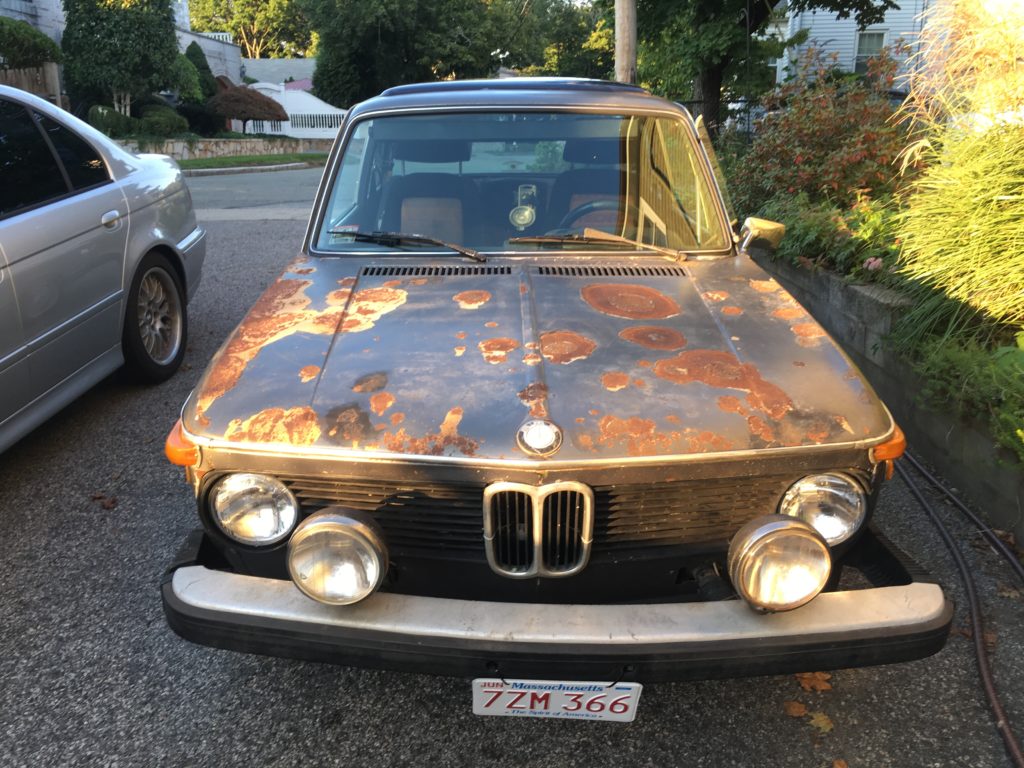
I next removed Bertha’s front bumper, and had to laugh at how the bellows surrounding the hydraulic cylinders had deteriorated into circular black rings that looked like calamari.
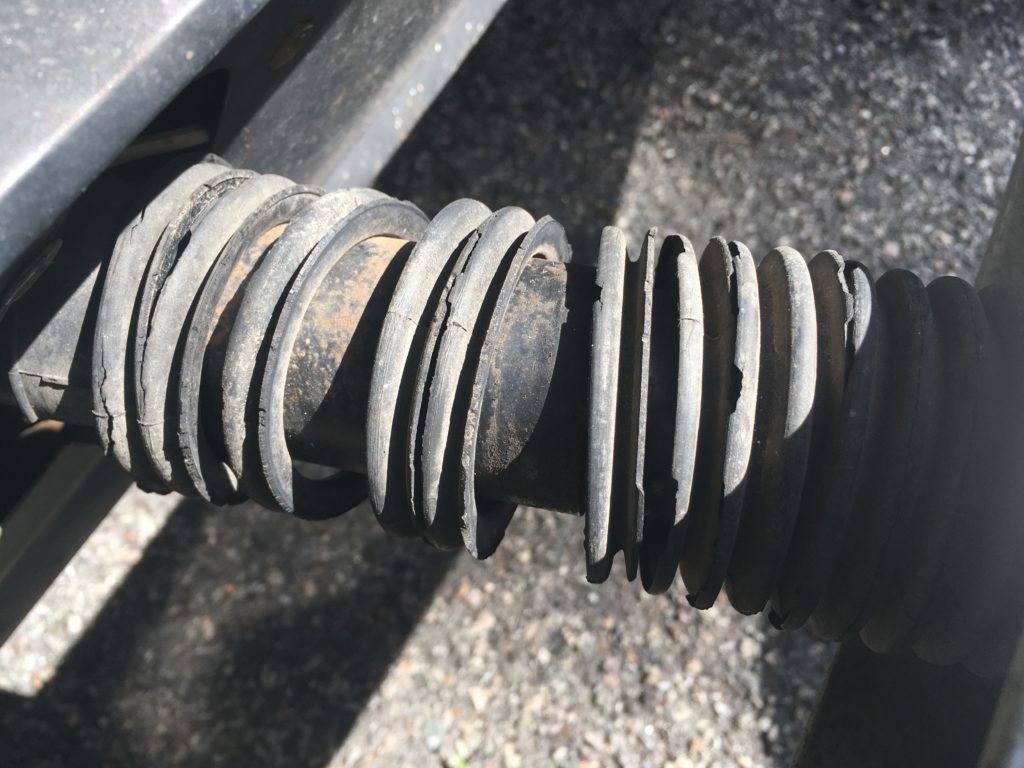
This kind of calamari takes 43 years to prepare.
Before I began the process of assembling a Frankenstein’s monster of a front bumper, I entertained simply using a straight but rusty one I had, one with no bumperettes on it. After all, its rust was nearly a perfect match to Bertha’s heavily-patinaed hood. I hung the bumper briefly on the brackets. It had a certain appeal, but the idea of installing a rusty bumper when I could build a clean one seemed wrong.
I thought about using this bumper, but backed off.
The front bumper installation proved much more troublesome than the rear. It was clear that during Bertha’s theft 26 years ago, she’d hit something; the original front bumper was slightly pushed in on the right, and there was a dent in the right front fender. I expected that to cause a problem affixing the bumper’s right ear. However, when I removed the bumper and test-fit the brackets, it was immediately obvious that there was a big problem: The right bracket was toed substantially inward.
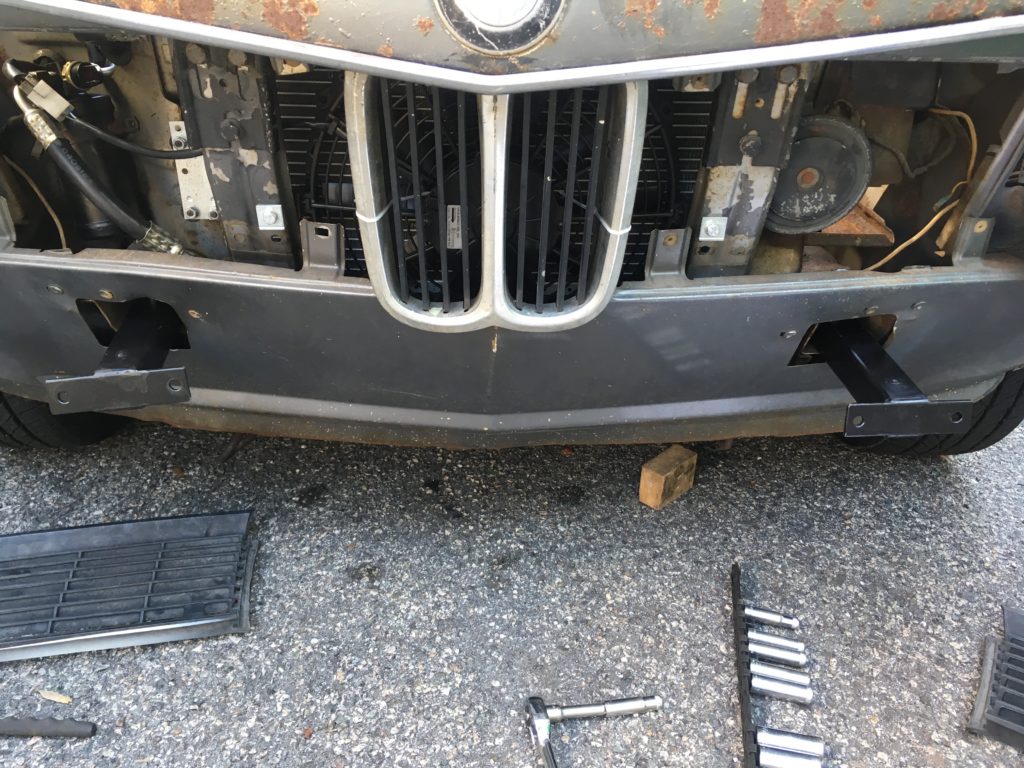
You can see how the right bracket is cocked inward.
When I looked in the engine compartment, I could see that the root cause was that the bumper support—the extension of the frame rail—was noticeably bent. I wondered if this was going to drag the whole swap to a halt.
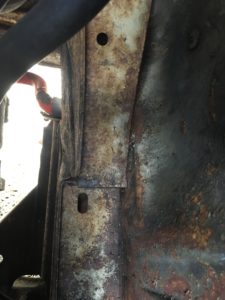
The right front bumper support was clearly buckled where it attached to the frame rail.
Each front bumper bracket is held in place by a big bolt at its rear and a smaller positioning bolt near its front. I inserted the bolt at the rear, but left the front bolt out, and slid the front of the bracket as far over as it would go to try to toe it outward. I then test-fit the bumper and marked where I’d need to drill a new hole in the bracket for the front bolt. Rather than follow the instructions and remove the brackets, bolt them to the bumper, and set the spacing at a pre-determined amount, instead I attached the bumper to the already-inserted brackets, and took turns tightening all of the bolts. In this way, I was able to get the bumper to fit, more or less.
Even though I had the paper hole template, I didn’t wind up drilling any new holes for the front bumper. With the alignment already imperfect due to the accident, I found that one of the existing holes from where the side-bellows mounted was close enough. And I didn’t use the Plexiglass pieces to cover the gaps around where the brackets went through the nose, because Bertha’s nose is too dented to have those pieces sit flush against it.
Note that because the BluntTech bumper kit has one-piece front bumper brackets, it’s possible that it may be a little less work for most people to use, but the fact that the Anton kit has two-piece front bumper brackets may have given me some extra play and adjustability that helped me with my bent front bumper support.
As I was installing the front bumper, I realized two things: The first was that I was missing the small irregularly-shaped aluminum spacers that sit between the bumper bracket and the inside of the bumper. I substituted stacks of washers, which worked well enough. The second was that the ’72 and earlier upright bumperettes gave the car a slightly flat-faced look, so I put out the call on Facebook to see if anyone had the spacers and ’73-style pointy bumperettes.
I thought about waiting until I had these parts, but with the number of cars and projects I have, I make no apologies for the fact that I sometimes tailor the level of effort of a repair to make it fit into the time allotted. I may revisit the spacers and bumperettes at a later date, but for now, it’s done—and that’s what it needed to be.
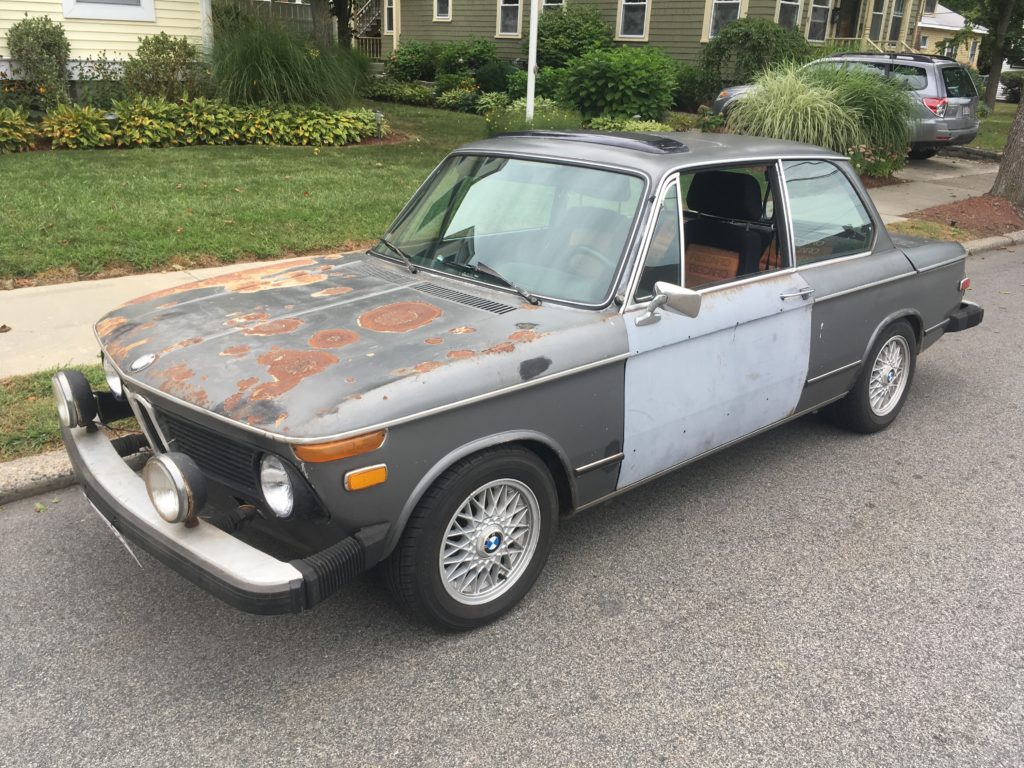
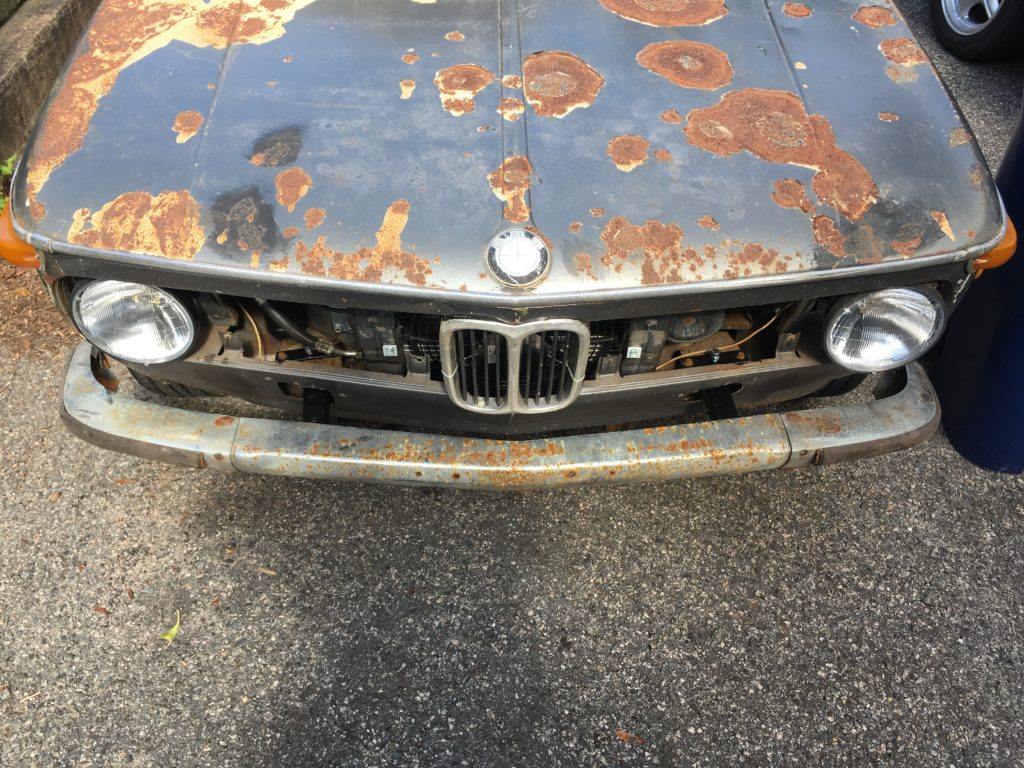
Here’s Bertha pre-facelift…
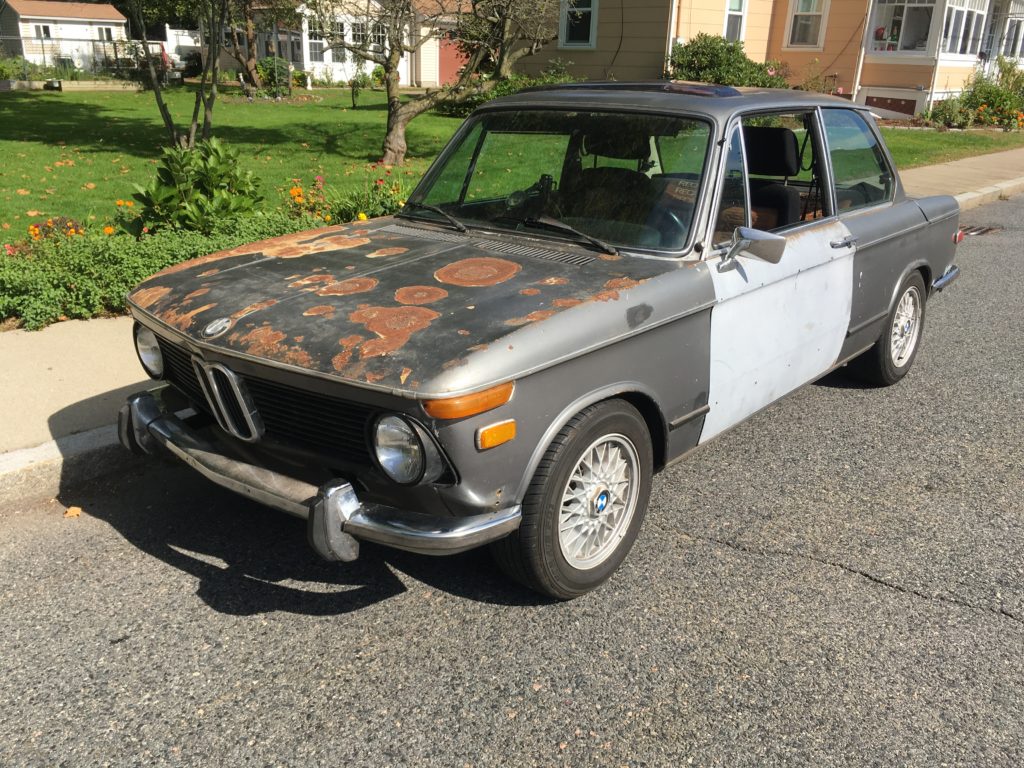
…and here she is with the bandages off.
Bertha’s overall appearance is now much trimmer, and her new nose certainly looks neat and tidy. Although I like it a lot, I’m not quite as bowled over by the look of the new front bumper as I am the rear. I guess that’s understandable; the front of a car is its face, and with the loss of both the bumper and the Cibiés, it’s a big change. My friend Alan Hunter Johansson sent me a beautiful set of vintage Cibié Oscars. In the spring, I’ll install them, and that may restore some of the swagger to Bertha’s nose. And, as I said, I may play with the bumperettes.
But perhaps more important was Alex’s reaction. I showed him the face-lifted car before anyone else saw it. He looked at it, smiled, sighed, and said quietly, “I always wanted to do that.”
I know, Alex. I know.
And now, every time I see a photo of a stock square-taillight 2002, I stare at it and think, “Damn, those bumpers are big!”—Rob Siegel
Rob’s new book, Just Needs a Recharge: The Hack MechanicTM Guide to Vintage Air Conditioning, is available here on Amazon. His previous book Ran When Parked is available here. Or you can order personally inscribed copies of all of his books through Rob’s website: www.robsiegel.com.