Last week, I’d removed the leaky gas tank in my ’79 Euro 635CSi, ordered a new Euro tank from Walloth Nesch in Germany, swapped the ultra-long-legged 3.07 differential with a more reasonable 3.45 unit I had kicking around that would be better suited to the car’s overdrive five-speed, and unbolted the driveshaft and giubo in preparation to have another shot at fixing the car’s sloppy shifter.
The new tank arrived in about a week. I unpacked it from its large box, set it out on the garage floor, and inspected it.
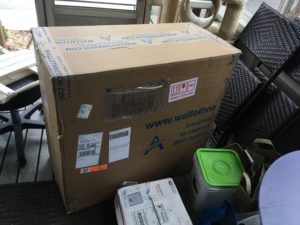
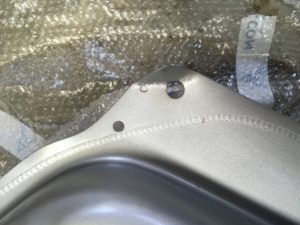
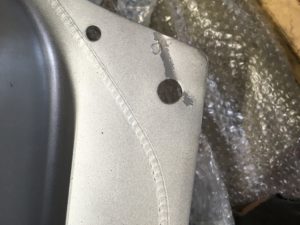
Despite its being well-packed, I found that one corner of the lip was bent up. It appeared to be outside the critical section of the seam, so rather than file a claim and wait at least another week, I simply banged it back down with a rubber hammer.
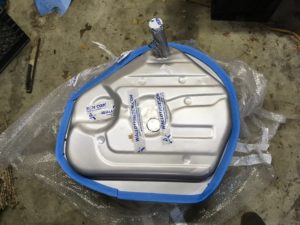
The tank was unpainted, however. I might have installed it as-is, but Mike Miller shamed me into painting it and using seam-sealer on the edge. I grabbed a spray can of Ace Hardware flat black that I had in the garage and gave it two quick coats.
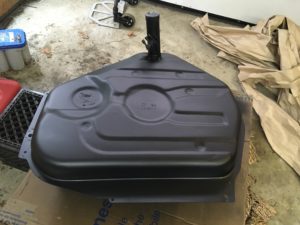
Mikey made me do it.
Then I transferred the pick-up tube and level sensor from the old tank, using the fresh O-ring that came with the tank, and prepared to install the tank in the car. I expected installation to be trivial, as an empty tank can easily be lifted into place and held there with one hand while you use your other hand to thread the three bolts that hold the tank into their holes, right? However, on attempting this, I found that the lip of the tank was hitting the underside of the car in several places, and I resorted to holding up the tank with a floor jack so that I could see exactly where those places were, then lower the tank and address them on the car with a Dremel tool.

After a few iterations, I’d ground away the offending sections. I touched them up with a little primer, raised the new tank into position, and installed the three bolts. Done.
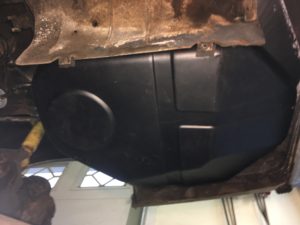
Completion is a wonderful thing.
With the tank and differential both swapped, that left just the sloppy shifter. I had tried to address this two years ago, but had been unsuccessful. This time I looked carefully at the parts diagram on realoem.com, and found that there were supposed to be little rubber O-rings on each sides of the shift rod as it went through the knuckle. Both of these were missing. Clearly, I thought, this was the source of the play in the shifter. I ordered these as well as the other little nylon washers shown in the diagram just to be certain that I had everything—and that it was new and correct.
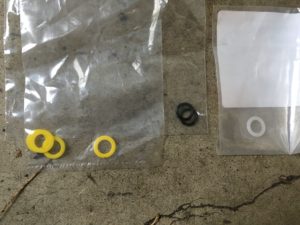
This is the smallest, lightest package of car parts I’ve ever paid $21.64 for.
When the shifter bushings arrived, I installed them, put the shifter back together, sat in the car, and prepared to be impressed.

But it made no difference; it was just as sloppy as it was before. This was exactly what had happened to me two years ago, at which point I just shrugged and left it as-is. But now, having taken the time to revisit the repair, this time it was personal.
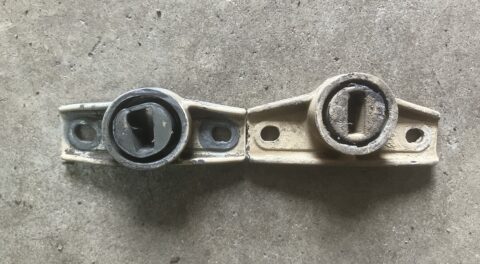
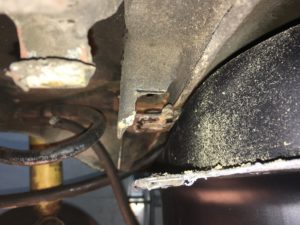
I thought that perhaps the play wasn’t coming from the knuckle at all, but from the shifter itself. I removed the shifter from the car and inspected it carefully, and once it was in my hand, I could see plain as day what the problem was: The plastic bushing in the hole at the bottom, through which the shift rod passes. Part of it was cracked off and missing, making it so that the nylon washer and metal clip that secures it didn’t have a flat square surface to sit against.
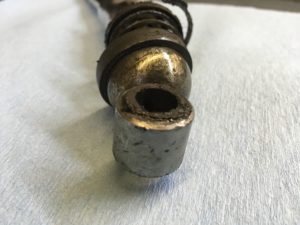
The source of my sloppy shifter was a cracked plastic bushing in the shifter itself—with a chunk missing.
Having swapped many transmissions over the years, I have a box of old shifter parts. It’s mostly 2002 stuff that employs a different kind of shifter, but I rooted around and found another identical shifter with the same bushing arrangement—but with the plastic intact. Once I installed it, the shifter slop was gone. (Well, not gone, but knocked down to the level of the moderate amount of play you expect from a shifter in a vintage BMW.) Shifter bushings done. As Tim Meadows used to say on Saturday Night Live, BOOYA!
With the shifter done, all that remained was for the driveshaft to be reinstalled. I attached the giubo to the transmission flange, taking care to tighten only the nut and bolt heads that weren’t in direct contact with the rubber. I removed the big hose clamp squeezing the giubo—put there prior to removal to compress it so the bolt holes line up with those in the transmission and driveshaft flanges—hand-tightened the two nuts holding the driveshaft center-support bearing, and then moved to the back of the car to reattach the driveshaft to the differential.
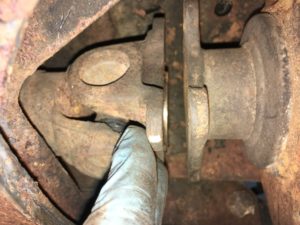
That’s a gap too big to be bridged by simply sliding the diff forward in its carrier-mounting holes.
And of course there was a problem.
I could see that there was a substantial gap, like about 3/8″, separating the driveshaft and differential flanges! Last week, I commented that I’d left the bolts that hold the differential to the axle carrier loose so that I could move the diff slightly and accommodate any small discrepancies, but the amount that the diff could wiggle in the bolt holes wasn’t nearly large enough to bridge this gap.
I was momentarily stumped; everything I’d read said that the side-loader differentials are readily interchangeable.
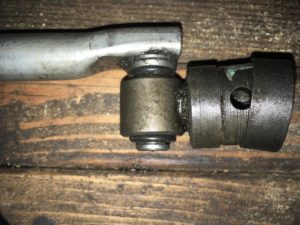
Then I looked at the driveshaft. I’d forgotten that, unlike a 2002 shaft, the E3/E9/E24 shaft has two splined sections, making the length adjustable. There’s a collar nut holding the splined sections together; loosen the collar nut, and the front section is free to slide into the rear section. The only problem was that, with the driveshaft installed, there was barely enough clearance to get a big pair of slip-joint pliers on the collar nut, and no way to get sufficient leverage to loosen it. And with the nut having been on there for nearly 40 years and 220,000 miles, leverage would definitely be necessary.
The collar nut on the driveshaft that locks the splined sections together.
It seemed that I would have to remove the driveshaft to get sufficient clearance to loosen the collar nut and tweak the shaft’s length. I hesitated to do this, as I’d just tightened all the giubo nuts, but you know how this stuff goes. Often you resist having to do some intermediate procedure, like removing Part A to get at Part B, but when you actually do it, it goes very quickly.
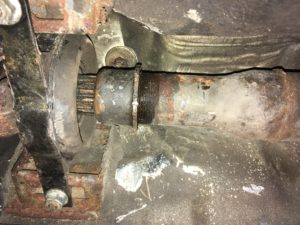
So back out the driveshaft came. With it lying flat on the garage floor, and with the application of a bit of heat and more than a little persuasion with the big slip-joint pliers and a monkey wrench, I loosened the collar nut and got the splines to slide. I then tightened the nut just enough to ensure that the two halves wouldn’t separate while I was re-installing the shaft, and maneuvered the shaft back into position in the car.
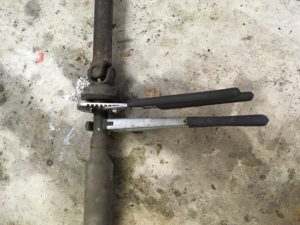
The collar nut gets a little persuasion.
I re-attached the giubo (again), hung the center-support bearing (again), loosened the collar nut to unlock the splines, slid the driveshaft output flange against the differential input flange, and bolted the two together. With the driveshaft installed, I then tightened the bolts holding the differential to the rear-axle carrier, slightly adjusted the center support bearing forward to pre-load it, and snugged down the collar nut. Driveshaft done! I doubt that the entire length-adjustment episode took much more than an hour.
The final step was re-installing the exhaust. As I’d said last week, Sharkie’s muffler is welded to the back of the resonator, and one of the headpipes is rust-welded to the front of the resonator, so the exhaust needs to be dropped and installed as a single unit. I’d thought that perhaps I’d turn this hat trick of a repair into a quartet by replacing the exhaust. However, the exhaust, although a bit loud, doesn’t actually have any holes in it. With too many projects always requiring too much money, I simply re-installed it.
After I double-checked that I had tightened the hose clamps on the fuel lines, there was nothing left to do but test-drive the car. After all, the 3.45 differential I’d just installed was from a 2800CS that I’d parted out over 30 years ago; it had been sitting under my porch ever since, and when I’d removed the drain plug to change the fluid, I’d found it empty, so there was the possibility that it was bad, or at least noisy.
I dumped five gallons of gas from a can into the car’s new tank, fired it up, and began to back it out of the garage.
And immediately, I heard it: WHACKscrape WHACKscrape. Fortunately, it appeared to be coming from the transmission hump as opposed to the rear end. After transmission or driveshaft removal, this is actually a fairly familiar sound to me, caused by my forgetting to remove the big hose clamp that I use to compress the giubo; as the transmission spins the giubo around, the WHACK is caused by the raised part of the hose clamp (where the tightening screw is) hitting the shift platform or the shifter rod, and the scrape is the tail of the hose clamp doing the same thing.
But I knew that this couldn’t be the cause, because I clearly recalled removing the hose clamp. I wondered what I could’ve done wrong in the shifter-bushing installation that caused something to hit the giubo. I nudged the car back into the garage and onto the ramps that flank the mid-rise lift, put the car in the air, and skooched under it.
I immediately saw the problem, although it was a bit of a disconnect: There was a big hose clamp still on the giubo. How, I puzzled, was that possible, when I so clearly remembered removing it?! Then I realized: I remembered removing the hose clamp the first time. I then had to put it back on to compress the giubo again so that I could remove the driveshaft, lay it on the floor, and loosen the collar nut. I was so efficient in all this that I’d forgotten I’d put the clamp back on, and thus forgot to remove it.

Oops.
The second attempt at the test drive went swimmingly. I heard no alarming noises when I backed out of the driveway, so I drove the car around the block. All still seemed fine, so I did my standard test run: one exit up and back down the Mass Pike. The new 3.45 differential, despite having sat without fluid in it for over 30 years, appeared to be whine-free, and had the intended effect of giving the car a bit more scoot under boot than the original 3.07. And the resulting raise in highway rpm was totally acceptable; previously, with the ridiculous combination of the overdrive gearbox and the 3.07 rear end, the car was practically snoozing, spinning only 2,800 rpm at 80 mph. Now, with the 3.45, it was turning a still-lazy 3,200 rpm at the same speed.
The only issue is that the speedometer, which previously had been slightly off due to the car’s not having its original close-ratio dogleg transmission, was now downright fanciful. As measured by the speed readout of Waze on my phone, an actual ground speed of 75 mph registered as 90 on the speedo. I contacted Jeff Caplan at Odometer Gears to see if this was something I or he could fix by swapping a gear, but he said that in this car, the speedometer would need to be demagnetized and re-magnetized. For now, I’ll just live with it. When I’m on a road trip, I always have my phone in plain sight running Waze anyway.
Plus, it’s cool seeing the speedo at 90 when you’re just cruising at traffic speed.
And the tightened shifter was a little bit of heaven—until it wasn’t.
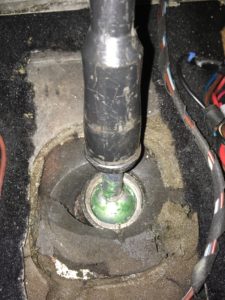
The snap ring holds the ball at the bottom of the shift lever.
When I got off the highway and downshifted, something was clearly amiss, with the shifter flopping all over the place. I wondered if one of the clips holding the shift rod in place had popped out. I beat it on home and got the car back into position over the lift. But before I raised it in the air, I put the shifter through its paces: It turned out that all that was wrong was that the snap ring that holds the shifter ball in its cup had popped out. I probably never had the ring properly seated in its groove. I re-stacked the spring, cup washer, and snap ring, and this time checked very carefully to be certain it was fully seated.
So: My winter-repair triad on Sharkie—gas tank, differential, and shifter bushings—is done. It is likely that I’ll drive the car in May to the Vintage in Asheville. For now, if Mother Nature would quit throwing March Nor’Easters at New England, that would be just peachy.—Rob Siegel
Got a question for Rob Siegel, the Hack Mechanic? You can find him in the BMW CCA Forums here!
Rob’s new book, Ran When Parked: How I Resurrected a Decade-Dead 1972 BMW 2002tii and Road-Tripped it a Thousand Miles Back Home, and How You Can, Too, is now available on Amazon. Or you can order personally inscribed copies through Rob’s website: www.robsiegel.com. His new book, Just Needs a Recharge: The Hack MechanicTM Guide to Vintage Air Conditioning, will be out in the spring.