With the Louie saga finally complete, and no 733i with a red leather interior and a deafeningly loud exhaust in my driveway—at least for now—it is time to move on to other things.
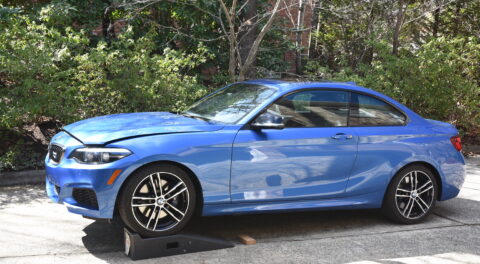
As you probably know, I have a 1979 Euro 635CSi, on which I spent a truly insane amount of time retrofitting air-conditioning last summer and fall. By the time the a/c was installed, it was too cold out to use it, so for a time I put the car into one of the outlying storage areas that I rent. But part of the calculus of living in New England and owning twelve cars involves figuring out what work I will do on which one, and when, and thus deciding which cars will over-winter in the three hallowed spaces in the garage at my house (well, four if there’s no junk in the garage, but there’s always junk in the garage). The near-permanently-disabled Lotus Europa occupies one space, so that leaves just two.
Let me first rewind the tape to when I bought the shark about four years ago. I was teetering on the edge of job change, and part of my bargain with myself was that if I bought it, I couldn’t throw money at it; I had to try to contain costs even more relentlessly than I usually do. Among the reasons the car was affordable were that had nearly 220,000 miles on it, it long ago had lost its original M90 motor and dogleg close-ratio five-speed transmission in favor of a conventional U.S.-spec M30 motor and overdrive five-speed, it had no a/c, and the gas tank leaked.
This last issue turned into a particular thorn in my side. I got a quote for a new gas tank from Walloth Nesch in Germany. At the time, their cost was a fairly reasonable $390 shipped. But, trying to save money, I also got a quote from a local shop to clean the tank, solder the leaky seam, and coat the inside with one of the bladder-like rubberized coatings that are available. The cost for that was $240, which came with a no-leak guarantee. Even though at the time half of my brain was practically screaming at the other half, “Yes, save money, but do it somewhere else; you’re an idiot if you don’t spend the extra $150 on a brand-new tank,” I went with the low-cost option.
You can just see this coming a mile away, can’t you?
Although the tank is easy enough to drop, held in by just three 19-mm bolts, on an E24 the exhaust is in the way; the hanger that holds up the muffler is supported by one of those bolts. And on my E24, the muffler is welded to the back of the resonator, and the front of the resonator is rust-welded to the headpipes. So in order to get the exhaust out of the way of the gas tank, you need to drop the entire exhaust as one piece from the headpipes back to the muffler. It’s a bit, shall we say, ungainly. So in 2016, I dropped the exhaust, took out the tank, and took it to a local shop to get the leak repaired.
While the car was laid up, I wanted to address something else: the sloppy shifter. This can be caused by several worn components. In order to isolate the cause and replace the responsible part or parts, you need to lay eyeballs and hands on them, which means pulling the giubo and the front part of the driveshaft out of the way. So I did that. It appeared that the slop was coming from a combination of the shift knuckle and an inadequate number of little plastic yellow washer bushings at both ends of the linkage rod that runs through the knuckle and the shift lever. I replaced them, but to my surprise, the shifter didn’t really seem to be any tighter.
At the time, I also thought about folding in another synergistic repair. The car still had its original Euro 3.07 rear end, which was meant to be coupled with the close-ratio five-speed that has a 1:1 fifth gear. However, as I said, instead of the dogleg close-ratio box, it had a Getrag 265 overdrive box whose fifth gear is 0.85:1. I like a long-legged car for the kind of road trips I do, but this combination was ridiculous; at 80 mph, the engine was loafing at just 2,800 rpm. On the one hand, that was good for gas mileage, but acceleration suffered.
I had a 3.45 rear end sitting under the back porch from a 2800CS I’d parted out 30 years ago, and with the exhaust out of the way, II thought about installing it to get some scoot back—but then the shop called and said that the gas tank was ready.
I re-connected the driveshaft, installed the tank, hung the exhaust back up, poured in a few gallons of gas, then drove it to the gas station to fill the tank. It appeared be leak-free. And why shouldn’t it be? I’d just paid good money to have it fixed. I was a bit disappointed that I hadn’t succeeded in tightening up the shifter, but at least the car was no longer leaking gas.
Soon after that, I drove the car about 2,200 miles round-trip to Southeast Sharkfest in Chattanooga—and on the way, the gas tank began leaking.
I couldn’t tell if I was madder at the shop that had supposedly fixed it or at myself for having chosen this option when I could’ve bought a brand-new tank for $150 more. Leaky gas tanks are dangerous, as the hot exhaust typically runs right past them. You might tell yourself that you’ll drive the tank down to such-and-such a mark on the gas gauge and then fill it only 2/3 of the way, but it’s easy to get this wrong and have it leak again.
When I got back home, I called the shop, and the owner said to bring it back in and he’d have another go at it—but of course the issue was my time: The tank had to come back out, the exhaust had to be dropped again, etc.
So that’s the backdrop. The shark came back home and went up on the lift. I was planning on addressing the tank and having another go at the sloppy shifter when the whole Louie adventure intervened. It was now Sharkie’s turn to get some love.
I didn’t seriously consider taking the tank back to the guy who’d fixed it and trying to get him to honor a two-year-old verbal guarantee; I began looking for another tank. Any E12 tank will fit an early E24 like mine, but I believe the correct Euro tank is larger. I put out the word on Facebook that I needed a tank for an early Euro E24. Some folks responded, but worries about how to test a used tank to make sure it doesn’t leak made me think that I should simply buy new. The only thing that makes me madder than having to do a repair twice because I was cheap is to have to pay for the same parts twice because I was cheap. I got a fresh quote from Walloth Nesch. The cost had increased slightly to $420.
But before I pulled the trigger, I wanted to be absolutely certain that the tank was in fact leaking from the seam and not from, say, the O-ring where the pickup tube goes in. I’d inspected the O-ring, but I wanted to be sure. So I dropped the exhaust and removed the old tank. I made a mental note that, if I was smart, I’d roll four repairs together: the tank, another crack at the shifter bushings, the differential swap, and a replacement exhaust that I could unbolt in sections. I almost wished that the exhaust had holes in it so I could feel good about taking a Sawzall to the damn thing.
When a tank is completely empty, it’s fairly light, and getting it in and out is pretty easy, but if it has some fuel in it, it becomes ungainly, as the fuel sloshes to one side as soon as you tip the tank when it’s lowered. I thought that I had run the tank down fairly dry before putting the car on the lift, but it still had a surprising amount of fuel in it. I supported it with a floor jack, lowering the jack with one hand while I tried to hold the tank steady with the other so that it wouldn’t slosh and tip.
With the tank on the floor, I didn’t see any clear evidence of fuel leaking out any portion of the seam, but I had an idea. Since the tank still had fuel in it, I could tip it along each of its straight edges and leave it in that orientation for a few hours. Sure enough, on the second try, I found the smoking gun: The area below the seam was wet with gas. Gotcha! I went upstairs and ordered the new tank from Walloth Nesch.
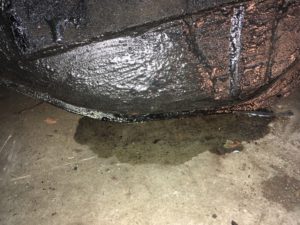
The leaky seam is caught in the act.
With the tank out, I began the differential swap. I first cleaned the numbers off the right side of both the differential in the car and the ancient spare one under the porch, and verified that they had ratios of 3.07 and 3.45, respectively. Next I spun the input flange and the side flanges of the 3.45 to verify that it still rotated freely after sitting for 30 years; initially, I felt a somewhat alarming high-friction spot in the rotation, but it freed up as I worked it. I then used a heavy wire brush to clean some of the layers of grease and dirt off the 3.45. I’m not one who cares what the underside of a car looks like, but this was over the line even for me.
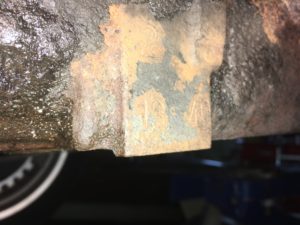
The stamp identifies the gear ratios; divide 40 by 13 and you get 3.07.
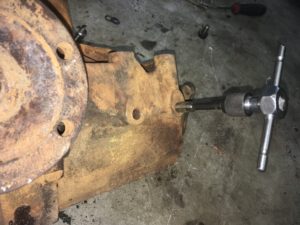
Finally, before installing the diff, I made sure that I could undo both the 10-mm drain plug and the fill plug. I put my impact wrench on a 10-mm Allen socket. The fill plug came out easily, but the drain plug didn’t budge; it took several rounds of heat and wax to free it up.
I then positioned the diff over a catch-pan to drain it. I expected it to reluctantly disgorge a puddle of sludgy old foul-smelling hypoid-gear-oil goo, but to my surprise, all that came out were a few tablespoons of what looked and smelled like water. This certainly gave me pause, but hell, at least no teeth came out (something which I have had happen after differential failure).
I spun the input flange again, still didn’t feel or hear anything scary, shrugged, and thought, “Well, worst case I’m wrong, it’s junk, and I have to swap the old one back in, but it doesn’t cost me anything except time.” I filled it with fresh Red Line 75W90, closed it up, ran a tap through the mounting holes so the bolts would go in easily, and began removing the 3.07.
Running a tap through the threads of something that’s been sitting under the deck for 30 years is always a good idea.
With the car up on the mid-rise lift, I used the impact wrench and an 8-mm Allen socket to zip off the six bolts holding each half-axle to the side flanges. This is one of two impact-wrench applications where using it speeds things up so much and works so well, it’s almost not fair (the other is the big nut at the top of a strut cartridge). You clean any dirt out of the Allen holes with a small screwdriver, put the socket into the hole, tap it lightly with a hammer to seat it, connect the impact wrench, pull the trigger, and whacketa-whacketa-WHEEEE your way to twelve little moments of bliss.
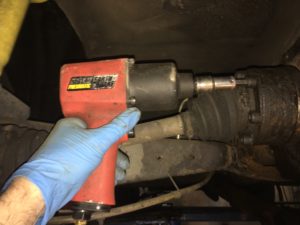
Using an impact wrench on the half-shaft bolts makes it so easy, it almost isn’t fair.
I undid the bolts attaching the diff to the driveshaft, positioned a floor jack beneath the diff, loosened the eight bolts holding it to the axle carrier and the one supporting it from a big rubber bushing at the rear, and used the jack to slowly lower the 3.07 out of the car.
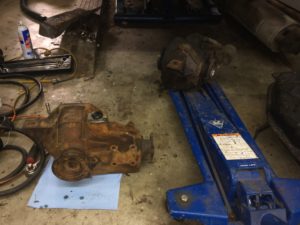
In my youth, I might’ve been able to muscle a diff into place, but the floor jack makes short work of it.
Since the back of the driveshaft was free, I used this moment to undo the front of the driveshaft so that I could access the shifter bushings. I used a big hose clamp to compress the giubo, and, taking care to hold the bolts that are directly against the giubo rubber still and loosen the nuts on the other end, undid the giubo. I then removed the two nuts holding up the center support bearing and lowered the driveshaft. Work on the shifter bushings would come later.
Back to the differential: Out with the old, in with the, uh, even older. Again using the floor jack, I raised the 3.45 into place (man, these old side-loaders are heavy!). I threaded the bolts holding it to the carrier and bushing, not fully tightening them since I usually re-connect the driveshaft and then snug down these bolts. This lets the diff adjust its position slightly to the driveshaft’s actual length, and makes it so that the shaft isn’t pulling or pushing on the rubber giubo.
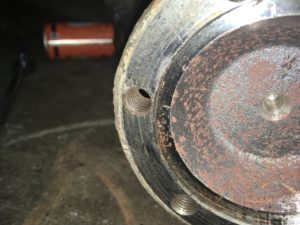
The flange on the 3.07 diff has threaded holes…
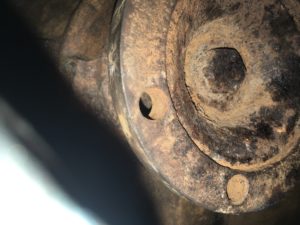
… unlike the thread-less flange holes on the 3.45 diff.
The last step was re-attaching the half-axles. I took one, lined up the holes in it with the holes in the differential flange, threaded in an Allen-head bolt, and had a conceptual disconnect when the bolt popped clear through the other side of the flange instead of being stopped by threads. When I looked, I found that, unlike the threaded flanges in the original 3.07 diff, the holes in the flanges on the 3.45 diff from the 2800CS had no threads.
This rang a bell, but I had utterly forgotten about it. I sent a quick message to my friend Terry Sayther, who confirmed that I just needed to use longer bolts, Nyloc nuts, and washers. The original bolts appeared to be about 60 mm long; I figured another 10 mm should be plenty. A quick perusal of McMaster-Carr’s wonderful website, click click click, and two days later I had what I needed. I probably could’ve gotten away with 65-mm bolts, but the extra length wasn’t a problem; there was plenty of clearance.
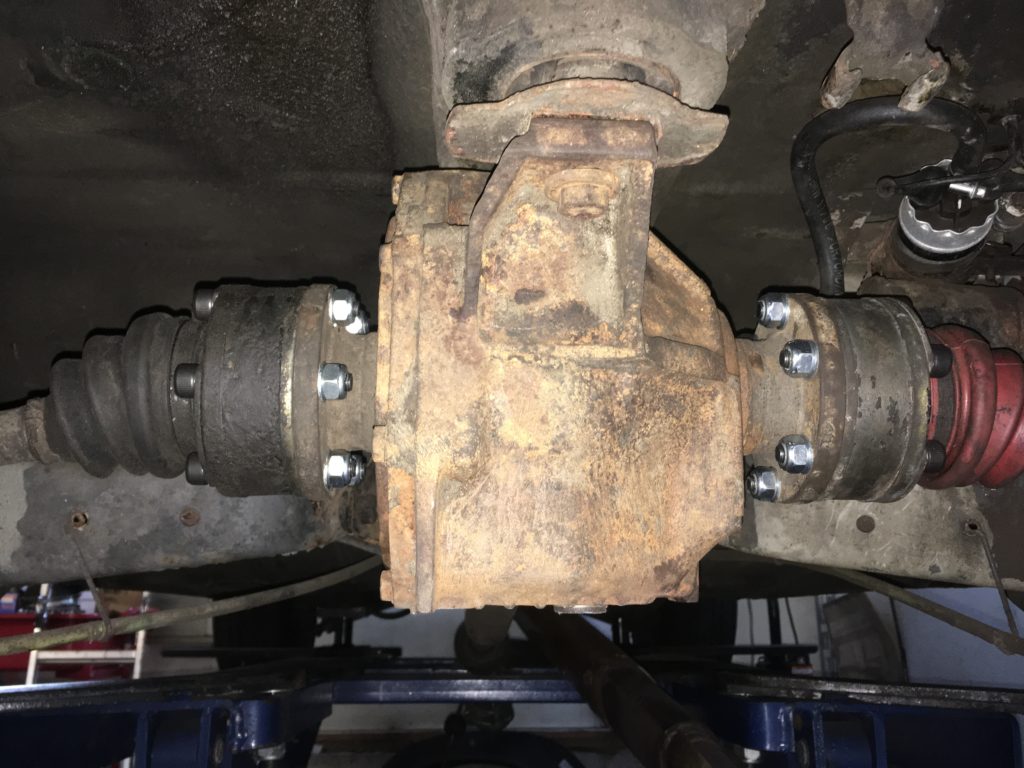
The newly-installed 3.45 diff enjoys the added long bolts and Nyloc nuts.
That just left addressing the shifter bushings, and of course installing the new tank once it arrives. But the hardest part of it seemed to be over.
You know that that’s wrong, don’t you?—Rob Siegel
Got a question for Rob Siegel, the Hack Mechanic? You can find him in the BMW CCA Forums here!
Rob’s new book, Ran When Parked: How I Resurrected a Decade-Dead 1972 BMW 2002tii and Road-Tripped it a Thousand Miles Back Home, and How You Can, Too, is now available on Amazon. Or you can order personally inscribed copies through Rob’s website: www.robsiegel.com. His new book, Just Needs a Recharge: The Hack MechanicTM Guide to Vintage Air Conditioning, will be out in the spring.