Over and over, I hammer this issue of “the Big Seven” things likely to strand a car that’s decades past its warranty period. I list them as fuel delivery issues, ignition issues, cooling system issues, charging system issues, belts, clutch hydraulics on a manual-transmission car, and ball joints. My mantra has been that preventive maintenance of these items—replacing them before they break—is an effective inoculation against a expensive and inconvenient tow and repair far from home.
There’s nothing revolutionary about the preventive-maintenance approach. You’d have to be living in a cave (a cave with no BMWs) to not know about how the cooling system in BMWs since the 1980s has been loaded with plastic components—plastic radiator tanks, plastic expansion tanks, plastic thermostats, plastic snap-on fittings at the ends of hoses—and how they eventually crack, causing coolant loss, which in turn cracks the head if you drive the temperature gauge into the red. If you’re going to daily-drive a high-mileage BMW and rely on it, you’re strongly advised to “do the cooling system” even if it’s not exhibiting any problems.
However, as I and others have written, the quality of replacement parts these days makes prophylactic parts replacement less of a slam-dunk. Last year, I wrote about finally giving my 200,000-mile E39 530i the full-on cooling system refreshment with OE/OEM parts it should’ve had years ago, only to have the brand-new replacement water pump leak. Still, on a car with that kind of mileage, it’s a choice I’d make again.
A tougher question is whether to prophylactically replace a fuel pump on a modern car. On a vintage carbureted car with an overhead cam like a 2002, the fuel pump is so easy to replace that whether you prophylactically change it or not is academic. It’s located up high on the head. Two nuts and two hose clamps and it’s off. If the pump’s age is unknown, you can swap it out before a trip, but if you don’t, throw a spare one in the trunk and it’s about the easiest roadside repair short of replacing a fuse.
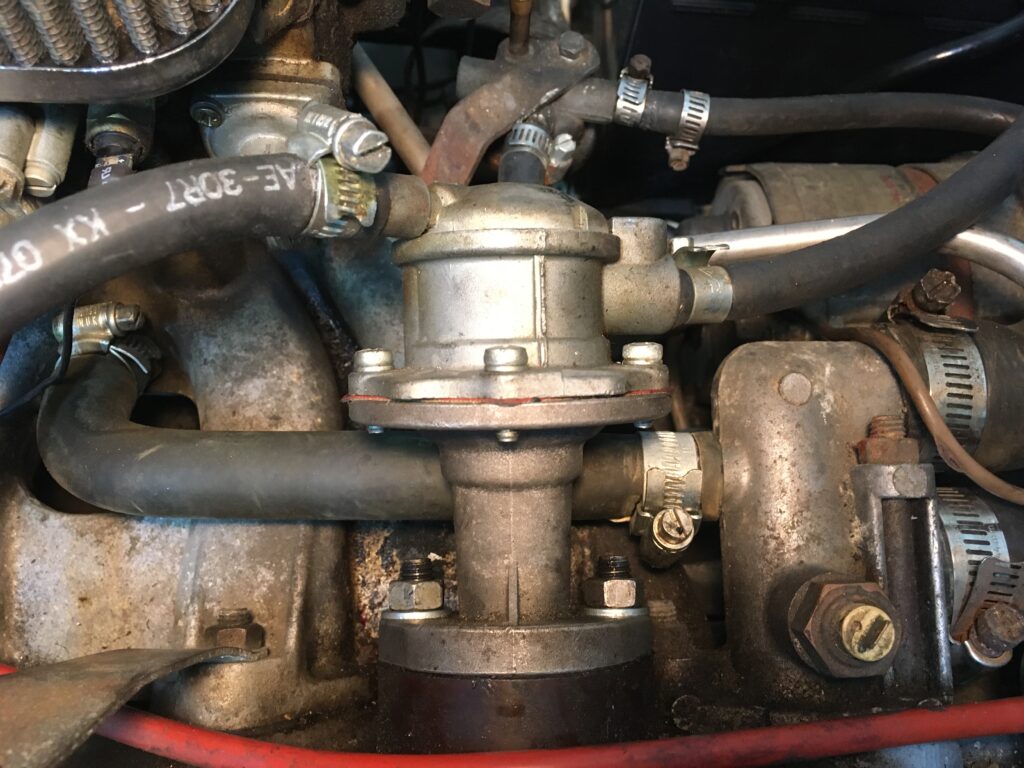
What 2002 owner HASN’T replaced one of these by the side of the road?
On the 1970s fuel-injected BMWs like a 2002tii or an E12 or an E24, there’s a single electric fuel pump located under the car in the back, near the fuel tank. It’s way up under there, making it a not exactly convenient roadside repair (if nothing else, after the gas runs down your arm, you’ll want to take a shower). They’ll often give you a bit of warning before they die—they won’t spin until you give them a little smack. So if I buy a car that does that, I’ll replace the pump. But if I’m road-tripping the car and it dies and I have a safe place to work under it, I can certainly swap the out pump with minimal effort.
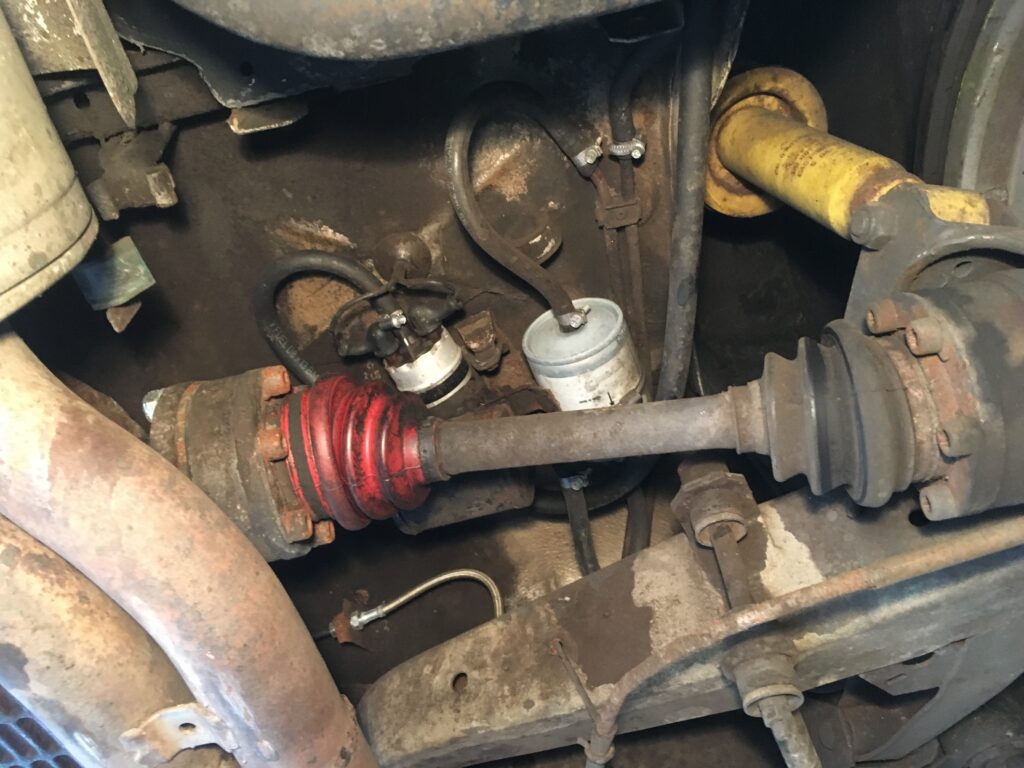
The fuel pump in the rear of my ’79 Euro 635CSi.
With the E28s and E30s came BMW’s first in-tank pumps, accessed by pulling up the bottom bench of the rear seat and lifting up an access panel. On these cars, the pump is a small cylinder that’s in-line with a pick-up tube that includes the flange that bolts to the top of the tank. Unbolt the flange, and a rigid unit of flange, pump, and pick-up tube lifts right out.
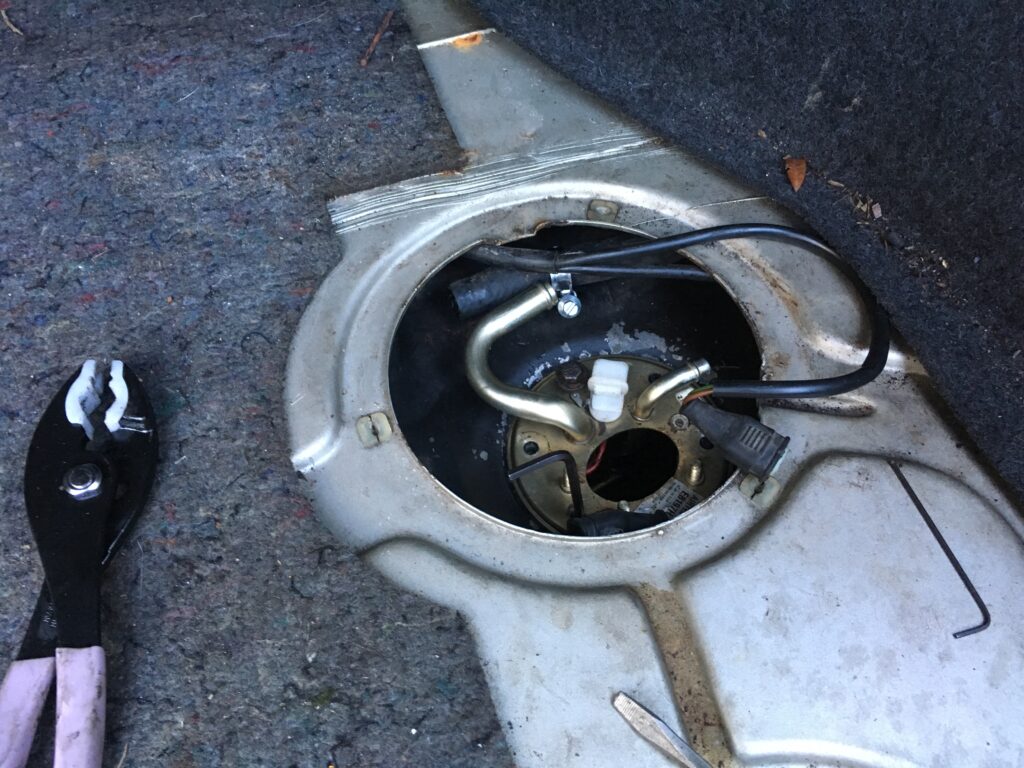
The top of the flange of an E28 in-tank fuel pump. The hole in the center is where the tube for the level sensor has already been withdrawn.
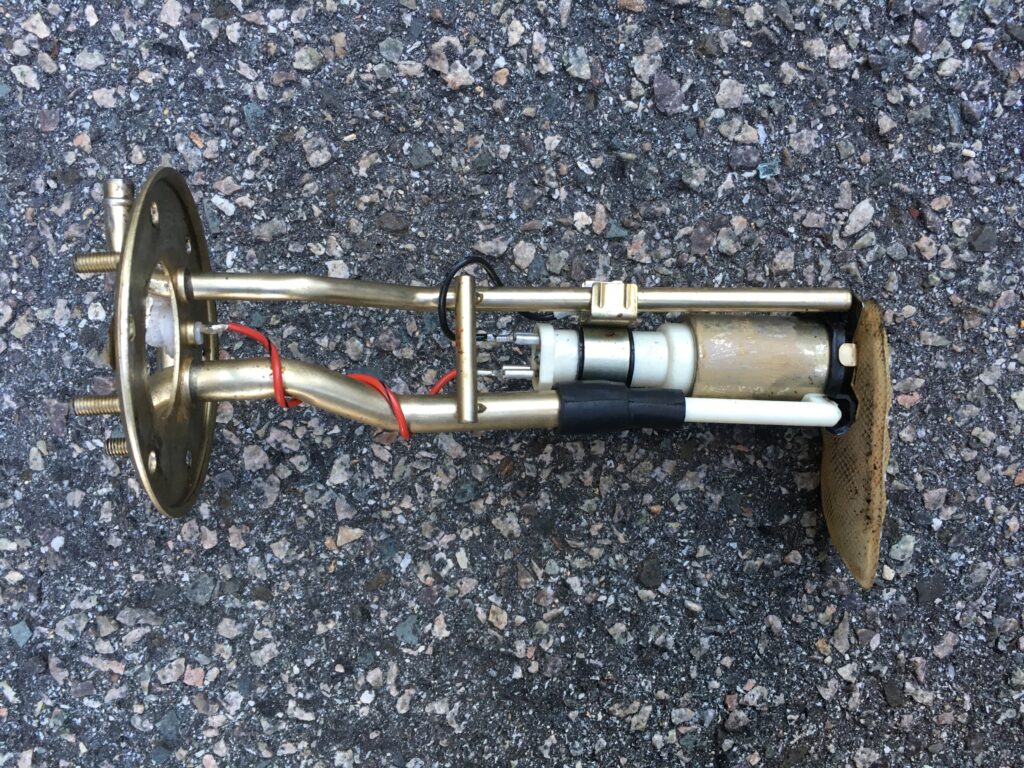
The E28’s in-tank pump assembly.
This rigid design is in stark contrast with what I encountered when I replaced the fuel pump on the E39 two years ago, which I did after the car died repeatedly on a hot day while driving with a low tank of gas. After I filled the tank, the problem didn’t recur, but considering that the car did die multiple times, replacement was not a preventive measure to me—if I didn’t replace it and it died again and left me stranded, I would’ve felt like an idiot, and I try not to feel like an idiot.
The thing to realize about these modern in-tank fuel pumps is that the four functions of 1) flange at the top to connect to the rubber send and return hoses, 2) pick-up tube to extend to the bottom of the tank and draw up fuel, 3) the fuel pump itself, and 4) the level sensor are all part of an ungainly non-rigid fuel pump assembly. I liken it to a dead squid, some parts of which have rigor mortis. Removing and installing the assembly is considerably more challenging than just pulling out a rigid unit like in the E28.
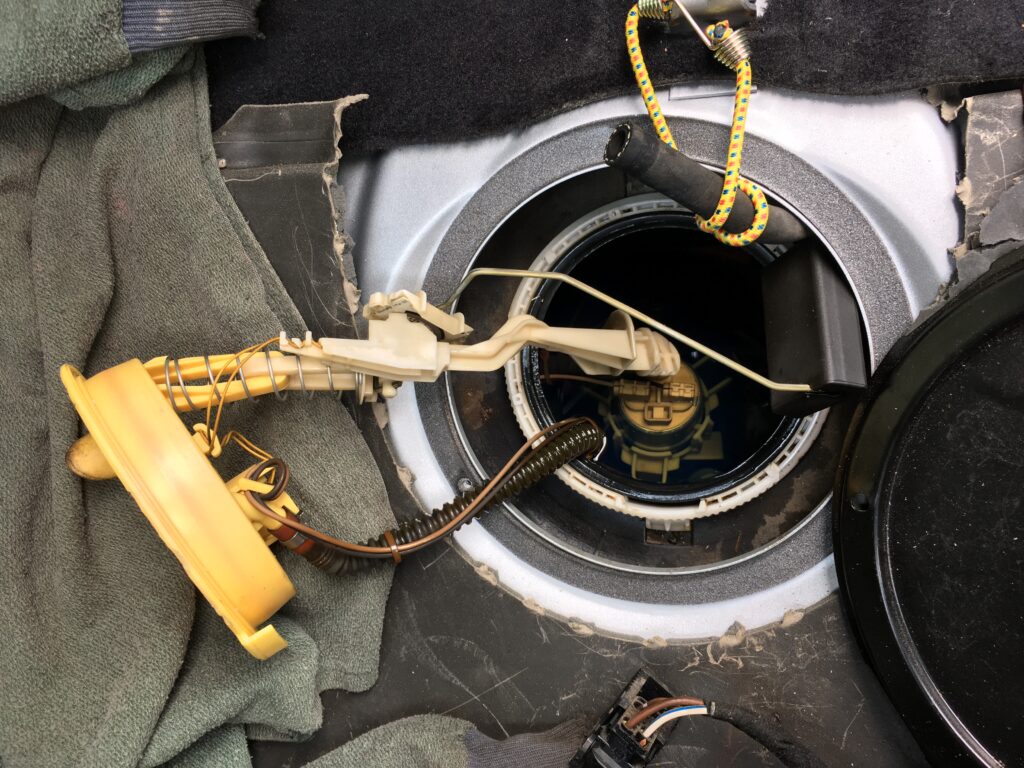
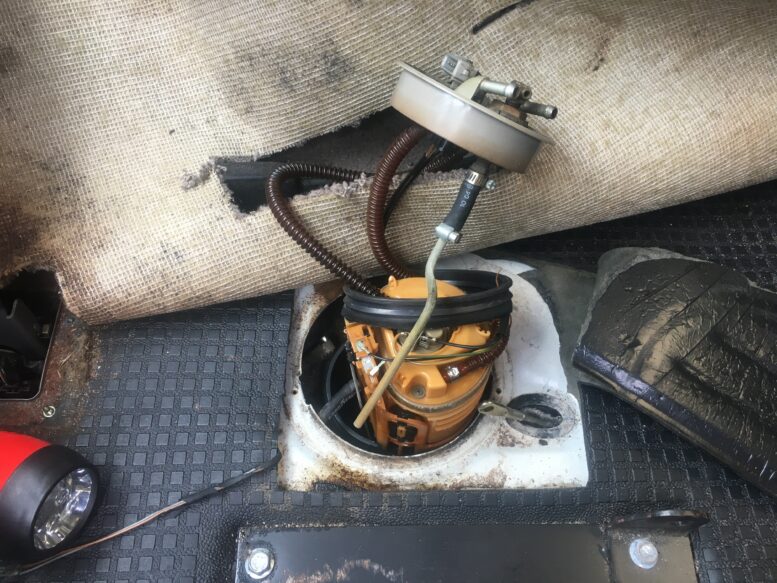
This looks like a scene from Alien, but it’s actually what you see when you began to withdraw the fuel pump from the E39’s tank.
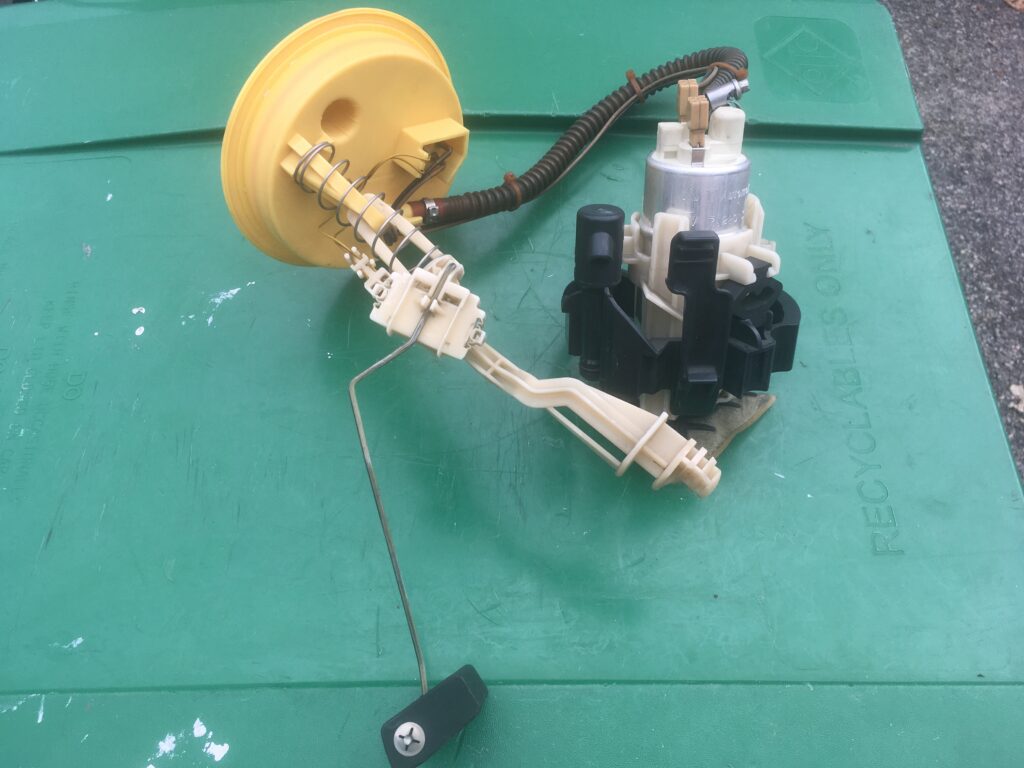
Once withdrawn, you can see the flange, the “cradle” containing the fuel pump, the flexible plastic hoses connecting them, and the float and arm for the level sensor.
I had to examine the question about prophylactically replacing an in-tank fuel pump because, it now being summer, I re-registered my little Winnebago Rialta (the VW Eurovan with a camper body on it) in preparation for Maire Anne and I spending some time on the Cape. I’d been largely doing the “If it ain’t broke, don’t fix it” thing with the Rialta until two years ago when a number of issues bit me. First, it died in my driveway. This turned out to be due to a crack in the coil pack that grounded itself if any moisture was near—a quick diagnosis and a trivial replacement. Then, while at a campground on the north shore last summer, the alternator died. I nursed the rig home, replaced the alternator, and got a bit of religion on preventative maintenance. I pored over the stack of receipts from the previous owner, saw that the water pump and all the ignition normal-wear-and-tear parts had been replaced about ten years ago, but found nothing about the fuel pump, so I bought a ordered a new VDO fuel pump from FCP Euro. I felt like a responsible automotive adult.
However, on the Rialta, in addition to the fuel pump being in the tank, accessing it reportedly required removing both of the front seats, pulling up the carpet, and removing portions of the handbrake and shift lever assemblies. This seemed like a lot to go through when there were absolutely no symptoms of any fuel delivery issues. So, I put the fuel pump in one of the RV’s cabinets, thinking that, if push came to shove, I could replace it roadside, or even if I couldn’t, having the part in hand would probably make it a one-day turnaround instead of three for a repair shop.
Now, there are two schools of thought to this “have a new one in the cabinet” thing. One is that why wouldn’t you want to have a spare fuel pump or other “Big Seven”-related part in the cabinet? The other is that if you bought a new part specifically because you think the one in the car is going to fail, why don’t you replace it before you go on the trip? I vividly recall prepping my ’72 2002tii “KUGEL” to drive to MidAmerica 02Fest in 2014 and packing a spare radiator. Why? Because I had a triple-core radiator installed which made the car run nice and cool, but there was too little clearance between it and the fan, and on hard braking I could hear the fan ticking against it. Shortly before I left, I realized that bringing a spare radiator just in case I happened to tear a hole in the one in the car was stupid. I had a known problem that I needed to remedy. So I did. In contrast, I had no known problem with the Rialta’s fuel pump, and so I was comfortable with my rationale for having a spare in the cabinet.
But a funny event changed my mind. Well, not funny to the person it happened to. Our friend Keith Martin, publisher of Sports Car Market (SCM) magazine, posted on Facebook a photo of his well-sorted ’72 Mercedes 250C on the back of a flatbed due to a failed fuel pump. It struck me as an omen. With a couple of weeks before our scheduled trip, I decided to whittle away at the replacement of the Rialta’s fuel pump, both for the peace of mind, and because I wanted to know whether, once it was done, I could’ve replaced the fuel pump by the side of Route 6 or not.
Long story short… no.
Exposing the pump wasn’t as bad as I thought. The fact that my Rialta has “captain’s chairs” means that the seats are on pedestals, so the bolts holding them on are easily accessible. The bases of the handbrake and shifter came up easily. Some finagling was needed to pull the carpet up and flip it to the side, but the second seat didn’t need to come out. But when I exposed the top of the gas tank, the recess where the flange and hoses are was filled with mouse detritus that had to be vacuumed out lest it fall into the gas tank.
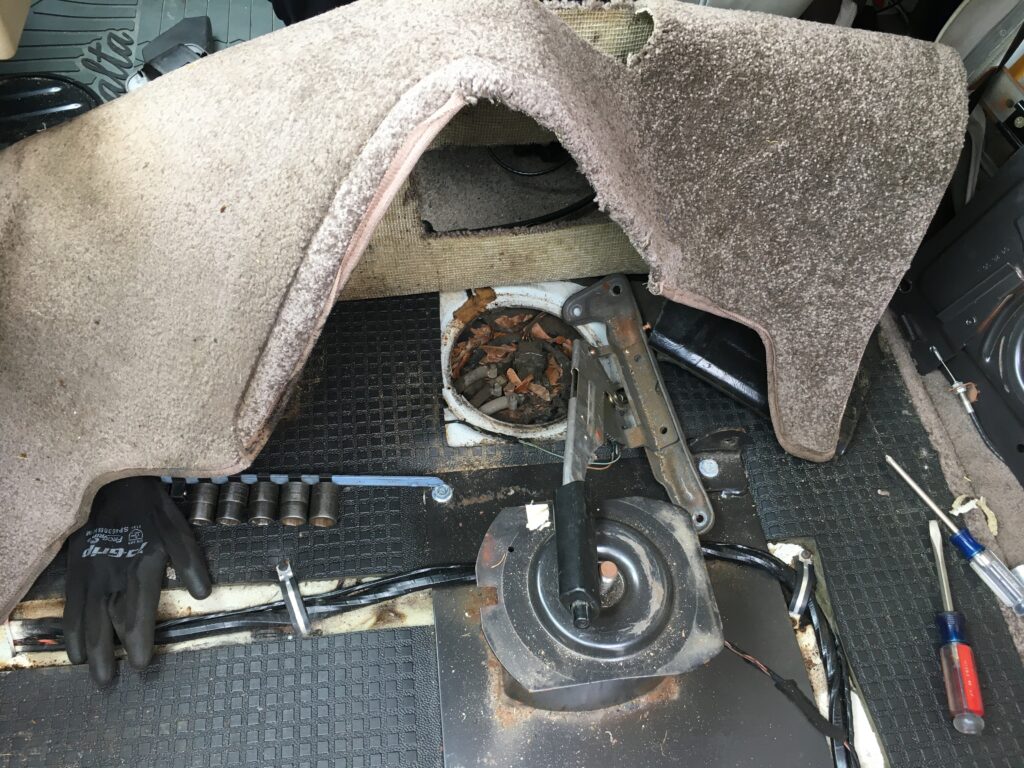
Yeah, this wouldn’t be fun on vacation.
Pulling the floppy assembly out of the tank was similar to how it was on the E39, except that the pump itself was a twist-lock onto a plate on the bottom of the tank, and even though it was supposed to unlock with a left-hand twist, it was reluctant to give it up. This simple task took me several hours. Finally, I dared my damaged back to let go before the pump did, and my back won.
Once the pump assembly was out, I began the surprisingly time-consuming task of detaching everything from pump so the other components could be reused.
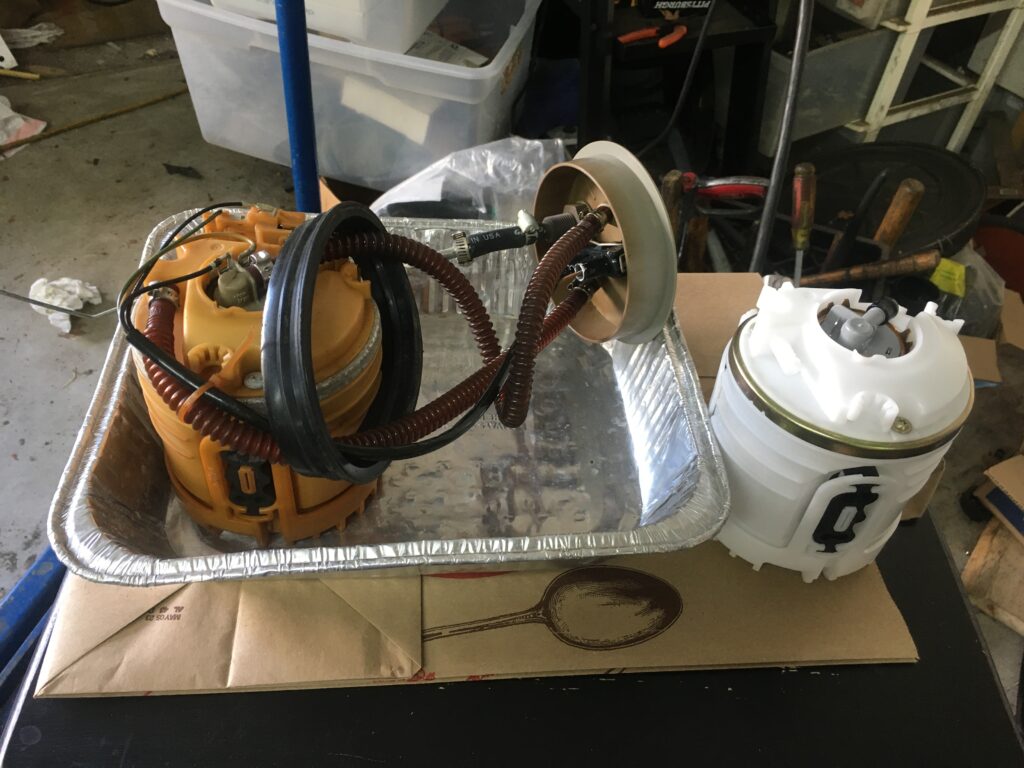
The coat-hanger-thin arm for the level sensor can be seen hanging off the left of the old pump. The new pump is on the right.
The corrugated plastic hoses were very difficult to remove from the original pump. First, those crimped-on clamps needed to be removed (always a bit of a challenge). And once they were off, the 27-year-old plastic hoses were still attached with a death grip. Yes, I could’ve replaced the hoses with new rubber, but it would’ve been a similar amount of work, as then they would’ve needed to be removed from the underside of the flange, and if I broke those nipples, I would’ve been in a world of hurt. I carefully pried the plastic hoses off using a pair of 9mm wrenches as levers. It was tedious work done at a table in the garage, with the pump sitting in a disposable aluminum roasting pan to contain the gas seeping out of it. These are the kind of things that are much easier to do in the comfort of your garage than under duress on the road.
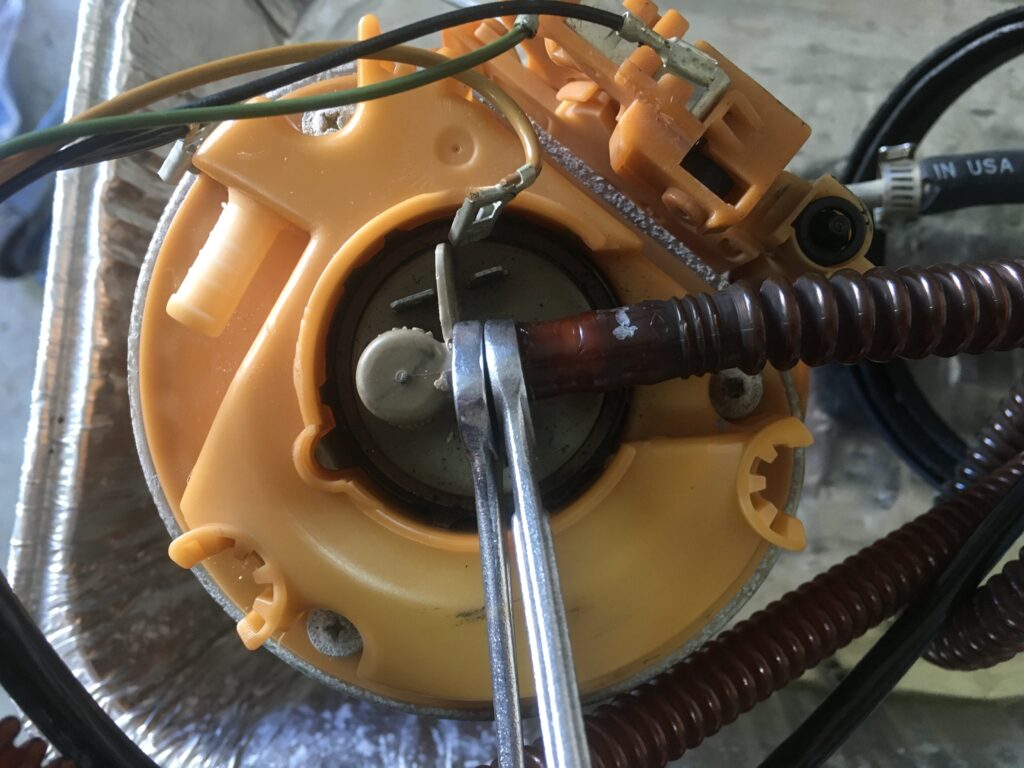
Who thought this would be the most time-consuming part of the job?
I couldn’t tell the age or even the brand of the pump I’d removed. That is, it wasn’t like doing the E39’s cooling system and finding some parts with original 2003 date codes on them.
With all the parts finally swapped over, the new pump went in without drama. I turned the key, cranked it while the system primed, and the pump-transplanted Rialta started. I buttoned the interior back up.
The “could I have done this on the road?” question wasn’t even close. I can’t imagine doing it unless I really had a compelling reason (like no available repair shop for a week), and even then, only if the RV, Maire Anne, and I were somewhere safe and shady.
And now, I don’t need to worry about it. And that’s really the core issue behind any of these “if it ain’t broke should I replace it?” preventive maintenance questions.
—Rob Siegel
____________________________________
Rob’s newest book, The Best of The Hack Mechanic, is available here on Amazon, as are his seven other books. Signed copies can be ordered directly from Rob here.

