Our story thus far: I’d installed air-conditioning into my 1973 E9 3.0CSi twenty years ago. It worked adequately, though not spectacularly. In 2013, during a road trip to the Vintage, a clevis pin fell off the back of a truck, smashed through the E9’s front grille, and embedded itself in the old-style serpentine-flow condenser.
Miraculously, the pin got stuck between two cooling tubes, not puncturing either. However, it reminded me that the serpentine-flow design was obsolete, and that installation of a modern parallel-flow condenser would almost certainly improve the a/c’s performance.
I measured the inside of the nose and purchased the largest parallel-flow condenser that would fit (16″x22″), but it took a couple of years for me to actually install it. It finally went in two years ago.
To my surprise, there was very little discernible improvement. Then, when I pulled the car out of storage at the start of this summer, I discovered that the a/c didn’t work at all. I hooked up a manifold-gauge set and found that it seemed low on refrigerant, but in addition to that, the manifold gauges were sluggish; the low and high-side gauges took a while to return to static pressure when the a/c was shut off. This is symptomatic of a restriction in the system. I decided the restriction was most likely due to a plugged expansion valve. Unfortunately, replacing it necessitates pulling the console and the evaporator assembly out of the car, which is one my least-favorite repairs on the E9 due to the fragility of the ancient console pieces.
When I pulled it apart, I found that the expansion valve was dirty but not completely clogged. I flushed out the core to be certain it wasn’t clogged. There was little to do but replace the valve, button things up, flush the system’s remaining hoses, and see what all this work had brought me.
In last week’s piece, I’d rebuilt the evaporator assembly using a brand-new blower motor. I tested it by temporarily wiring it directly to the battery to be certain that the squirrel cages spun without hitting anything. With that done, it was time to—finally!—reinstall the assembly and reclaim my precious a/c in my precious E9.
However, installing the evap assembly meant dealing with the dreaded “intermediate piece,” the BMW parts catalog’s name for the roughly Kleenex-box-size part that sits over the opening on the top of the evap assembly and directs air in your face, as well as, if desired, to the defroster vents. In the illustration below from RealOEM, it’s #13, part number 64501811407, and long listed as NLA. As pictured, you’re looking at the back of the piece; the angled vent shown is the part that faces the firewall of the car. The piece shown in the diagram has cylindrical ports on the side, but the piece in the E9 doesn’t have those. That version of the piece is in E3s (Bavarias), since E3s have the circular dash vents on the corners.
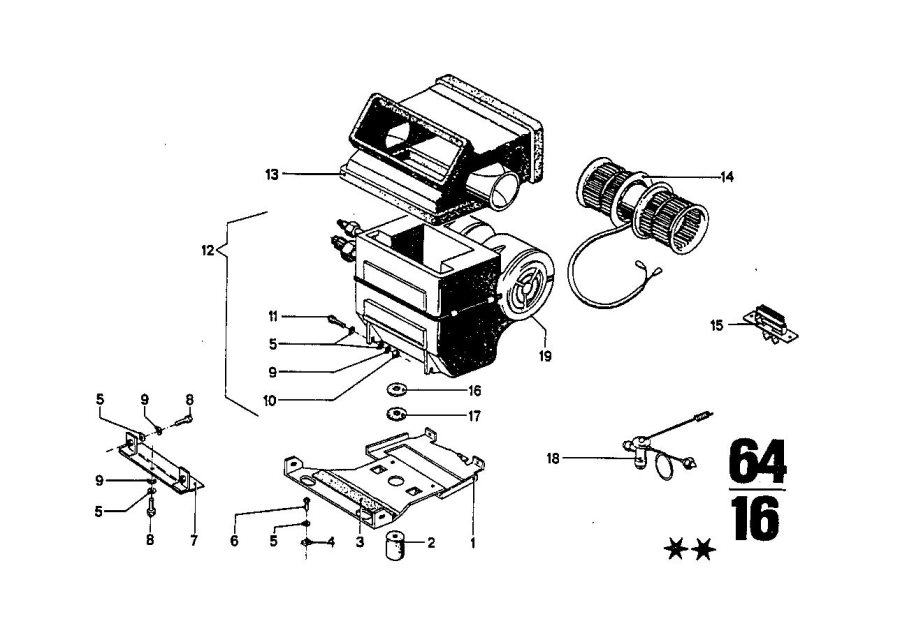
The “intermediate piece” is #13.
You can also see from the illustration that the evap assembly is held in place by a base plate (#3) with a front bracket (#7). Together, the brackets and small fasteners hold the assembly up to the intermediate piece and allow it to seal against the other pieces. At least in theory.
The first problem is that the openings of the intermediate piece are all lined with felt to help it seal and not let the precious cold air leak out before it is expelled in the direction of your face. That felt, however, is now 46 years old, and as you can see from the photos above and below, is in poor condition.
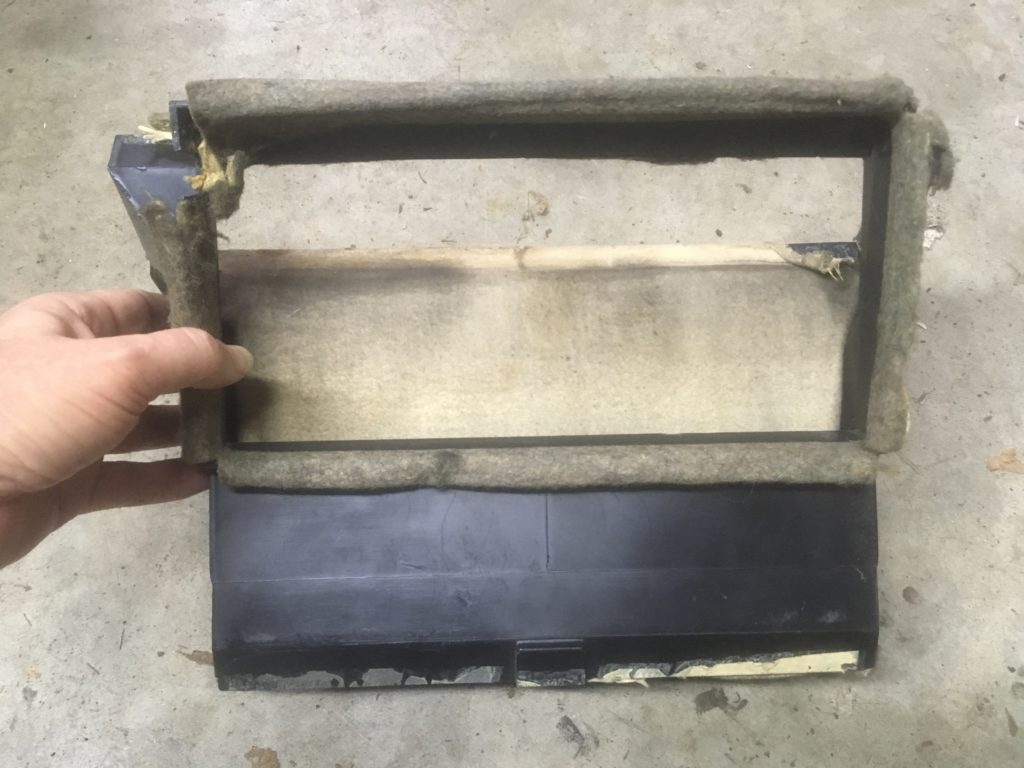
The underside of the intermediate piece showing the old fragile felt.
I thought about replacing the felt with the same thin adhesive-backed closed-cell foam I use to replace the degraded foam on heater box flaps, but that brings us to the second problem: The plastic is 46 years old as well, and will crack if you so much as look at it the wrong way. I decided that relining the openings with foam, although it would help seal them up, would create pressure on the piece during installation and increase the likelihood of cracking. Given the choice of having it remain intact or having it leak a little cold air, I opted for the former.
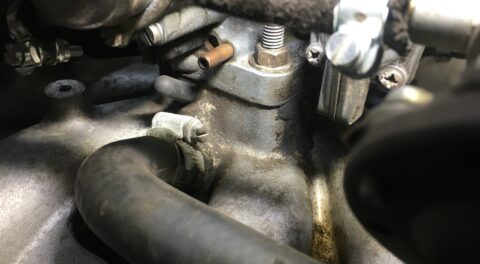
Installing the evaporator assembly and the intermediate piece is a delicate process. You need to sit the piece on top of the assembly, tilt them both, slide them forward into place, mate up the opening of the piece with the underside of the dash, raise up the assembly, secure the assembly temporarily with the retaining fasteners, and attach the metal a/c hoses. Then, once the Bowdin cables are back in place (and don’t get me started on those), you reinstall the front vent and sliders, align the assembly, intermediate piece, sliders, and brackets to make things fit as best you can, and tighten the fasteners.
I was just at the beginning of performing this procedure when I heard the unmistakable sound of intermediate piece cracking.
Damn it!
My reaction was less from concern of cratering the functionality of the system—that is, I knew that a piece of duct tape or JB-Weld could coax the piece into remaining in position—than in having been party to the transition of a fragile unobtanium part that had survived to this point in time only to cross the boundary from the uncracked universe into the cracked one before my very eyes and ears.
Oh, well. Onward.
One of my Hack Mechanic Tips For Sane Living is to verify a repair as early as possible. That’s why I temporarily wired the evap assembly to the battery to make sure that the squirrel cages on the fan didn’t rub; you want to know things like that before you spend hours installing the assembly. Likewise, I had many hours of assembly ahead of me, but I wanted to know ASAP if the rebuilt evaporator assembly with its new expansion valve solved the problem. So I pressure-tested the system with nitrogen, found that it held, hooked up the vacuum pump, and ran it for 90 minutes. While it was pumping the system down, I jury-rigged enough of the electrical controls to be able to turn on the compressor, the condenser fan, and the blower motor . With the system pumped down, I shot in the first can of R134a.
As I write in my air-conditioning book, recharging a non-stock a/c system is a little bit like divining the future by reading portents. The high-side gauge should go high, the low-side gauge should go low, the can of refrigerant should feel cold as the gas is drawn into the system and expands, the hose going into the evaporator assembly should begin to get cold and sweat, cold air should begin coming out of the vents, and the vent temperature thermometer should drop.
The first three of those things happened. The second three, unfortunately, did not.
Further, when I shut off the a/c, I noticed that the manifold gauges returned to their static reading slowly and sluggishly, just as they did before I pulled things apart, particularly the high-pressure gauge.
In other words, despite having diagnosed the problem as a clogged or otherwise misbehaving expansion valve—by far the hardest component to replace—and pulled out the evap assembly to replace it, and cracked the uber-rare intermediate piece while putting the assembly back in, I still had the same problem. I went through several of the stages of grief, including anger, bargaining, and resignation. I’ll add embarrassment, since I did write a goddamn air-conditioning book.
With both the expansion valve and the receiver-drier newly replaced, the problem pretty much has to be in either the compressor or the condenser. The compressor is the one I installed 20 years ago when I did the retrofit. It’s functioned fine, and the fact that I see the high side go high and the low side go low when I switch it on indicates that it’s compressing. The condenser is the new 16×22 parallel-flow unit I installed a couple of years ago. I have another compressor sitting in the garage, a brand-new Sanden 508 clone I bought for the a/c resurrection in my ’75 2002 (Bertha) but wound up not needing. The parallel-flow condenser is a $45 part from Amazon. I just put a replacement on order. I’m pretty sure it’s the same part number as the one I installed two years ago, so, with any luck, the fittings and mounting holes are all in the same place. However, with these Chinese-made parts, there’s no guarantee of that.
Which component will I install first? A part of me thinks “Just throw them both in and be done with it,” but the engineer/problem solver in me wants to know which one is actually bad. I’m thinking I’ll try the compressor first, as I can replace it fairly easily from under the car. The condenser, because it was sized to be the biggest one that I could fit in the nose, was a bit of a pain to install, and requires pulling th radiator to get at it from the back.
This isn’t a story; it’s a bloody tragedy. I hope you’re enjoying this. I’m certainly not.—Rob Siegel
Rob’s new book, Just Needs a Recharge: The Hack MechanicTM Guide to Vintage Air Conditioning, is available here on Amazon. His previous book Ran When Parked is available here. Or you can order personally inscribed copies of all of his books through Rob’s website: www.robsiegel.com. His next book, Resurrecting Bertha: Buying Back the Car My Wife and I Drove Off From Our Wedding, will be released in the fall.