As I wrote about last week, I’m installing air conditioning in my 1969 Lotus Elan +2 using an electric compressor. A fair amount of work has gone into carefully designing and installing the new circuit that supports the compressor (which draws from 40 to 80 amps) in such a way that the current doesn’t flow through the car’s original 55-year-old Lucas wiring. There’s one relay that switches the compressor on, and a second one that turns on the condenser fans.
If you don’t know, a relay is basically a remote-controlled switch that’s thrown by a little electromagnet. Thick wires are generally used to carry current to the device you want to turn on with the switch, but thin wires can be used for the electromagnet. If you’re installing, say, a big cooling fan or driving lights or a power amp, this makes it so you don’t need to run thick high-current wires up to the switch you install on the dashboard to turn it on; you only need the thick wires between the device, battery, and ground. The little numbers are the so-called DIN-standard relay terminals. 30 and 87 are on the high-current side of the relay. 30 supplies 12 volts from the battery, and 87 goes to the device you want to turn on. 86 and 85 are on the low-current side. 86 supplies 12 volts from a turn-on switch or sensor, and 85 is ground. So, feed 86 12 volts and ground 85 to get low current flow through the electromagnet, which pulls the internal contact connecting 87 and 30 closed, causing high current to flow from 30 to 87 to your device and then to ground. Pretty simple, really. Almost every small square-box relay in your car works this way, although some of them, like your horn, are switched on the negative side instead of the positive side.
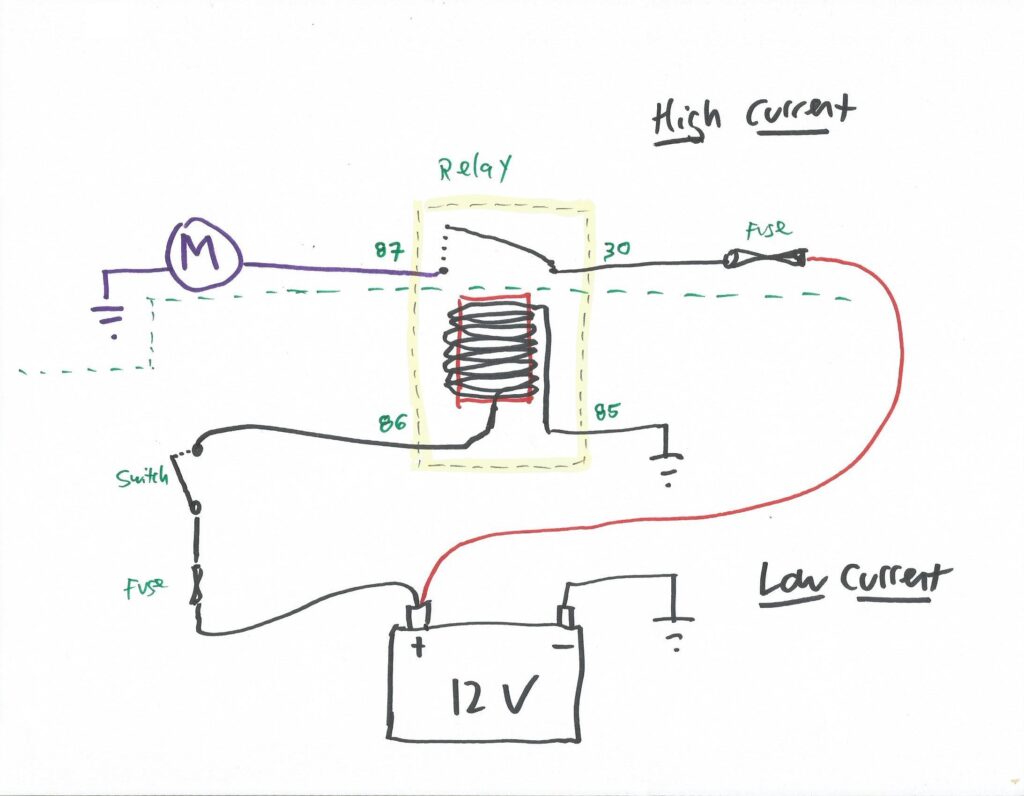
A standard circuit with a relay, a device that it turns on, a switch, and fuses.
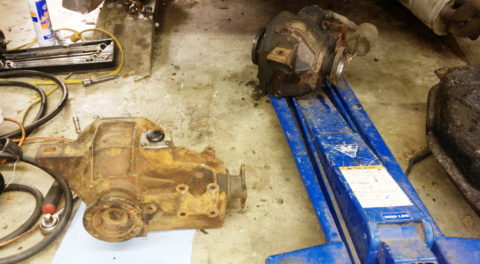
Having retrofitted air conditioning into half a dozen vintage BMWs (and revived it in many more), and knowing that you always run the condenser fan off a relay, I can install them in my sleep. Connect a blade fuse holder between 30 and the battery, run a wire from 87 to the fan, connect 86 to the fan turn-on signal from the evaporator assembly, run a ground wire to 85, done. But this installation in the Elan +2 was complicated by the fact that there’s no mechanical fan on the water pump. There are only a pair of electric fans on the radiator. So the radiator fans need to pull double-duty as the condenser fans, so they have to be turned on both by the evaporator as well as by the adjustable thermostatic sensor switch mounted on the radiator. Further, because I’ve learned not to trust that sensor, I wired in a manual override switch (it’s literally a 2002 blower fan switch hose-clamped to the steering column) so if I see the temperature creeping up, I can reach down, pull the knob, and power-up the fan.
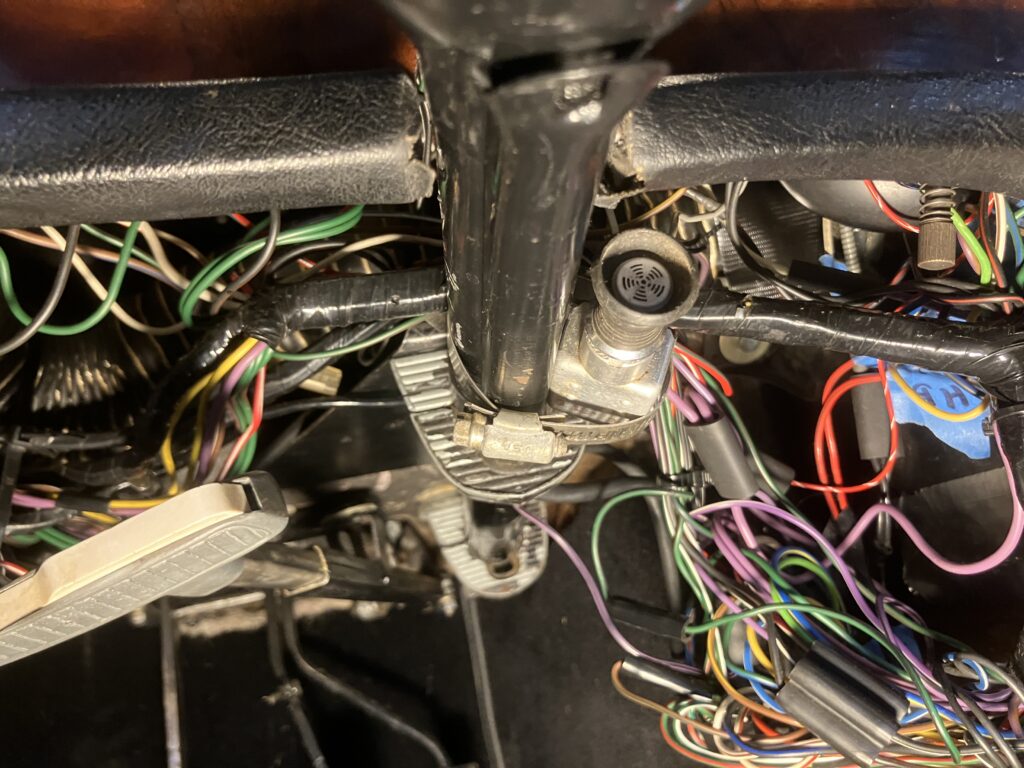
Totally not kidding about reusing a 2002 blower fan switch in the Elan +2.
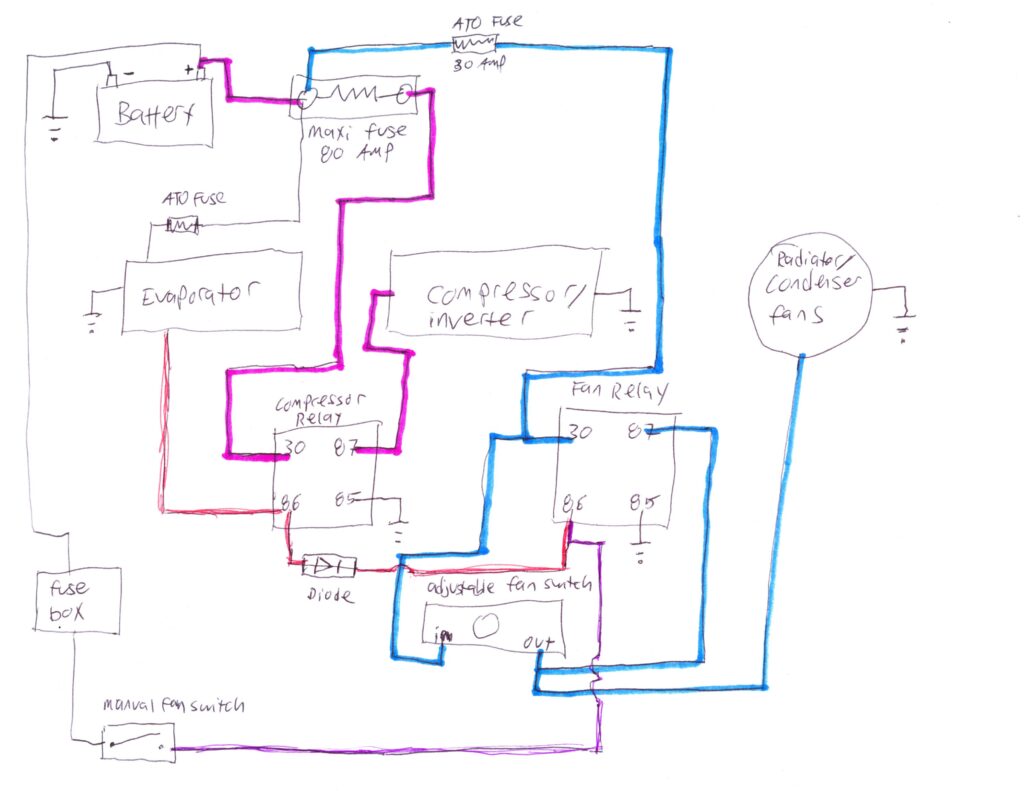
Wiring all this up involved having the compressor relay and the manual override switch both trip the fan relay, as well as have the thermostatic switch directly power the fan. It got complicated enough that I, who loudly proclaims that it’s rarely necessary to consult a wiring diagram to figure out what’s going on in a vintage car, needed to draw one up in order to keep the installation straight. In this diagram, the new thick 4-gauge wiring for the compressor is in magenta, and the new 10-gauge wiring for the condenser fan is in blue. The three methods of turning on the fan are also highlighted, with the manual override switch path shown in thin purple, the turn-on from the condenser shown in thin red, and the adjustable thermostatic sensor (that I don’t really trust) part of the blue path.
There’s only so much I can hold in my head.
You’ll also see something surprising on the thin red path—a diode. This is because after I wired the system up and carefully tested it, I discovered that turning on the evaporator to fire up the air conditioning did indeed trip the fan relay and turn on the condenser fans as desired, but that yanking the fan override switch to turn the fans on had the most unwelcome consequence of turning on the air conditioning!
What was going on is a phenomenon called “back-feeding.” It’s a common issue when towing. On a “dumb” tow where a truck is towing a small trailer, the trailer’s lights are powered through the hitch connector and current only flows one way, but on a “smart” tow where the thing being towed has its own power system (like if a vehicle is being towed behind a motor home), current can flow in a direction you don’t want.
If you look at my wiring diagram, you can see what was happening. Turning on the manual fan switch sent current through the thin purple path to terminal 86 of the fan relay and turned it on, but because I had it wired so the compressor relay would trip the fan relay, these two relays were connected, so current back-fed along the thin red path in the direction opposite from the one I’d intended—from fan relay terminal 86 to compressor relay terminal 86, and then from there to the evaporator. Sheesh!
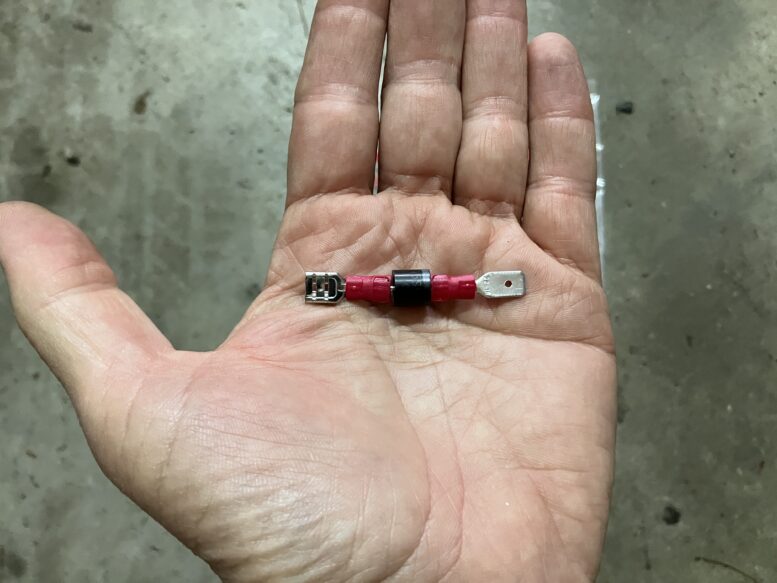
A diode is an electrical component that only allows current to flow one way. While there are all sorts of bulkhead-mountable $20 devices available from the trailer world, all that was needed was a diode, a few connectors, and a length of heat-shrink tubing. $6 bought me 25 of them on Amazon.
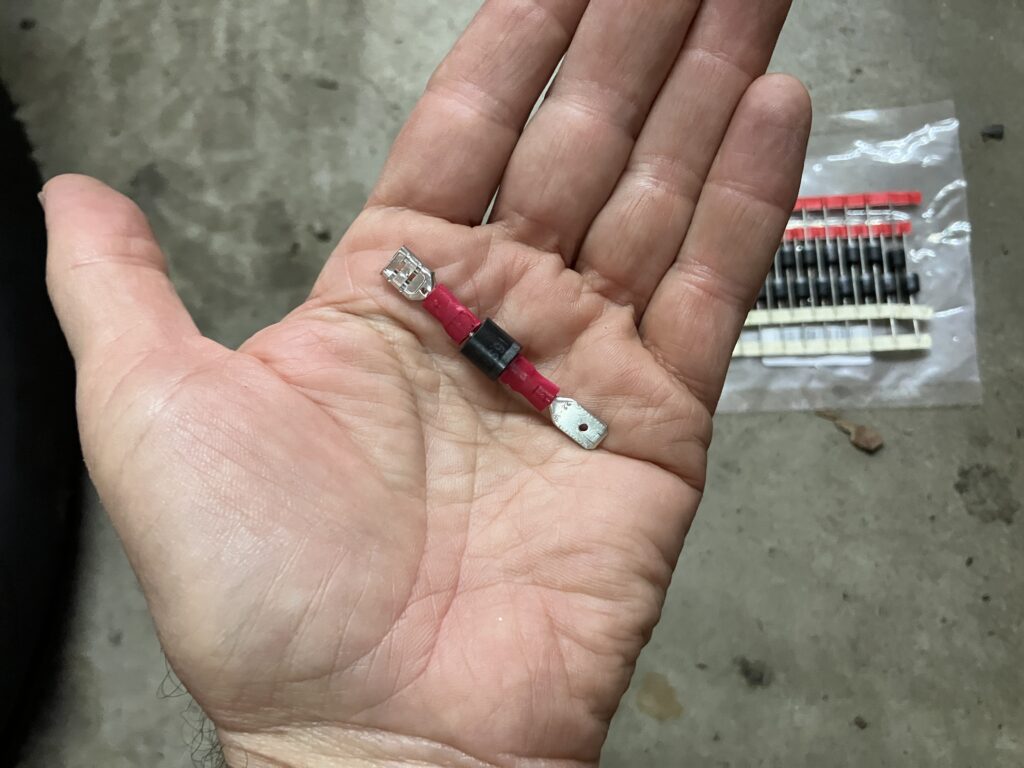
The pack of diodes in the background, and a diode with connectors crimped onto the ends in my hand.
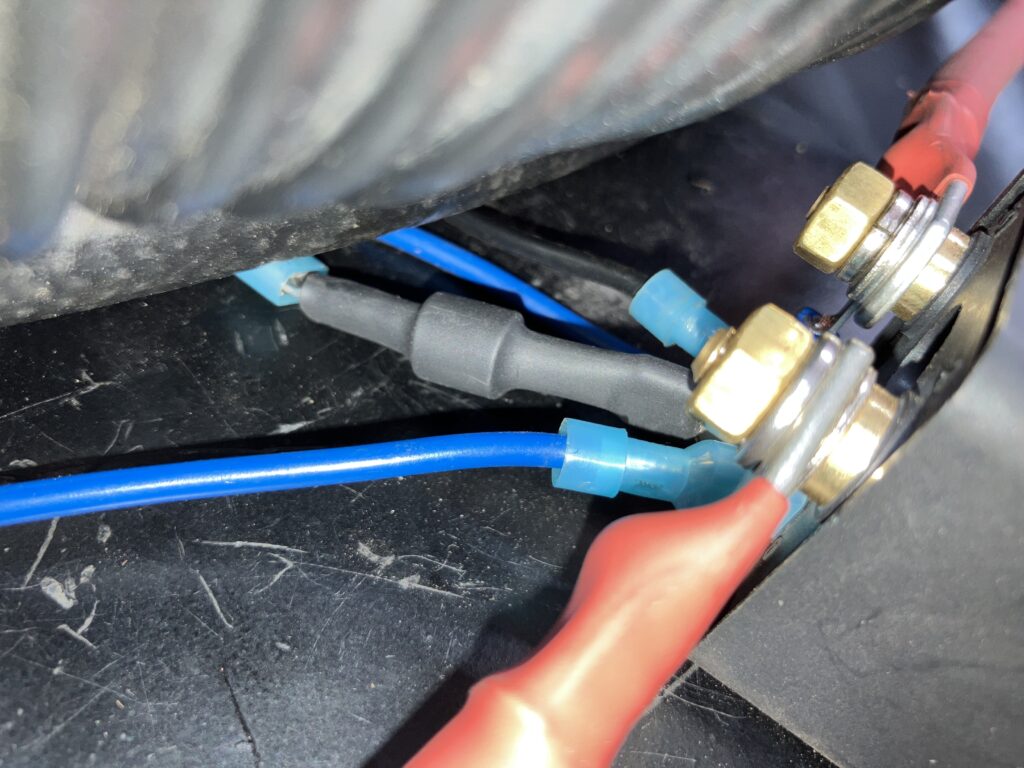
The heat-shrunk-and-installed final product.
So, if you delete the mechanical cooling fan in your vintage BMW, rely only on a thermostatically-controlled electrical cooling fan, don’t trust the thermostatic sensor, install a manual-override switch, then decide to install electric air conditioning, and find that it’s accidentally being turned on by the fan override switch, you’ll remember this article and not feel like a lone whack job.
Hey, it could happen.
—Rob Siegel
____________________________________
Rob’s latest book, The Best of The Hack Mechanic, is available here on Amazon, as are his seven other books, including Just Needs a Recharge: The Hack Mechanic Guide to Vintage Air Conditioning. Signed copies can be ordered directly from Rob here.
Tags: diode electrical schematic override