In my book Just Needs a Recharge: The Hack Mechanic Guide to Vintage Air Conditioning, I define “vintage air conditioning” as a system that doesn’t have climate control (meaning the evaporator assembly is separate from the heater box and there’s no blend door combining the hot and cold streams), has standard a/c fittings and not model-specific “block fittings,” originally had R12 in it, might have originally had flare fittings instead of the better-sealing o-ring fittings, and, when converted to R134a, probably should have improvements made in order to cool better. The systems in 1970s-era BMWs where I spend most of my wrenching hours (2002, Bavaria, E9) are textbook examples of vintage a/c systems.
The E30, however, straddles this line. It’s a car that originally had R12 in it and uses standard fittings (though the bent metal pipes that run through the firewall are more associated with newer cars). However, while it doesn’t technically have climate control, the heater and evaporator cores are contained in the same box. I’m not complaining about this last part. In a nice piece of design, both cores can be slid out without removing the heater box, something I was thrilled about when I discovered it while dealing with the mouse infestation in the FrankenThirty.
However, one area I’d neglected to include on my “vintage a/c” list is the degree of electrical simplicity of the a/c system. In a vintage system, it’s so basic that you never need a wiring diagram to diagnose anything. You just trace wires. Turning on the a/c blower fan trips a relay that turns on the compressor fan, and sends 12V to the compressor unless it’s blocked by the a/c temperature switch or the drier’s pressure switch. This is depicted in the generic diagram from my book.
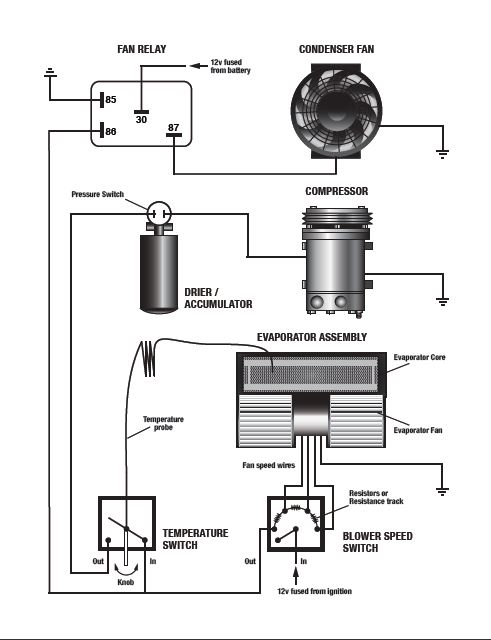
Typical a/c wiring on a vintage car. Copyright 2018, Hack Mechanic Press, used by permission. Oh, right, I’m the publisher, I gave the permission. I may need to sue myself.
So, with that vintage mindset, and with the FrankenThirty’s plumbing now complete and the system holding pressure for several days, I decided to test the electrical system by turning on the blower fan, condenser fan, and compressor, figuring that, even if it’s not all working, how hard could it be to troubleshoot and fix?
Oh my lord what a giant pain in the ass.
First, the trivial part. I already knew that the blower fan worked. It’s the same dual-squirrel-cage fan that pushes fresh air into the cabin, and I already knew that that worked. This is another advantage of having the evaporator and heater cores in the same box. One fan to rule them all, one fan to blow on them. The blower fan in the FrankenThirty is a little squeaky, but that kind of fits with its mouse-infested heritage. I hadn’t yet checked that it still worked when I pressed the a/c switch, but I did, and it did. One down, two to go.
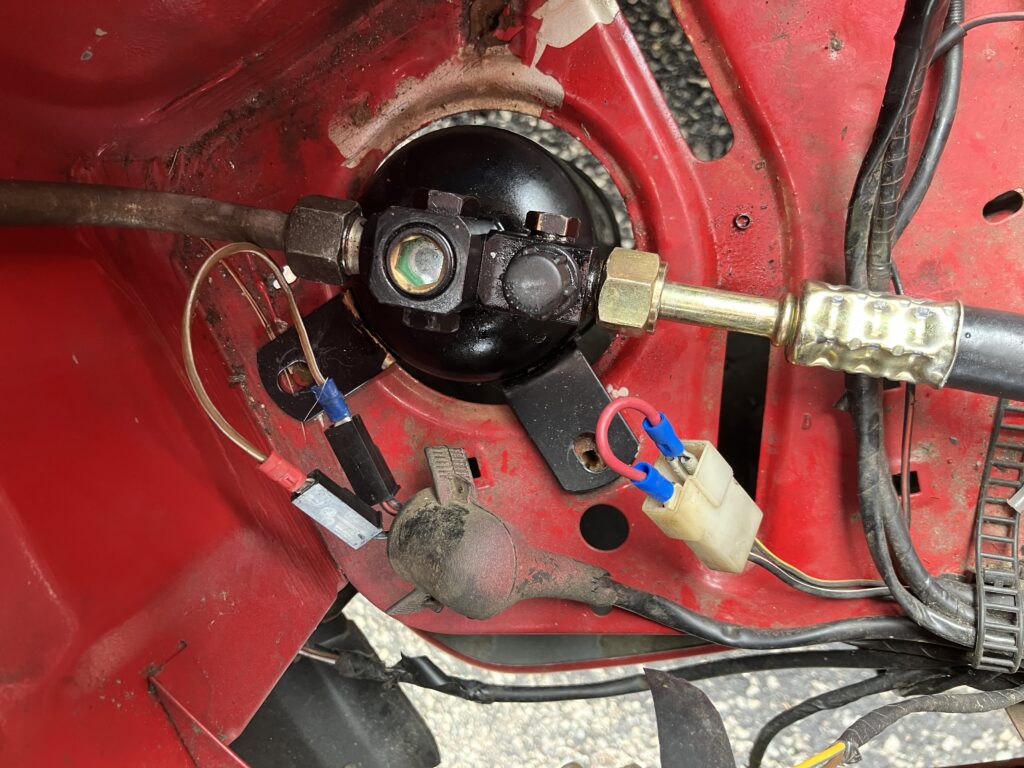
I thought I’d verify compressor power next, as that seemed easier than the condenser fan, which doubles as an auxiliary fan for the cooling system and runs at two speeds. I was surprised to find that the red-and-black compressor wire was severed short of the connector on the compressor. I chalked it up to one of any number of things associated with the car’s salvage title past—the fact that the 1988 325is was apparently reassembled with the front clip and motor from a 1987 325e. Before I went to the trouble to extend the wire and crimp a connector onto the end, I hit the a/c button and checked for voltage on the wire.
Nothing.
Oh, right. I’d installed the new receiver-drier without the pressure sensors, so the connectors need to be jumpered over. Okay, males on this sensor, females on the other, jumpers installed, and… let’s see that voltage!
Don’t judge me.
Nothing.
Hmmmmn.
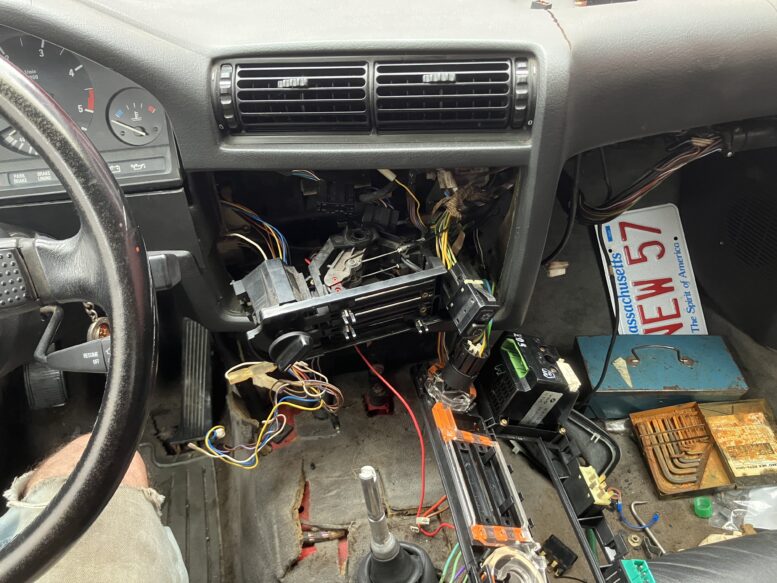
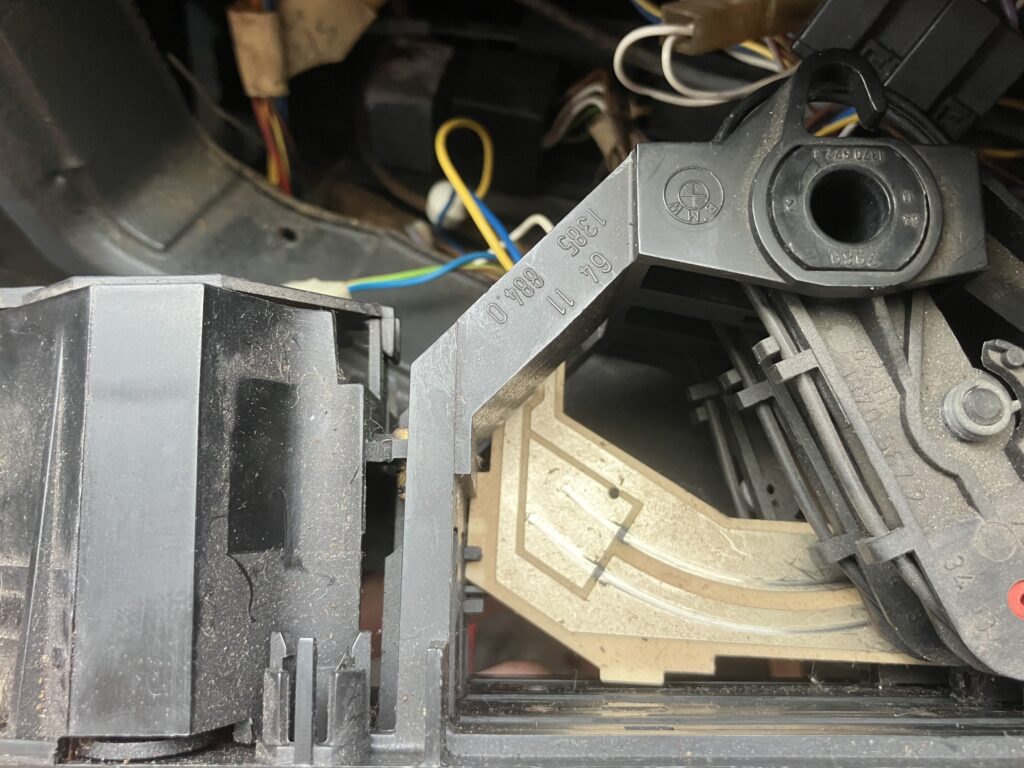
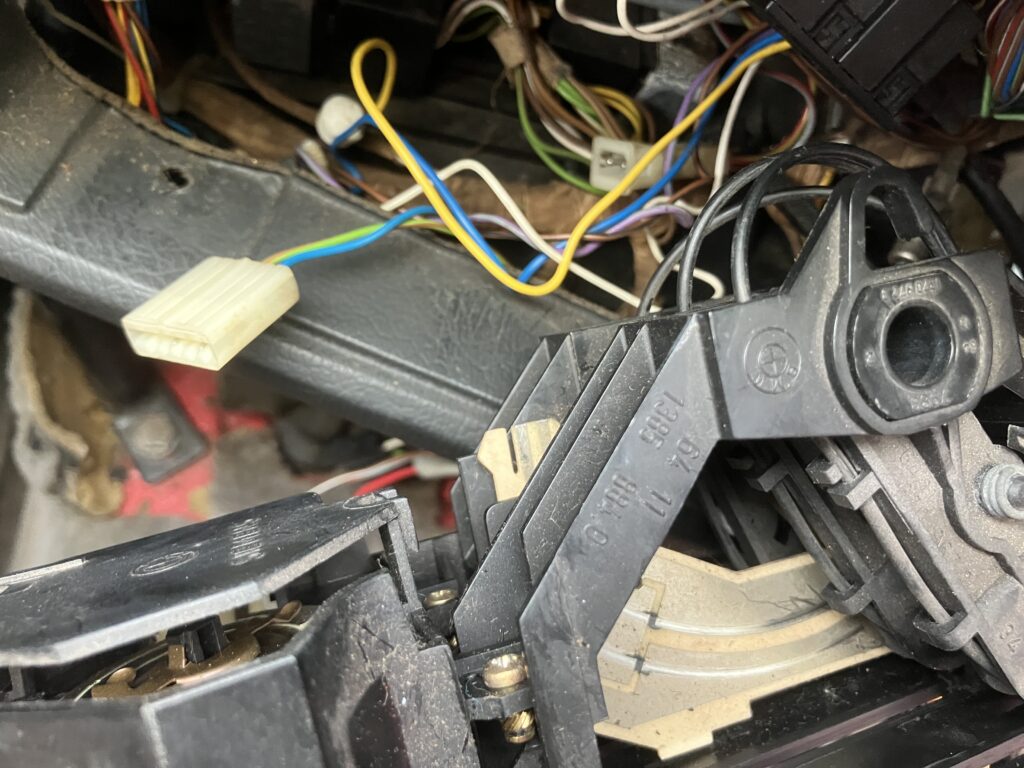
This lead me down the rabbit hole of the E30’s a/c wiring. Fortunately, due to the car’s large devoted fan base, Google quickly hit on several troubleshooting threads on E30 forums (this one and this one, along with the electrical troubleshooting manual (ETM) available on Wedophones, were particularly helpful). The fact that the hot water cut-off switch, the water shut-off solenoid, the evaporator temperature regulator, and possibly a switch contact on the slider tracks all need to work in order for the a/c switch’s blue light to come on and for voltage to be sent to the compressor came as a complete surprise to me. (The ETM also lists an “a/c inline fuse,” but its location still remains a mystery.) It soon became clear that I needed to lay eyeballs and hands on these components, so out came the console, then the climate control faceplate (this video was very helpful on the latter).

Put the patient on the table, crack open its chest.
What I found was surprising. Both the connector for the hot water cut-off switch on temperature control knob and the one for the switch on the vent sliders were just hanging off in space. Combined with the cut-and-hanging compressor wire, it made me think it was likely that the a/c had never been hooked back up after the car suffered its salvage event in 1992.
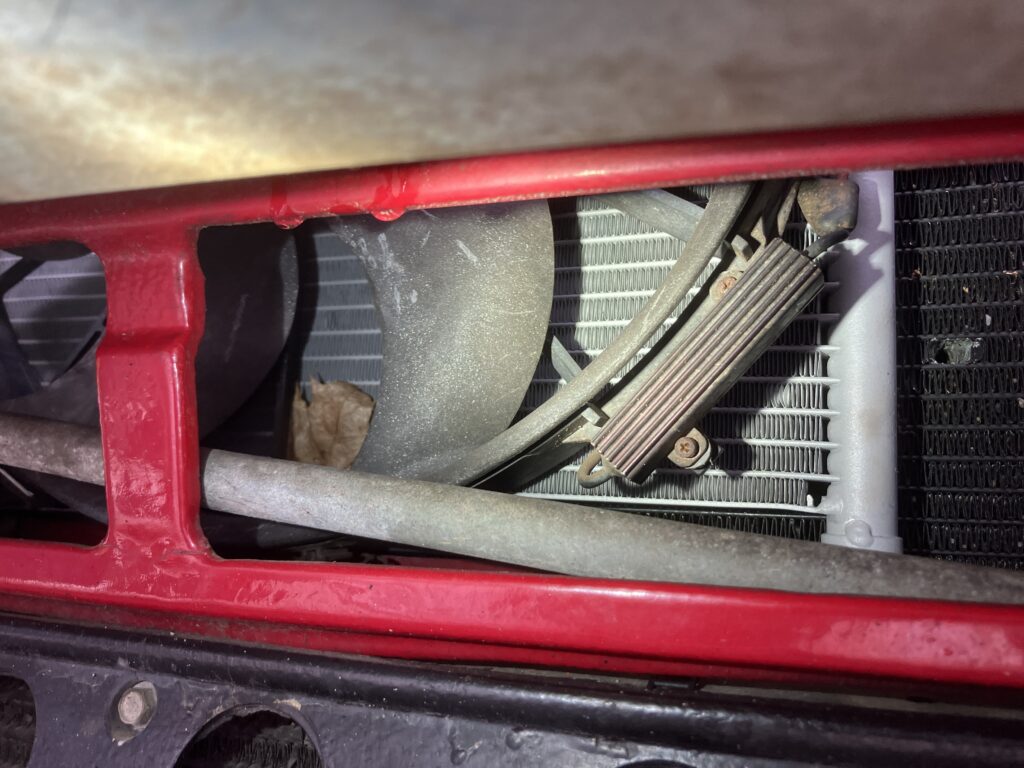
These odd electrical tracks prevent the compressor from turning on unless there’s fresh air flow onto the evaporator to prevent freezing.
I could find very little documentation online about the electrical connector for the sliders. It’s the one pictured below. However, you can see in the above photo that the track isn’t fully secured to the slider panel, and the forums were full of posts from people who said that the switch is troublesome and unnecessary (like you WISH an R134a-converted system gets so cold that the evaporator freezes up), so it was recommended that you simply cut off the connector and splice the wires to bypass the sliders. Music to my Hack Mechanic ears.
The a/c connector version of “The short happy life of Francis Macomber.”
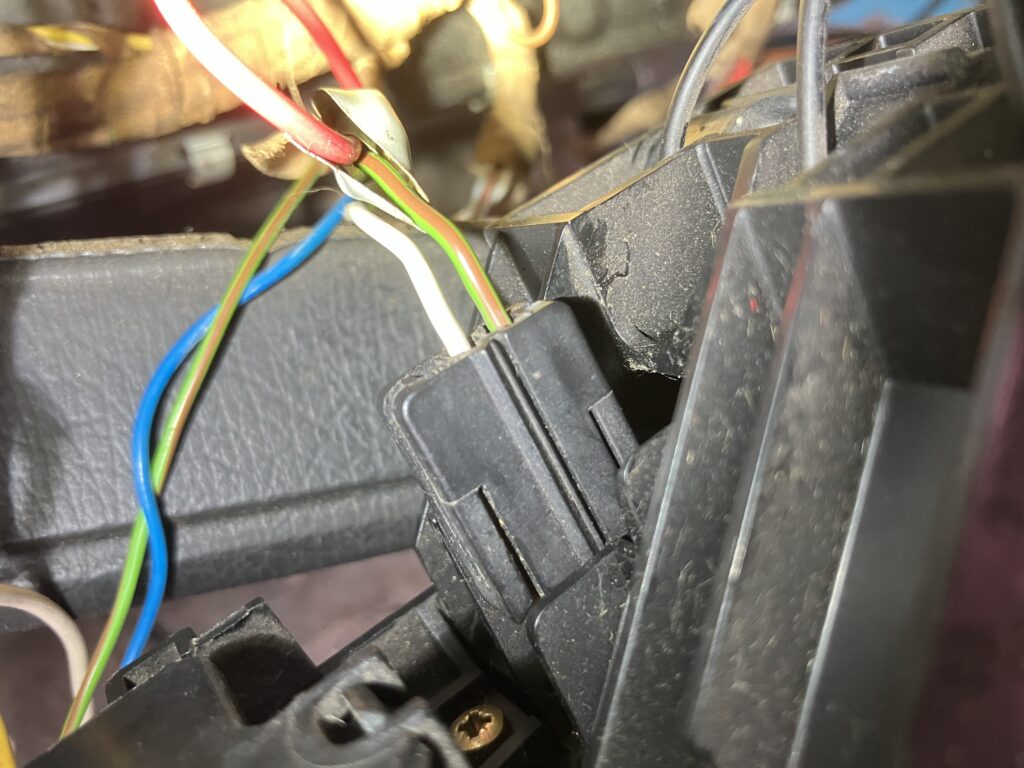
The connector shown on the left in the photo below turned out to be the one that needed to be plugged into the underside of the temperature knob. Once it was, I could hear the water shut-off solenoid click on and off when I twisted the knob.
The one with the blue and green/brown wires.
Although there turned out to be nothing wrong with the evaporator temperature regulator, I probed around in its socket with a multimeter until I found where power was entering and leaving it. Soon, I got the blue light in the a/c switch to come on, and finally I could hear the metallic click of the compressor’s clutch engaging.
That left the condenser fan. As with the a/c, there are several very good troubleshooting guides in the forums, including this one. When I installed the new condenser and put the original fan on it a few weeks ago, I tested the fan before putting the pair in the car, or at least I thought I did. I apparently did it wrong, because when I jumpered terminal 30 to 87 in the socket for the K6 relay, the high-speed fan came on, but when I did the same on the K1 relay, the low-speed fan didn’t, implicating the resistor mounted on the fan. Fortunately you can reach it through the hole in the valence. I chopped it out and bypassed it, which some folks choose to do even if it’s working so that the fan runs on high speed whenever it’s called to attention.
Peekaboo, I see you.
I then went back inside the car, hit the a/c switch, and… still no condenser fan.
Damn.
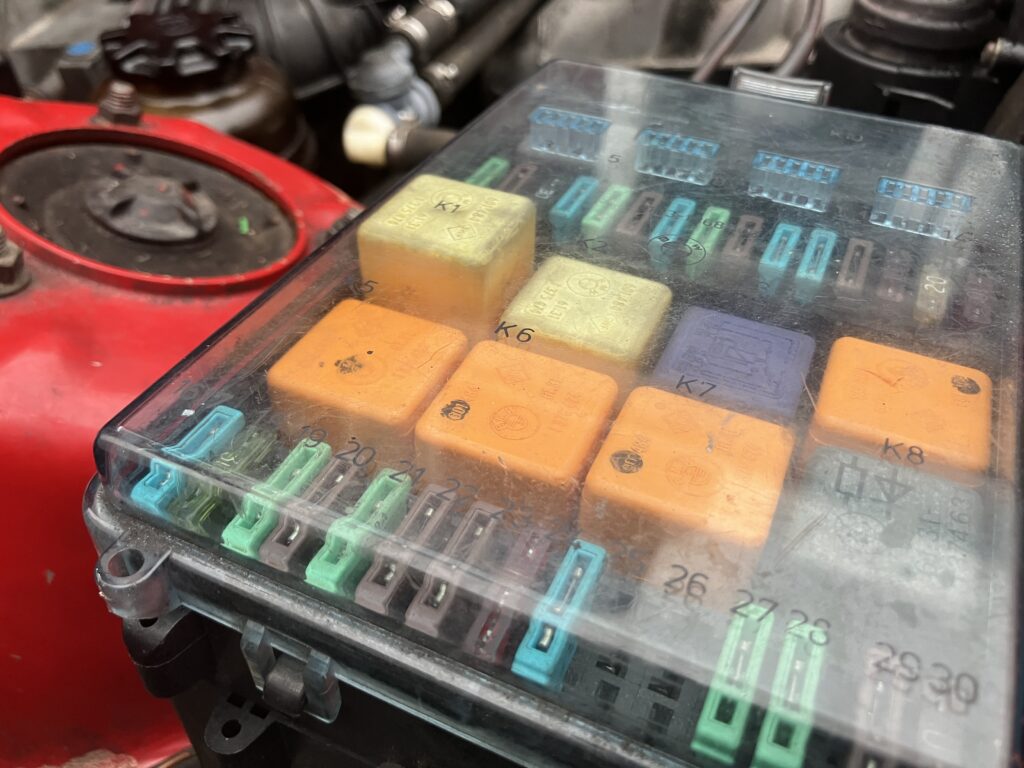
I focused on the K1 relay. I verified that K6 worked by jumpering the connector on the temperature switch on the radiator, then swapped K6 for K1. It made no difference. I was beginning to long for resurrecting the a/c in a 2002.
So I looked at the voltages at the K1 connector. I’ve written numerous articles over the years about relays (Google “Rob Siegel Hagerty relays” and you can find a series of four from 2017). Basically, applying voltage to relay terminal 86 and grounding terminal 85 (or vise versa) energizes an electromagnet which pulls terminal 30 to terminal 87 and turns on whatever the relay is supposed to turn on (which is why, when you bypass a relay, you jumper 30 to 87). I verified that, when I hit the a/c switch, terminal 85 had voltage on it, so the problem must be ground on terminal 86. To be certain, I made a set of extension wires with female terminals at one end and males at the other and plugged them between the relay and its socket, except for 86 which I connected to a ground stud. The condenser fan whirred to life.
This was pretty cool to do.
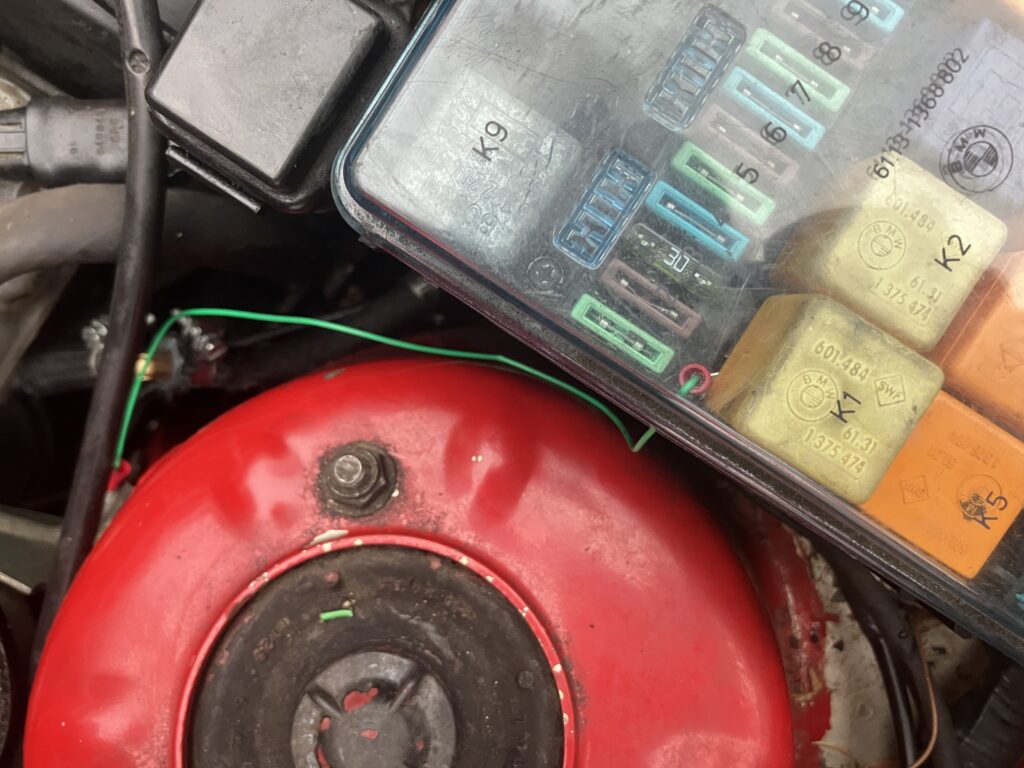
Obviously, having the relay flopping around was just a debugging tool, not any kind of a drivable fix. I looked in the forums and found that the K1 relay was grounded at G200, which is located way up under the dashboard, up above the clutch pedal. In a yoga pose worse than the one I need to do when working under the dash in the Lotus, I undid the G200 connection, cleaned it, corralled all six of the ring terminals that share G200 back into position, tightened the nut… and it made no difference.
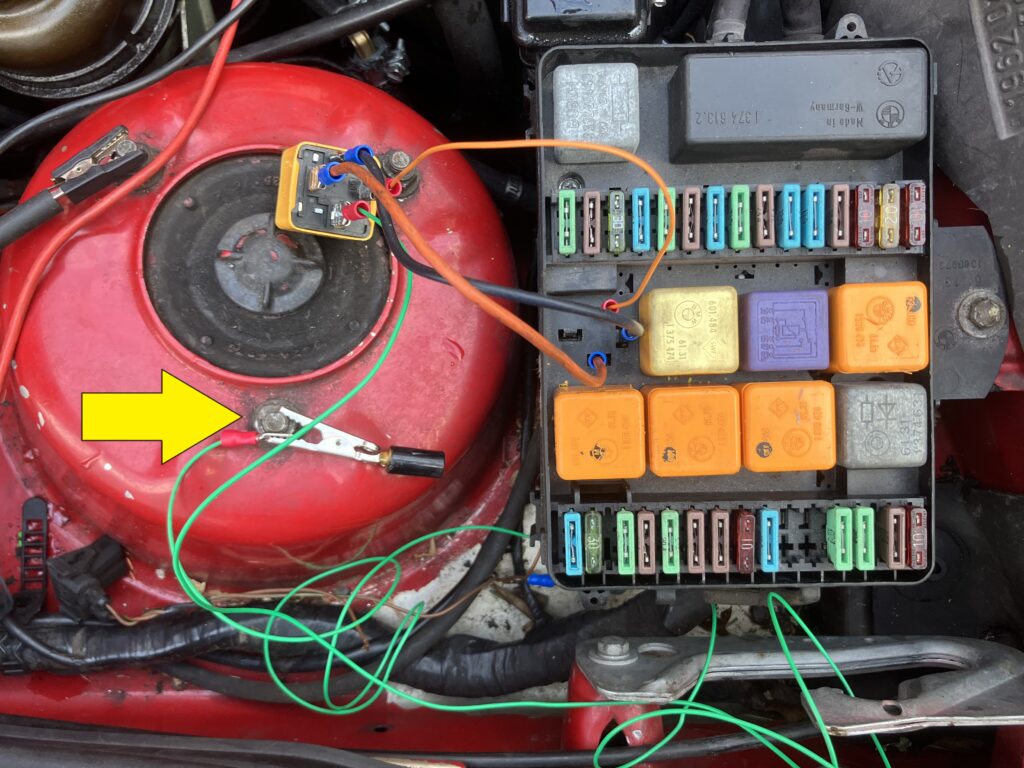
Why wasn’t K1 grounded? No idea. And with the car’s salvage-title past, who knows? I really didn’t want to go to the trouble of lifting the fuse box and accessing the wire to K1 terminal 86 from underneath, so I came up with a pretty nice workaround. I took four “piggyback” quick-connectors, straightened them out except for the one on 86, and mounted them on the bottom side of the relay.

Neat, huh?
I made sure that I could close the cover on the fuse box with the now-raised relay installed, then ran a ground wire from 86 to a convenient ground in the engine compartment.
Stand tall, my little relay.
As I once said to my oldest son, you are so grounded!
I hit the a/c button, and the condenser fan happily complied.
With the system now plumbed, holding pressure, and electrically functional, it won’t be long before I charge it up and see if all this work pays off (after all, the goal is to drive the car to The Vintage, and the calendar is rocketing toward that date). Now if only spring would do its thing and actually get the ambient air temperature high enough that, once I charge the newly-resurrected a/c system, I can tell how well it’s actually working.
—Rob Siegel
____________________________________
Rob’s newest book, The Best of The Hack Mechanic, is available here on Amazon, as are his seven other books. Signed copies can be ordered directly from Rob here.
Tags: A/C Repair compressor