

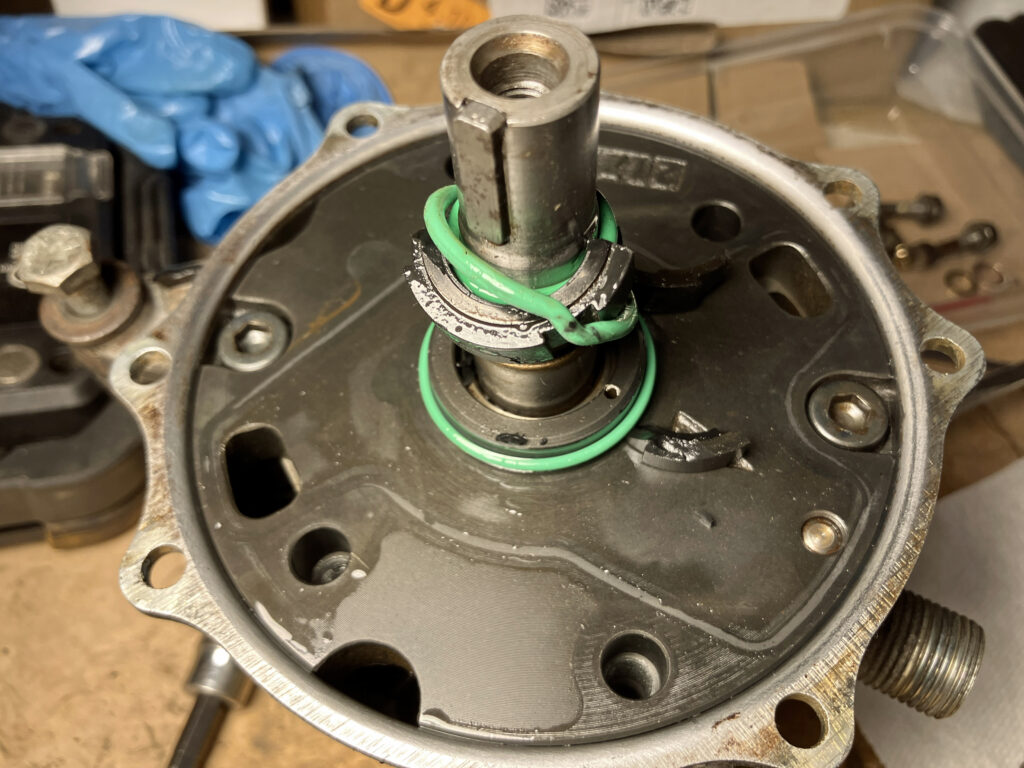
Last week, I patted myself on the back for having rebuilt the Behr wing cell compressor in the FrankenThirty for $17, the price of a Santech gasket and o-ring kit. I had it all back together and then had a qualm of concern that I hadn’t correctly installed the seal that sat in front of the carbon fiber ring on the compressor shaft. Specifically, I looked at photos I’d taken of the ring when I disassembled the compressor and thought I could see where the original, likely squashed and hardened, black o-ring was still sitting in a groove. If that was the case, the new green o-ring was just sitting proudly on top of it. Rather than continue to worry about it, I pulled the front of the compressor apart and found that the carbon ring had shattered.
This was not one of my better days in the garage.
Since the carbon ring is unobtanium, my budget rebuild appeared to have run out of road. Plus, since I didn’t know what I’d done wrong, I hesitated to try it again, even if I had another carbon ring.
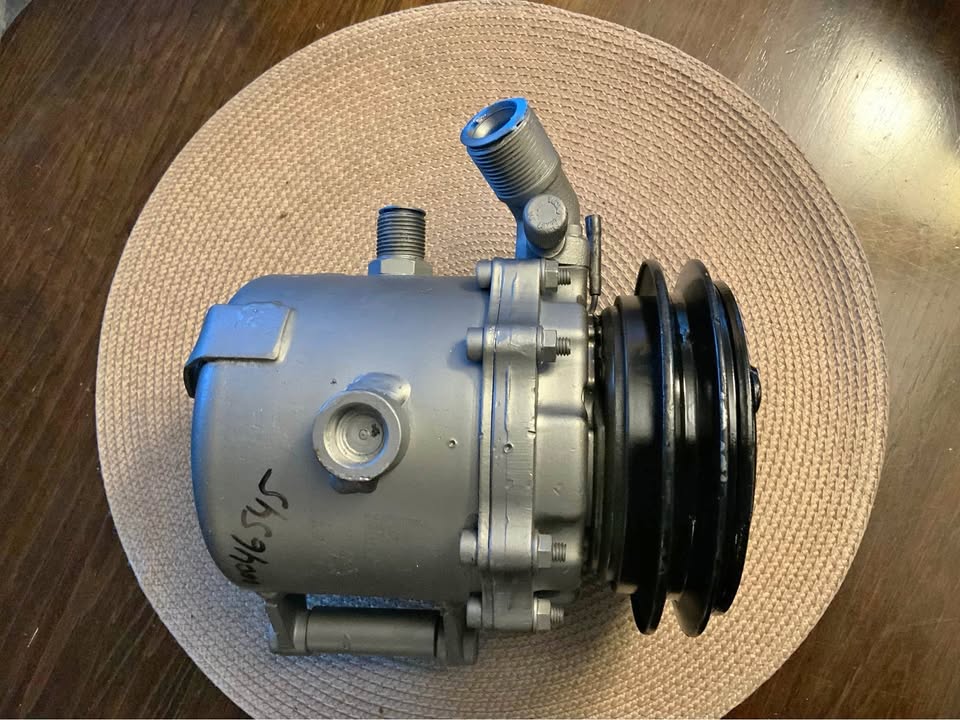
So, I began to look for a rebuilt or good used compressor. The starting price for a wing cell in unknown condition on eBay was over a hundred bucks, but to my delight, I found a local Facebook Marketplace ad for an unused rebuild from RY Compressors, just an hour north of me in Gloucester. The asking price was $178, or best offer. I sent the seller an honest message explaining my situation, advising that while he should get as much as he could for it, I could be up there the next day with $100 in cash. He responded quickly, saying that that sounded fair and that he’d rather have the thing out of his garage and used to revive an E30. I shot up to Gloucester the following morning. The seller was very knowledgeable, had owned a bunch of 2002s and E30s, and had a 325iX and an E-Type Jaguar in his garage. I left with my prize and drove home through light snow.

Score!
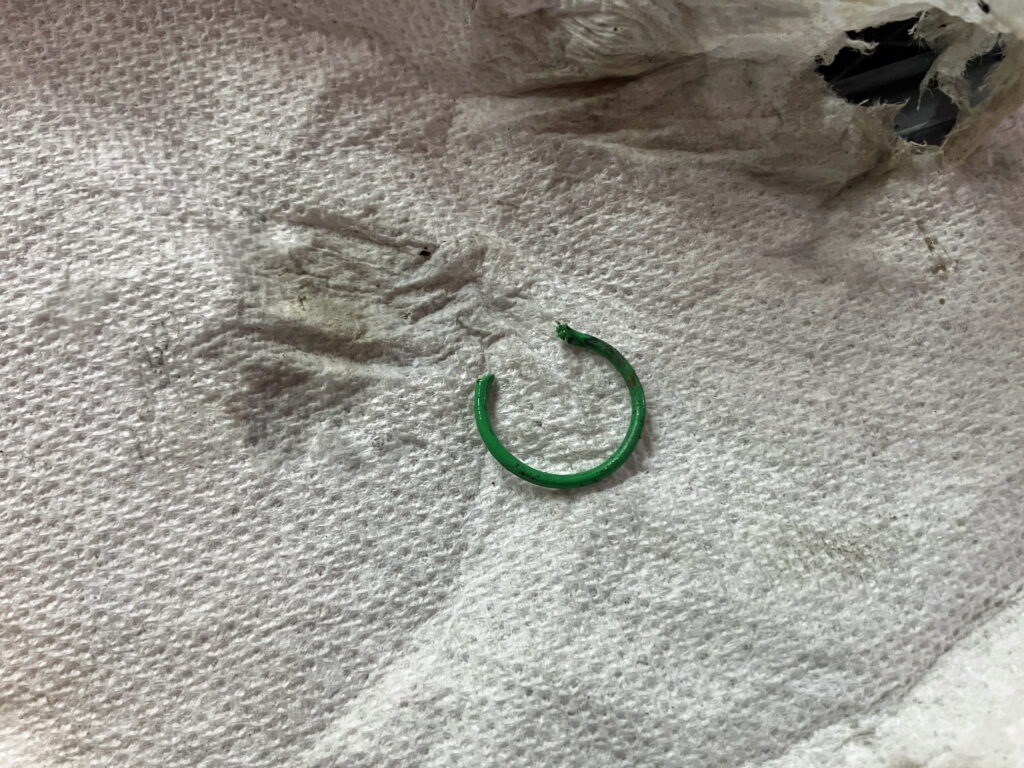
While this was happening, two crucial comments were made on last week’s post by the same two guys who had provided helpful input. Federico Molina wrote, “I know exactly what you did wrong. The compressor’s front cover has a steel disc retained by a snap ring (the 2 parts at the front of the diagram). You are supposed to remove this disc, replace the o-ring around it (M13-2103), and then press it back in. Don’t worry; I didn’t reseat the disc correctly the first time and almost broke my seal too!”
The other was from Carlos Perez, who offered, “What’s your shipping address – so I can send you a carbon ring?” Although I already had bought the rebuilt compressor, I graciously took Carlos up on his offer. You know, just in case.
Seriously, such expertise and willingness to help makes me proud to be a 40-year member of BMW CCA.
Now that I had the rebuilt wing cell, I thought through the path I would take with it. It was almost certainly full of PAG oil, which is appropriate if the system will be charged with R134a. While mineral oil is what was originally used for R12, one of the tricks of the trade is that Ester oil is good for both R12 and R134a, so you can charge with R134a, and, if it doesn’t cool well enough, fall back to good old R12. I was likely to do it in the other order—that is, I really didn’t want to replace the original serpentine condenser with a modern parallel-flow unit or replace the original Behr fan with a modern Spal fan (or at least jump the resistor on the Behr fan so it runs on high speed), both of which are advised if you’re doing an R134a conversion.
Taking an even larger step back, I’m the guy who advises people that if they think they’re going to get a cold car without replacing the old compressor with a Sanden or one of its Chinese-made clones, do whatever adaptation of hoses and fittings is necessary to fit the Sanden, install a parallel-flow condenser and honking fan, and replace every hose under the hood, they’re fooling themselves, and yet that’s exactly what I hoped to do—verify the system was leak-free, install an original wing cell, recharge with R12, and smile. Hey, it worked on my last E30 ten years ago. I am well aware that A/C Solutions produces an E30 kit that has every hose, nut, and bolt for the conversion. It’s about $1750 shipped. I hope to not spend a tenth of that cost.
At the same time, I am more aware than most that if you have a leaky system, it won’t cool at all. If you have a dirty system, it’ll only cool for a short amount of time before the expansion valve clogs up, so even if you’re doing things on a budget, you need to be systematic if you hope to come out of it with a functional and reliable system.
I decided that I needed to see how much of the system was functional and leak-free. After all, if the Behr a/c condenser fan is seized, the condenser is Swiss cheese, and multiple hoses are perforated, I might decide to walk away from the goal of getting the car cold, which I mainly want to do so I can drive it to The Vintage in air-conditioned comfort.
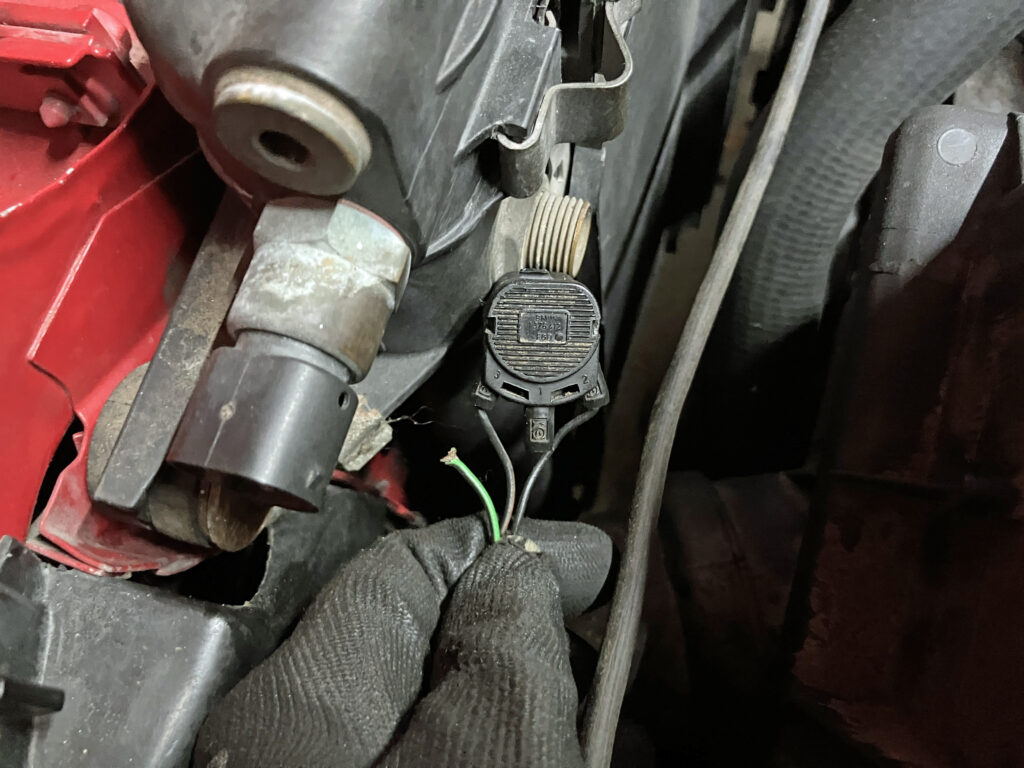
I started with the condenser fan. Sure enough, it wouldn’t turn on. Fortunately, that turned out to be due to the common problem of broken wires on the connector to the radiator switch.
Gotcha.
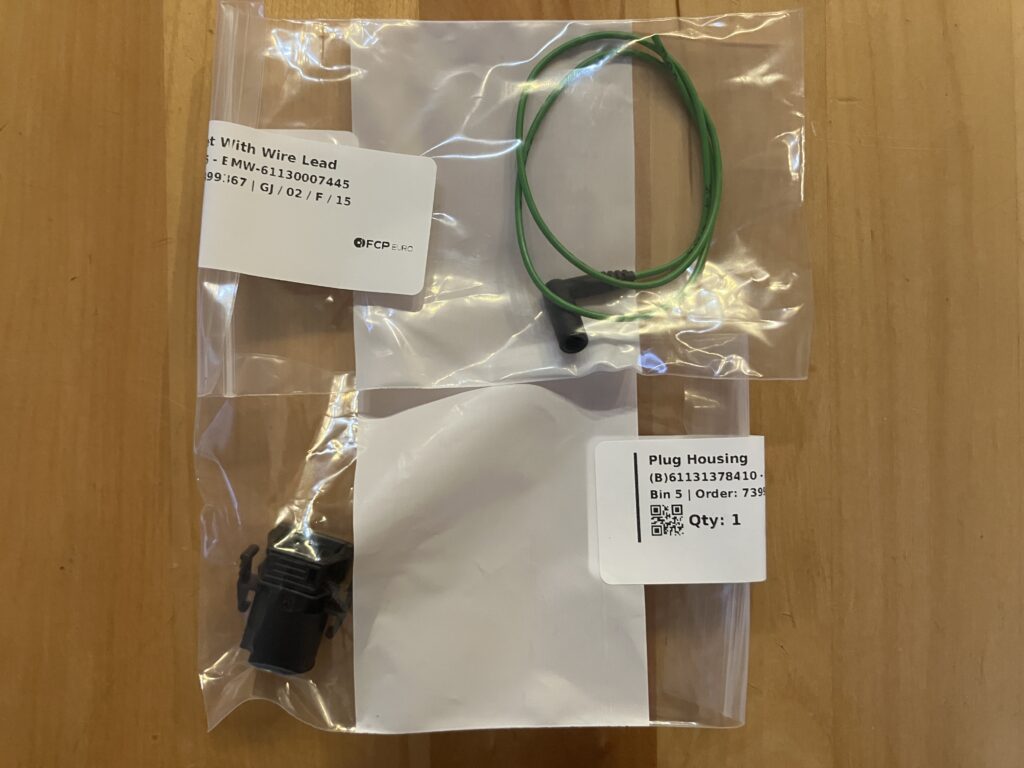
I cajoled the broken wire into electrical contact long enough to test the fan, and it spun back to life. I then ordered what I needed to fix it. You can buy the connector with all three of the pigtails on it on eBay, but it’s a bit pricey. I found that the genuine BMW right-angle waterproof terminals (“BMW Round Receptacle 2.5 Watertight (0510 mm),” part number 61130007445) are only $4.58 each at GetBMWParts, and the plug housing (part number 61131378410) is only $3.48. Prices were slightly higher at FCPEuro, but shipping was less. I decided to buy the plug and one broken terminal for $21 shipped. When I get far enough in the project that I need the fan running, I’ll install these parts, but for now, I just wanted to know if it works, and it does.
I’ll get to it if I don’t lose the parts.
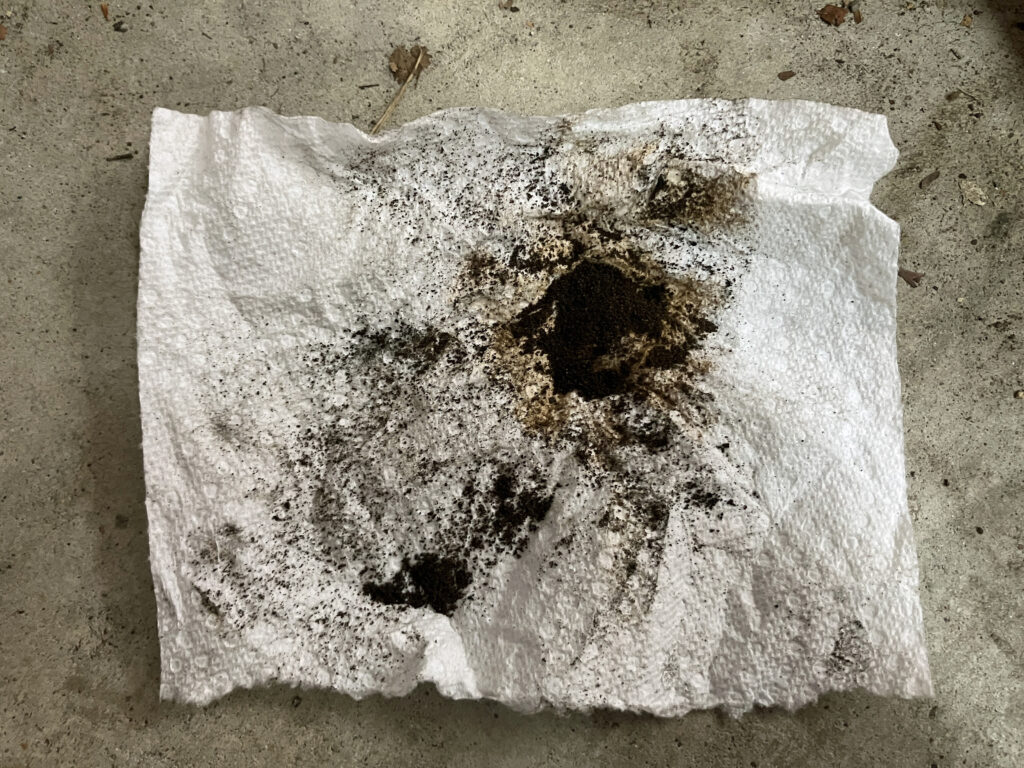
Next, I began the process of flushing out the hoses and components. I’d already flushed the evaporator core when I had it out of the heater box for the de-mousing last fall. My plan was to fire up my air compressor and blow compressed air through the lines (as well as the condenser) while having a paper towel rubber-banded to the fitting on the end so I could see how much dirt was coming out and if it looked clean, to flush the lines out with mineral spirits. The suction side (from the evaporator output to the compressor input) blew clean, but the discharge side (from the compressor output through the condenser and drier to the evaporator input) had a lot of scale, powdered rust, and dirt.
This wasn’t good.
To be clear, I’d already removed the old receiver drier. The contamination in the photo above was what came out when I blew the path from the compressor discharge hose through the condenser and out the hose, connecting it to the drier. This was pretty clear evidence that the condenser was internally rusting. There was also powdery rust, though not as much, in the line from the drier to the evaporator.
I continued to use compressed air until the residue on the paper towel wasn’t remotely like in the photo above and was more like faint staining, followed up with clear mineral spirits. Unfortunately, the color of the spirits that came out of the condenser was unmistakably brownish.
If anyone else was doing this and described the situation to me, I’d tell them that they were fooling themselves if they thought they’d get a functional, reliable system without replacing the condenser and, ideally, every a/c line, at least the ones on the discharge side. Still, I wanted to know for sure whether or not there were egregious leaks in the system that gave me no choice but a full and expensive replacement of multiple components.
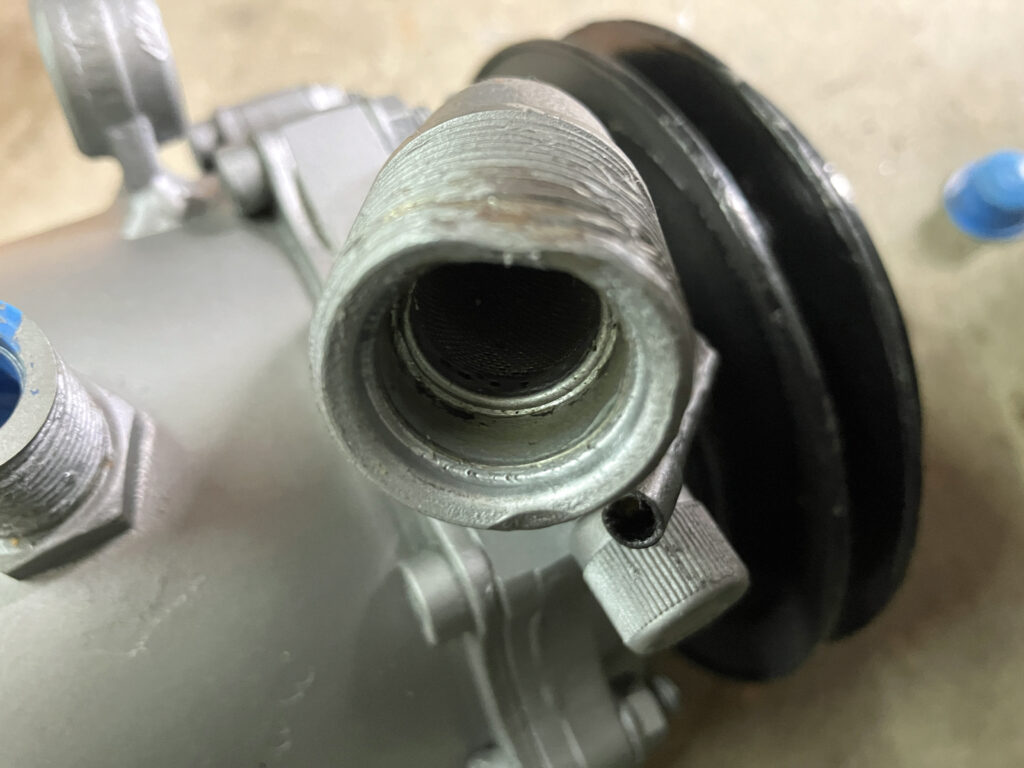
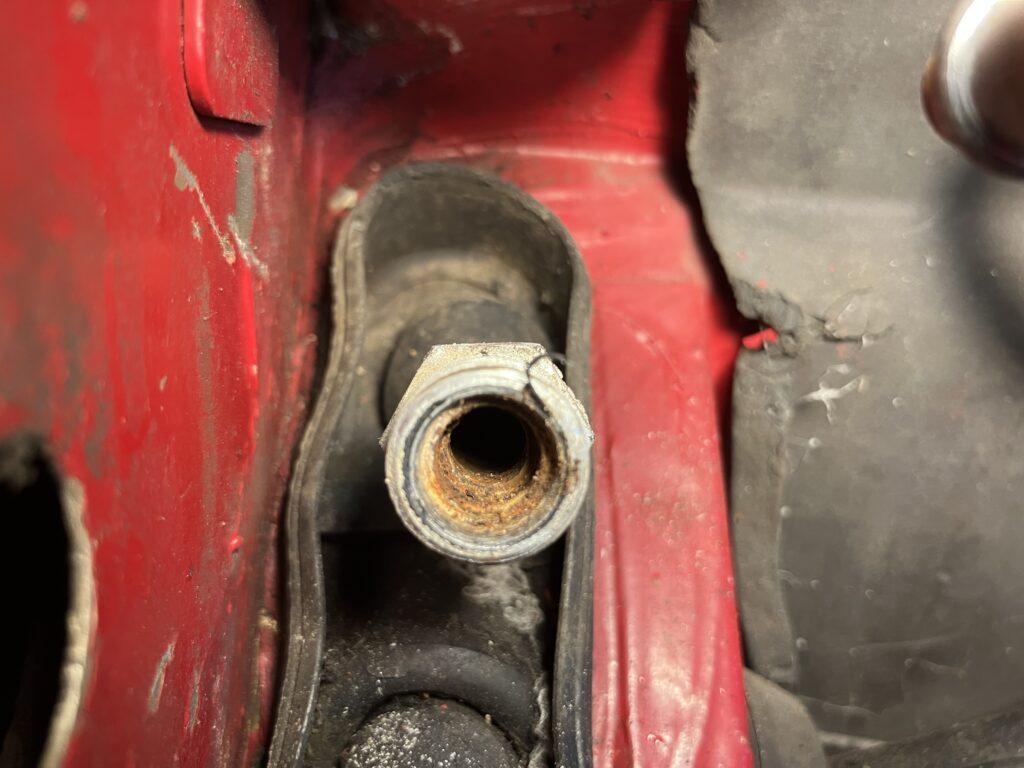
So, I set about to temporarily mount the compressor to connect the fittings and seal up the system. As soon as I looked at the suction fitting, I could see that it was squashed at the top, likely damaged in shipping. I couldn’t believe I didn’t see this when the fellow sold it to me.
Disappointing but easily remedied.
Fortunately, I had the same fitting on the compressor I’d just rebuilt, and that one had a brand-new o-ring and a clean internal screen, so I swapped it over, which is shown in the photo at the top of this piece.
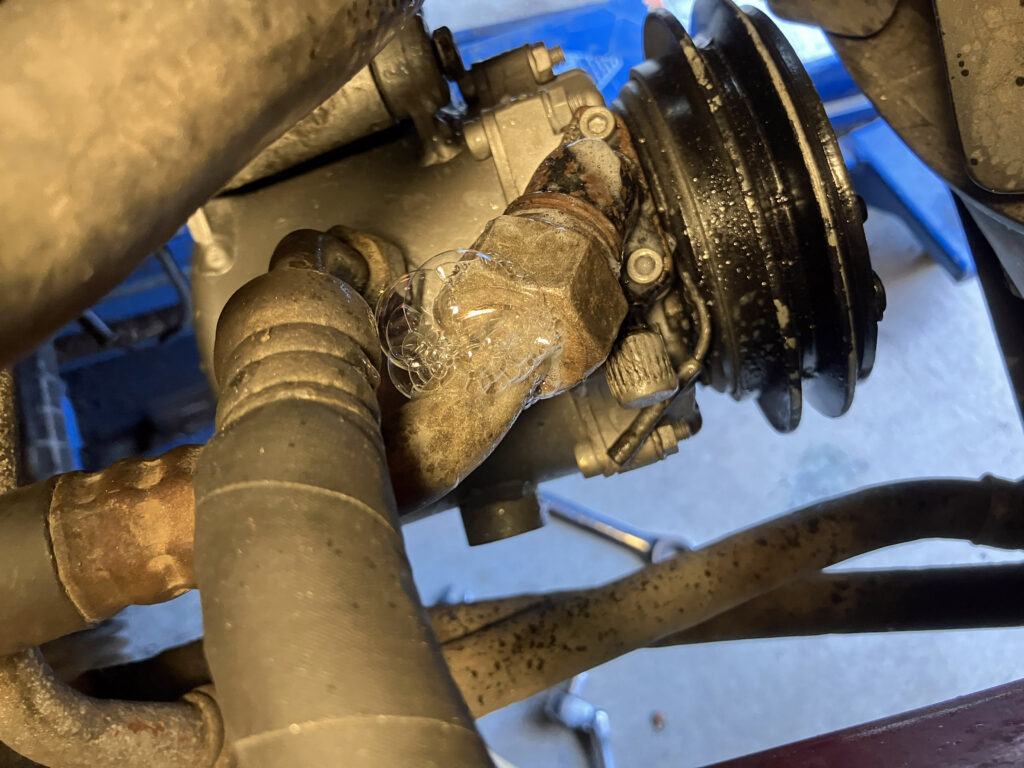
I hung the compressor from the bracket on the block and threaded on the fasteners just enough to hold it in place while I fit new green o-rings to both hose fittings, snugged them down, and did the same thing on the new receiver drier. Then I pulled my trusty nitrogen bottle from the back of the garage and my manifold gauge set off the wall, connected the center yellow hose to the nitrogen bottle, connected the red and blue hoses to the high and low service ports on the E30, and gently pressurized the system to about 100 psi.
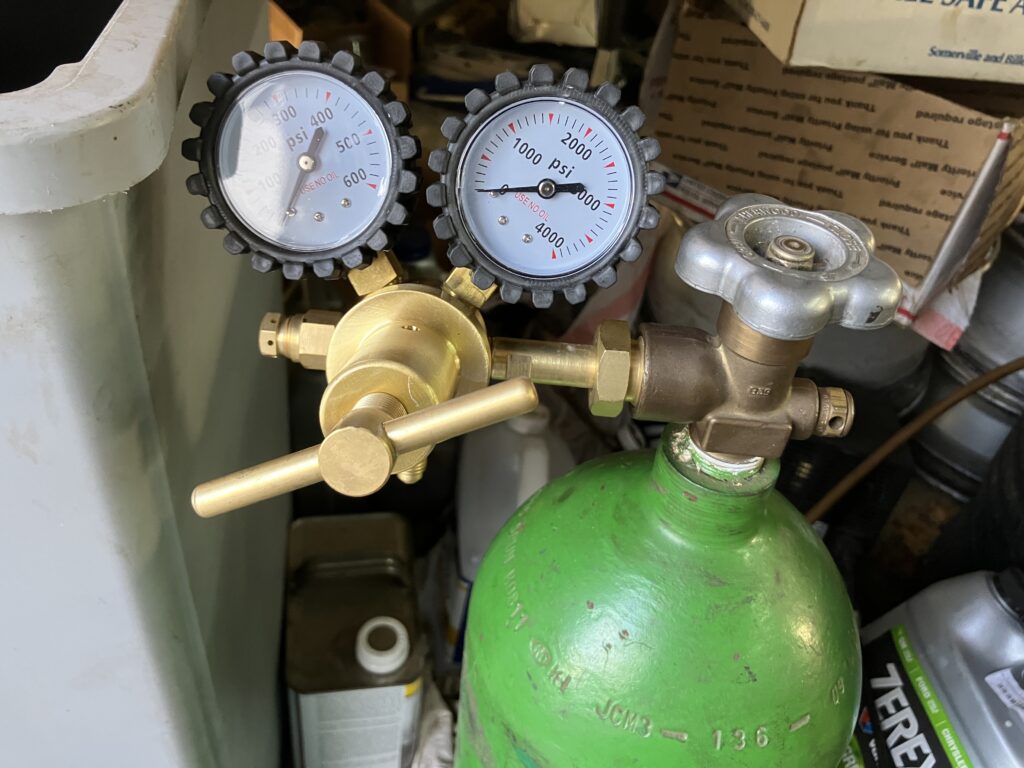
The nitrogen bottle about to be pressed into service.
As I discuss in my book Just Needs a Recharge, I can’t for the life of me understand why anyone doing any a/c work doesn’t pressure-test like this after they assemble an a/c system. Instead, people rely on trying to hear and find leaks when they pull a vacuum or detect them after the system has been charged with refrigerant by looking for leakage of dye mixed with the refrigerant oil. Particularly when resurrecting an old system, pressurization works EXTREMELY well. The first pass is that you simply listen. If there’s a major leak, you hear the nitrogen rushing out, your ear rapidly directs you to the general location, and you pinpoint it with your fingers by feeling the rush of air on your skin. On the second pass, you listen for hissing, but you may need to use a hose with one end to your ear and the other end poking around near fittings to localize the source. On the third pass, you watch the numbers on the manifold gauge set to see if they’re dropping, and if they are, you spray an engineered soap solution like Big Blu onto the fittings to see where the bubbles are. I would never, ever put an a/c system into service without going through these steps before I even thought about evacuating and recharging it.
So, how’d it go?
On the first pass, I heard nitrogen rushing out from near the hood latch on the right side. This is where there are screw-in joints in the hard suction and discharge lines to and from the evaporator core under the dash. I hadn’t taken these apart and prophylactically replaced their o-rings because I didn’t know I needed to. It was now clear that I did.
It was the larger of these two—the fitting on the suction line—that was badly leaking.
When I took a big wrench to the fitting, I was surprised to find it wasn’t even remotely tight. I wondered if the FrankenThirty’s a/c system had ever even been brought back to functionality after the car’s salvage / rebuild incident in 1992. But I pulled it apart and installed a fresh green o-ring.
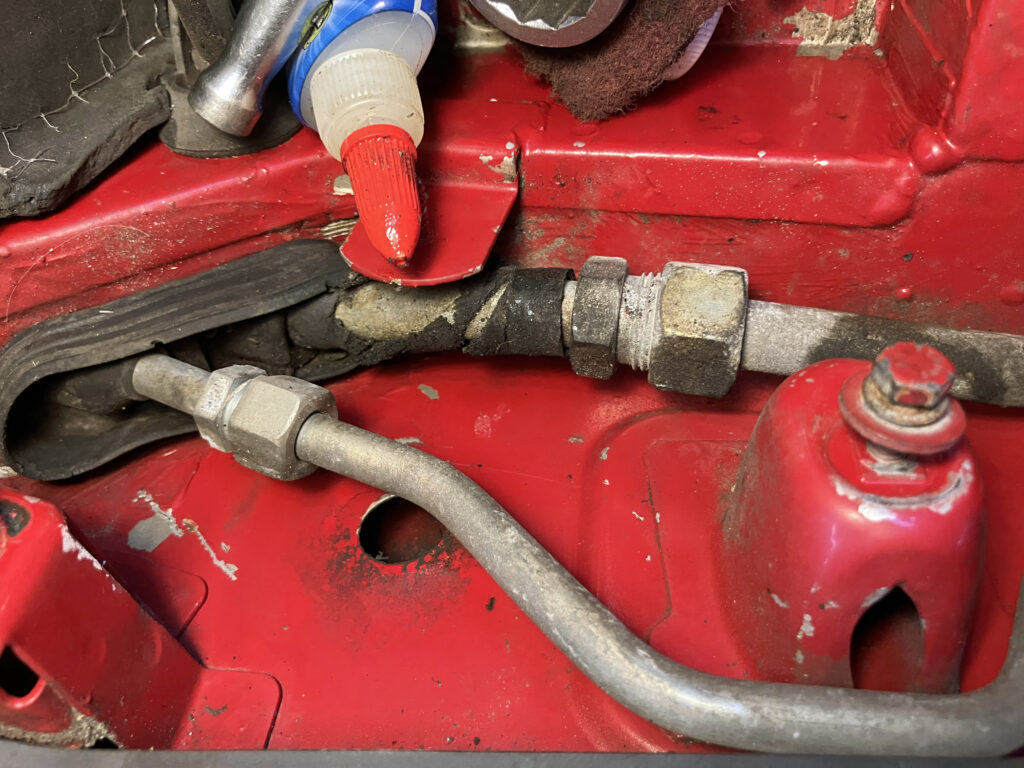
While I was in the neighborhood, it seemed prudent to do the same on the discharge side. I did not like what I saw. In spite of my having blown out this metal line with both compressed air and mineral spirits, there was visible corrosion inside it.
Sigh.
I fitted a new o-ring there, pressurized the system again, and continued on. The huge gush of nitrogen from this area was gone, but I could see the pressure on the gauges rapidly dropping and hear air escaping near the compressor. I poked down there with a piece of hose held to my ear, and the sound appeared to be coming from the suction fitting. I sprayed it with Big Blu and was immediately met with a confluence of bubbles.
That’s a big gotcha.
I tightened the fitting, but it only got worse, so I pulled things apart and found that the o-ring had gotten pinched.
Well, that certainly explains things.
To my surprise, I installed and damaged three o-rings before I got the suction fitting to seal. My experience is that the male and female o-ring fittings are designed so that when you feel the metal-on-metal as the male part bottoms out in the female part, the o-ring is properly squeezed. You don’t need to snug it down with a dying strain like a flare fitting, but the geometry usually prevents o-rings from being squashed or cut if you do. For some reason, this one didn’t follow those rules. It needed to be tightened very carefully and stopped before I felt the fitting bottoming out.
But once that was done, the system held pressure, which was pretty remarkable considering I hadn’t replaced a single hose or hard line. If I were going to take the next step and evacuate and recharge it (which I’m nowhere close to doing), I’d first pressurize it and let it sit overnight to be certain it’s tight. But the fact that the reading didn’t budge over a 10-minute period, which meant if there were leaks remaining, they were small ones, was a pretty major milestone, especially considering that this was done in the dead of winter with the Lotus Europa kicked outside between snowstorms.
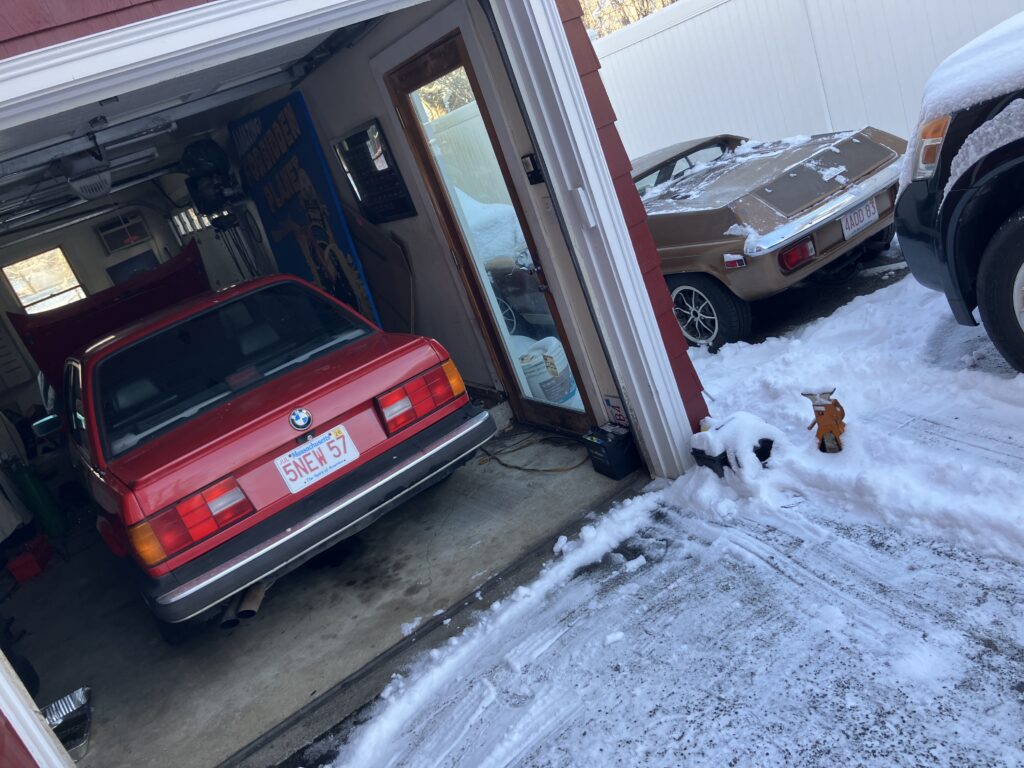
The E30 occupies prime winter garage real estate for this work. As you can see, regarding the Lotus sitting outside, I’m using the term “between snowstorms” imprecisely.
I’m going to think about the next steps carefully. Even though the original serpentine condenser doesn’t appear to leak, a Nissens 94172 parallel-flow condenser is as low as $105 shipped. Not buying and installing it strikes me as foolish. The hard lines, though, are more complicated. Some of them have different part numbers for pre- and post-facelift E30s (9/87 being the dividing date on Realoem and other sites). Because the FrankenThirty has a 7/31/87 build date and has the quirk of much from the firewall forward is from a pre-facelift car, I don’t know which lines I have. Plus, it’s not even clear that all of them are available.
We’re about to get whacked with a Nor’easter, so it may be a while before I get the FrankenThirty back in the garage for another round of work. This will give me an opportunity to think things through. It might have been easier if the situation was less gray—that is, if I’d found the condenser fan seized, the condenser actively leaking, and multiple hoses gashed. “Tight but dirty” is a tough diagnosis for me to throw substantial sums of money at in a car whose value is so clearly capped. It may be that the reasonable path is to replace the condenser, give the hard lines on the discharge side the best possible cleaning I can with a combination of a rough-bristle wand, compressed air, and mineral spirits, and rely on the filter in the receiver-drier and the screen on the suction side of the compressor to catch anything I miss.
We shall see.
—Rob Siegel
____________________________________
All eight of Rob’s books are available on Amazon. Signed, personally inscribed copies can be ordered directly from Rob here.