
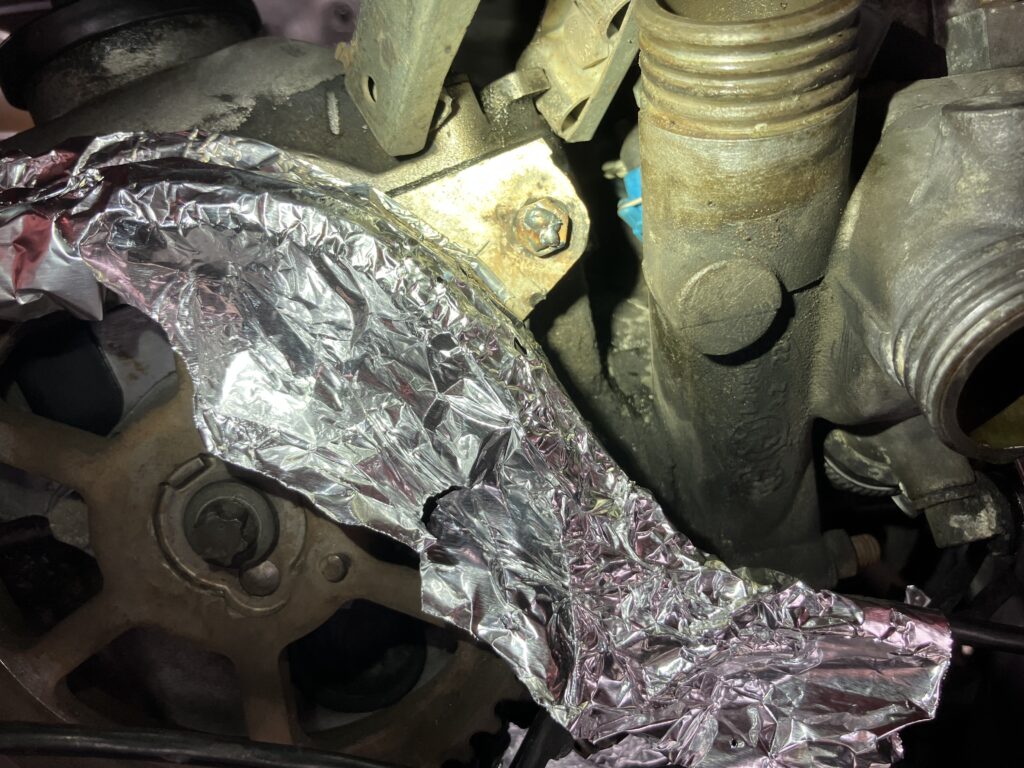
Last week I wrote about attaching the FrankenThirty’s original Behr condenser fan to my brand-new Nissens parallel-flow condenser and being ready to install the pair in the nose of the car. But I stopped because I remembered that, when I bought the car last August and replaced the timing belt, I found that sometime in the distant past one of bolts holding on the upper timing cover had snapped off. Thus the cover was not fully secured to the head.
At first I didn’t think it mattered, as the cover is really just a dust cover for the timing belt. However, the distributor cap is bolted to the cover, so the unsecured corner of the cover created a slight misalignment between the cap and the rotor, and I found that a small wear groove was visible on the inside of the cap. As I looked through the nose of the car, still bereft of its grilles, condenser, fans, and radiator, I realized that it’d never be easier to deal with this snapped-off bolt than right now. And if I didn’t, I’d worry about the misalignment getting worse and eventually causing ignition failure at some highly inconvenient location on the drive I hope to take in the car down to The Vintage in Asheville this May. So in I went.

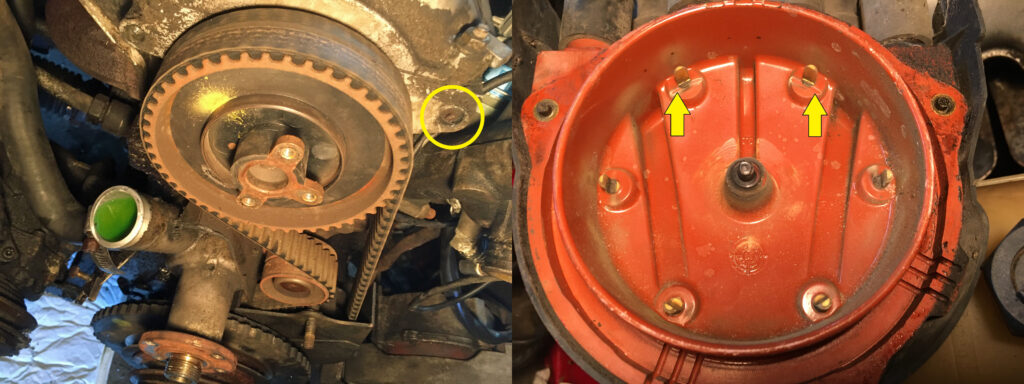
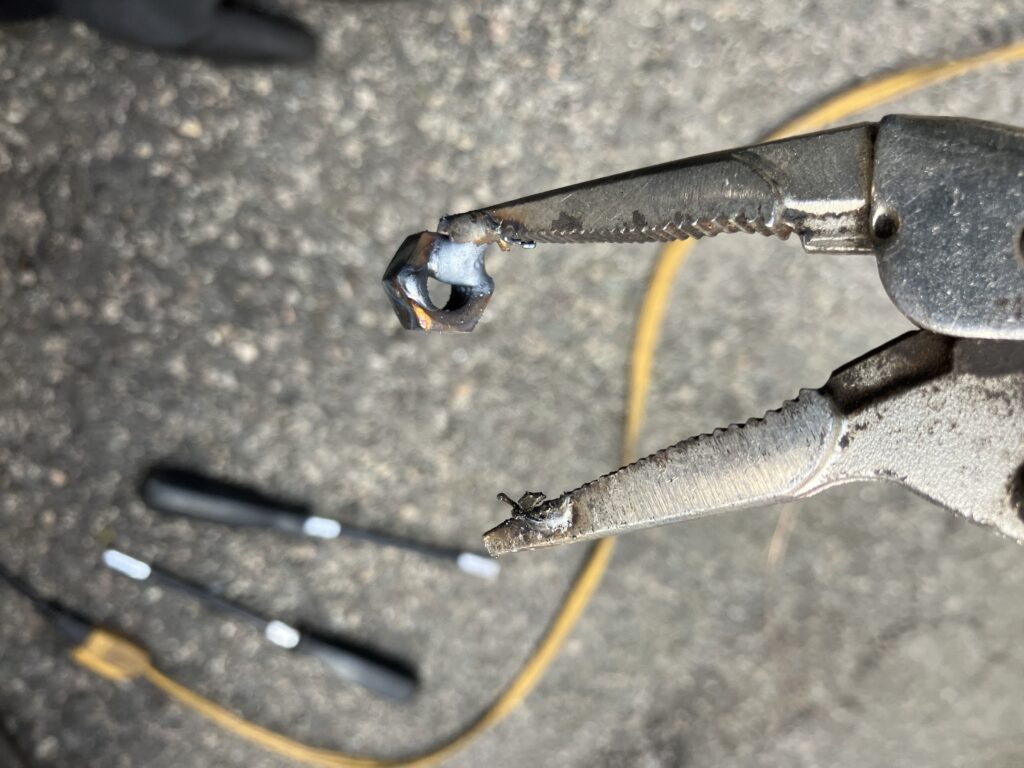
The snapped-off bolt (left) and the resulting groove inside the distributor cap (right).
If you don’t know, there’s no easy way to remove a snapped-off bolt. As I wrote in my first book in the chapter on “Stuckness, For Real” (that’s me poking fun at Robert Pirsig’s utterly useless chapter on “Stuckness” in Zen and the Art of Motorcycle Maintenance), the idea that you’re going to drill a hole in a bolt, thread an EZ-Out into it, twist it counter-clockwise, and have it seamlessly back out the bolt WHEN THE FREAKING THING SNAPPED OFF WITH A SOCKET ON THE BOLT HEAD is usually utter fantasy. That approach often only succeeds in breaking off the EZ-Out in the just-drilled hole, in which case you’re truly boned. In the real world, if there’s nothing of the snapped-off bolt to grab onto, the two methods for dealing with it are: drilling out the bolt with ever-larger drill bits until you can peel the remnants off the insides of the threads and then re-tap them, or welding a nut onto the top of the broken bolt. The first method requires centering the drill with accuracy that I’ve never achieved. The second requires a welder.
The theory behind the weld-a-nut trick is that in addition to giving you something to grab onto and twist, the act of welding sends a jolt of high-amperage current through the MIG wire directly into the bolt. This heats the bolt and helps to break the bond of corrosion in the threads in a more direct way than a torch or an induction heater can. I do own a Millermatic 141 welder I bought about ten years ago when I had fantasies of doing my own bodywork, and I have used it once or twice to do the weld-the-nut trick, but never on a vertical surface of a still-installed engine.
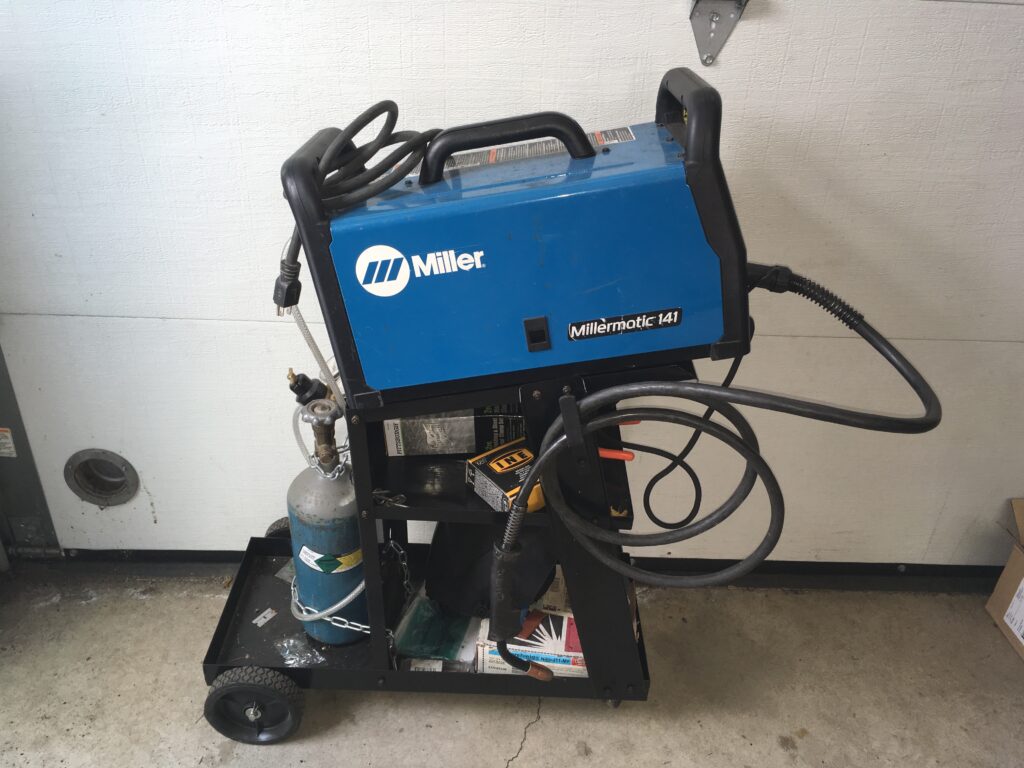
My seldom-deployed Millermatic.
So I did what everyone else does—I looked on YouTube.
I watched a dozen videos where people use the weld-a-nut trick onto snapped-off bolts, and much like car or house restoration shows where a year-long project is condensed into 30 minutes, the videos show the errant bolt withdrawn in a matter of seconds. Some videos show a washer placed between the bolt and the surrounding metal surface both to protect it as well as to provide a cup in which the melted MIG wire can pool, but in my case it didn’t seem necessary, as the MIG wire was unlikely to stick to the aluminum head. Plus, with the face of the head oriented vertically, there wasn’t an obvious way to hold the washer in place.
I started by cleaning the face of the bolt with my Dremel tool. When the bolt is recessed into the threads as it was on the FrankenThirty’s head, you first need to build up a little mound of welding material that stands proud of the surface. I had no trouble doing that, though gravity made the mound sag so it was always a bit south of the center of the bolt, and the disposable aluminum roasting pan I pressed into service to shield the timing belt made things awkward. But that part of it went fine.
What a nice little mound.
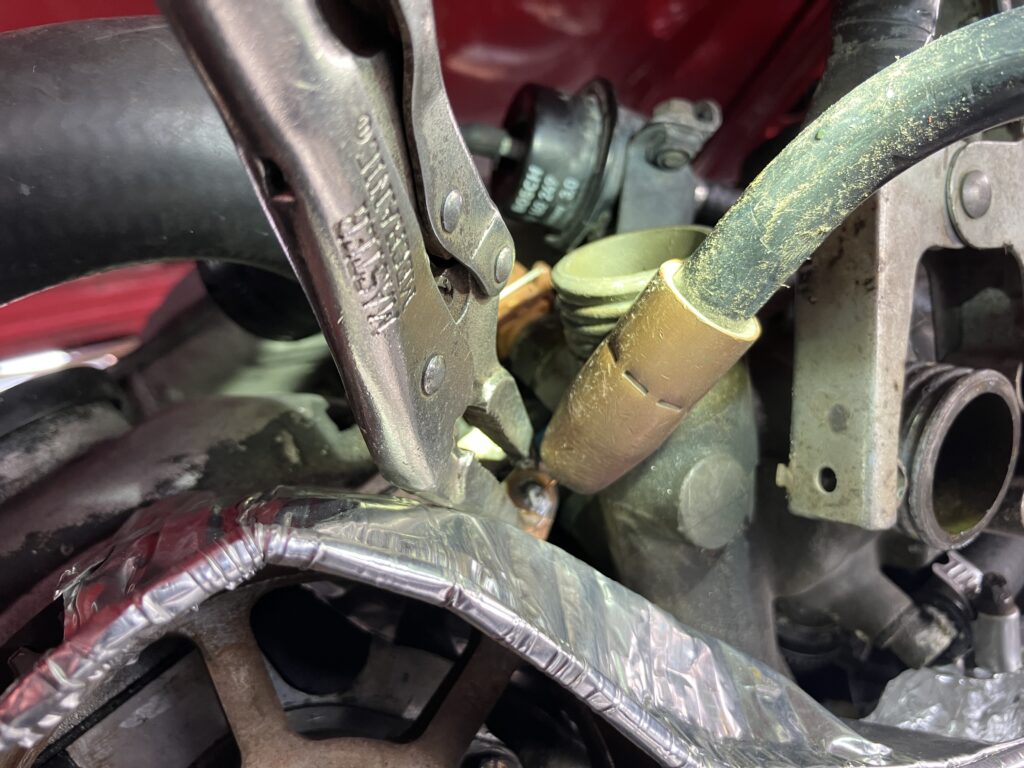
It was when I tried welding the nut onto the mound that things went sour. No matter what I did, I couldn’t get the nut to adhere to it, at least not well enough to deliver any meaningful torque. I cleaned the face of the mound with the Dremel tool. I held the nut in place with needle-nosed Vise Grips. I tapped it on with a hammer. I played with the voltage and the wire speed on the welder. Maybe three of my 15 attempts produced a nut that stayed on the mound long enough to actually apply some torque, but the others snapped off immediately. I was better at inadvertently welding the nut to the Vise Grips than I was to the bolt.
This looked promising, but it never held.
This was not what I wanted.
In desperation, I called my brother-from-another-mother Paul Wegweiser, who is fluent in both torch and weld. I told him what I was trying to do, how I attempted it, and what went wrong. I waited to absorb his expert opinion and sage wisdom. I assumed it would have something to do with welder voltage and wire speed, or cleaning and grounding. Instead, he said the last thing I expected:
“Yeah… I’ve never gotten that to work. I’ve always had to fall back to drilling out the bolt and re-tapping the hole. I’ve tried it with and without the washer. The only thing I can suggest is that maybe the coating on the nuts you’re using is preventing the MIG wire from sticking to them and the mound. You might try drilling out the threads and cleaning the faces on a belt sander. But honestly, it’s probably not you.”
I gave it one more try. I drilled and de-faced three nuts, and had the same result. I reached the point where I was worried about possibly damaging the head with my ham-fisted attempts. And when I saw that a little hole had been burned in the aluminum roasting pan I was using to shield the timing belt (no visible damage to the belt), I knew it was time to stop and accept my bolt-drilling fate.
Unfortunately, drilling out bolts, well, sucks. It’s time-consuming and difficult to do well and cleanly. To have any hope of success, you really want to start with nice sharp new bits. Plus, there’s a school of thought that you want nice sharp new left-handed bits so they’ll apply a loosening torque on the bolt as they’re drilling and maybe even back it out in the process. I’ve only had this happen once, but no harm in trying. Unfortunately I found that my left-handed bits must have gotten dull with use as the bolt face simply laughed at them, so I read up on best bits to use for drilling out bolts. I found a video where a fellow dealt with what I was about to do, tried a number of bits, and strongly recommended Bosch glass and tile cutting bits, so I ordered them.
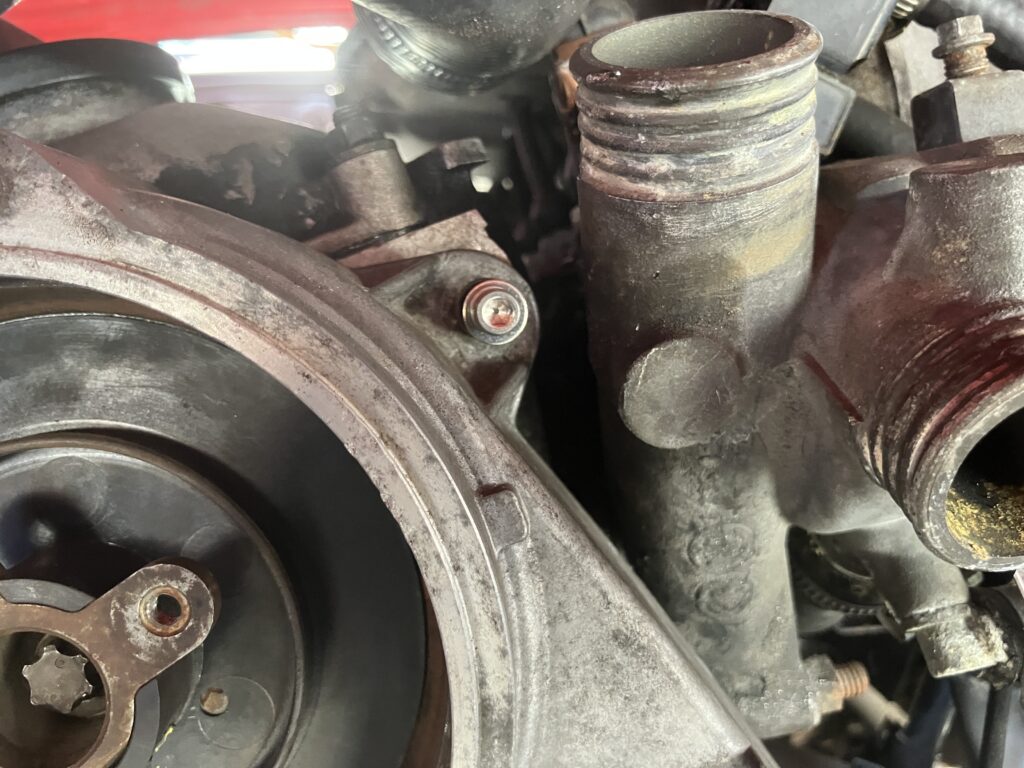
I believe that the original snapped-off cover bolt was an M8 with a 13mm head, but since all my repair needed to do was secure that corner of the upper timing cover to prevent the distributor cap from moving around (e.g., I wasn’t going to be lifting the engine from that bolt or anything), my plan wasn’t to drill it out entirely but instead to drill and and tap it for a smaller 10mm M6 bolt. I center-punched a pilot hole as best as I could, but of course once I began drilling, I saw that I was off, but since I would be using a smaller bolt, it wouldn’t really matter. The new drill bits worked pretty well. I employed the 1/8″ bit first, then followed it with the 3/16″. In about 15 minutes, I’d drilled myself a nice hole.

Success. Sort of.
To my surprise, though, I couldn’t find my M6 tap anywhere in the house, garage, or basement. Instead I found a 10-24 tap that, by coincidence, was remarkably close in size to the hole I’d just drilled. I tapped it, ran down to my local Ace Hardware store and was surprised that they had no 10-24 cap-head bolts. But I found an Allen-head bolt and a washer that fit the bill. I put a little blue Loctite on the threads and reattached the front timing cover. Done.
I’m totally calling this success.
As soon as it warms back up outside, I’ll drop the condenser, fan, and radiator back in and finish buttoning the front of the engine back up. Then I can begin to deal with the FrankenThirty’s unresolved air conditioning issues, which include a discharge line from the condenser into the evaporator that’s rustier than I’d like, and a slow leak.
—Rob Siegel
____________________________________
All eight of Rob’s books are available on Amazon. Signed, personally inscribed copies can be ordered directly from Rob here.
Tags: broken bolt drilling welding