If you looked at the cover image and thought, “Something’s missing,” you’re correct.
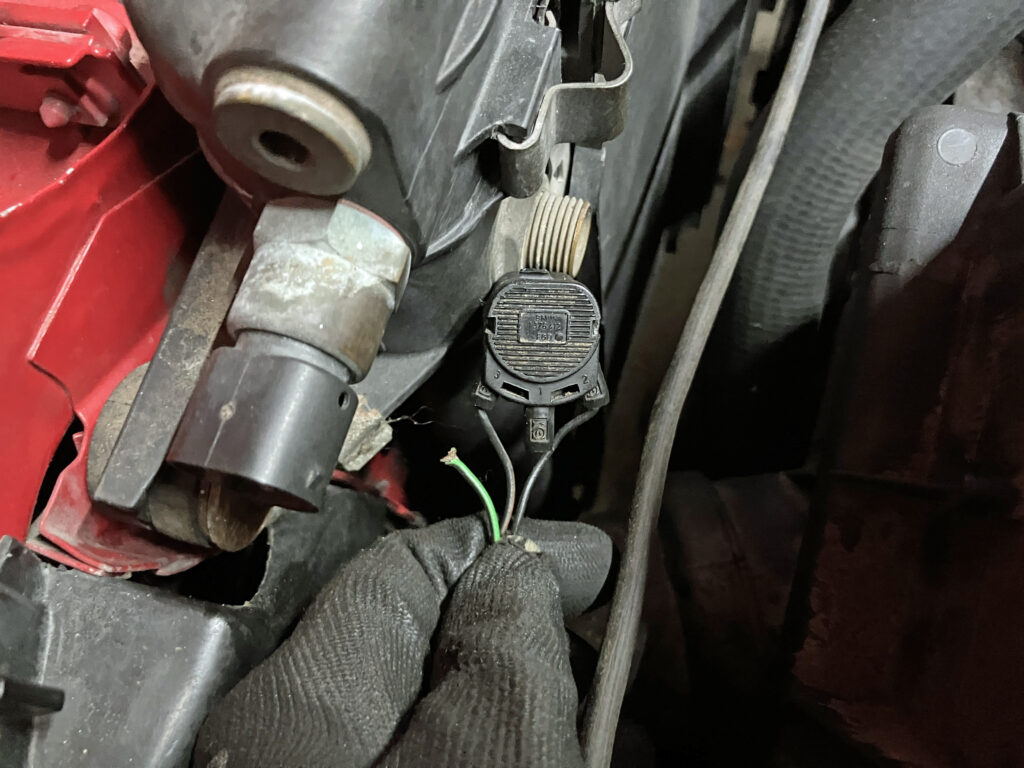
A few weeks ago, while moving forward with FrankenThirty’s a/c rejuvenation, I tested the condenser fan by jumpering the terminals on the switch at the top left of the radiator. The fan didn’t spin, and it was obvious why—there was a broken wire on the bottom terminal. I temporarily cajoled it into making contact to verify that the fan worked, then went online to learn what I needed to do to fix the connector.
You can buy a connector with all three pigtails on it on eBay, but it’s a bit pricey. I found that the genuine BMW right-angle waterproof terminals with the pigtail wire hanging off (“BMW Round Receptacle 2.5 Watertight (0510 mm),” part number 61130007445) are only $4.58 each at GetBMWParts, and the plug housing (part number 61131378410) is only $3.48. Prices were slightly higher at FCPEuro, but shipping was less. I bought one right-angle terminal and the plug housing—which I needed, as when I pulled mine off the radiator switch, both plastic lock tabs snapped, and when I pried mine open to slide the broken right-angle terminal out the back, it twanged off somewhere in the driveway, never to be seen again—for $21 shipped.

Not a lot of tricky diagnosis is needed here.
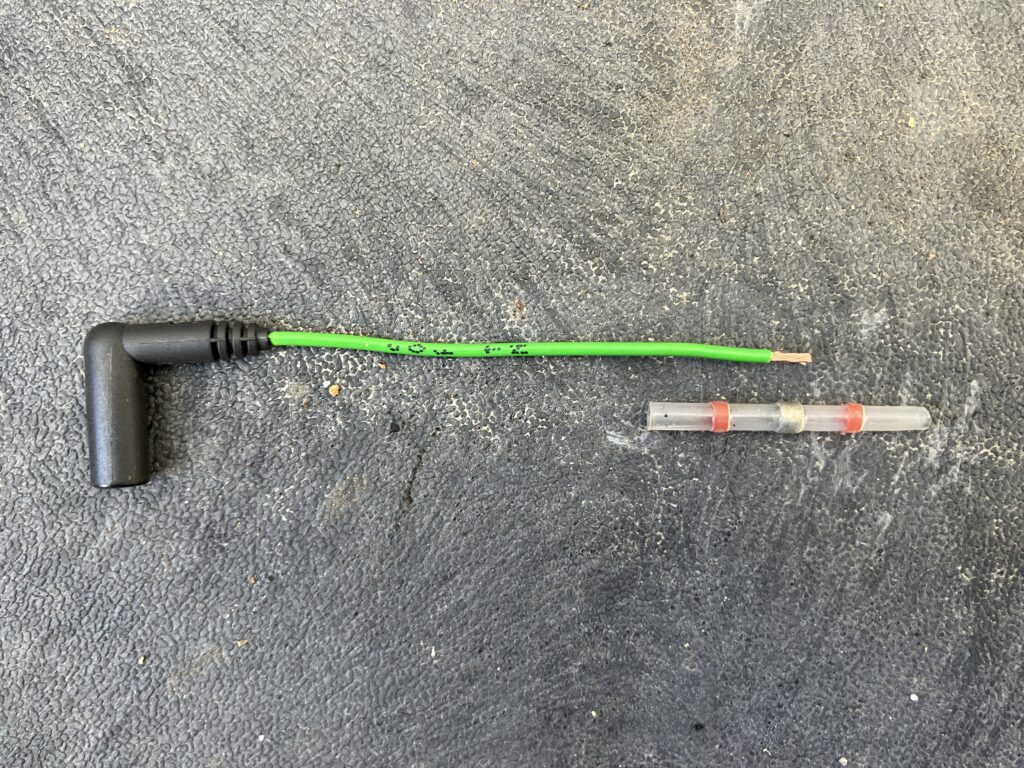
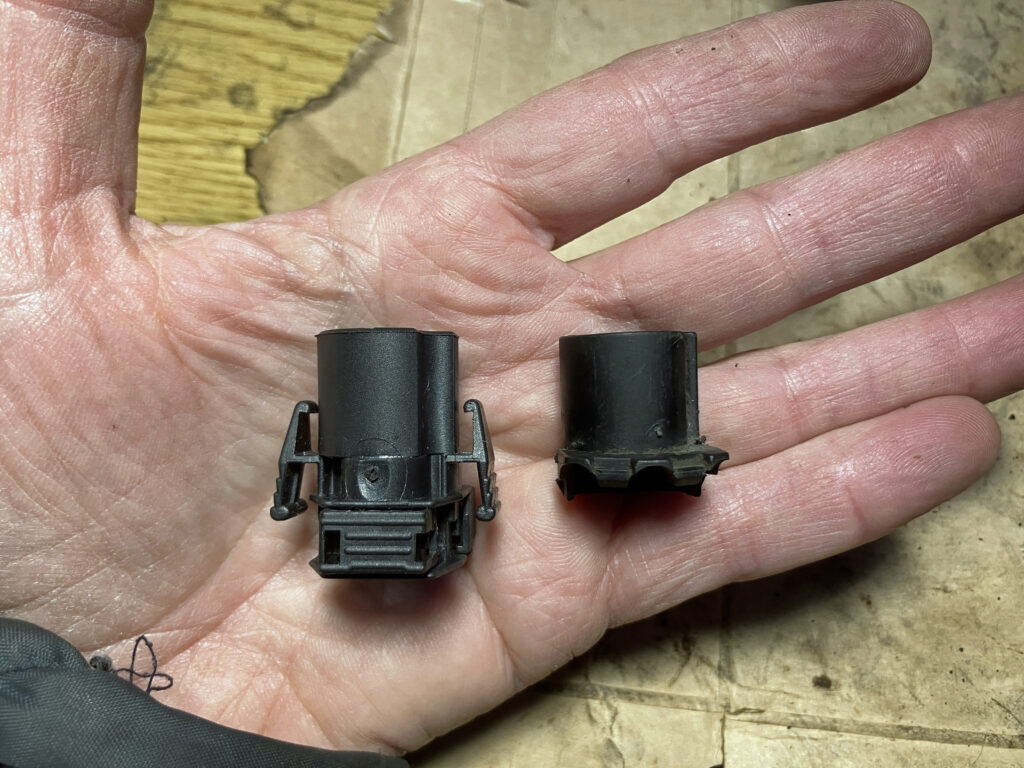
We’ve had a cold and icy spell the past few weeks, but the weather responded to March’s approach by dialing it back. I thought about pulling the Lotus Europa out of the garage and putting the E30 in, so I could resume working on it but I decided to finesse the issue by doing the connector repair in the driveway in the late February afternoon sun, which was not exactly hardship. I began by inspecting the parts to make sure what I ordered looked correct.

Looks good to me.
The basic approach to repairing the connector was to open it up, slide out the right-angle terminals whose wires were not broken, splice the newly ordered terminal onto the broken wire, and then slide everything into the new housing. When I discovered the problem several weeks ago, I did the first two parts, so I immediately began splicing the terminal onto the broken wire. This can be done in a few ways. Twisted wires and electrical tape are a no-no. Twist-on wire nuts are only to be used in emergencies and for short periods of time. For an under-hood fan motor blowing on the condenser and the radiator, a robust connection that is resistant to vibration and moisture is essential. A crimp-on barrel connector is adequate for vibration but inadequate for moisture.
My go-to technique used to be soldering the wires together and sealing the splice with heat-shrink tubing, but more and more I’ve been using solder-seal heat-shrink splice tubing (link just for reference). These little transparent pieces of heat-shrink tubing contain a circular solder band. Strip the ends of both wires, slide them into the tubing, visually confirm that both stripped wire ends are inside the solder band, then heat it with a heat gun. This both melts the solder and shrinks the tubing to provide a (hopefully) water-tight seal.
This shows how enough insulation must be stripped off the wire so the band can melt around it. If you stick it in too far, the solder band will surround the wire’s insulation, preventing electrical contact with the other wire.
I cut some of the housing off the portion of the wiring harness that held the broken wire so it could be trimmed far enough back to allow the splice connector to be in line, stripped the insulation off the tip, slid the splice tubing over it, and carefully slid the end from the right-angle connector into the tube.
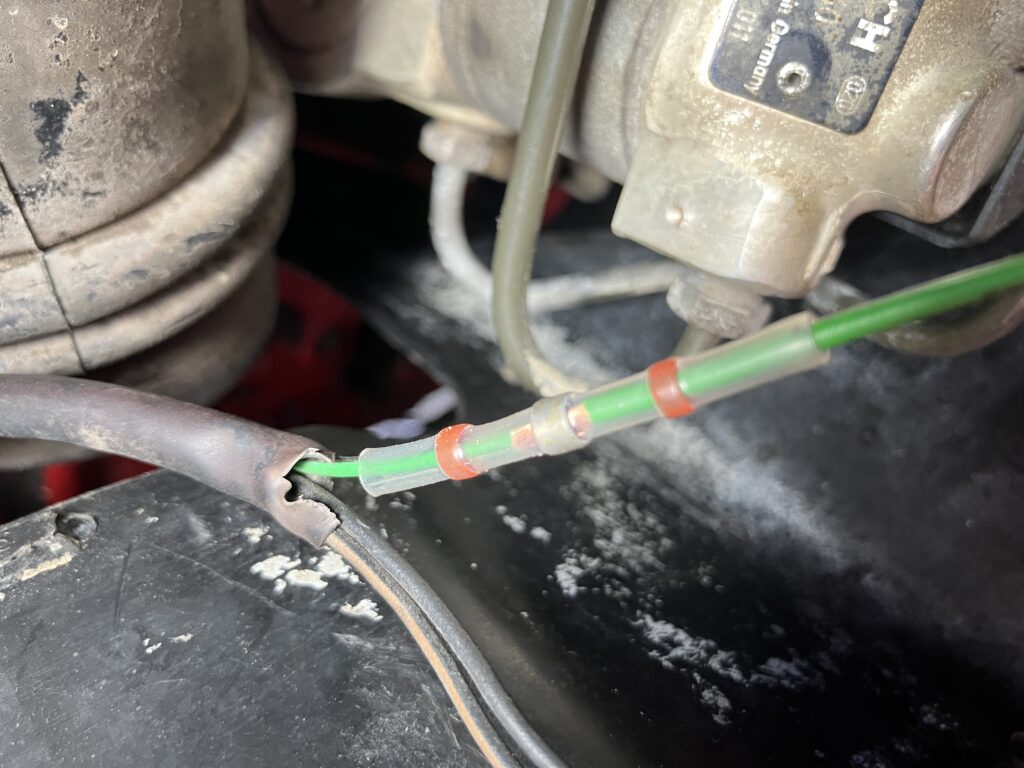
Before heat…
Once I verified that both stripped ends overlapped inside the solder ring, I heated the piece of tubing and visually confirmed that the solder band had melted.
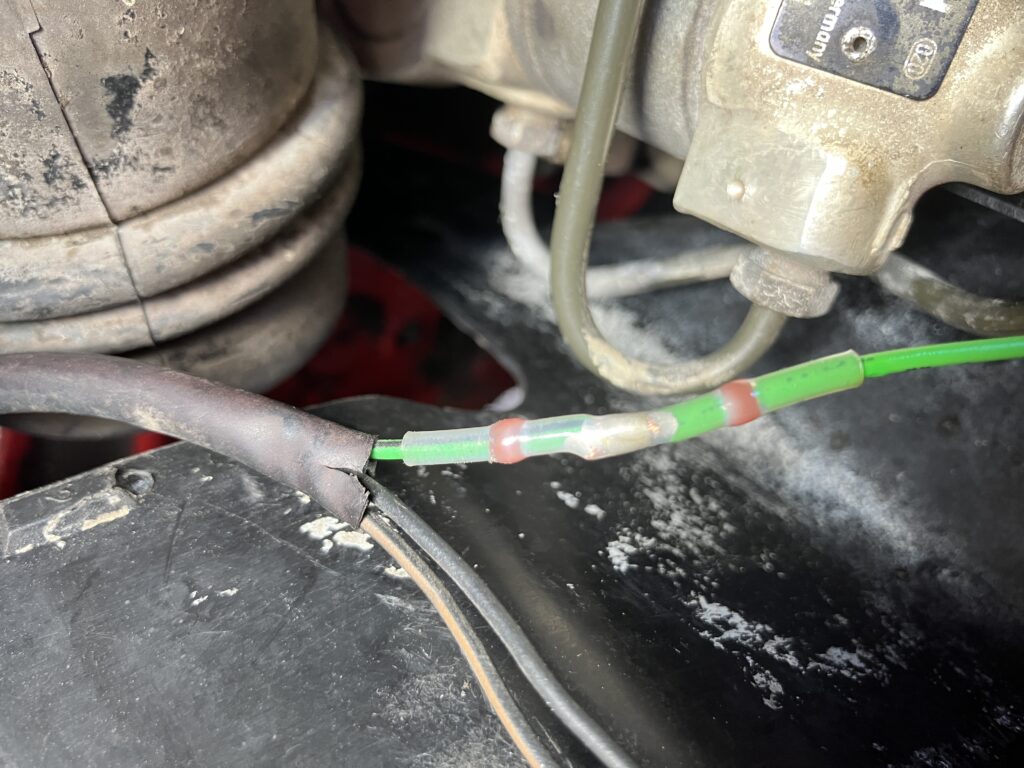
…and after.
All that was left to do was to slide all three right-angle terminals into the new plug. To do this, I needed to take the back part of the plug off. Having had mine fly off into the weeds several weeks ago, I didn’t have the old back piece to compare. The piece that remained of the original connector had semi-circular indentations in which the right-angle part of the terminals sat. I thought the new plug must have a piece that mates against it.
Hmmm.
I played with the plug and found a snap-in latch piece on the top of the back.

…and another one on the bottom:
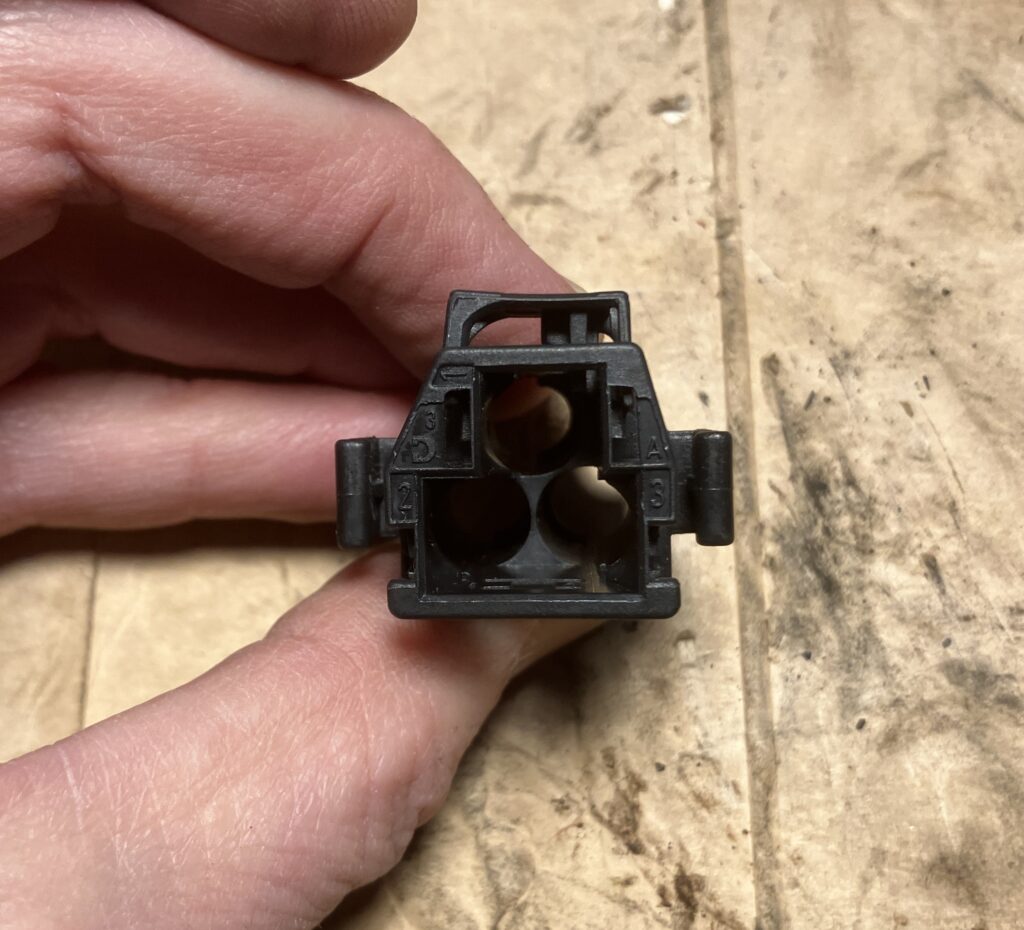

Removing both didn’t remove the back part of the connector, and there didn’t appear to be any way to slide the right-angle terminals inside.
As of this posting, it’s still a mystery. According to RealOEM, part number 61131378410 superseded part number 83300492947, but I can’t find anything online about their differences or how you get the right-angle terminals inside 61131378410. FCPEuro’s website lists them as parts of a 1988 325is (which the FrankenThirty is, mostly, sort of). When you look at plug 61131378410 on their website, at the bottom of the screen, it says, “You might also need” and shows 61130007445, the right-angle terminal, so according to some database, they are supposed to go together. But maybe this is why there’s a market for more expensive plugs with all three pigtails already mounted inside.
So, I used the original plug with an open back, and nothing is holding it in place. At least I got the new pigtail soldered on, so the fan now works. And since I’m about to yank the radiator to get at the condenser, it’s not like the plug needs to be secure anyway.

That’ll do, pigtail. That’ll do.
But it is a bit strange.
Okay, you E30 folks solved the mystery of my misplaced o-ring, which shattered the carbon ring in my wing cell compressor. Do you have any opinions on this plug?
—Rob Siegel
____________________________________
All eight of Rob’s books are available on Amazon. Signed, personally inscribed copies can be ordered.