A few weeks ago, I wrote a piece describing how Hampton, the 48,000-mile ’73 2002 I bought in September, had thick black undercoating sprayed all around the engine compartment, initially making me think that perhaps the front end had been smacked and the undercoating was covering up the signs of impact. Fortunately, I discovered that it was the waxy rust-inhibiting kind of undercoating, not the hide-the-bodywork kind, and that it responds well to Klean-Strip Prep-All Wax and Grease Remover. I’ve been whacking away at it a few square inches at a time. The goal isn’t to remove it all, as scrubbing off what’s deep inside the nose is neither practical nor necessary, but to make it so it’s not the first or second thing your eye is drawn to when you open up the engine compartment.
I’m getting there.
Prep-All has an added advantage that its fumes are not nearly as cloying as other stuff I routinely spray in the garage. The Safety Data Sheet says it’s 60–100% hydrotreated light naphtha, 7–13% hydrotreated light distillate (petroleum), and <5% toluene (specific concentrations are a trade secret).
Now, my garage is attached to the house, my wife Maire Anne has an extremely sensitive sense of smell, and whenever I spray brake cleaner or even work with kerosene in the parts cleaner, she notices the smell in the house—and on my clothes when I come in. I don’t have those issues at all working with the Prep-All, which is a nice benefit of the fifteen-minutes-at-a-time-in-the-cold-garage approach. I do, however, turn the exhaust fan on when I use it.
In the piece a few weeks ago, I photographed the area after having cleaned the undercoating off the plainly-visible areas behind the headlight bucket. It’s a Chamonix (white) car, and these areas are high up, so my eye was drawn there first.
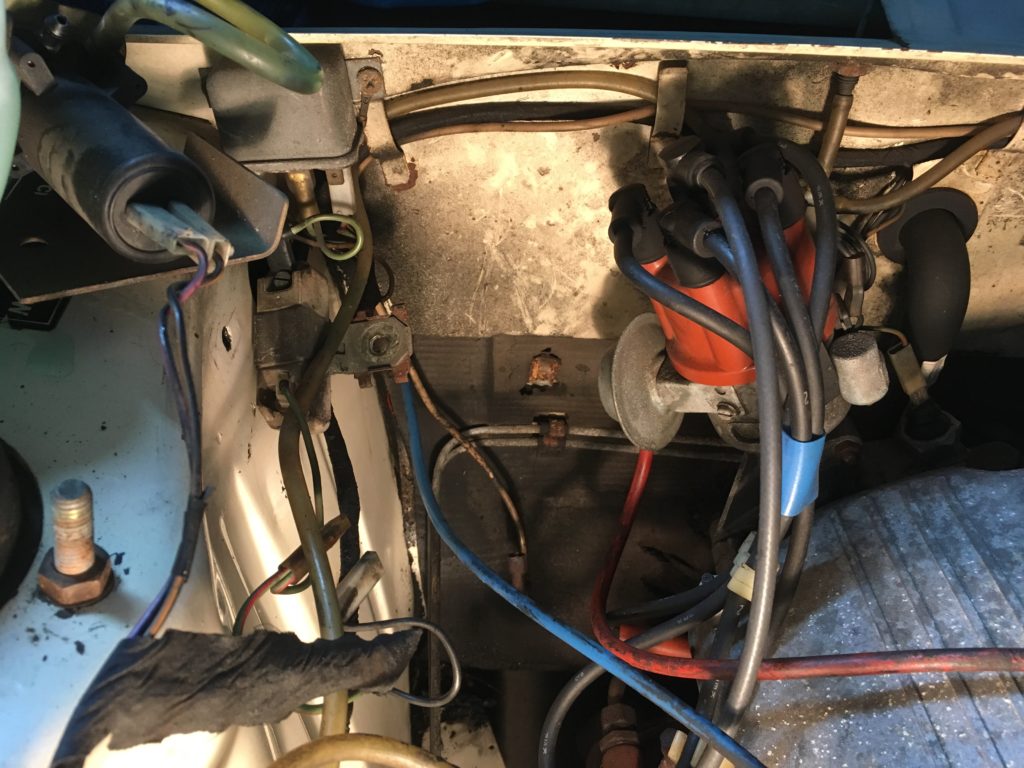
Next, I moved on to the right inner fender wall. Although I’m trying to clean, not detail, I removed the charcoal canister (yes, the car still has it) and the coil and ballast resistor to have unimpeded access. My most-used technique was simply spraying the Prep-All onto a small section of a folded paper towel and working small areas with it, frequently unfolding the paper towel to expose clean paper and using it to wipe, as the waxy nature of the undercoating tended to make it spread itself around once the working section of the paper towel had maxed out its absorbency. On some of the areas where the undercoating was thick and dry, I sprayed Prep-All directly on, let it soak, and scraped it with a plastic tool to help break the coating up. In a few areas, I did have to resort to a small piece of Scotch-Brite soaked in Prep-All, but probably 80% of the removal was done with a paper towel.
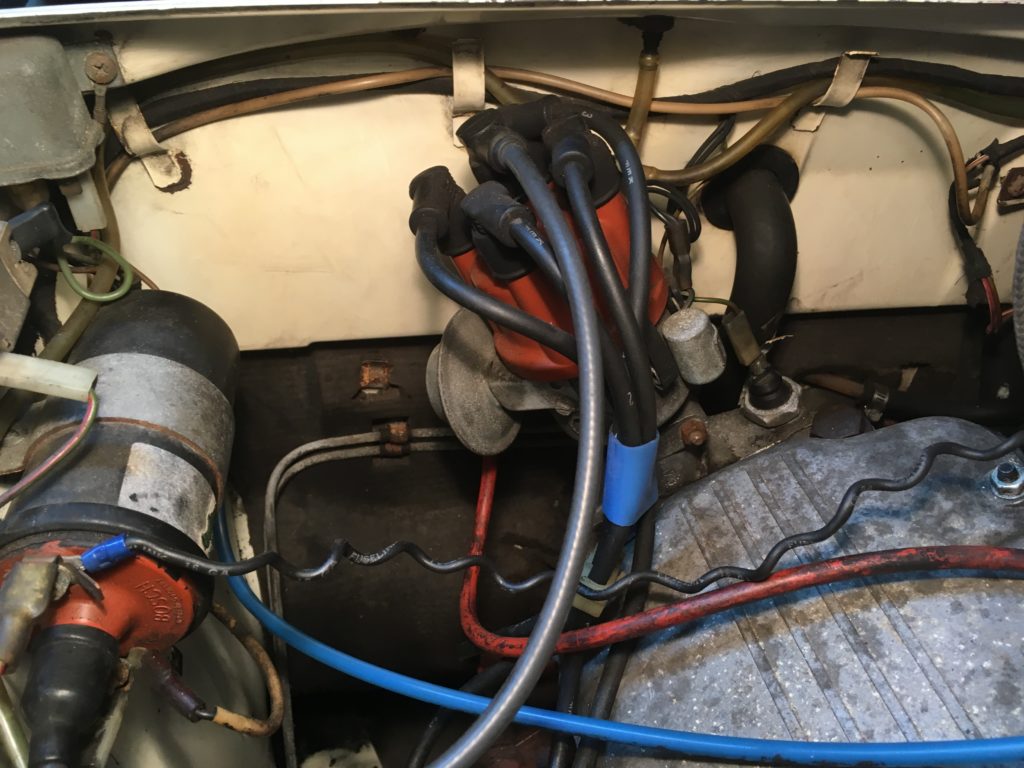
In a couple of cleaning sessions, I turned this:
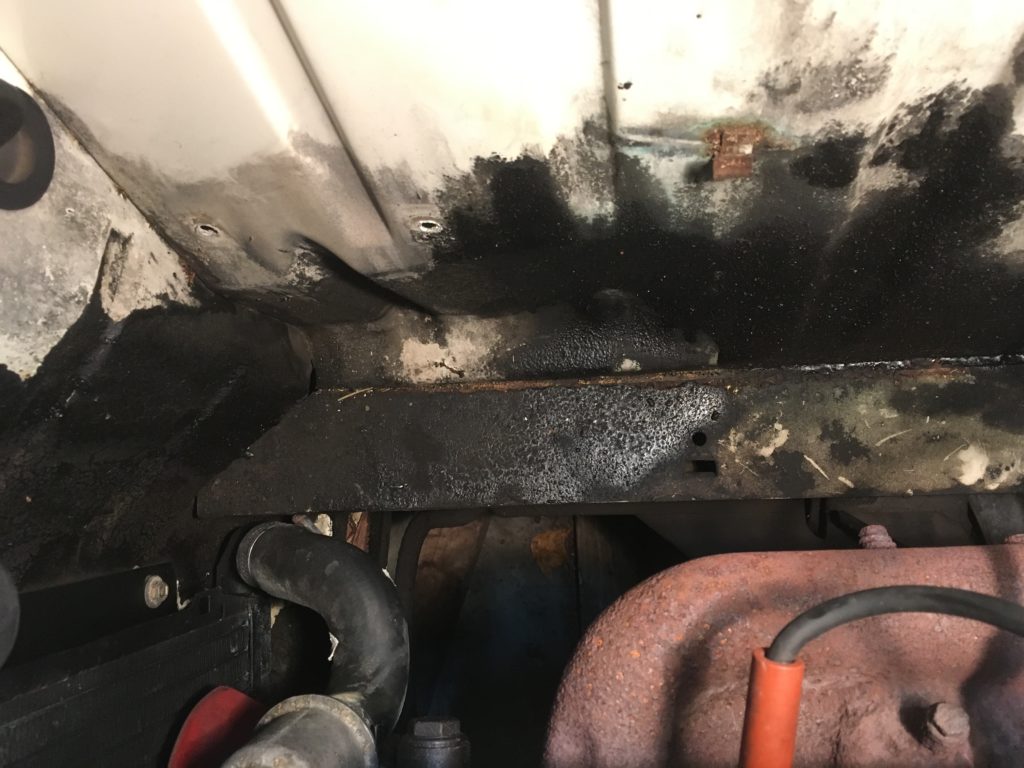

Obviously I was quite pleased with the result. I certainly didn’t expect to see intact paint on the frame rail.
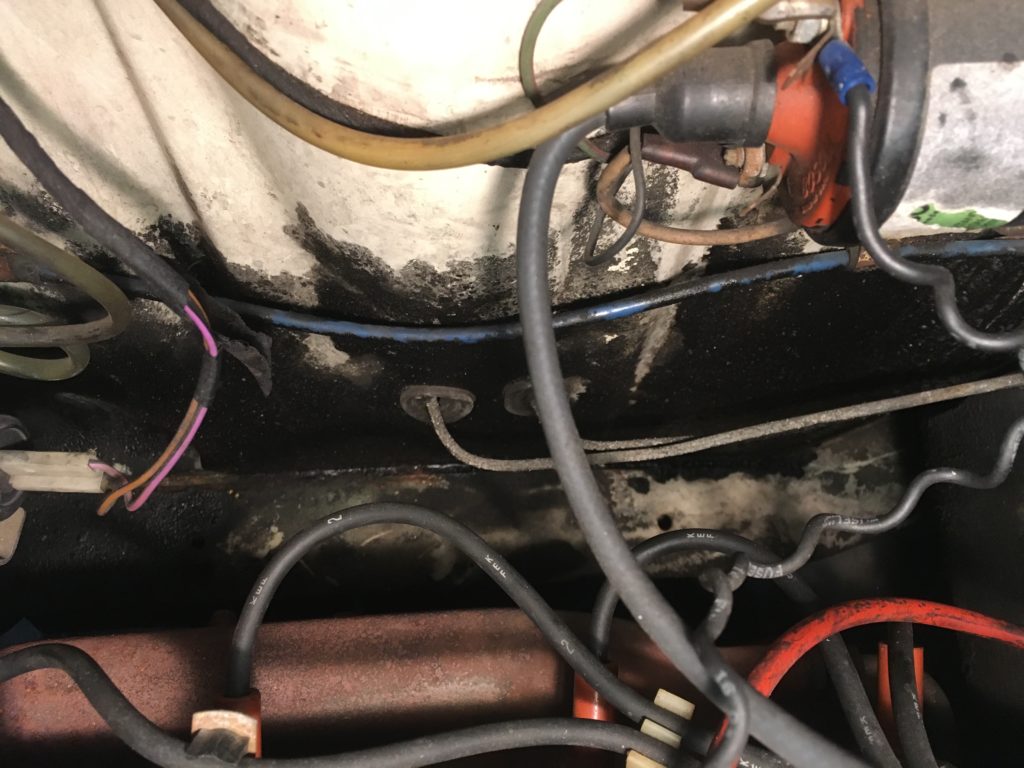
I worked my way around the cowl, unbolting some things but cleaning around others. This:
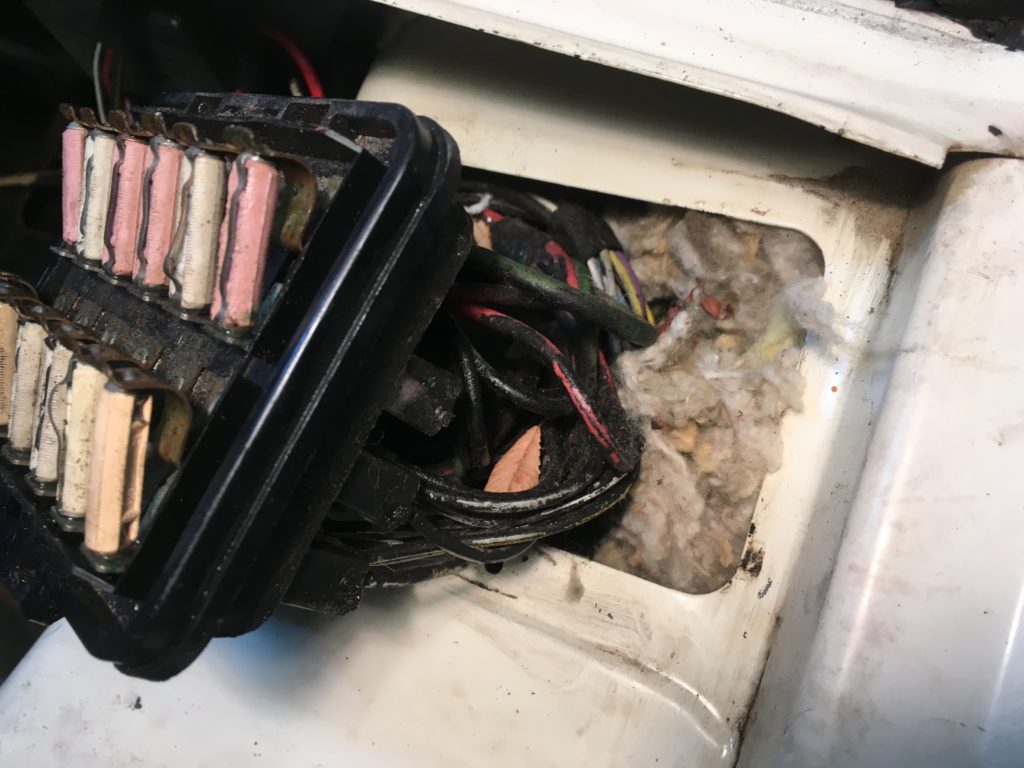
If your 02 has been sitting, odds are it, too, has one of these.
But when I began pulling the material out, it wasn’t just a mouse nest—it was like a clown-car caricature of a mouse nest: It just kept on coming! I wondered if the mice had been going for comfort or minimization of heat loss. Fortunately, no mice, living or dead, were inside. If I’d been smart, I would’ve used it to scrub off undercoating. I’m sure it was quite absorbent.
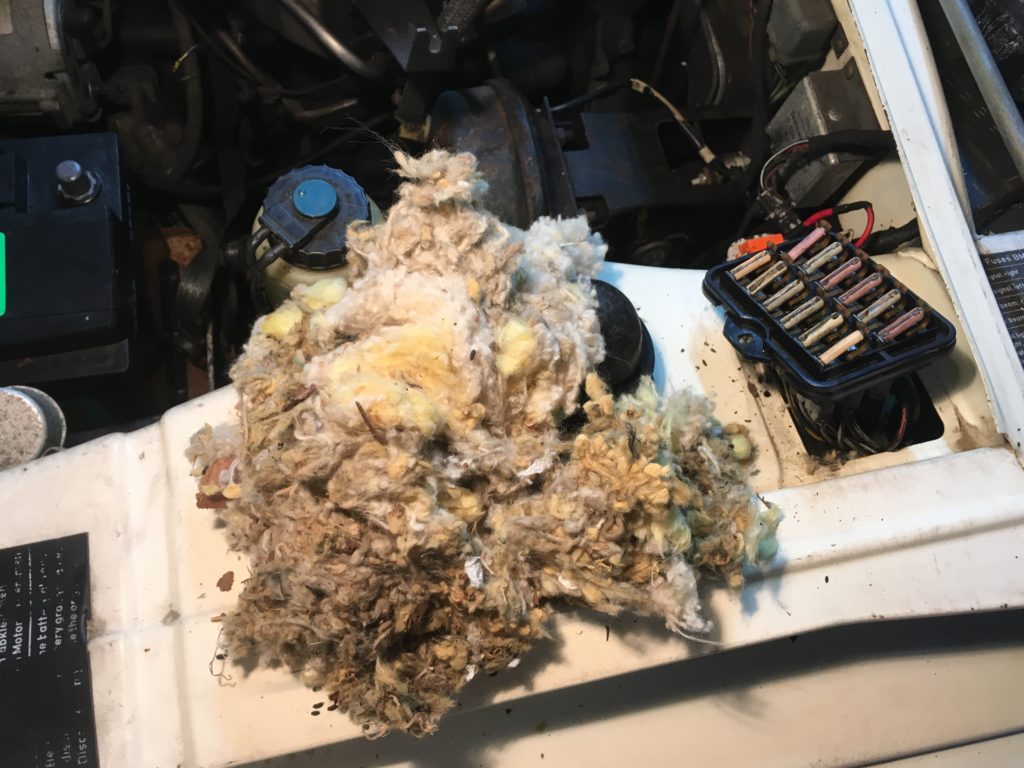
A rodent family clearly had settled in during the car’s ten-year storage.
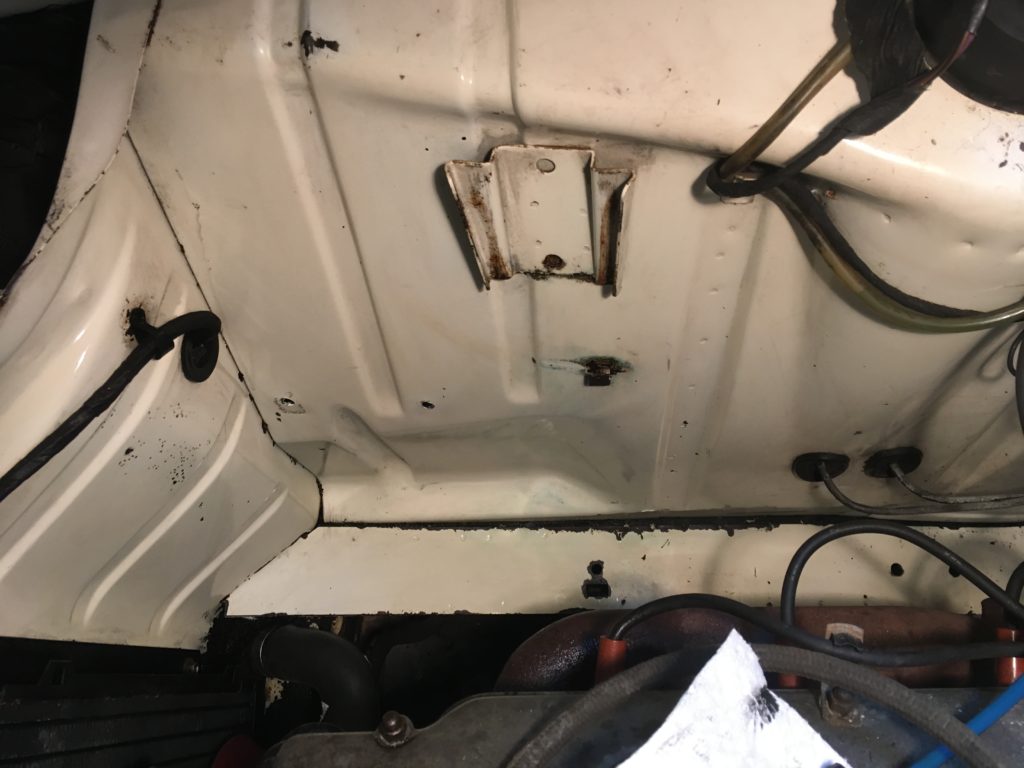
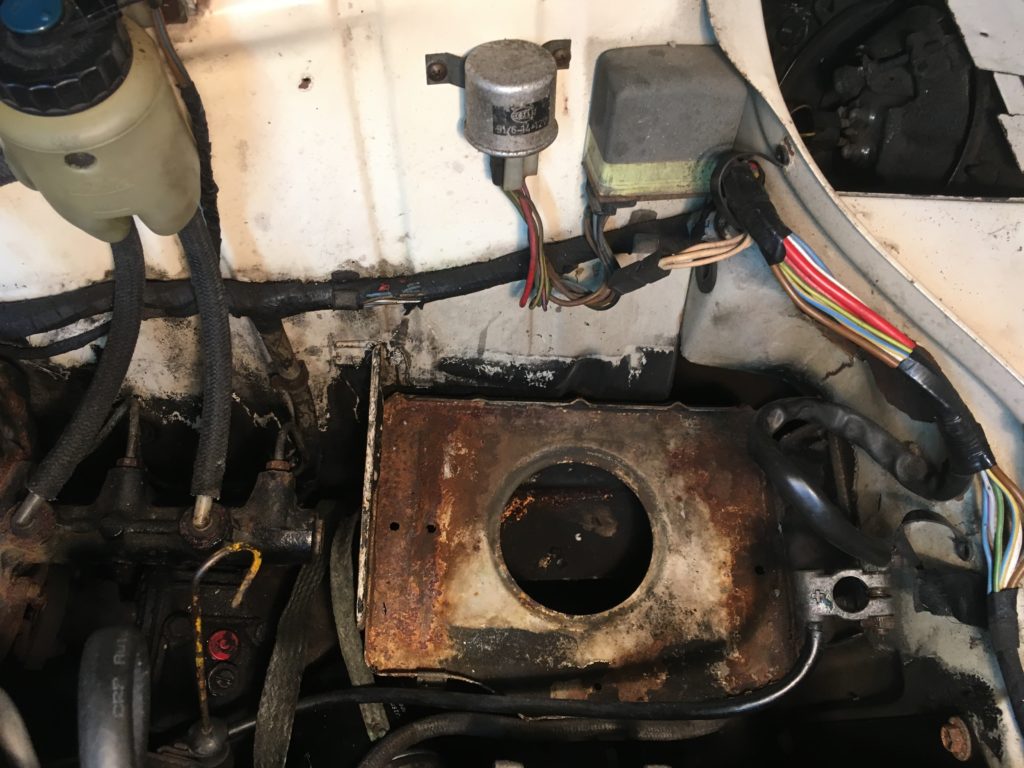
The left inner fender, like the right, was heavily undercoated, and is much more difficult to expose for scrubbing access; the brake master cylinder and steering box are in the way, the wiring harness is clipped to it, and both the bracket supporting the brake booster and the battery tray are bolted to it. Apparently I didn’t snap a “before” pic. I stress that I’m not done, but by picking the low-hanging fruit, I’ve gotten it to this point:
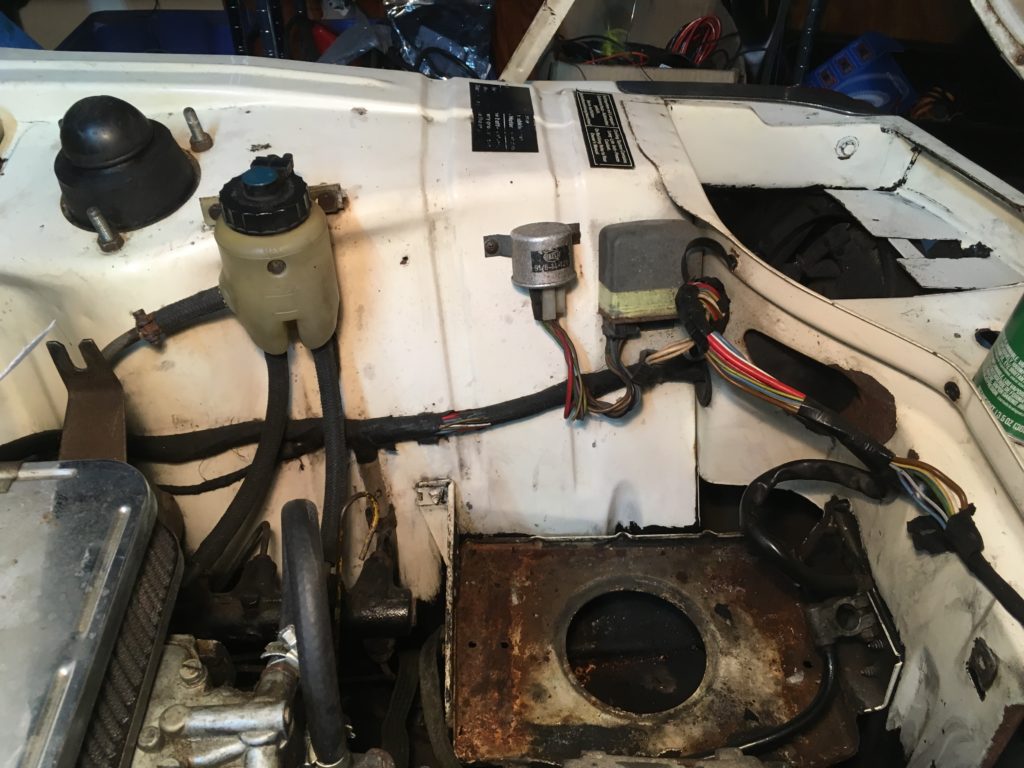
The picture is a little deceptive. If you look closely, you can see the undercoating peeking out behind the battery tray. Tipping the camera, the less-easy-to-reach undercoating becomes plainly visible.
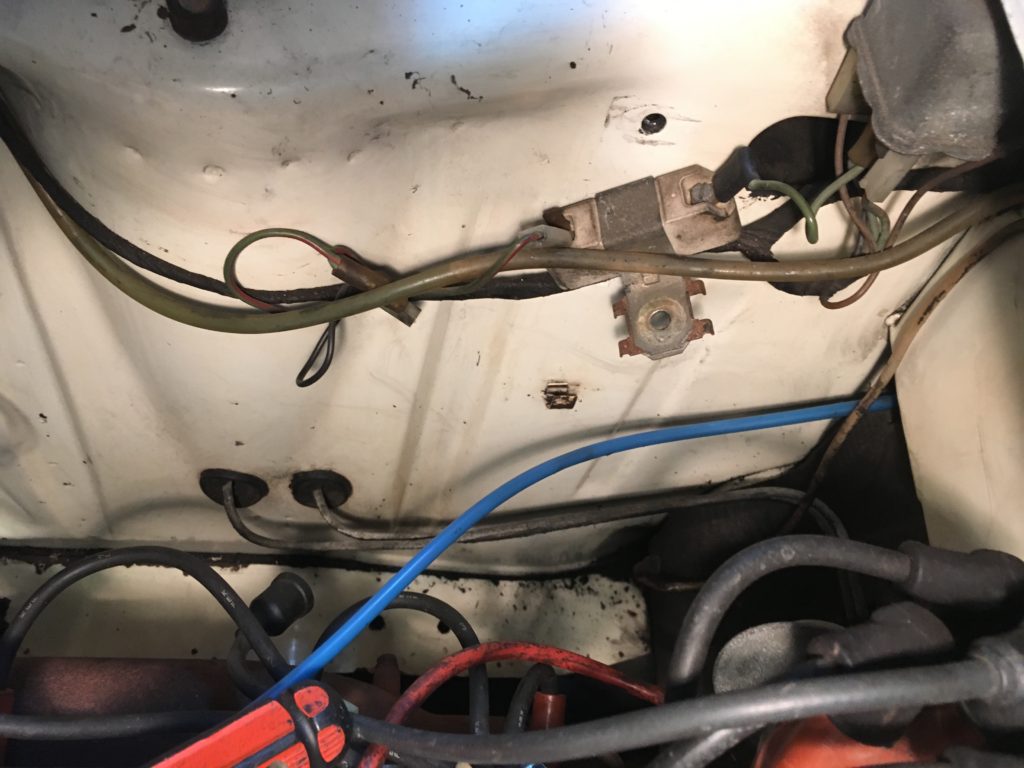
I’ve been trying to reach down into the less-accessible areas with a toothbrush and other scrubbing implements, use them to soak and loosen the coating, and then wipe it off with a paper towel wrapped around a stick of wood, but it’s much less effective than good old access and hand pressure. If the car wasn’t crammed like a sardine into a corner of my garage for the duration of the winter, I might try some solvent-based approaches combined with a power-wash, but where it is, I can’t have caustic stuff dripping everywhere.
So: This isn’t all of the undercoating, but it’s certainly a big dent. I want to find that sweet spot where I feel like I’ve cleaned off most of what’s doable without disassembling much of the engine compartment, where you actually have to hunt to find undercoating on paint rather than simply changing the viewing angle.—Rob Siegel
Rob’s new book, Resurrecting Bertha: Buying Back Our Wedding Car After 26 Years In Storage, is available on Amazon here. His other books, including his recent Just Needs a Recharge: The Hack MechanicTM Guide to Vintage Air Conditioning, are available here on Amazon. Or you can order personally-inscribed copies of all of his books through Rob’s website: www.robsiegel.com.