
Surely you don’t think I’d go to all this work, buying back and resurrecting Bertha, the 1975 2002 I owned in Austin—initially purchased 32 years ago partially because it had air-conditioning—and not get the a/c working? As Bugs Bunny said to Elmer Fudd, “You don’t know me very well, do you?”
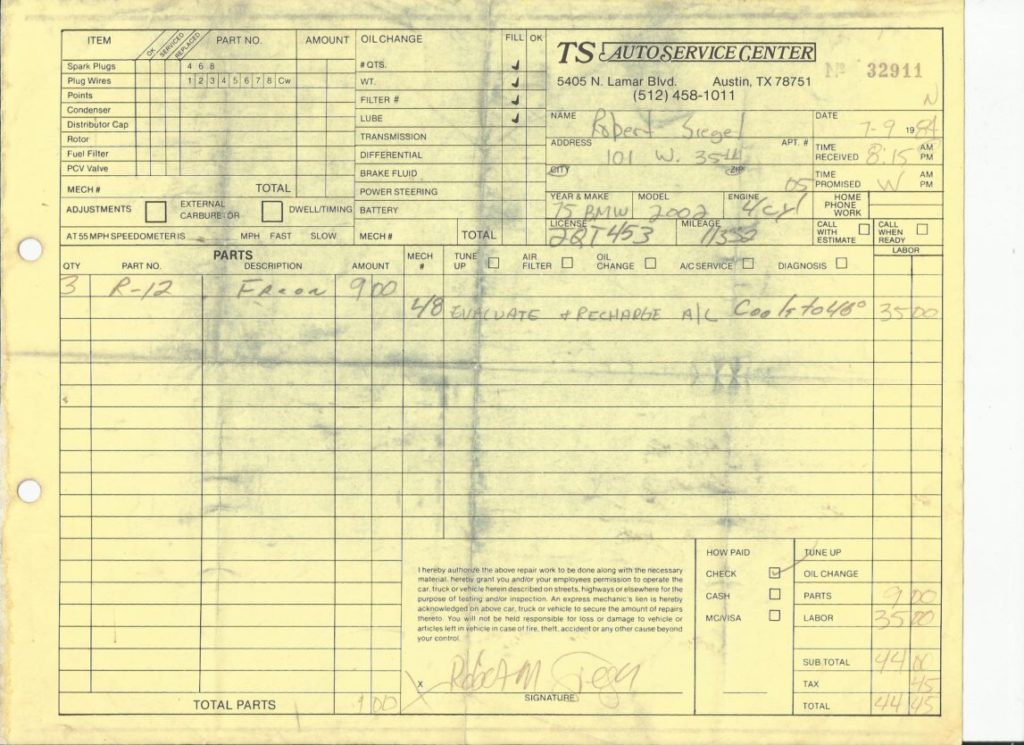
As I mentioned a few weeks back, I still have the folder of receipts from my roughly six-year ownership of Bertha in the 1980s. One of the little treasures in that folder is this receipt, dated 7/9/1984, from TS Auto Service at 5405 North Lamar Blvd in Austin, for evacuation and recharge. It included three cans of R12 at $3 each, and with labor, it totaled $44.45.
Ah, those were the days.
I kid you not.
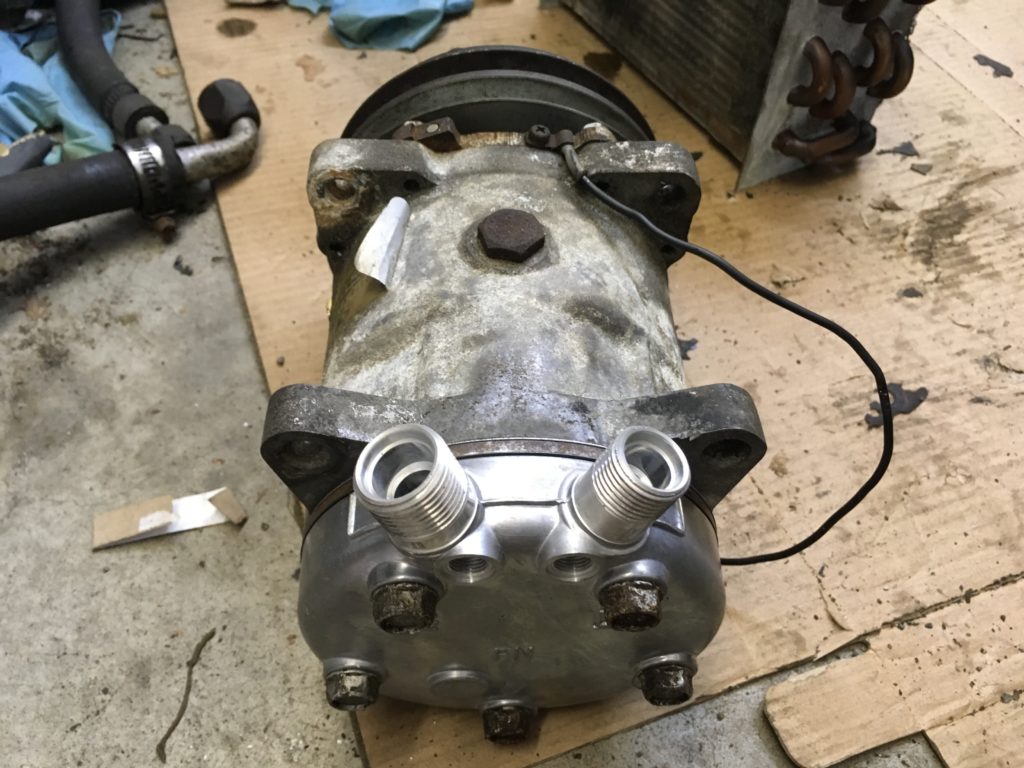
After Maire Anne, Bertha, and I moved to Boston, when I installed Bertha’s new hot motor, I jettisoned the original York compressor and its miserable bracket that wraps around the front of the water pump, and sprang for a rotary-style Sanden 508 compressor and the correct bracket for it. When re-purchased Bertha, I found that my memory, or at least that part of it, was right: There was the Sanden and the bracket.
What I had not remembered was that I, or a previous repair shop, had totally, um, hacked the hose setup.
There are four major components in an a/c system (compressor, condenser, receiver/drier, and evaporator). So there are four hoses connecting them, with fittings at both ends. In examining Bertha, I found that six of those eight fittings were barb fittings, secured by–egad!—hose clamps. In my recently-published air conditioning book, I write about how, when you change a compressor from an old upright piston model to a newer smaller, lighter, quieter rotary-style unit, the odds are slim that the fittings will match, or will come in at the same angle, and how you thus almost always need to suck it up and replace the four hoses and not be seduced by the dark side of trying to just cut off the old crimped-on fittings and secure new barbed fittings with hose clamps. Apparently, back in the day, my will was weak.

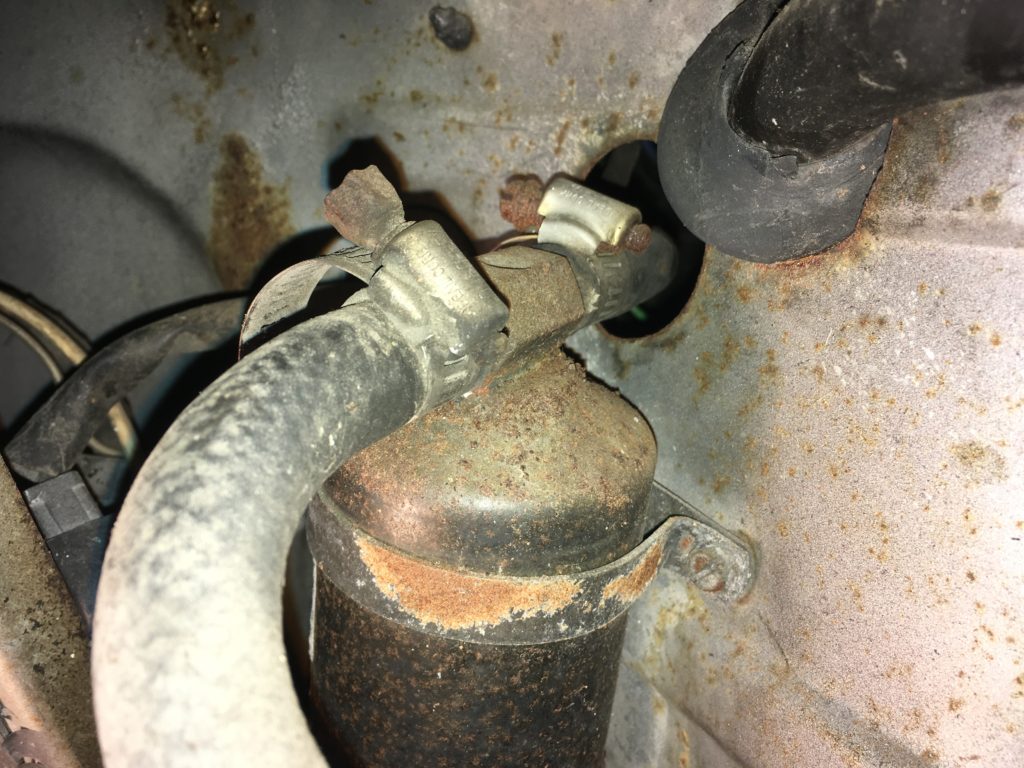
Bertha had hose clamps on most of the a/c fittings. Yeesh!
Due to my mistakes in trying to order correct valves and guides for Bertha’s head, I wound up having several weeks of time to burn while the head was in the machine shop. Because it was a particularly hot summer in Boston, I dived into Bertha’s a/c rejuvenation with a lot of energy. In keeping with the low-budget, be-true-to-what-you-did-in-the-1980s, reuse-everything-possible spirit of the entire Bertha project, I decided to reuse the existing Sanden compressor and bracket. As with any a/c rejuvenation, I planned to retrofit a new larger parallel-flow condenser and a big cooling fan. For refrigerant, I chose to use R134a, because I’d never done a 2002 a/c system with a big modern condenser and R134a, and I wanted to see how well it worked.
I’ll freely admit that this was an odd set of parameters, but, well, I can be a pretty odd guy sometimes.
But reusing the existing compressor and bracket was somewhere between risky and foolish. The fact that the compressor itself was an authentic Sanden 508 was appealing, since nowadays the market is flooded with Chinese-made clones. On the other hand, those clones sell for as little as $85, and I’ve never had a problem with one of them.
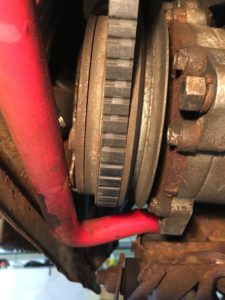
To complicate things, Bertha’s Sanden had flare fittings on it. As I write in the book, when you rejuvenate an a/c system and replace major components, you’re wise to select parts that have O-ring fittings instead of flares, since O-rings are much less leak-prone. With a compressor, you can replace the back head, swapping it with one that has O-ring fittings. I’ve done this previously, but when I tried to do it on Bertha’s Sanden, the two gaskets between the head, valve plate, and compressor didn’t release their death grip without shredding, and the remnants were rock-hard.
I spent hours carefully scraping and sanding the surfaces clean; $25 for the new O-ring back head, another $10 for the gaskets, and I didn’t have any idea whether the compressor was still good? Really, with a new Sanden clone being available for $85, it was a ridiculous choice.
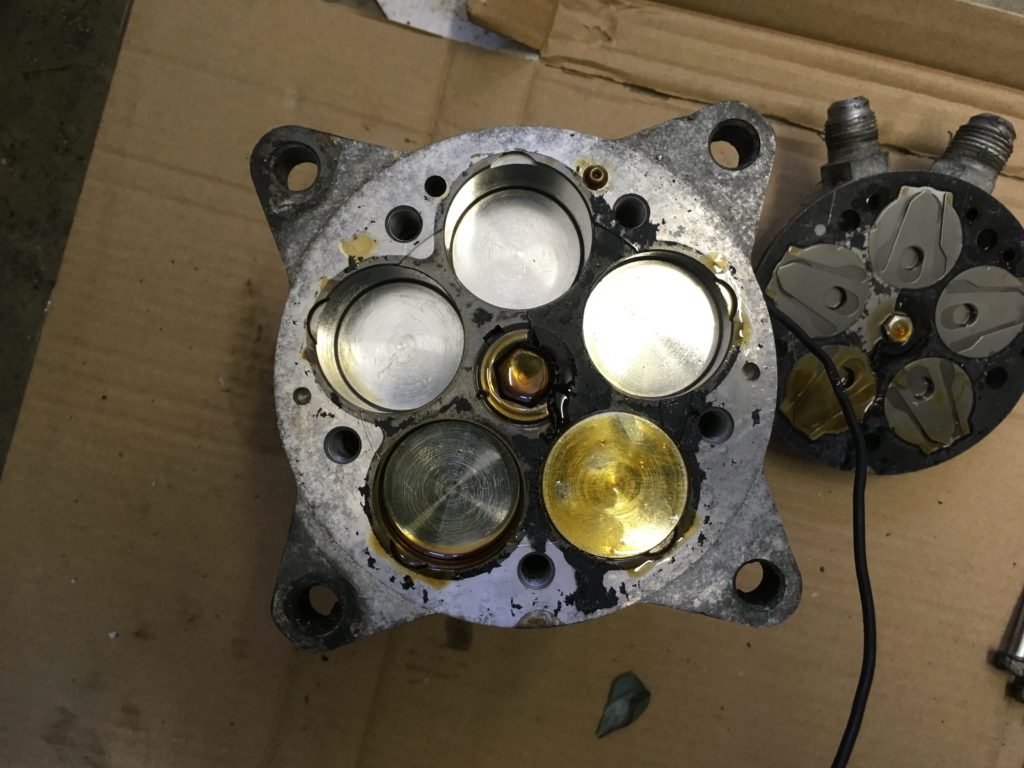
This shows the original back head (right) with flare fittings removed from the Sanden 508 (left). The shredded gasket is apparent.
And here’s the newly-replaced back head with o-ring fittings.

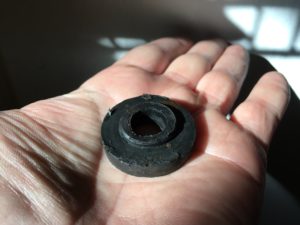
This is one of the pesky rubber bushings on the original bracket.
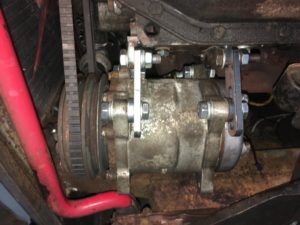
The choice of reusing the bracket was just as foolish. The bracket was a copy of the original Clardy Sanden bracket, which was widely available back in the 1980s. Like the Clardy bracket, this one used four pairs of big rubber bushings with metal dowels in the center to isolate the compressor vibration from the engine. Over time, these bushings wear out, causing the compressor and bracket to cock toward the engine; this failure mode was clearly in evidence with Bertha. A fellow by the name of Dave Donahoe, who goes by the handle hobiedave on bmw2002faq.com, makes reproductions of the Clardy bracket with the improvement that the rubber bushings are gone and the bracket instead hard-bolts to the block. If you’re installing a Sanden or its clone on a 2002’s M10 block, this is the bracket you need; I even had a spare hobiedave bracket at the house. But for some reason I was hung up on this issue of keeping true to my 1980’s choices and reusing the bracket that was already in Bertha.
However, Bertha’s rubber bracket bushings were shot, and search as I might, I could not find any source for them; they appear no longer to be made. I measured them accurately and found the closest match in existing bushing catalogs, but no supply house would sell me such a small number of them to try.
Then I remembered that at the Vintage in Asheville last May, I’d bought a complete intact Clardy a/c system, and wondered if it came with intact bushings. I opened the box and found that the bushings did indeed appear to be in excellent condition. I raided them for Bertha and re-mounted the original Sanden 508 and bracket.
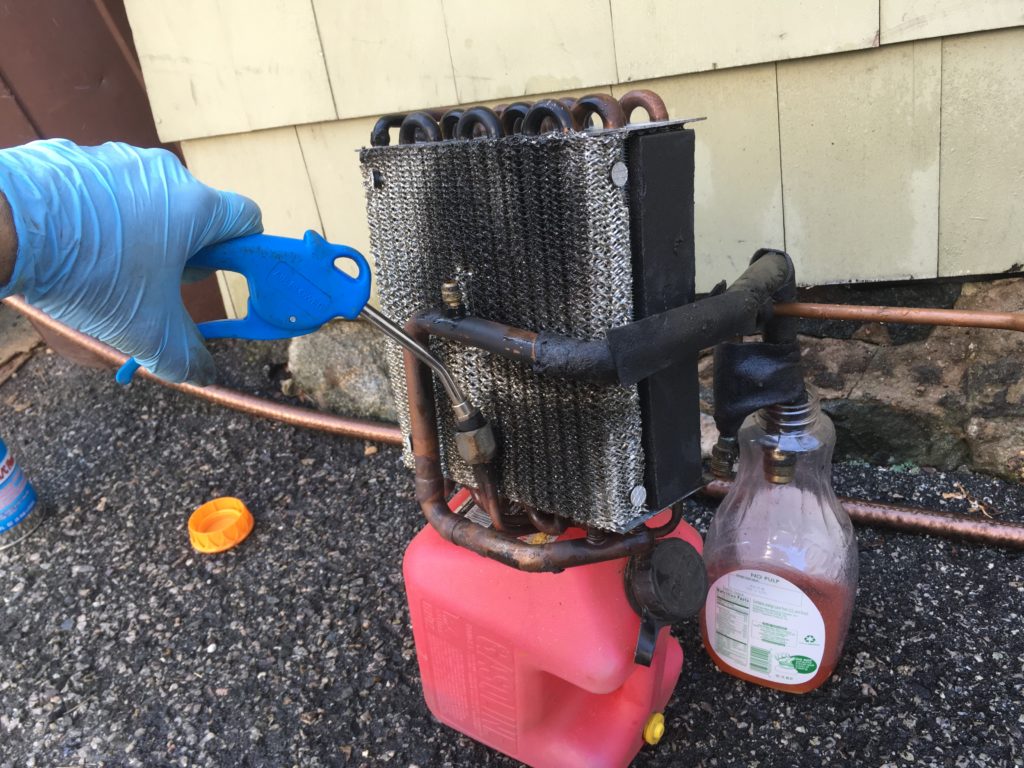
I could write reams about selecting a parallel-flow condenser for a 2002 (much of it is in the book). I decided to use the well-vetted specification that a 10″x18″ condenser fits in the nose and bolts to the front panel without needing to cut any sheet metal. I used a Spal 30101505 12″ medium-profile pusher fan in front of the condenser. I often mount these fans directly to the condenser with a zip-tie kit, but the fan seemed a bit heavy for that, so I bolted it to the hood supports instead.

The 10″x18″ parallel-flow condenser and Spal 12″ fan fit in Bertha’s nose without needing to cut anything.
That left the evaporator and expansion valve. As I say in the book, if you want to be sure (well, as sure as possible) that an a/c system will blow cold when you assemble and charge it, you should remove the evaporator assembly, disassemble it, flush the evaporator core, and replace the expansion valve. However, if you don’t see any evidence of contamination in the a/c hoses (no metal shavings, no oily or powdered residue), and if you’re not changing the type of refrigerant oil being used, you can chance it and leave the evaporator intact. The hoses looked uncontaminated, but I was planning on switching from R12 and mineral oil to R134a and ester oil. This meant that the evaporator needed to be disassembled and the core flushed.
There were two other reasons to yank the evap assembly. First, with the high degree of rodent contamination in Bertha, I fully expected the evaporator assembly to be full of acorns, snail shells, nests, dung, and dead little rodent bodies. I was stunned to find that it was clean as a whistle inside. I theorized that this was an odd benefit of the fact that the rodents in the garage where Alex had stored Bertha were rats, not mice, and were probably too large to get inside the evap assembly.
Second, the evap assembly sits behind the heater box. 2002 heater boxes frequently need to be removed and rebuilt to replace a dead blower motor and to re-line the flaps with rubber foam so they seal and don’t let hot outside air in; Bertha’s heater box suffered both of these maladies. So, since on a 2002, yanking the evaporator assembly is easy (as opposed to on an E9, where it’s a bloody pain), out it came. I disassembled it, and cleaned and flushed the evaporator core.
It’s very satisfying to flush an evaporator core. You know it’s clean.
I cleaned and reused the original expansion valve.
For the expansion valve, I try to use original Egelhof valves, stamped “Made in West Germany,” but these are getting harder and pricier to come by. I thought I’d found one, but when it arrived, it had a “Made in China” label on it. Instead of using it, I cleaned the old Egelhof valve, made sure that I could blow through it (which only ensures that it’s open; it doesn’t ensure that it can move), verified that the blower fan worked, reassembled the evaporator assembly, and hoped that I’d made the right choice.
When I got Bertha’s head back from the machine shop in July, my a/c work stopped, as the main event—resurrecting Bertha herself, not her a/c system—returned to center stage. But once I’d gotten Bertha over the hump and began driving her around in Boston’s biblically-hot summer, I knew that in a few repair sessions I could finish the a/c installation, charge it up, and see if the choices I’d made produced a functioning system or if I’d have to tear it open again.
Interestingly, what I didn’t do was remove, rebuild, and reinstall the heater box, even though it made perfect sense to do so while the evap assembly was out, and even though I’d already bought a blower motor for it. I knew that I could get it done in three easy sessions (one to remove, one to rebuild, and one to reinstall), but, fundamentally, I just didn’t feel like doing it.
Plus, by this time, we were in the middle of an August heat wave in Boston. Who the hell cared about any auto repair related to working heat?
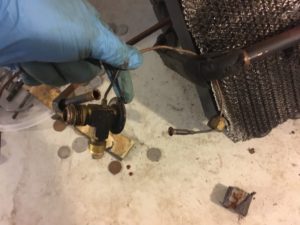
I rotated the footwell flaps open, peered in, sniffed, verified that, like the evap assembly, the heater box appeared to be free of rodent detritus, and taped the footwell openings shut with duct tape. I reinstalled the evaporator assembly, installed a generic O-ring drier where the old one had been, and used my Mastercool Hydra-Krimp 71500 to make the four hoses, all cut to length and crimped in the car. I also found and installed a set of a/c-console side pieces; these had been missing from Bertha for 30 years.
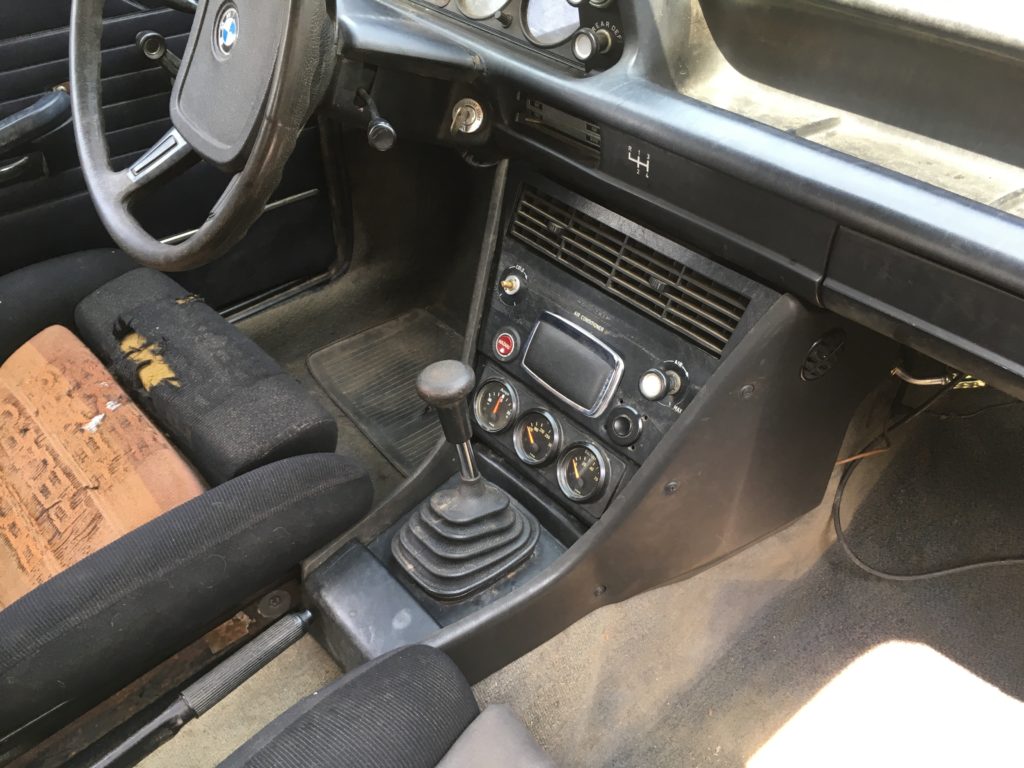
With the a/c console side pieces installed, Bertha’s interior suddenly looked complete.
One of the things I discuss in the book is the advantage of prophylactially pressure-testing an a/c system with nitrogen, how it works better at finding leaks than pulling a vacuum or than using dye. I say that if you pressurize the system to 120 psi (the maximum reading on the low-pressure gauge) and let it sit overnight, if it drops by one psi, that could just be a change in pressure due to a temperature drop in your garage, but if it drops by five psi, you’re in denial if you don’t think it has a leak.
I pressure-tested Bertha overnight, and it dropped by 2-1/2 psi.
I thought, “Is this a test?” I sprayed Big Blu soap solution on all of the connections, but I did not see any bubbles anywhere. I decided that I could either chase a leak that I wasn’t even certain was there, or evacuate and charge it and see if my reused compressor and expansion valve worked. I opted for the latter.
After doing all this a/c work, it’s always a big relief to see the high-pressure gauge go high and the low-pressure gauge go low as you’re charging a system up with refrigerant, indicating that the system is working. Considering my risky choices of re-using both the compressor and expansion valve, I was elated.
But as I was shooting in the second can of R134a, I heard a loud hissing from the front of the engine compartment—and I saw liquid refrigerant shooting out the inlet connection to the drier. What the—?! I shut the car off, grabbed a wrench, and tightened the connection. The leak stopped. Apparently, when I installed this hose, I’d mistaken some tightness in the threads for a sealed O-ring fitting, and hadn’t snugged the thing all the way down. I made doubly sure that it was snug now, and continued to charge the system. I thought it was likely that this had been the source of my mysterious 2-1/2 psi overnight pressure drop.
That afternoon, I had 42ºF vent temperatures. It wasn’t the meat-freezing 32ºF I was getting in Kugel with his R12 system, but it was damn fine for R134a. Bertha was back, and cool as a cucumber.

I hate rubber bushings on compressor brackets.
The a/c worked fine until I replaced the alternator a few weeks ago. At that point, largely coincidentally, when I turned on the a/c to see how the new alternator reacted to the electrical load from the big Spal fan, I heard a noise that sounded like a chainsaw; it turned out to be due to the compressor belt being loose and alternately slipping and grabbing. I tightened the belt, but immediately saw a major problem: With the belt tight, the compressor and bracket were not only cocked out of alignment with the engine, the compressor pulley was hitting the big Suspension Techniques front sway bar.
The root cause of this was clearly my odd and unwise choice of reusing the original bracket, mounted to the block with rubber bushings. Even though I thought that I had a good set of bushings, in just a few weeks they’d caused the bracket to cock.
So I did what I should’ve done at the beginning: I installed the bushing-free hobiedave bracket that I had sitting in my basement. It’s a little bit of a dance, replacing the bracket with the hoses still on the compressor (the system was already charged up and functioning), but in one hot and sweaty repair session, I got it done.
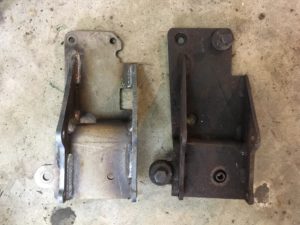
The original bushing-laden bracket (right) and Hobiedave bracket (left).
Saved by Hobiedave!
So: Bertha is not only running, she’s cold. Let’s hope that I can get a road trip out of her before I need to worry about the heater box that I should’ve rebuilt when I had the chance.—Rob Siegel
Rob’s new book, Just Needs a Recharge: The Hack MechanicTM Guide to Vintage Air Conditioning, is available here on Amazon. His previous book Ran When Parked is available here. Or you can order personally inscribed copies of all of his books through Rob’s website: www.robsiegel.com.